

The Ultimate Guilt Free Chocolate Cake You Need in Your Life
Let’s be completely real for a second. If you are anything like me, the craving for something sweet, rich, and intensely chocolatey usually hits right around 8 PM. For the longest time, I felt like I had to choose between sticking to my health goals and satisfying my massive sweet tooth. It was either eat a dry, cardboard-like “diet” dessert or cave and eat a traditional slice of cake that left me feeling sluggish the next day.
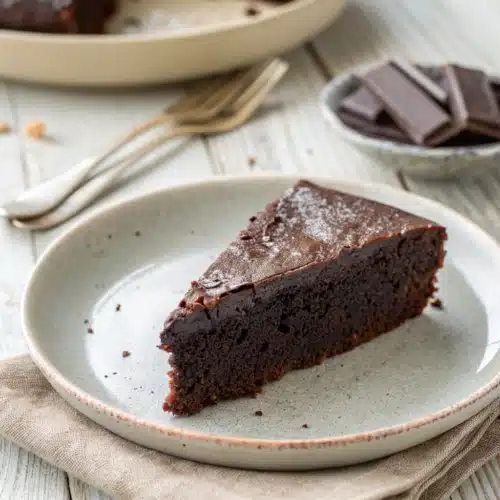
Well, I am so excited to tell you that those days are officially over. After countless kitchen experiments, epic baking fails, and a whole lot of taste testing (my family didn’t mind that part), I have finally perfected the ultimate guilt free chocolate cake. This isn’t just a “good for a healthy cake” kind of recipe. This is a genuinely delicious, melt-in-your-mouth, fudgy masterpiece that stands entirely on its own.
Whether you are trying to cut back on refined sugars, sneaking some extra protein into your kids’ snacks, or just looking for a lighter dessert option that actually tastes decadent, this is going to become your new go-to recipe. Grab your mixing bowls, because we are about to make some magic happen.
What Is A Guilt Free Chocolate Cake?
You might be wondering what exactly makes a cake “guilt-free.” Honestly, I don’t love the word “guilt” when it comes to food, but in the baking world, it usually means we’ve swapped out the heavy, processed ingredients for wholesome, nutrient-dense alternatives.
A traditional chocolate cake relies heavily on cups of refined white sugar, heaps of butter or vegetable oil, and bleached all-purpose flour. While those ingredients are totally fine in moderation, they aren’t exactly something you want to eat every single day. This guilt free chocolate cake flips the script entirely.
Instead of processed sugar, we are using pure maple syrup for a gentle, natural sweetness. Instead of butter or inflammatory oils, we rely on plain Greek yogurt and unsweetened applesauce to create a tender, moist crumb while adding a sneaky boost of protein. And instead of white flour, we are using oat flour, which adds a beautiful dose of whole-grain fiber. The result is a cake that is incredibly rich and deeply chocolatey, but leaves you feeling energized and satisfied instead of weighed down.
How to Make Guilt Free Chocolate Cake
Quick Overview
Making this cake is as simple as it gets. We are going to start by whisking our dry ingredients in one bowl to ensure the baking soda and cocoa powder are evenly distributed. Then, we’ll mix our wet ingredients in another bowl until they are smooth and creamy. We gently fold the wet and dry together, and right at the end, we stir in a splash of hot water. This hot water step is crucial—it enhances the chocolate flavor and creates that velvety texture we all crave. Pour it into a pan, bake it until a toothpick comes out clean, and try your hardest to let it cool before diving in!
Ingredients
Here is what you will need to grab from your pantry and fridge to make this magic happen:
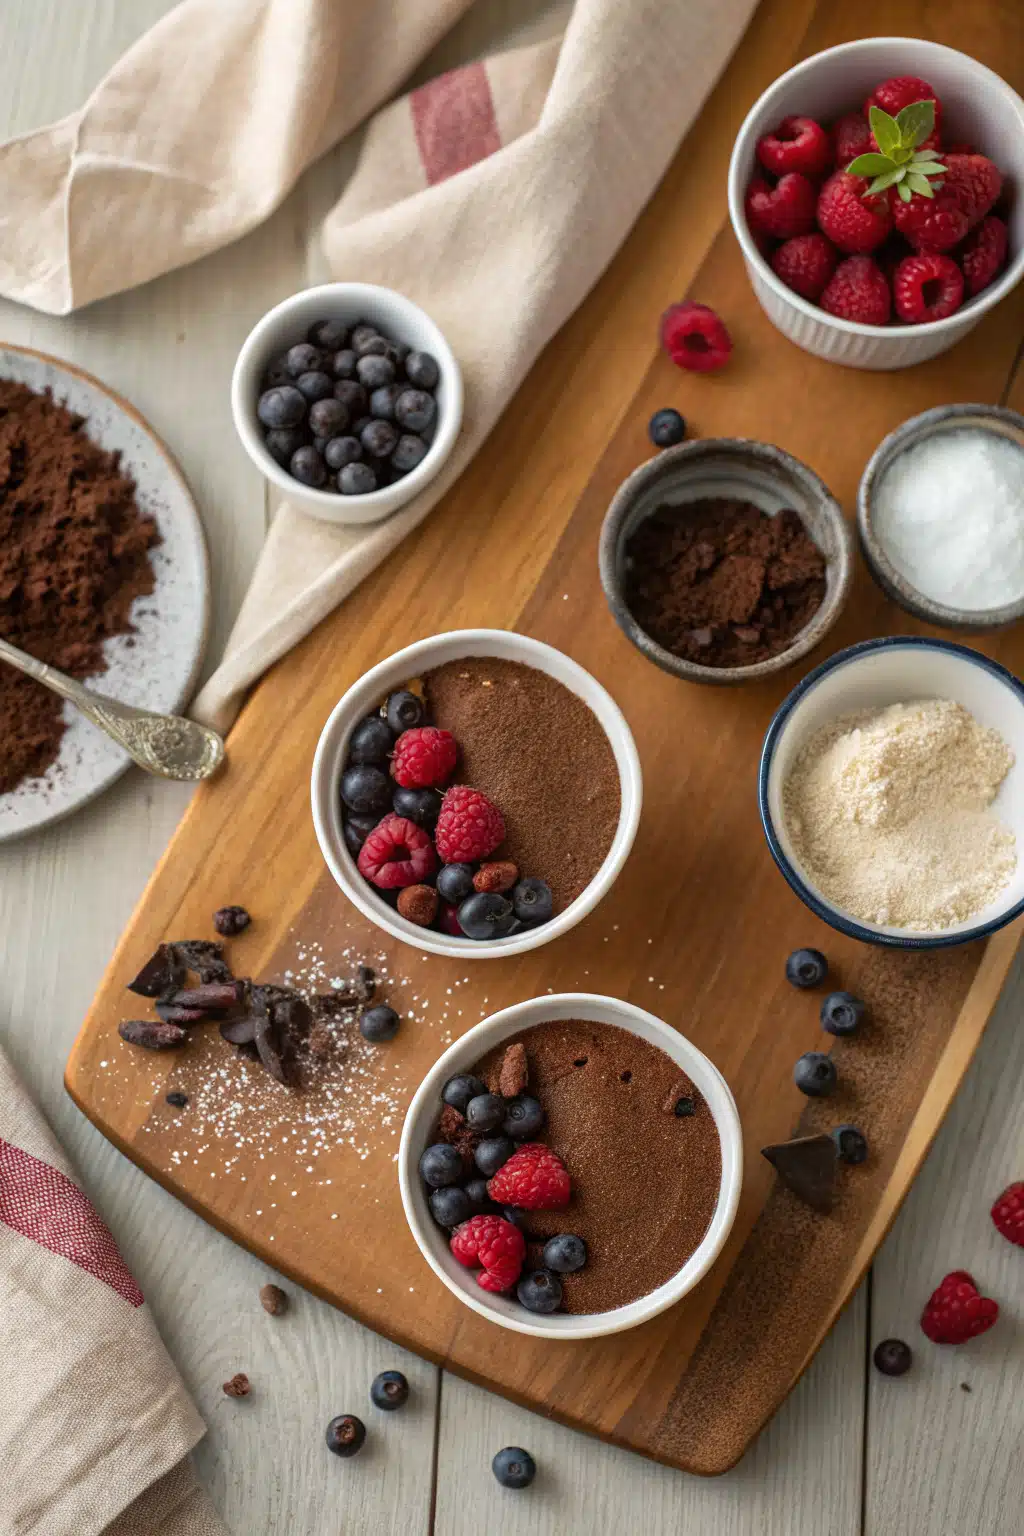
- Oat Flour: You can buy this pre-made or just blend rolled oats in your blender until fine. Make sure it’s certified gluten-free if you have sensitivities!
- Unsweetened Cocoa Powder: Use a high-quality cocoa powder here since it provides all the chocolate flavor.
- Baking Soda & Baking Powder: To give our cake the perfect fluffy lift.
- Salt: Just a pinch to balance the sweetness.
- Eggs: Two large eggs at room temperature to bind everything together.
- Plain Greek Yogurt: The secret weapon for a ridiculously moist crumb without excess fat.
- Pure Maple Syrup: For natural sweetness. You can also use honey if you prefer!
- Vanilla Extract: A splash of vanilla makes the chocolate flavor pop.
- Hot Water: Added at the very end to bloom the cocoa and create a fudgy texture.
Step-by-Step Instructions
Step 1: Preheat & Prep Pan
First things first, preheat your oven to 350°F (175°C). Grab an 8×8 inch square baking pan and line it with parchment paper. I like to leave a little overhang on the sides so I can easily lift the cake out later. If you don’t have parchment, lightly grease the pan with a little coconut oil spray.
Step 2: Whisk the Dry Ingredients
In a medium-sized mixing bowl, add your oat flour, unsweetened cocoa powder, baking soda, baking powder, and a pinch of salt. Take a whisk and give it a really good mix. Cocoa powder loves to clump up, so make sure you break apart any little lumps so your cake bakes evenly.
Step 3: Combine the Wet Ingredients
In a separate, larger bowl, crack your room-temperature eggs. Add the plain Greek yogurt, pure maple syrup, and vanilla extract. Whisk this together until it is completely smooth and looks like a creamy caramel sauce. Making sure your eggs and yogurt are at room temperature helps them blend effortlessly.
Step 4: Bring It All Together
Gently pour your dry ingredients into the bowl with the wet ingredients. Use a rubber spatula to fold them together. Stop mixing just before all the flour disappears. Now, pour in your hot water. Carefully stir it in—the batter will suddenly look a bit thin, but don’t panic! That is exactly how it should look for a super moist cake.
Step 5: Bake to Perfection
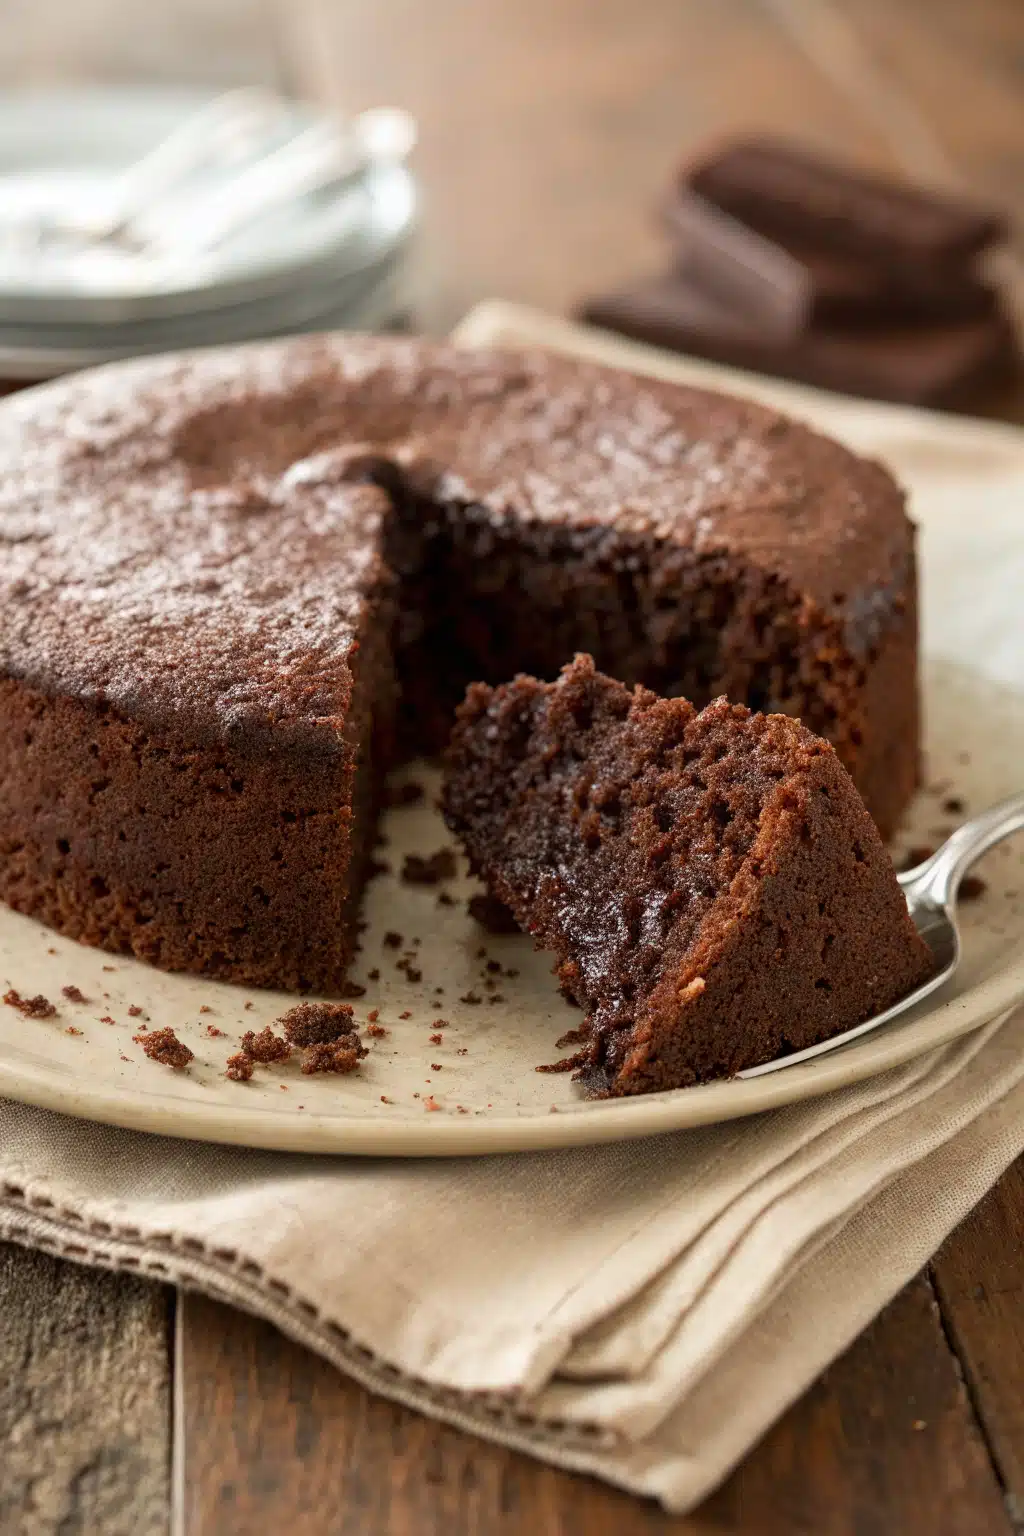
Pour the batter into your prepared baking pan, smoothing out the top with your spatula. Bake in the center of your oven for 25 to 30 minutes. You’ll know it’s done when the edges pull away slightly from the pan and a toothpick inserted in the center comes out mostly clean, with maybe a few moist crumbs attached. Let it cool completely in the pan before slicing!
What to Serve It With
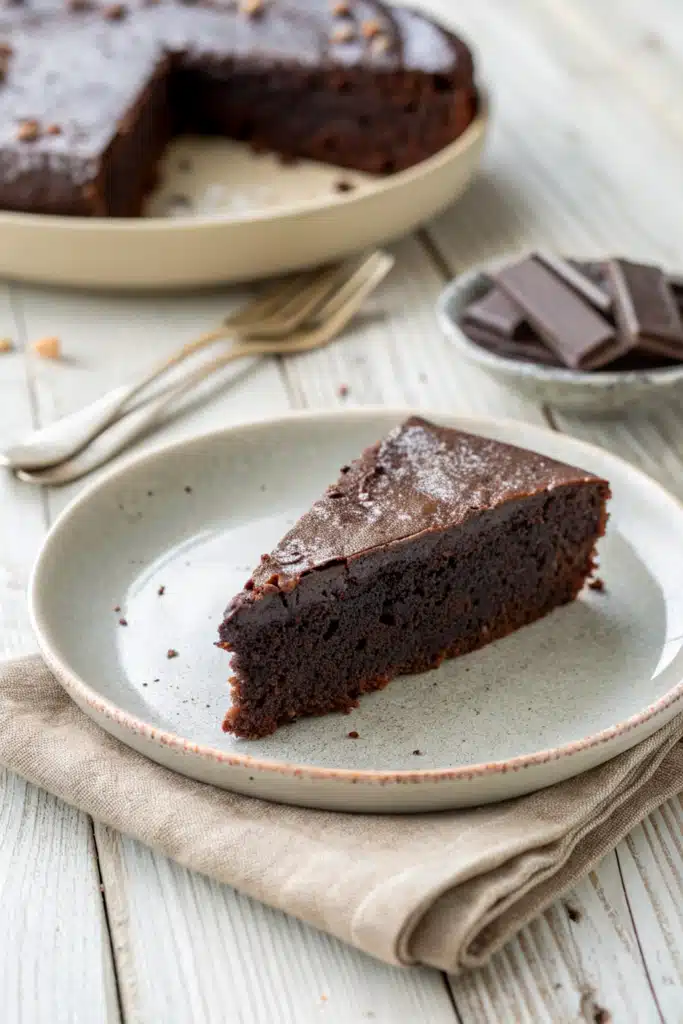
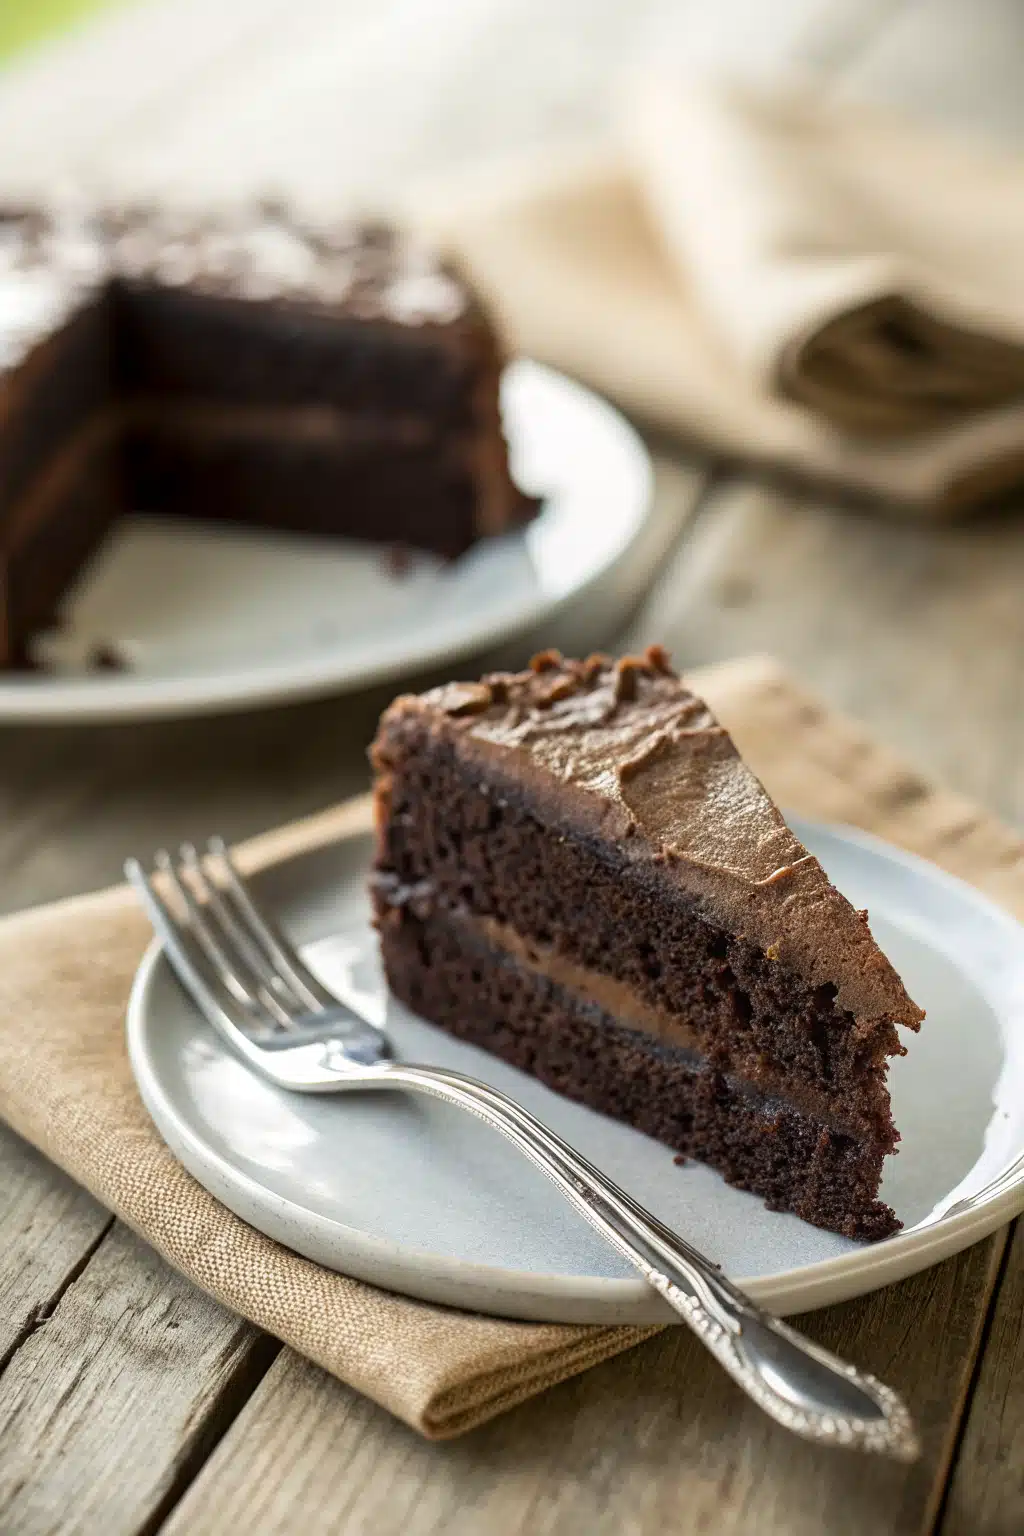
This guilt free chocolate cake is incredibly flavorful on its own, but dressing it up makes it feel like a fancy restaurant dessert. My absolute favorite way to serve this is with a generous handful of fresh raspberries or sliced strawberries. The tartness of the berries cuts through the rich chocolate perfectly.
If you want to add a creamy element, a dollop of coconut whipped cream or even a spoonful of vanilla Greek yogurt is heavenly. For my true chocoholics, try melting a tablespoon of dark chocolate chips (look for the sugar-free or stevia-sweetened ones to keep it light) with a tiny bit of coconut oil, and drizzle it right over the top of your slice. It creates a gorgeous, snappy chocolate shell!
Top Tips for Perfecting Your Guilt Free Chocolate Cake
Even though this recipe is incredibly forgiving, I’ve picked up a few helpful tricks along the way to make sure your cake turns out flawless every single time.
Don’t overmix the batter: Once you add the dry ingredients to the wet, mix just until they are combined. Overmixing oat flour can make the cake dense rather than light and fluffy.
Use room temperature ingredients: I know it’s annoying to wait for eggs and yogurt to warm up on the counter, but it really makes a difference. Cold yogurt can cause the batter to seize up and bake unevenly.
Let it cool completely: Because this cake is so moist and doesn’t rely on gluten for structure, it is a bit fragile when it’s hot out of the oven. Letting it cool completely gives it time to set up so you get perfect, clean slices.
Storing and Reheating Tips
If you magically happen to have leftovers (which rarely happens in my house), storing this cake is a breeze. Because of the Greek yogurt, I highly recommend storing the cake in an airtight container in the refrigerator. It will stay fresh and incredibly moist for up to 5 days.
You can also freeze this cake! Wrap individual slices tightly in plastic wrap, then place them in a freezer-safe bag. They will keep for up to 3 months. When you are ready for a treat, just let a slice thaw in the fridge overnight.
Whenever I eat a leftover slice, I love to pop it in the microwave for exactly 10 to 12 seconds. It takes the chill off and makes the chocolate flavor taste like it just came fresh out of the oven all over again.
Frequently Asked Questions
Final Thoughts
Finding a dessert that genuinely satisfies your cravings while still making you feel great afterward is like finding a unicorn. But I promise you, this guilt free chocolate cake is the real deal. It has become a staple in my kitchen, and I am so thrilled to finally share it with all of you.
Whether you bake it for a weekend family dinner, meal-prep it for your afternoon sweet tooth, or just whip it up because it’s a Tuesday and you deserve chocolate, I know you are going to love every single bite. Don’t forget to grab your favorite toppings and make it your own!
If you try this recipe, please let me know how it turned out! I love hearing about your baking adventures. Happy baking, friends!
Guilt Free Chocolate Cake
Ingredients
Main Ingredients
- 2 cup mixed flour almond, walnut, coconut
- 1 pinch salt
- 0.75 cup cocoa powder
- 1 tbsp baking powder
- 3 large eggs
- 0.5 cup coconut oil melted
- 3 cup grated raw vegetables 1.5 cups beetroot & 1.5 cups zucchini
- 0.25 cup organic maple syrup
- 0.25 cup dark chocolate chips 70% dark
- 1 cup boiling water
- 0.5 tsp baking soda
- 1 tbsp white vinegar
Instructions
Preparation Steps
- Preheat oven to 340°F. Line three 9-inch cake tins with oil and baking paper and set aside.
- In a large bowl, sift the flours, salt, cocoa powder, and baking powder. Using a whisk, stir until combined.
- Add the eggs, coconut oil, grated vegetables, maple syrup, and chocolate chips. Mix until almost combined, then pour in the boiling water.
- Mix the baking soda with the white vinegar in a small dish, then add it to the batter. Mix everything until well combined.
- Divide the batter evenly into the three prepared tins and bake for 12 to 15 minutes, or until the cakes have risen and a toothpick inserted into the center comes out clean.
- Set aside to cool in the tins for 15 minutes before turning out to assemble and serve.
Notes
Featured Comments
“Impressed! Clear steps and crowd-pleaser results. Perfect for busy nights.”
“New favorite here — comforting. crowd-pleaser was spot on.”
“Super easy and turned out amazing! My family asked for seconds. Saving this one.”
“This sweet treat was absolutely loved — the fresh really stands out. Thanks!”
“Made it tonight and wow — restaurant-level! Will definitely make Deliciously Guilt-Free Chocolate Cake Recipe again.”
“Packed with flavor and so simple. Exactly what I wanted from Deliciously Guilt-Free Chocolate Cake Recipe.”


