

There’s something about pulling together a simple, comforting dish with just a few ingredients that makes me smile every time. One of my favorites is these gorgeous green bean bundles — I swear, they’re like tiny little packages of happiness. I remember watching my grandma make something similar when I was a kid, the smell of bacon wafting through the kitchen, and I’d sit there waiting patiently, dreaming about that first bite. Fast forward to today, and I still do this when I want something cozy, flavorful, and honestly, a little fancy without any fuss. They’re perfect on busy weeknights, served alongside roasted chicken, or even as a stand-alone appetizer during family gatherings. The best part? They disappear in minutes at my house — my kids ask for these all the time, and they’re so easy to customize. Trust me, once you try making your own green bean bundles, they’ll become a staple in your meal rotation too!
What is green bean bundle?
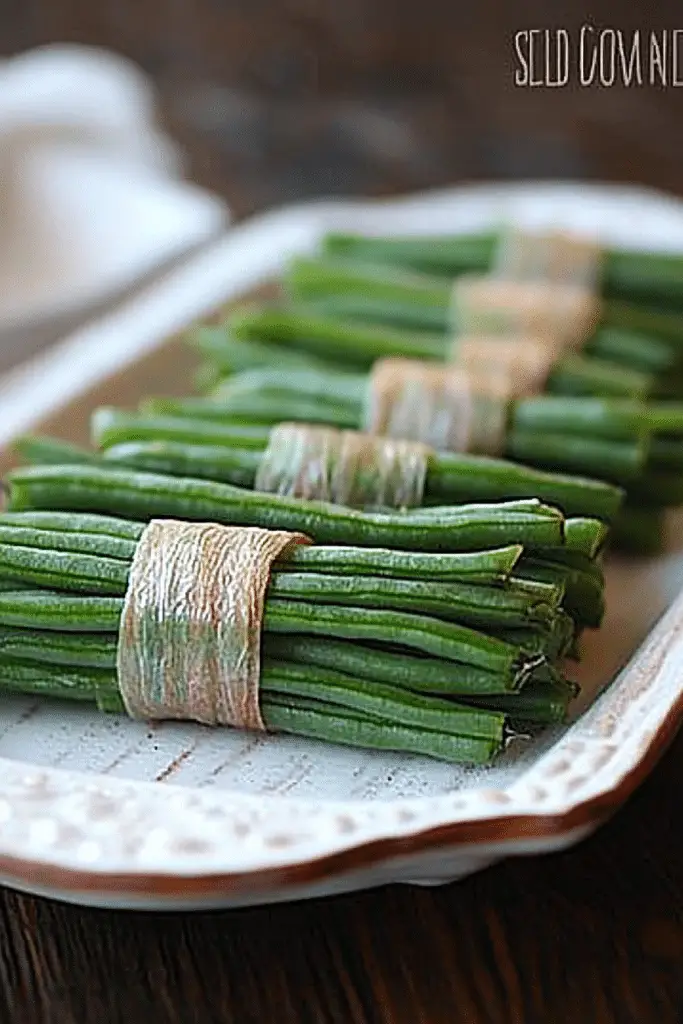
Think of green bean bundles as a charming twist on classic green beans, wrapped up in a little bundle of flavor. It’s essentially fresh green beans—bright, crisp, and vibrant—wrapped with slices of crispy bacon, then baked or roasted to perfection. The name “bundles” comes from how the beans are gathered together, almost like little gifts, then tied up with a toothpick or a strip of bacon. It’s a dish that’s deeply comforting but also impressively simple to throw together. Think of it as a mix between a veggie side and a fancy finger food, perfect for when you want something that looks just a little special but is actually super easy. My favorite part? The combination of that smoky bacon with the fresh, slightly crunchy greens—it’s a flavor combo I keep coming back to.
How do I make green bean bundles?
Quick Overview
This dish is all about wrapping fresh green beans with strips of bacon, then baking until everything is crispy and tender. The process is straightforward: prep your beans, assemble the bundles, bake, then serve! It’s the kind of recipe that’s almost meditative—you lay out your ingredients, roll, and relax while the magic happens in the oven. The real trick is not overcooking the bacon, which you’ll catch by checking for that irresistibly crispy edge. It’s a simple yet impressive side, and if you’re like me, you’ll be making extras because they’re just too good to resist.
Ingredients
For the Main Bundles:
- 1 pound fresh green beans (trimmed and washed)
- 8-10 slices of bacon (choose your favorite—thick-cut works great)
- 1 tablespoon olive oil or melted butter (optional, for tossing)
- Salt and freshly ground pepper (to taste)
Optional Extras for Personal Touches:
- Minced garlic or garlic powder
- Red pepper flakes for a spicy kick
- A sprinkle of brown sugar or honey drizzle for sweetness
- Grated Parmesan or shredded cheese for extra indulgence
Step-by-Step Instructions
Step 1: Preheat & Prep Pan
Set your oven to 400°F (200°C). Line a baking sheet with parchment paper or a silicone mat—trust me, this makes cleanup much easier, and the bacon won’t stick. Gather all your ingredients so everything is within reach. I like to have my green beans trimmed and ready, bacon slices laid out flat, and any extras pre-measured. This dish is all about quick assembly, so prep well!
Step 2: Mix Dry Ingredients
If you want to season your green beans before wrapping, toss them with a little olive oil, salt, pepper, and garlic. Honestly, I do this only if I want extra flavor—sometimes I just keep them simple. It helps the beans stay crispier and adds a subtle layer of flavor. Just be careful not to overdo the oil; a light coating is enough.
Step 3: Mix Wet Ingredients
This step isn’t always necessary unless you’re adding extra seasonings or marinades. But if you’re feeling fancy, a tiny splash of balsamic vinegar or lemon juice can brighten everything up. I tested this with a squeeze of lemon on top after baking, and it was a game-changer.
Step 4: Combine
Nothing fancy here—just lay out a few green beans, and wrap each bundle with a slice of bacon. I find that 4–5 beans per bundle is perfect; not too bulky, and it cooks evenly. Secure with a toothpick if needed, but oftentimes the bacon will hold itself nicely. Make sure to space them out on your baking sheet for even crisping.
Step 5: Prepare Filling
If using extras like garlic or cheese, sprinkle them on top of the bundles before baking. I like to add minced garlic at this stage because the heat mellows it out nicely and infuses the whole dish.
Step 6: Layer & Swirl
For a more elegant presentation, you can arrange the bundles with a slight swirl, creating a little pattern on the plate. If you want to add a swirl of mustard or honey glaze, now’s the time—brush it on before going into the oven for a glossy, flavorful finish.
Step 7: Bake
Pop the tray into your preheated oven and bake for about 20–25 minutes. Keep an eye on the bacon; you want it crispy but not burnt. The green beans should be tender but still with a slight crunch. My trick is to check around the 20-minute mark, and if the bacon looks ready but the beans need a bit more time, cover lightly with foil to prevent over-browning.
Step 8: Cool & Glaze
Once out of the oven, let the bundles rest for 5 minutes. This helps everything settle and makes them easier to handle. If you’re adding a glaze or sauce, brush it on now while the bacon is still warm so it seeps into all those crevices.
Step 9: Slice & Serve
Carefully remove toothpicks if used. Serve the bundles hot, arranged on a platter or individual plates. They taste even better with a sprinkle of extra pepper or a squeeze of lemon. My family loves these with a side of mashed potatoes or even a simple Caesar salad for a complete meal.
What to Serve It With
This dish is as versatile as it is delicious. For breakfast, pair it with scrambled eggs and a strong cup of coffee—nothing kickoff your morning like the smell of bacon and fresh greens. During brunch, I love to serve these alongside a flaky quiche or a fruit platter, with mimosas or fresh juice. They also make a fantastic side for roasted chicken or steak — just slice them into smaller pieces if serving as part of a larger spread. And as a stand-alone snack or appetizer at friends’ gatherings? Absolutely! I’ve found that a little bowl of creamy dip—maybe some ranch or blue cheese dressing—complements the smoky crunch perfectly. Honestly, I’ve even served these cold the next day, and they’re still just as good. They’re a hit at my house for any casual get-together or special occasion. Plus, because they’re so easy to prepare ahead, I often make them in advance and reheat gently before serving—trust me, they’re just as tasty warm or at room temperature.
Top Tips for Perfecting Your Green Bean Bundles
After making these dozens of times, I’ve picked up a few tricks I want to pass along. First, always choose fresh, firm green beans—slimy or limp ones will ruin the texture. When trimming, aim for evenly cut stems so they cook uniformly. For wrapping, I’ve tested everything from toothpicks to twine, but honestly, good quality bacon seems to stick better to itself, so I rarely need extras. If you want crispy bacon all over, arrange the bundles with space around each to let the hot air circulate evenly; overcrowding will result in soggy spots. When it comes to seasoning, don’t be shy—garlic, pepper, and a pinch of paprika add great flavor, but a touch of brown sugar can give a surprising sweet contrast. I’ve learned that baking at 400°F hits that perfect crispy point, but if you’re using a convection oven, lower the temp slightly and cut down baking time. Personal tip: I always check and remove the bacon once it’s the perfect crisp—trust your nose and eyes! For glaze options, try honey mustard or a balsamic syrup for a shiny, flavor-packed finish. I tested this with different thicknesses of bacon too, and I found that thinner slices cook faster and get crispier, but thicker bacon stays juicier. The key is to keep an eye on them, especially near the end — every oven is a little different!
Storing and Reheating Tips
This dish is quite forgiving. If you have leftovers, store them in an airtight container in the fridge for up to 3 days. Be sure to let them cool completely before refrigerating—hot bacon can cause condensation and sogginess. To reheat, the oven or toaster oven is best; heat at 350°F for 10–15 minutes until crispy again. Microwave works in a pinch, but you might lose some of that crispy bacon texture. I don’t recommend freezing cooked bacon bundles because they tend to lose their crunch once thawed. if you want to prepare ahead, raw green beans and bacon can be assembled a day in advance, then baked fresh for serving. And about the glaze — if you’re planning to reheat, wait to add it until after warming, as some glazes can become sticky or separate when heated repeatedly. Trust me, reheating gently preserves their best qualities. This way, you can enjoy the flavors of freshly baked bundles even days later, without sacrificing texture or taste.
Frequently Asked Questions
Final Thoughts
Honestly, these green bean bundles have become one of my favorite little hacks in the kitchen. They bring together the ideal balance of smoky, crispy bacon and fresh, crunchy green beans. Every time I serve them, I get compliments—and my family devours them before I can blink. The best part? They’re so simple that even a busy weeknight feels special, but they’re also fancy enough to impress guests. Over the years, I’ve tinkered with seasonings, experimented with cheese, and perfected my timing — and I still never get tired of the satisfying crunch and smoky aroma. If you’re looking for a scene-stealing side that’s easy, affordable, and totally customizable, give these a try. I promise, you’ll love how cozy and delicious they are. Happy baking, and I can’t wait to hear how yours turn out! Don’t forget to leave a comment or share your tweaks—I always love hearing new ideas.

green bean bundles
Ingredients
Main Ingredients
- 1 pound Haricot verts or green beans ends trimmed
- 4 slices center cut bacon cut in half
- 1 spray olive oil spray
- 1 pinch salt
- 1 to taste fresh cracked pepper
- 0.125 teaspoon garlic powder
Instructions
Preparation Steps
- Blanch the green beans for 3 minutes, then dry on paper towel.
- Preheat oven to 400°F. Spray a baking sheet with olive oil spray.
- Make 8 even bundles and wrap each bundle (about 1.6 oz each) in one half slice of bacon.
- Place the bundles seam side down on the baking sheet.
- Lightly spray the tops with a little more oil, season with salt, pepper and garlic powder to taste, then bake for about 14-16 minutes.
Notes
Featured Comments
“Impressed! Clear steps and quick weeknight win results. Perfect for busy nights.”
“New favorite here — turned out amazing. crowd-pleaser was spot on.”
“Super easy and turned out amazing! My family asked for seconds. Saving this one.”
“This sweet treat was absolutely loved — the light really stands out. Thanks!”
“Made it tonight and wow — turned out amazing! Will definitely make Easy Bacon Green Bean Bundles Delight again.”
“Packed with flavor and so simple. Exactly what I wanted from Easy Bacon Green Bean Bundles Delight.”


