

Simple Homemade Bread: The Only Recipe You’ll Ever Need
There is nothing quite like the aroma of simple homemade bread wafting through the kitchen. It is one of those deeply comforting smells that instantly makes a house feel like a home. For the longest time, I was absolutely terrified of working with yeast. I convinced myself that baking bread was this magical, complicated science reserved only for professional bakers or grandmothers with decades of experience. But let me tell you a little secret: it really isn’t.
Once I finally pushed past my fear and gave it a try, I realized just how incredibly forgiving and rewarding bread baking can be. You do not need a fancy stand mixer, expensive proofing baskets, or a culinary degree to make a gorgeous, crusty loaf. All you need is flour, water, yeast, a little bit of salt, and some patience. Whether you want a thick slice to slather with melting butter or the perfect base for a hearty sandwich, this easy recipe is going to become your new weekend tradition. Grab your mixing bowl, and let’s get our hands doughy!
What Is Simple Homemade Bread?
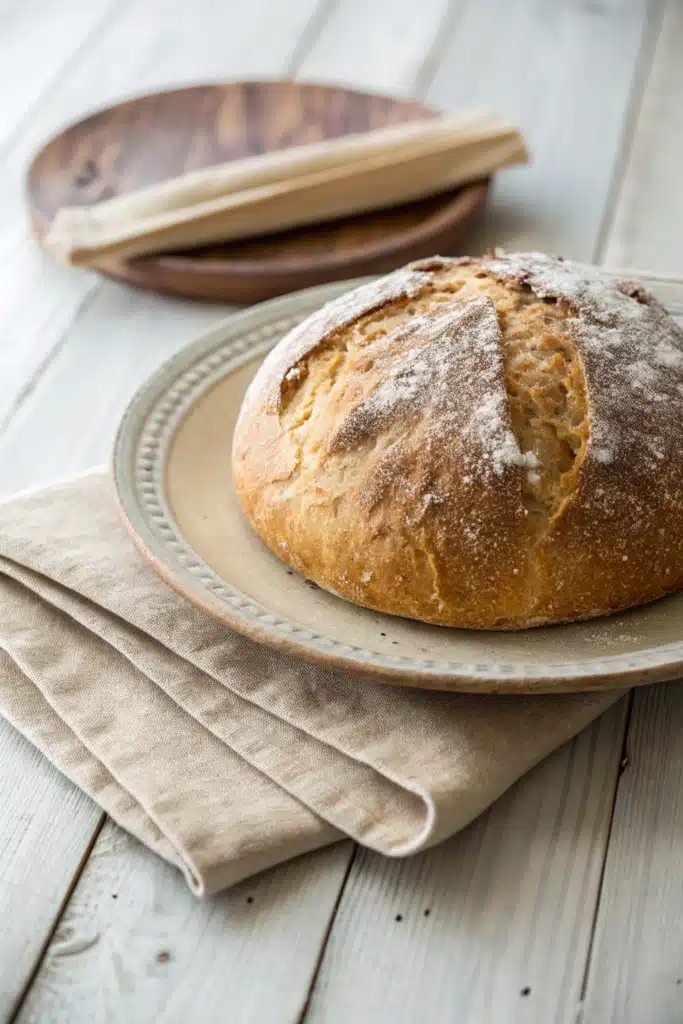
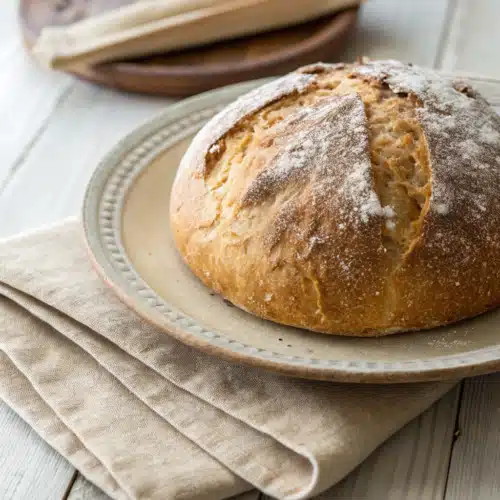
When we talk about simple homemade bread, we are talking about a classic, no-fuss rustic loaf. It is the kind of bread that features a beautifully golden, slightly chewy crust on the outside, while remaining incredibly soft, fluffy, and tender on the inside. Unlike the squishy, heavily processed loaves you find in the supermarket aisles, this bread relies on just four basic pantry staples. There are no preservatives, no dough conditioners, and no unpronounceable chemicals—just pure, honest ingredients.
This specific recipe is what I like to call a “gateway bread.” It is specifically designed for beginners who want the satisfaction of baking from scratch without the overwhelming complexity of sourdough starters or multi-day ferments. It is a straight-dough method, meaning you mix everything together, let the yeast do its heavy lifting, shape it, and bake it. The result is a versatile, artisan-style loaf that tastes like it came from a high-end bakery, right out of your own oven.
How to Make Simple Homemade Bread
Quick Overview
Do not let the idea of making bread intimidate you. The actual hands-on time for this simple homemade bread is surprisingly minimal! You will start by activating your yeast in some warm water. Once it is nice and bubbly, you simply mix in your flour and salt to form a shaggy dough. From there, you will give it a quick knead until it is smooth, then let it rest and rise until it has doubled in size. After the first rise, you will shape the dough, pop it into your loaf pan, and let it rise one more time before baking it to golden perfection. Most of the time required is just waiting for the yeast to do its magic!
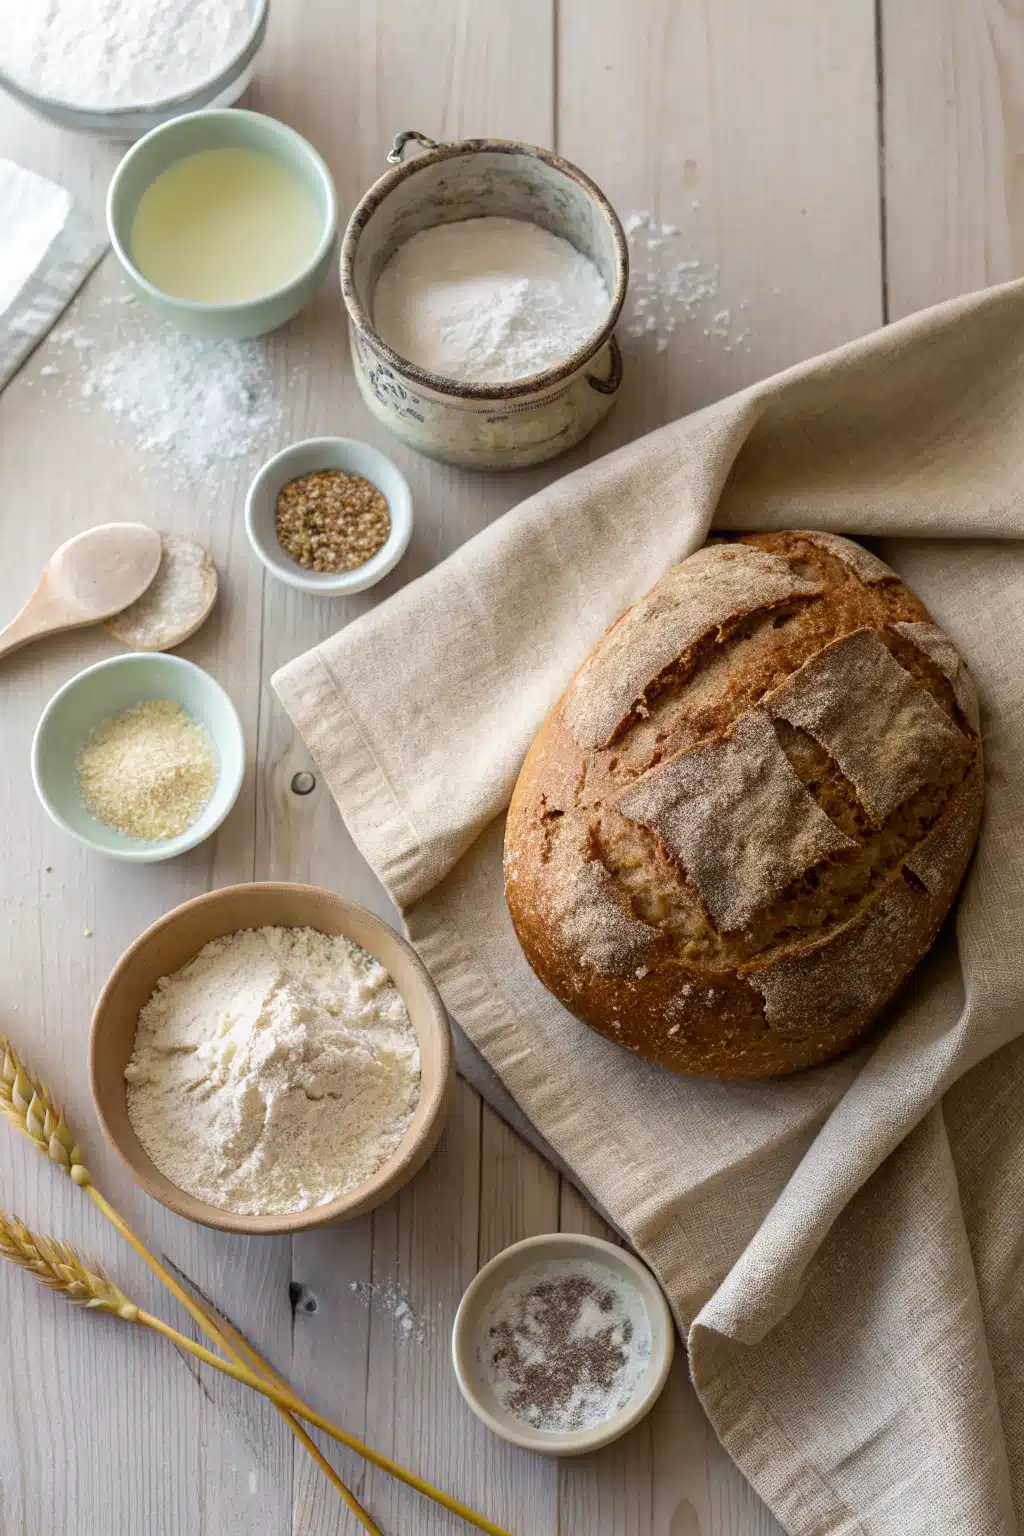
Ingredients
You probably already have everything you need sitting in your pantry right now. Here is what you will need to grab:
- Warm Water: The water needs to be warm to the touch, but not hot. Think bathwater temperature (around 105 to 110 degrees Fahrenheit).
- Active Dry Yeast: This is what gives our bread that beautiful lift. Make sure your yeast is not expired!
- Sugar or Honey: Just a pinch! This gives the yeast something sweet to feed on so it can activate properly.
- Bread Flour or All-Purpose Flour: Bread flour will give you a slightly chewier texture, but regular all-purpose flour works wonderfully too.
- Salt: Essential for flavor. Without salt, your bread will taste completely flat.
- Olive Oil or Melted Butter: Just a splash to keep the dough soft and add a hint of richness.
Step-by-Step Instructions
Step 1: Proof the Yeast
In a large mixing bowl, combine your warm water, a teaspoon of sugar, and the active dry yeast. Give it a gentle stir and let it sit for about 5 to 10 minutes. You will know it is ready when the mixture looks frothy and smells distinctly yeasty. If it doesn’t bubble up, your yeast might be dead, and you will need to start over.
Step 2: Mix the Dough
Once your yeast is happy and bubbly, add in your salt, oil, and about half of your flour. Stir it together with a wooden spoon until it forms a loose batter. Gradually add the rest of the flour until the dough becomes too thick to stir. It will look a bit shaggy and messy at this point, and that is exactly what you want.
Step 3: Knead to Perfection
Turn your dough out onto a lightly floured surface. Use the heel of your hand to push the dough away from you, then fold it back over itself. Give it a quarter turn and repeat. Knead the dough for about 8 to 10 minutes. You are looking for a smooth, elastic ball that springs back slightly when you poke it with your finger.
Step 4: The First Rise
Lightly oil a large bowl and place your kneaded dough inside, turning it once so the top is coated in oil. Cover the bowl with a clean kitchen towel or plastic wrap. Place it in a warm, draft-free spot in your kitchen and let it rise for about 1 to 2 hours, or until it has completely doubled in size.
Step 5: Shape and Second Rise
Gently punch the dough down to release the air bubbles. Turn it out onto your counter and shape it into a log that fits your greased loaf pan. Place the shaped dough into the pan, cover it loosely, and let it rise again for about 45 minutes to an hour. It should crown beautifully over the rim of the pan.
Step 6: Bake and Cool
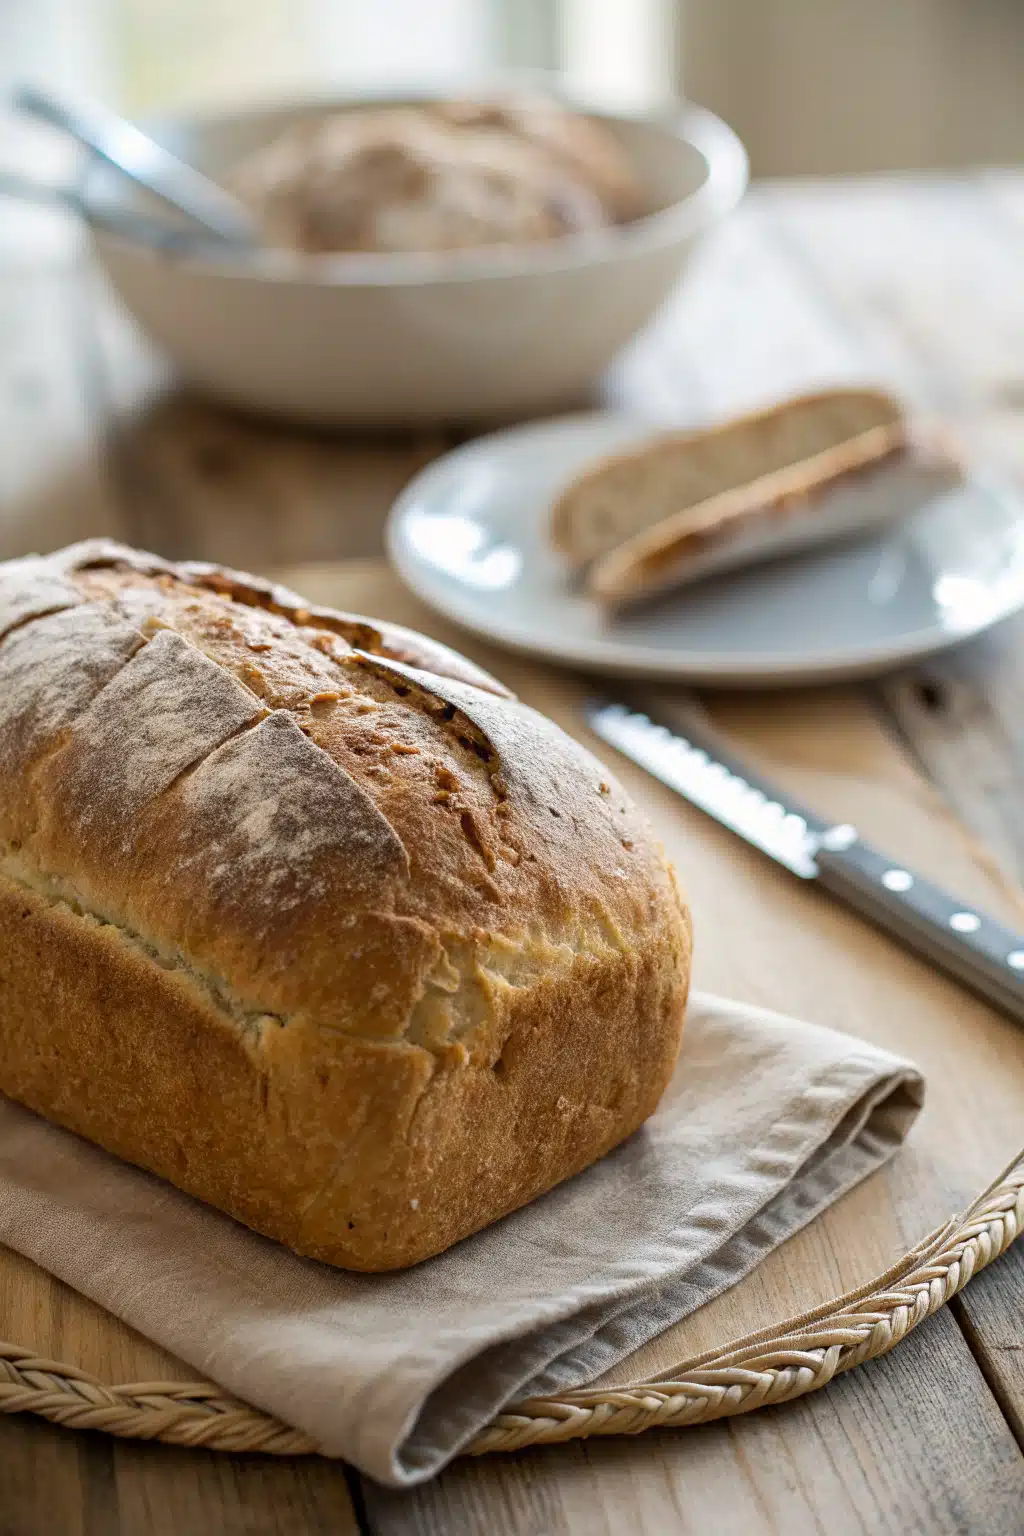
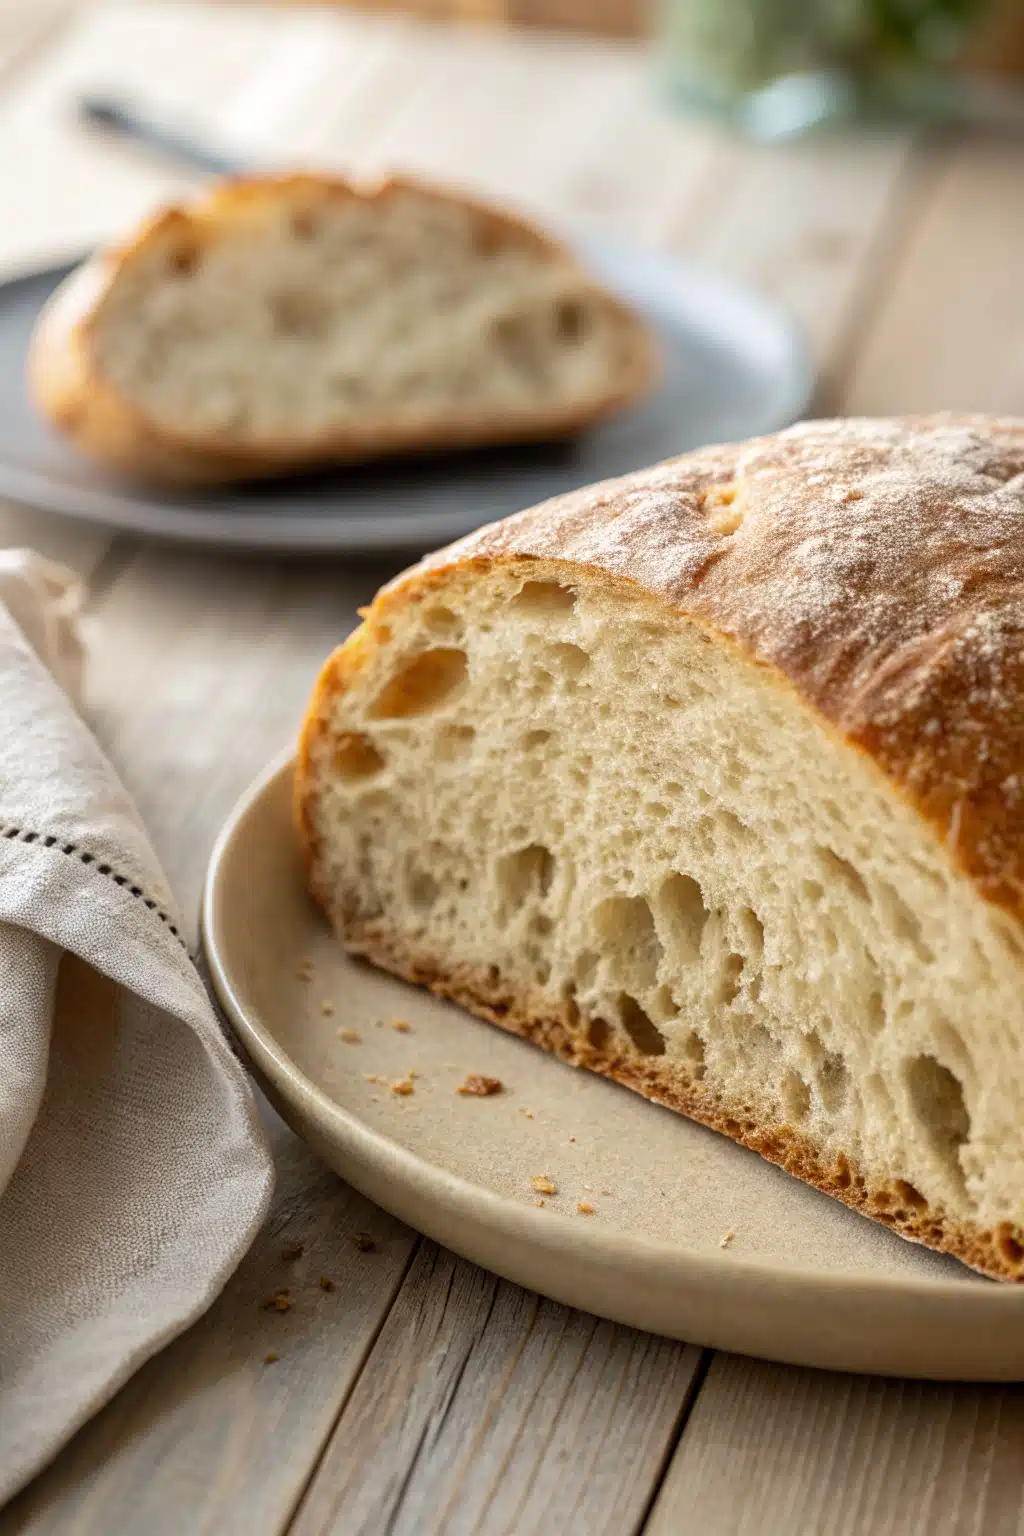
Preheat your oven to 375 degrees Fahrenheit. Bake the bread for 30 to 35 minutes until the top is a deep golden brown. If you tap the bottom of the loaf, it should sound hollow. This is the hardest part: you must let the bread cool completely on a wire rack before slicing it! Cutting into hot bread will make it gummy.
What to Serve It With
Honestly, my absolute favorite way to eat this simple homemade bread is still slightly warm, generously smeared with good quality salted butter and a drizzle of honey. It is heaven on earth. But because this loaf is so versatile, it pairs perfectly with just about anything you are cooking up.
It makes the most incredible grilled cheese sandwiches you will ever eat. The crust gets perfectly crisp in the pan while the inside stays fluffy. It is also my go-to side for hearty meals. Serve thick slices alongside a steaming bowl of creamy tomato soup, a rich beef stew, or a big family pasta dinner to mop up all that extra marinara sauce. If you have leftovers that are a few days old, it transforms into the most amazing French toast or homemade garlic bread.
Top Tips for Perfecting Your Simple Homemade Bread
Even though this recipe is incredibly straightforward, there are a few little tricks I have learned over the years to make sure your bread turns out spectacular every single time:
- Watch your water temperature: This is the number one mistake beginners make! If your water is too hot, it will kill the yeast. If it is too cold, the yeast will not wake up. Aim for lukewarm water that feels perfectly comfortable on your wrist.
- Measure flour correctly: Do not scoop your measuring cup directly into the flour bag. This packs the flour down, resulting in a dense, heavy loaf. Instead, use a spoon to fluff the flour, scoop it into your cup, and level it off with a butter knife.
- Let the dough tell you when it is ready: Rising times are just guidelines. Depending on how warm or cold your kitchen is, your dough might take more or less time to double in size. Pay attention to the size of the dough, not just the clock.
- Do not skip the cooling process: I know it is agonizing to wait when your house smells like a bakery, but letting the bread cool completely sets the crumb. Slicing it while it is piping hot releases the steam and leaves you with a sticky, doughy texture.
Storing and Reheating Tips
Because this simple homemade bread does not contain any artificial preservatives, it will not last quite as long on the counter as store-bought bread. But don’t worry, keeping it fresh is easy!
Store your completely cooled loaf in a bread box, a paper bag, or wrapped tightly in plastic wrap at room temperature for up to 3 days. Whatever you do, do not put it in the refrigerator! The fridge will actually draw the moisture out of the bread and make it go stale much faster.
If you cannot finish the loaf in a few days, freezing is your best friend. I like to slice the entire loaf before freezing. Place pieces of parchment paper between the slices and store them in a freezer-safe bag for up to 3 months. When you are craving a slice, you can pop the frozen bread straight into the toaster. It tastes just as fresh as the day you baked it!
Frequently Asked Questions
Final Thoughts
Baking your own simple homemade bread is one of the most fulfilling things you can do in the kitchen. There is just something so grounding about mixing flour and water with your own hands and watching it transform into a beautiful, nourishing loaf. I really hope this recipe takes the fear out of working with yeast and shows you just how fun and easy bread baking can be.
If you give this recipe a try, please let me know how it turns out! I love hearing about your baking adventures. Grab a slice, slather on some of your favorite jam, and enjoy every single bite. Happy baking, my friends!
Easy Bread Recipe
Ingredients
Main Ingredients
- 3 cups all-purpose flour
- 1.5 teaspoons active dry yeast
- 1.5 teaspoons kosher salt
- 1.5 cups warm water
Instructions
Preparation Steps
- In a large bowl, whisk together the flour, yeast, and salt.
- Add the warm water and stir until a shaggy dough forms.
- Cover the bowl with plastic wrap and let it rest at room temperature for 4 hours.
- Preheat your oven to 450°F (230°C) and place a skillet or Dutch oven inside to heat.
- Turn the dough out onto a floured surface and shape it into a round loaf.
- Carefully place the dough into the preheated skillet or Dutch oven.
- Bake for 35 minutes, or until the crust is golden brown and the bread sounds hollow when tapped.
- Let the bread cool for at least 1 hour before slicing.
Notes
Featured Comments
“Impressed! Clear steps and turned out amazing results. Perfect for busy nights.”
“New favorite here — creamy. crowd-pleaser was spot on.”
“Super easy and turned out amazing! My family asked for seconds. Saving this one.”
“This sweet treat was absolutely loved — the fresh really stands out. Thanks!”
“Made it tonight and wow — restaurant-level! Will definitely make easy bread recipes again.”
“Packed with flavor and so simple. Exactly what I wanted from easy bread recipes.”


