

There’s something about the smell of freshly baked cookies that instantly takes me back to lazy Sundays at my grandma’s house. The warm, buttery aroma mingling with the sweet scent of melting butterscotch chips… it’s honestly one of my favorite memories. I remember sneaking into the kitchen and grabbing a cookie or two before they even cooled — those gooey, caramel-rich bites disappeared faster than I’d like to admit. And now, whenever I bake butterscotch cookies, it’s like a little time machine that whisks me right back to those carefree days. Trust me when I say this: these cookies are dangerously addictive. They’re incredibly easy to make, packed with a rich butterscotch flavor, and perfect for when you need a quick, satisfying treat. My kids ask for these all the time, and I’ve even snuck a handful for myself when I needed a little midweek pick-me-up. Serving them warm with a glass of milk or a cup of coffee? Absolutely heavenly. You’re gonna love this recipe — I promise it’ll become a family staple in no time!
What is Butterscotch Cookies?
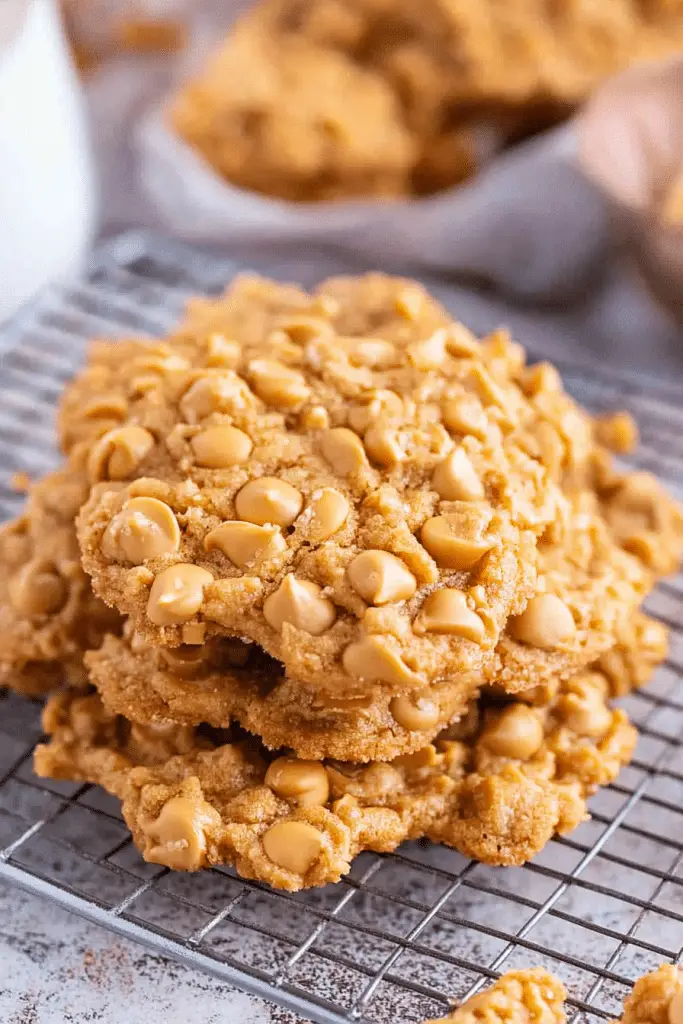
Think of butterscotch cookies as soft, buttery cookies studded with those sweet, caramel-y morsels of butterscotch chips. It’s essentially a shortcut to dessert heaven — the cookie dough itself is rich and tender, but once baked, it transforms into a melt-in-your-mouth delight. The name “butterscotch” comes from the traditional flavoring made by boiling brown sugar and butter, creating those lush, deep caramel tones we all adore. In cookies, it’s like a cozy hug — the perfect balance of sweet and buttery, with just enough chewiness. These cookies are a cross between classic chocolate chip cookies and caramel bites, but with that distinctive butterscotch twist that sets them apart. Think of it as your new go-to treat, especially when you’re craving something sweet but don’t want to fuss with complicated ingredients or long baking times. It’s like a warm, portable hug—everyone loves a batch of butterscotch cookies!
How do you make Butterscotch Cookies?
Quick Overview
This recipe is as straightforward as it gets. You start by creaming butter and sugar, mixing in eggs and vanilla, and then gently folding in dry ingredients along with those irresistible butterscotch chips. The dough comes together quickly, and after a few scoops onto your baking sheet, it’s off to the oven. No fancy equipment or long waiting — just good old-fashioned baking magic. Trust me, it’s perfect for a weekend treat or spontaneous sweet fix. The key to perfect cookies is not overmixing — I always do this, and it makes all the difference in keeping the cookies tender and chewy. Once baked, let them cool just enough to enjoy that gooey middle, and then add a quick drizzle of glaze or just serve as-is. These are one of those recipes that look fancy but are truly easy to make — once you try it, you’ll wonder why you ever bought cookies from the store!
Ingredients
For the Main Batter:
– 1 cup unsalted butter, softened (trust me on this one, don’t melt it — soft is best)
– 1 cup brown sugar (dark or light depending on how deep you want the caramel flavor)
– 1/2 cup white sugar
– 2 large eggs
– 2 teaspoons vanilla extract (the more, the merrier!)
– 2 1/4 cups all-purpose flour (sift if you’re feeling fancy)
– 1 teaspoon baking soda
– 1/2 teaspoon salt
For the Filling:
– 1 1/2 cups butterscotch chips (you can find these in most grocery stores or online — I say, get the good quality ones)
– Optional: 1/2 cup chopped nuts or chocolate chips for extra texture
For the Glaze:
– 1 cup powdered sugar
– 2-3 teaspoons milk or cream
– 1/2 teaspoon vanilla extract
– A sprinkle of sea salt or a drizzle of melted chocolate (if you’re feeling fancy)
Step-by-Step Instructions
Step 1: Preheat & Prep Pan
Set your oven to 350°F (175°C). Line a baking sheet with parchment paper or silicone baking mats — this keeps the cookies from sticking and makes clean-up a breeze. I always do this first because it’s the least fun to realize you forgot when your dough is already ready to go. Spray or lightly grease if needed, but parchment is my favorite — no mess, no fuss.
Step 2: Mix Dry Ingredients
In a small bowl, whisk together the flour, baking soda, and salt. This is my little trick for even distribution of those leavening agents — I’ve learned that overmixing the dry ingredients in the batter can make cookies tougher, so I keep this step quick and gentle.
Step 3: Mix Wet Ingredients
In a large bowl, cream the softened butter with the sugars until the mixture is light and fluffy — I use a hand or stand mixer, but a good old wooden spoon works too if you’re patient. It should look slightly pale and feel soft. Then, add eggs one at a time, making sure each is well incorporated before adding the next. Add vanilla last — this is what really pulls all the flavors together and makes your house smell amazing.
Step 4: Combine
Gradually add your dry ingredients to the wet mixture, mixing on low speed or gently folding by hand. You don’t want to overmix here — just until combined. If you overdo it, your cookies might turn out dense or tough. Once the dough looks and feels soft but not sticky, you’re good to go. Finally, fold in the butterscotch chips gently, saving a few for topping if you like a little extra sweetness on top.
Step 5: Prepare Filling
If you’re adding nuts or extras, fold them in now. For the filling, I often keep it simple: just the butterscotch chips mixed into the dough. But if you wanna go wild, sprinkle some chopped nuts or even chopped caramel candies — it’s your cookie, make it yours!
Step 6: Layer & Swirl
Scoop tablespoon-sized balls onto your prepared pan, leaving about 2 inches apart. For that beautiful swirl effect, I sometimes press a few extra butterscotch chips on top and do a gentle swirl with a toothpick or a skewer to create marbling — it’s such a fun little touch that makes the cookies look bakery-fancy.
Step 7: Bake
Bake for 10-12 minutes, or until the edges are golden and the centers look just set. Keep an eye on them — every oven is a bit different. If you like them chewier, pull them out a minute earlier. When you see that slightly cracked surface and those rich caramel noses peeking out, that’s when you know they’re perfect. Let them rest for about 5 minutes before transferring to a wire rack — this helps them set up and prevents breakage.
Step 8: Cool & Glaze
Once cooled just enough to handle, you can drizzle with a simple vanilla glaze or melt some chocolate for an extra treat. Trust me, a drizzle of melted milk or dark chocolate turns these from lovely to *oh wow*. Or just enjoy them as they are — they’re downright addictive anyway.
Step 9: Slice & Serve
These cookies are best enjoyed when still warm, but they hold their charm once cooled. Serve them on a pretty plate, with a glass of milk or your favorite brew. They also make fabulous freezing candidates — just freeze them in an airtight container for up to a month, then thaw at room temp whenever a craving strikes.
What to Serve It With
These butterscotch cookies are like a blank canvas — you can dress them up or down depending on your mood or the occasion. For breakfast (hey, no judgment!), serve a warm cookie alongside your coffee with a smear of cream cheese or a drizzle of honey. My family loves these for brunch, where I put a plate out with some fresh fruit and a steaming pot of coffee — they’re basically a sweet little treat to start the day. For dessert, I love pairing them with vanilla ice cream or a scoop of dulce de leche for an extra caramel boost. These cookies are also fantastic for casual get-togethers or movie nights—just grab a handful and enjoy the sweet comfort. I usually pack a few in a tin for family road trips or gift a batch to friends — they always disappear fast, trust me. They’re just one of those recipes that feels cozy and special, no matter when or where you enjoy them.
Top Tips for Perfecting Your Butterscotch Cookies
I’ve made this recipe countless times, and over the years I’ve picked up a few tricks to make the best cookies every single time. First, I always do this: soften the butter just enough so it’s easy to cream, but don’t melt it. Melty butter makes spread-out cookies, and that’s not what we want here. If your dough feels too sticky, toss in a little extra flour — it’s better to add gradually than overdo it at once. When mixing in the butterscotch chips, fold gently — overmixing can crush the chips, which isn’t the end of the world, but it does slightly affect the texture. For swirling the toppings, I like to use a toothpick or a skewer to make pretty, marbled patterns — it makes the cookies look as good as they taste. If you’re feeling playful, try adding a pinch of sea salt on top before baking for a sweet-salty contrast. Oh! And I’ve tested substituting coconut oil for butter, which added a subtle coconut flavor; it’s delicious if you like a hint of tropical. The key is patience — don’t rush the baking, watch for that perfect golden edge, and you’ll get cookies that look and taste just right. These tips have probably made the biggest difference in my cookie success rate, and I hope they help you, too!
Storing and Reheating Tips
Once these butterscotch cookies are cooled, I keep them in an airtight container at room temperature — they stay fresh for up to 3 days, which is usually enough at my house. If you want to keep them longer, pop them into the fridge for up to a week, just make sure they’re well sealed — humidity can make them get a little stale. For freezing, I individually wrap each cookie in plastic wrap and store in a zip-top bag for up to a month. When it’s time to enjoy, just thaw at room temperature — they taste just as wonderful as freshly baked. If you’ve glazed them, wait until they’re fully cooled before adding the glaze, or it might get all melty and weird. Reheating? I recommend a quick 10-second zap in the microwave for a warm, gooey effect or just enjoy at room temp if you prefer that crumbly, chewy bite. These tips keep my cookies tasting fresh and cozy, no matter when I want one — I hope they do the same for you!
Frequently Asked Questions
Final Thoughts
This recipe for butterscotch cookies has truly become a favorite in my household, and I bet it will be in yours too. There’s something so comforting about that buttery, caramel flavor paired with the chewy texture and melty chips. They’re simple enough to whip up on a weeknight but special enough to serve at gatherings or as homemade gifts — everyone appreciates a batch of warm, homemade cookies. I honestly encourage you to experiment a little — maybe add some sea salt on top, swap in some chopped pecans, or even try coconut flakes. The beauty of a good basic recipe like this is in the versatility and love you put into it. I can’t wait to hear how yours turn out! Drop a comment below or share your twists — I love swapping ideas. Happy baking, friends — and enjoy every warm, sweet bite!

butterscotch cookies
Ingredients
Main Ingredients
- 1.5 cup sugar
- 0.5 cup salted butter
- 0.666 cup evaporated milk
- 1 cup butterscotch chips
- 3.5 cups old-fashioned oats
- 0.5 cup shredded sweetened coconut
Instructions
Preparation Steps
- Add sugar, butter, and evaporated milk to a saucepan. Bring to a boil on medium high. Boil for 1 minute, stirring constantly.
- Remove from heat and stir in butterscotch chips. Stir in oats and coconut.
- Let cool for 5 minutes. Drop by teaspoonful onto a piece of wax paper. Let cool for 2 to 3 hours before eating.
Notes
Featured Comments
“Impressed! Clear steps and family favorite results. Perfect for busy nights.”
“New favorite here — restaurant-level. crowd-pleaser was spot on.”
“Super easy and turned out amazing! My family asked for seconds. Saving this one.”
“This sweet treat was absolutely loved — the fresh really stands out. Thanks!”
“Made it tonight and wow — perfect for busy nights! Will definitely make Easy Butterscotch Treats You’ll Adore again.”
“Packed with flavor and so simple. Exactly what I wanted from Easy Butterscotch Treats You’ll Adore.”


