


You know those days? The ones where the clock is ticking, your stomach is rumbling, and the thought of complex cooking feels like climbing Mount Everest? Yeah, I have those. A lot, actually. And on those days, my absolute go-to, the recipe that saves my sanity and delights everyone at the table, is my Chicken Bundles. Forget those fancy restaurant appetizers or painstakingly rolled-up appetizers; this is the real deal for busy weeknights, impromptu get-togethers, or just when you need a comforting hug in edible form. They’re like a cozy, savory hug that you can hold in your hand. Honestly, I think they’re even better than those little Puff Pastry bites you see everywhere, and way more forgiving if you’re not a pastry chef. The magic happens because it’s so incredibly simple, yet the flavor is surprisingly rich and satisfying. This isn’t just a recipe; it’s my secret weapon for feeling like a culinary rockstar without breaking a sweat.
What are chicken bundles?
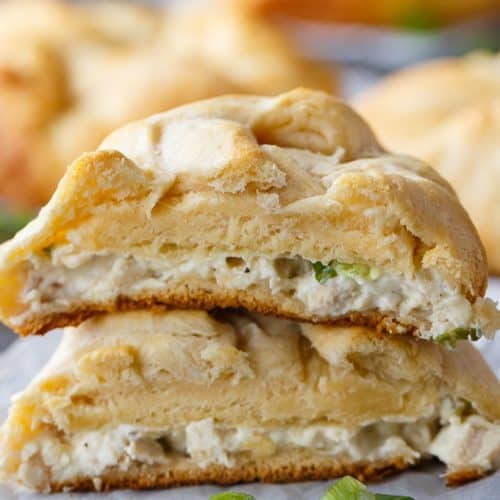
So, what exactly are these magical Chicken Bundles? Think of them as little pockets of pure joy, cradling a savory, Flavorful Chicken filling within a tender, slightly sweet dough. It’s not quite a dumpling, not quite a potsticker, and definitely not a pie, but it has elements of all of them in the best possible way. The name itself, “Chicken Bundles,” really captures what they are – simple, delightful packages. I call them bundles because you’re essentially bundling up deliciousness. The dough is wonderfully forgiving, and the filling is incredibly customizable, which is a huge part of why I adore them. It’s the kind of dish that feels both comforting and a little bit special, all at once. They’re the perfect size for a snack, a light meal, or an appetizer that will have your guests begging for the recipe.
How do I make chicken bundles?
Quick Overview
The beauty of these Chicken Bundles lies in their simplicity. You’ll whip up a quick, no-fuss dough, prepare a flavorful chicken filling, then bundle them up and bake until golden and delicious. The whole process, from start to finish, takes surprisingly little time, especially if you have some pre-cooked chicken on hand. It’s a straightforward method that guarantees a satisfying result every single time, making it perfect for even beginner cooks. You don’t need any fancy equipment, just a couple of bowls and a baking sheet.
Ingredients
For the Main Batter:
You’ll need all-purpose flour, baking powder for a little lift, a pinch of salt to enhance the flavors, and sugar for that subtle sweetness. I like to use whole milk for this, but I’ve tested it with almond milk and it actually made it even creamier! Using room temperature milk helps everything combine more smoothly.
For the Filling:
This is where the magic happens! Cooked, shredded chicken is the base. You can use rotisserie chicken, leftover baked chicken, or even Chicken Breasts simmered and then shredded. I usually add a bit of finely chopped onion or shallot for a little bite, some garlic powder for depth, a touch of paprika for color and mild warmth, and salt and pepper to taste. Sometimes, I’ll stir in a tablespoon or two of mayonnaise or Greek yogurt to make the filling extra moist and bind it together beautifully.
For the Glaze:
This is optional but highly recommended! A simple glaze made from melted butter and a sprinkle of garlic powder or herbs adds a beautiful sheen and an extra layer of flavor once they’re out of the oven. It’s what takes them from good to absolutely irresistible. You can also brush them with a simple egg wash for a golden crust if you prefer not to use butter.
Step-by-Step Instructions
Step 1: Preheat & Prep Pan
First things first, let’s get your oven prepped. Preheat it to a nice, consistent 375°F (190°C). While the oven is doing its thing, grab a baking sheet and line it with parchment paper. This is a lifesaver for cleanup, trust me! If you don’t have parchment, a light greasing of the pan will do, but parchment is truly your best friend here.
Step 2: Mix Dry Ingredients
In a medium-sized mixing bowl, whisk together your all-purpose flour, baking powder, salt, and sugar. Give it a good whisk to make sure everything is evenly distributed. You want those little pockets of leavening agent spread out so you get an even rise. The texture you’re aiming for is a light, fluffy blend.
Step 3: Mix Wet Ingredients
In a separate bowl or large measuring cup, pour in your milk and add your melted butter (make sure it’s not too hot, or it’ll scramble the egg if you use one!). Whisk it all together until it’s nicely combined. If you’re using an egg for richness, whisk it in here too. The goal is a smooth, liquid mixture.
Step 4: Combine
Now, pour the wet ingredients into the dry ingredients. Gently fold them together with a spatula or wooden spoon until *just* combined. It’s super important not to overmix here! A few lumps are perfectly fine – in fact, they’re a good sign! Overmixing develops the gluten too much, which can make your bundles tough instead of tender and fluffy. We want tender, so stop as soon as you don’t see big pockets of dry flour.
Step 5: Prepare Filling
In another bowl, combine your shredded cooked chicken, finely chopped onion or shallot (if using), garlic powder, paprika, salt, and pepper. Stir in your binder – usually a tablespoon or two of mayonnaise or plain Greek yogurt works wonders. Mix it all up until the chicken is nicely coated and the filling holds together when you squeeze it. Taste it and adjust seasonings as needed. This filling is so flavorful on its own!
Step 6: Layer & Swirl
Now for the fun part! Spoon about half of the batter onto your prepared baking sheet, spreading it out into a rough rectangle. Don’t worry about it being perfect! Then, spoon the chicken filling over the batter, spreading it as evenly as you can, leaving about a half-inch border around the edges. Finally, dollop the remaining batter over the filling. You can gently spread it a bit, but it’s okay if it doesn’t cover everything completely. I like to use a spatula or the back of a spoon to swirl the top batter down slightly into the filling to create those pretty little pockets.
Step 7: Bake
Pop the baking sheet into your preheated oven. Bake for about 20-25 minutes, or until the bundles are puffed up, golden brown around the edges, and cooked through. You can check for doneness by inserting a toothpick into the center; it should come out clean. The smell that fills your kitchen at this stage is just incredible!
Step 8: Cool & Glaze
Once they’re out of the oven, let the Chicken Bundles cool on the baking sheet for about 5-10 minutes. This is crucial for them to firm up a bit. While they’re cooling, melt a tablespoon or two of butter in a small saucepan and stir in a pinch of garlic powder or dried herbs. Brush this deliciousness over the warm bundles. If you used parchment, you can carefully lift them off the sheet and place them on a wire rack for glazing, or just glaze them right on the parchment-lined sheet.
Step 9: Slice & Serve
Once glazed and slightly cooled, you can cut them into squares or rectangles. They are best served warm, but honestly, they’re still pretty darn good at room temperature. This is the part where they disappear in minutes at my house!
What to Serve It With
These Chicken Bundles are surprisingly versatile and can be a star player in so many meal scenarios. For a delightfulBreakfast, I love serving them warm with a side of fresh fruit. A strong cup of coffee is the perfect companion, and they look so inviting on a breakfast plate. When it comes toBrunch, they really shine! You can make them a bit more elegant by arranging them on a tiered stand with a drizzle of honey or a dollop of Sour Cream. They pair beautifully with a mimosa or a sparkling cider. As aDessert? Hear me out! If you make the filling a bit sweeter, or use a sweet glaze, they can be a surprisingly satisfying sweet treat. Imagine them dusted with powdered sugar after dinner – a comforting end to a meal. And for thoseCozy Snacks, well, this is their happy place. They’re perfect for a movie night, a casual get-together with friends, or just an afternoon pick-me-up. Serve them with your favorite dipping sauce – ranch, a mild salsa, or even a sweet chili sauce. My family loves them with a simple side of ketchup, and they are gone in a flash!
Top Tips for Perfecting Your Chicken Bundles
I’ve been making these for years, and I’ve picked up a few tricks along the way that I think will help you achieve Bundles perfection. When it comes to theZucchini Prep, if you decide to add shredded zucchini to your filling (a favorite variation of mine!), make sure you squeeze out as much moisture as humanly possible. Trust me on this one; nobody wants a soggy bundle! Grating it on the large holes of a box grater is usually best. ForMixing Advice, remember what I said about not overmixing the batter. This is probably the most crucial step for tender bundles. Stir until you just see the dry flour disappear. A few streaks or small lumps are your friends! ForSwirl Customization, don’t be afraid to get creative. You can use a fork to gently swirl the top batter into the filling, creating beautiful patterns. You can also try adding a spoonful of pesto or a bit of mild cheese into the filling for extra flavor and visual appeal. When it comes toIngredient Swaps, the filling is your playground! Feel free to add finely chopped celery, carrots, or even a sprinkle of dried herbs like thyme or rosemary. If you don’t have chicken, finely chopped cooked turkey or even a mix of sautéed mushrooms and vegetables can work. ForBaking Tips, always keep an eye on your oven, as they can brown quickly. If they’re browning too fast on top, you can loosely tent them with foil for the last 5-10 minutes. Ensure your oven is properly preheated; a consistent temperature is key. ForGlaze Variations, if butter isn’t your thing, a simple mix of milk and a touch of honey can give a nice shine. You can also skip the glaze entirely and just dust them with a little Parmesan cheese or some fresh parsley after they come out of the oven. These little tweaks can really elevate your Chicken Bundles!
Storing and Reheating Tips
One of the best things about these Chicken Bundles is how well they store, making them fantastic for meal prep or enjoying leftovers. If you’re keeping them atRoom Temperature, they’re best enjoyed within 2-3 hours of baking. They tend to lose their ideal texture if left out for too long. ForRefrigerator Storage, this is where they really shine. Once they’ve cooled completely, store them in an airtight container. They’ll stay delicious for up to 3-4 days. I usually just pop them into a good old plastic container, but a glass dish with a tight-fitting lid works wonders too. ForFreezer Instructions, these bundles freeze beautifully, which is why I often make a double batch! Let them cool completely, then wrap them individually in plastic wrap, and then place them in a freezer-safe bag or container. They’ll keep well in the freezer for up to 2-3 months. To thaw, I usually transfer them to the refrigerator overnight. ForGlaze Timing Advice, it’s usually best to add the glaze *after* reheating if you’ve stored them. If you’re reheating from the fridge, a quick brush of glaze after they’re warm is perfect. If you’re reheating from frozen, let them thaw first, then glaze before or after reheating depending on your preference.
Frequently Asked Questions
Final Thoughts
There you have it – my absolute favorite Chicken Bundles recipe! It’s a dish that truly embodies the idea of simple comfort food that doesn’t skimp on flavor. The ease with which these come together, combined with the satisfying taste and texture, is why they’ve earned a permanent spot in my recipe rotation. They’re proof that you don’t need complicated techniques or exotic ingredients to create something truly special and delicious. Whether you’re looking for a quick weeknight dinner solution, an impressive appetizer, or just a comforting snack, these Chicken Bundles are a winner. If you love this recipe, you might also enjoy my Easy Cheesy Breadsticks or my Speedy Skillet Lasagna – they’re all about delicious, fuss-free cooking. I really hope you give these a try. I can’t wait to hear how yours turn out and what delicious variations you come up with! Happy baking, and more importantly, happy eating!
Chicken Bundles
Ingredients
Main Ingredients
- 250 g cream cheese softened
- 0.125 tsp pepper
- 60 ml unsalted butter melted, divided
- 3 boneless skinless chicken breasts cooked and cut into small cubes
- 0.25 tsp salt
- 4 green onions chopped
- 3 package refrigerated crescent roll dough 235g package
Instructions
Preparation Steps
- Preheat oven to 350°F (175°C).
- In a bowl, mix cream cheese with 2 tablespoons (30ml) of melted butter. Add chicken, salt, pepper, and green onions and mix well.
- Separate crescent roll dough into rectangles. Seal perforations. Spoon 1/4 cup (approx. 60g) of the chicken mixture into the center of each rectangle. Pull the 4 corners to the center and pinch to seal the edges. Brush the tops with the remaining melted butter. Place the bundles on an ungreased baking sheet.
- Bake for 19 minutes, or until golden brown. Serve warm or cold.
Notes
Featured Comments
“Yes! This is exactly the kind of recipe I need on busy nights. Simple, tasty, and saves me so much stress!”
“Impressed! Clear steps and restaurant-level results. Perfect for busy nights.”
“New favorite here — family favorite. crowd-pleaser was spot on.”
“Super easy and turned out amazing! My family asked for seconds. Saving this one.”
“This sweet treat was absolutely loved — the cozy really stands out. Thanks!”
“Made it tonight and wow — crowd-pleaser! Will definitely make Easy Chicken Bundles: A Simple Family Dinner again.”


Yes! This is exactly the kind of recipe I need on busy nights. Simple, tasty, and saves me so much stress!