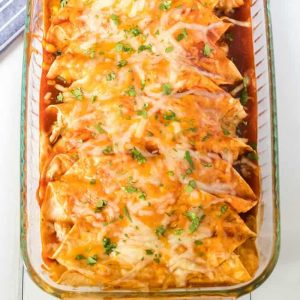
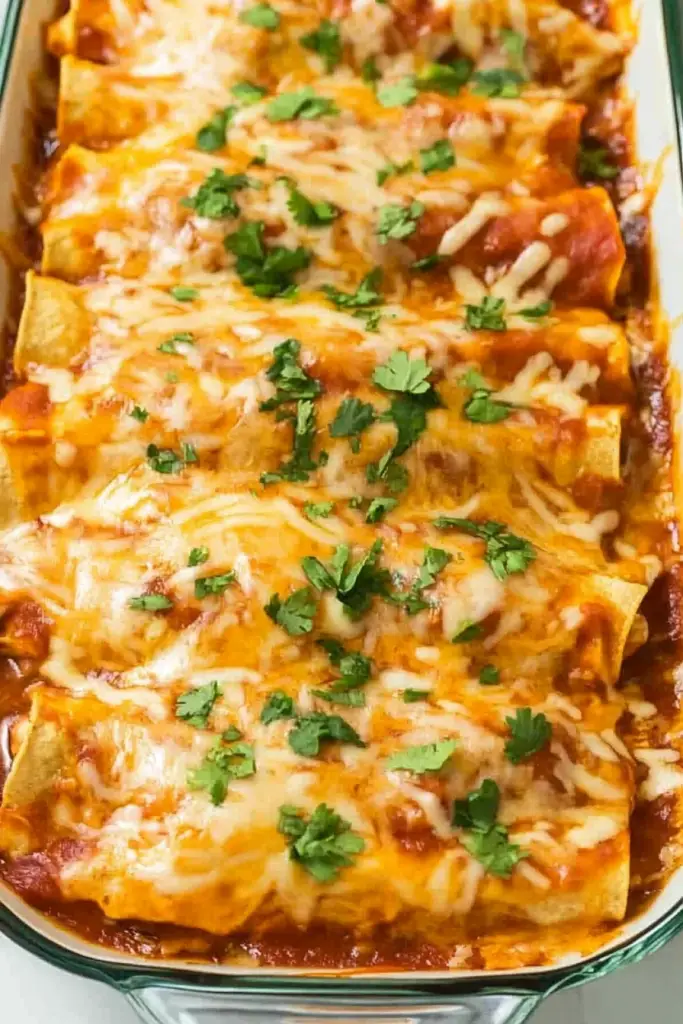
Oh, friends, if there’s one dish that instantly transports me back to my childhood kitchen, it’s a plate piled high with gooey, cheesy Chicken Enchiladas. It’s that perfect aroma that fills the house, a comforting blend of spices and melted cheese that just screams “home.” I’ve tried countless variations over the years, from super fancy restaurant-style to quick weeknight shortcuts, but this recipe, this one right here, is my absolute go-to. It strikes that perfect balance – incredibly flavorful, wonderfully cheesy, but surprisingly manageable to make, even on a crazy Tuesday. Honestly, it’s the kind of meal that makes even the pickiest eaters in my house lick their plates clean. Forget those bland, dry enchiladas you might have had elsewhere; these are tender, saucy, and packed with so much goodness. They’re like a warm hug in food form, and I just know you’re going to love them as much as we do. It’s a bit like my homemade lasagna, but with a completely different flavor profile – more south-of-the-border zing, you know?
What is chicken enchiladas?
So, what exactly are Chicken Enchiladas? At its heart, it’s a dish that celebrates comfort and flavor. Think of it as a Mexican-inspired casserole where tender pieces of chicken, often mixed with some savory goodness, are rolled up inside soft corn tortillas. These little tortilla packages are then nestled into a baking dish, generously smothered in a rich, vibrant enchilada sauce, and topped with a blanket of glorious, melty cheese. It’s then baked until everything is bubbly, gooey, and utterly irresistible. The name itself, “enchilada,” comes from the Spanish word “enchilar,” meaning “to add chili.” And that’s exactly what happens – chilies are key to that signature flavor. While there are tons of variations out there, from red enchilada sauce to green, and fillings ranging from cheese to beans to different meats, the essence remains the same: a deeply satisfying, layered dish that’s a true crowd-pleaser. It’s essentially a culinary hug, wrapped up in a tortilla!
Why you’ll love this recipe?
There are so many reasons why I keep coming back to this chicken enchilada recipe, and I’m so excited to share them with you! First and foremost, the flavor. Oh my goodness, the flavor! The chicken is incredibly tender, infused with a subtle blend of spices that complements the rich, slightly smoky enchilada sauce. And that cheese? It’s the perfect gooey, stretchy blanket that ties everything together. But it’s not just about taste; this recipe is genuinely easy to pull off. I know “easy” can sometimes mean sacrificing flavor, but that’s not the case here. I’ve streamlined the process over the years so that even on a busy weeknight, I can whip up a batch without feeling overwhelmed. It’s a lifesaver, honestly! And let’s talk about cost-efficiency. The ingredients are all pretty standard pantry staples or readily available at any grocery store, making it a budget-friendly option for feeding a hungry family. What I love most, though, is its versatility. While this recipe is for Chicken Enchiladas, you can totally adapt it. If you have leftover roasted chicken from Sunday dinner, this is the perfect way to repurpose it. Or, if you’re feeling adventurous, a quick shredded beef or even a vegetarian bean filling works wonderfully. It’s that kind of forgiving, adaptable recipe that always delivers. It’s also perfect when you’re craving something hearty and satisfying but don’t want to spend hours in the kitchen. It’s a definite upgrade from my simple quesadilla recipe for those times when you need something a little more special!
How do I make my famous chicken enchiladas?
Quick Overview
Making these chicken enchiladas is simpler than you might think! We’ll start by prepping our chicken and sauce, then soften the tortillas just a bit before filling and rolling them. A generous pour of sauce and a mountain of cheese go on top before a short bake to melt everything together into cheesy perfection. The key is not to overcomplicate it; focus on good ingredients and letting the oven do its magic. It’s a straightforward process that results in something truly spectacular.
Ingredients
What is the recipe for chicken filling?
2 cups cooked shredded chicken (rotisserie chicken is a lifesaver here, or you can boil and shred a couple of Chicken Breasts yourself)
1/2 cup sour cream (full-fat makes it extra creamy!)
1/4 cup finely chopped cilantro (freshness is key!)
1 teaspoon cumin
1/2 teaspoon garlic powder
Salt and freshly ground black pepper to taste
For the Sauce:
2 tablespoons olive oil
1 medium onion, finely chopped
2 cloves garlic, minced
1 teaspoon chili powder (adjust to your heat preference)
1/2 teaspoon smoked paprika
1/4 teaspoon dried oregano
1 (15-ounce) can tomato sauce
1 cup chicken broth (low-sodium is good so you can control the salt)
Salt and freshly ground Black Pepper to taste
For Assembling:
8-10 corn tortillas (use good quality ones; they make a difference!)
2 cups shredded Monterey Jack cheese (or a Mexican blend for extra flavor!)
Optional toppings: sliced avocado, extra cilantro, a dollop of sour cream, salsa
Step-by-Step Instructions
Step 1: Preheat & Prep Pan
First things first, get your oven preheating to 375 degrees Fahrenheit (190 degrees Celsius). While the oven is warming up, grab a 9×13 inch baking dish. You don’t need to grease it heavily, just a light spritz or a thin wipe of oil will do. This helps prevent any sticking and ensures those beautiful enchiladas slide out easily after baking.
Step 2: Mix Dry Ingredients
In a medium bowl, combine the shredded cooked chicken, sour cream, chopped cilantro, cumin, and garlic powder. Give it a good mix until everything is well incorporated and the chicken is nicely coated. Season generously with salt and freshly ground black pepper. I always taste a little bit of the filling at this stage to make sure the seasoning is just right – it’s my secret for perfectly flavored enchiladas every time!
Step 3: Mix Wet Ingredients (for the Sauce)**
Okay, now let’s get that delicious sauce going. Heat the olive oil in a medium saucepan over medium heat. Add the finely chopped onion and sauté until it’s softened and translucent, about 5-7 minutes. Add the minced garlic and cook for another minute until fragrant, being careful not to burn it. Stir in the chili powder, smoked paprika, and oregano, and let them toast for about 30 seconds to release their wonderful aromas. Pour in the tomato sauce and chicken broth, stirring everything together. Bring the sauce to a simmer, then reduce the heat to low, cover, and let it gently bubble away for about 10-15 minutes. This allows the flavors to meld beautifully. Season with salt and pepper to taste. I like my sauce to be flavorful but not overly spicy, so I usually keep the chili powder moderate, but feel free to amp it up if you like it hot!
Step 4: Prepare Tortillas
This step is crucial for preventing your tortillas from cracking when you roll them. You have a couple of options here. You can lightly fry them in a little oil for about 15-20 seconds per side until they’re just softened and pliable. Or, for a healthier option, you can warm them up briefly in a dry skillet over medium heat until they’re soft and flexible. Some people even microwave them wrapped in a damp paper towel for about 30 seconds. Whichever method you choose, the goal is to make them bendy, not crispy or tough.
Step 5: Assemble the Enchiladas
Now for the fun part! Lay a softened tortilla flat. Spoon about 2-3 tablespoons of the chicken filling onto the center of the tortilla. Roll it up snugly and place it seam-side down in your prepared baking dish. Repeat with the remaining tortillas and filling, arranging them in a single layer in the dish. Don’t worry if they’re a little snug; that helps them hold their shape.
Step 6: Sauce and Cheese Time
Pour the prepared enchilada sauce evenly over the rolled tortillas, making sure to cover them completely. Then, generously sprinkle the shredded Monterey Jack cheese (or your favorite blend) all over the top. You want a good, thick layer of cheese – it’s the crowning glory of these enchiladas!
Step 7: Bake
Pop the baking dish into your preheated oven. Bake for 20-25 minutes, or until the sauce is bubbling around the edges and the cheese is melted and golden brown. Keep an eye on it towards the end; you want that beautiful bubbly, melty goodness without it burning.
Step 8: Cool and Serve
Once they’re out of the oven, let the enchiladas rest for about 5-10 minutes before serving. This allows the cheese to set up a bit and makes them easier to serve. Garnish with your favorite toppings like fresh avocado slices, a sprinkle of extra cilantro, or a dollop of cool sour cream. Serve immediately and prepare for the compliments!
What to Serve It With
These chicken enchiladas are so versatile, they’re fantastic with a variety of sides, depending on the meal you’re aiming for. For a classic, hearty dinner, I love serving them with some simple Mexican rice (the kind cooked with tomato sauce!) and a side of refried beans. A crisp green salad with a lime vinaigrette also adds a lovely freshness that cuts through the richness. If I’m feeling a bit fancy, I’ll whip up some creamy cilantro-lime slaw – it’s a game-changer! For a lighter option, a simple corn salsa with black beans is always a winner. And, of course, no enchilada meal is complete without some extra salsa and maybe a scoop of guacamole on the side. My family also loves them with just a side of tortilla chips for scooping up any extra sauce and cheese. It’s honestly a meal that stands well on its own, but these accompaniments truly elevate the entire dining experience.
Top Tips for Perfecting Your Chicken Enchiladas
Over the years, I’ve picked up a few tricks that I think make all the difference in getting these chicken enchiladas just right. First, when it comes to the chicken, don’t be afraid to season it well before shredding. If you’re boiling chicken breasts, add salt, pepper, and maybe a bay leaf to the water. For the sauce, toasting your spices (chili powder, cumin, oregano) for just 30 seconds before adding the liquids really awakens their flavor. It’s a small step, but it makes a huge impact! Another crucial tip is how you prepare your tortillas. If they’re dry and stiff, they *will* crack when you roll them, and nobody wants that! Lightly frying them in a shallow pool of oil for just a few seconds per side, or even just warming them thoroughly in a dry pan until pliable, makes them wonderfully flexible. Trust me on this one; it’s a game-changer. For the cheese, I always opt for Monterey Jack or a Mexican blend because it melts so beautifully and has that perfect gooey pull. Don’t skimp on the cheese! When assembling, ensure your filling isn’t too wet. If your shredded chicken is a bit dry, the sour cream will help bind it nicely without making it watery. If you accidentally make too much sauce, you can always save some for dipping or for another batch later. And a little trick I learned after many tries: if you find your enchiladas aren’t as colorful as you’d like, a tiny bit of tomato paste added to the sauce can deepen the red hue beautifully. Finally, don’t overbake! You want that cheese bubbly and golden, but not burnt. A good 20-25 minutes at 375°F is usually perfect.
Storing and Reheating Tips
These chicken enchiladas are fantastic for making ahead, which is why they’re such a weeknight hero! If you have leftovers, or if you want to prep them a day in advance, here’s how I usually do it. Store any leftovers in an airtight container in the refrigerator for up to 3-4 days. The flavors actually tend to meld even more overnight, making them even tastier the next day. When you’re ready to reheat, you have a few options. For individual servings, I often pop a portion in the microwave, covered with a damp paper towel, for about 1-2 minutes, or until heated through. If I’m reheating a larger portion, I’ll transfer them back into a baking dish, cover it loosely with foil, and reheat in a preheated oven at 350°F (175°C) for about 15-20 minutes, or until nice and hot. Sometimes I’ll even remove the foil for the last 5 minutes to crisp up the cheese a little. If you’re assembling them for later baking (say, the next day), you can assemble them completely, cover the baking dish tightly with plastic wrap, and then foil, and refrigerate. Just add a few extra minutes to the baking time when you’re ready to cook them. I don’t recommend freezing them once baked, as the tortillas can get a bit mushy upon thawing. However, you *can* freeze unbaked enchiladas. Just assemble them in a freezer-safe baking dish, wrap them very tightly in plastic wrap and then foil, and freeze for up to 1-2 months. Thaw them overnight in the refrigerator before baking as directed, adding about 5-10 minutes to the baking time.
Frequently Asked Questions
Final Thoughts
There you have it, my friends! My absolute favorite chicken enchiladas recipe. I truly hope you give this a try, because it’s more than just a meal; it’s a little bit of happiness on a plate. It’s that perfect combination of comforting flavors and satisfying textures that just makes everyone in my family smile. It’s the kind of dish that brings people to the table, sparks conversation, and creates those lovely food memories we all cherish. Whether you’re serving it up for a casual weeknight dinner, a family gathering, or even a potluck, I promise it’s a recipe that will be requested again and again. If you loved this, you might also enjoy my slow cooker carnitas or my simple chicken tortilla soup for more Tex-Mex inspired deliciousness. Can’t wait to hear how yours turns out! Please feel free to leave a comment below and share your own enchilada adventures, or let me know if you tried any fun variations. Happy cooking!

The BEST Chicken Enchilada Recipe
Ingredients
Main Ingredients
- 8 flour tortillas soft shell size
- 2.5 cups shredded chicken I love to buy a rotisserie chicken and shred that up!
- 0.5 cup black beans
- 0.5 cup corn
- 1 10 oz can diced tomatoes with green chiles
- 1 tsp cumin
- 0.5 tsp garlic powder
- 0.5 tsp onion powder
- 2 small cans red enchilada sauce
- 4 oz cheddar cheese shredded, divided
- 4 oz Monterey Jack cheese shredded, divided
- Cilantro for garnish
Instructions
Preparation Steps
- Preheat the oven to 350 degrees.
- In a large bowl mix together chicken, beans, corn, tomatoes, and spices.
- Divide cheese evenly into 2 separate bowls. Set one bowl of cheese to the side, you will use it for topping once all the enchiladas are assembled.
- Pour 0.5 cup enchilada sauce into the bottom of a 9x13 pan and spread evenly.
- Pour 1 can of enchilada sauce into a shallow bowl. Dip a tortilla in the enchilada sauce, covering both sides with sauce. Let the excess drip off. Place about 1/3 cup chicken mixture in the middle of the tortilla and top with cheese. Roll tortilla around the chicken mixture and place seam side up in the baking dish.
- Assemble remaining enchiladas and place them all in the 9x13 pan. Top enchiladas with remaining enchilada sauce and sprinkle on the remaining cheese.
- Bake for 20 minutes. Remove from the oven and top with chopped cilantro.
- Serve warm! Enjoy with more cilantro, sour cream, salsa, tomato and avocado.
Notes
Featured Comments
“Impressed! Clear steps and turned out amazing results. Perfect for busy nights.”
“New favorite here — comforting. crowd-pleaser was spot on.”
“Super easy and turned out amazing! My family asked for seconds. Saving this one.”
“This sweet treat was absolutely loved — the light really stands out. Thanks!”
“Made it tonight and wow — creamy! Will definitely make Easy Chicken Enchilada Recipe again.”
“Packed with flavor and so simple. Exactly what I wanted from Easy Chicken Enchilada Recipe.”


