

Oh, where do I even begin with this one? It’s one of those recipes that has saved me more times than I can count, especially during those frantic weeknights when everyone suddenly declares they *need* cookies. You know the feeling, right? The craving hits, and the thought of starting from scratch with measuring flour, creaming butter, and all the rest just feels… overwhelming. That’s where this magical Chocolate Chip Cookie mix comes in. It’s not *exactly* a shortcut in the sense of using a store-bought mix (though those have their place!), but it’s more like a super-smart, time-saving prep-ahead situation that results in cookies so good, no one will ever guess you didn’t spend hours making them. Honestly, it’s my secret weapon. It’s like having a little piece of cookie heaven ready to go whenever inspiration (or desperation!) strikes. Compared to my grandma’s from-scratch chocolate chip cookies, which are divine but require undivided attention, this method is a lifesaver when time is tight, yet the flavor and texture are still absolutely top-notch. My kids ask for these all the time, and the best part? I can whip them up with minimal fuss.
What is Chocolate Chip Cookie Mix Magic?
So, what exactly *is* this “Chocolate Chip Cookie mix hack” I’m raving about? Think of it as a pre-portioned, perfectly balanced dry ingredient base for your favorite chocolate chip cookies, all bundled up and ready to go. Instead of pulling out all the individual bags and boxes every single time you want cookies, you create a large batch of this dry mix beforehand and store it in your pantry. When that cookie craving hits, you simply grab your pre-made mix, add the wet ingredients (which are usually just a few staple items like eggs, butter, and vanilla), and bake. It’s essentially the dry foundation of your favorite chocolate chip cookie recipe, mixed together and waiting for its moment to shine. It’s like having a cheat code for deliciousness! It takes all the measuring and combining of dry stuff out of the equation when you’re in a pinch, making the whole baking process feel so much more manageable. It’s the closest thing to a true store-bought cookie mix, but with the unbeatable advantage of controlling exactly what goes into it and ensuring homemade taste.
How do you make chocolate chip cookie mix?
This whole process is designed to be as straightforward as possible, giving you that homemade cookie goodness without the fuss. It’s all about doing a bit of upfront work that pays off in spades down the line.
Quick Overview
The magic happens in two main phases: first, you’ll mix all the dry ingredients for your Chocolate Chip Cookie mix in one big batch and store it. Then, whenever you need cookies, you’ll just grab a portion of that mix, add your wet ingredients, and bake. It’s a simple concept that streamlines the entire baking process, turning a potential hour-long endeavor into a quick, enjoyable 20-minute bake. This method ensures you always have the foundation for perfect chocolate chip cookies at your fingertips.
Ingredients
For the Dry Chocolate Chip Cookie Mix Base: For the Dry Chocolate Chip Cookie Mix Base: For the Dry Chocolate Chip Cookie Mix Base: For the Dry Chocolate
You’ll need all-purpose flour, granulated sugar, brown sugar (packed!), baking soda, and salt. Make sure your flour is fresh; stale flour can really impact the texture. For the sugars, using a mix of granulated and packed brown sugar is key for that classic chewy texture and caramel notes. And don’t skimp on the salt – it balances the sweetness beautifully. I usually make a big batch of this dry mix, enough for about 4-6 batches of cookies, depending on my recipe size. Store it in an airtight container in a cool, dry place.
For the Wet Ingredients (when ready to bake):
This is where your recipe choice comes in! Typically, you’ll need softened butter (unsalted is best so you can control the salt), eggs (room temperature eggs incorporate better), and vanilla extract. I sometimes add a little milk or cream if I want an extra tender cookie, but it’s not always necessary. Make sure your butter is truly softened, not melted. It makes a world of difference!
For the Mix-Ins (when ready to bake):
The stars of the show: chocolate chips! I love using a mix of semi-sweet and milk chocolate chips for a depth of flavor, but use whatever you prefer. Chunks are great too! You can also add nuts like walnuts or pecans, or even a sprinkle of toffee bits.
Step-by-Step Instructions
Step 1: Prepare Your Storage Container
Get a large, clean, airtight container ready. This is where your magic mix will live. Make sure it’s big enough for all the dry ingredients you plan to mix. I like to use a big glass jar or a sturdy plastic container. Labeling it with the contents and the date is always a good idea!
Step 2: Measure and Combine Dry Ingredients
In a large bowl, measure out your all-purpose flour, granulated sugar, packed brown sugar, baking soda, and salt. Use a whisk to thoroughly combine everything. This step is crucial for even distribution of leavening agents and salt, ensuring consistent results in every cookie.
Step 3: Transfer to Storage Container
Carefully pour the whisked dry ingredients into your prepared airtight container. Gently shake or tap the container to settle the ingredients. Seal it tightly.
Step 4: When Cookie Craving Strikes – Measure Your Mix
Pull out your pre-made dry mix. For a standard batch of cookies (about 2 dozen), you’ll typically need about 2 to 2.5 cups of the dry mix. Consult your favorite chocolate chip cookie recipe for the exact amount of dry ingredients needed and measure that amount from your stored mix. Place the measured mix into a new, clean bowl.
Step 5: Add Wet Ingredients
To the bowl with your measured dry mix, add your softened butter, eggs, and vanilla extract. If your recipe calls for milk or cream, add that too. It’s important that your eggs and butter are at room temperature for the best emulsification.
Step 6: Combine Wet and Dry
Mix everything together using a stand mixer with a paddle attachment or by hand with a sturdy spoon or spatula. Start on low speed and gradually increase to medium. Mix just until the ingredients are combined and no dry streaks of flour remain. Be careful not to overmix, as this can lead to tough cookies!
Step 7: Stir in Chocolate Chips (and other Mix-Ins!)
Gently fold in your chocolate chips, nuts, or any other desired mix-ins. Again, mix just until they are evenly distributed throughout the dough. Overmixing at this stage can also affect the cookie’s texture.
Step 8: Scoop and Bake
Scoop rounded tablespoons of dough onto parchment-lined baking sheets, leaving about 2 inches between cookies. Bake in a preheated oven according to your recipe’s instructions, usually around 350°F (175°C) for 8-12 minutes, or until the edges are golden brown and the centers are still slightly soft. They’ll continue to cook a bit on the hot baking sheet.
Step 9: Cool and Enjoy!
Let the cookies cool on the baking sheets for a few minutes before transferring them to a wire rack to cool completely. This is the hardest part, I know! Enjoy those warm, gooey cookies with a glass of milk.
What to Serve It With
These chocolate chip cookies are so versatile, they’re welcome at almost any occasion! The beauty of having the chocolate chip cookie mix ready to go means you can whip up a batch for any spontaneous gathering or personal craving.
For Breakfast: Honestly, who says cookies are just for dessert? I love having a warm chocolate chip cookie with my morning coffee on a weekend. It feels like such a treat. You can also crumble one up and sprinkle it over yogurt for a little texture and sweetness.
For Brunch: Elevate your brunch spread by arranging these on a beautiful platter. They pair wonderfully with fresh fruit, like strawberries or raspberries. A mimosa or a fancy latte would be the perfect beverage companion to these cookies.
As Dessert: This is the classic! Serve them warm with a scoop of vanilla bean ice cream for an instant lava cake situation. They’re also great as part of a dessert board with other cookies, brownies, and some chocolate sauce for dipping.
For Cozy Snacks: This is my go-to. After the kids are in bed, or during a movie night, a warm cookie (or two!) with a tall glass of cold milk is pure comfort. They’re perfect for those moments when you just need a little something sweet to brighten your day. My family has a tradition of always having a batch ready for the first day of summer vacation, and these cookies are always the star!
Top Tips for Perfecting Your Chocolate Chip Cookie Mix
Over the years, I’ve learned a few tricks that really help elevate these cookies from good to absolutely unforgettable, especially when using a pre-made mix. These little nuggets of wisdom have come from plenty of baking experiments (and a few happy accidents!).
Dry Mix Storage: Always use an airtight container. Moisture is the enemy of your dry mix, leading to clumping and potential staleness. I’ve found that storing it in a cool, dark cupboard, away from heat sources like the oven or dishwasher, keeps it fresh for months. If you live in a very humid climate, consider adding a food-grade desiccant packet, but make sure it’s sealed away from direct contact with the mix.
Measuring the Mix: When you’re ready to bake, measure your dry mix accurately. Spoon the mix into your measuring cup and level it off with a straight edge (like the back of a knife). Don’t scoop directly from the container with your measuring cup, as this can pack the flour too much, leading to a denser cookie.
Butter Temperature is Key: Softened butter is crucial. It should be pliable enough that you can press your finger into it and leave an indent, but not so soft that it’s greasy or melted. This allows the butter to properly cream with the sugar, creating air pockets that contribute to the cookie’s lift and tender texture.
Don’t Overmix the Dough: This is probably the most common mistake. Once you add the wet ingredients to the dry mix, mix *just* until combined. Overmixing develops the gluten in the flour too much, resulting in tough, dense cookies instead of soft, chewy ones. You’ll see a few small streaks of flour still – that’s fine! The chocolate chips will help disperse those.
Chill the Dough (Optional but Recommended): While this method is designed for speed, chilling the dough for at least 30 minutes (or even overnight) can make a world of difference in texture and flavor. It allows the flour to hydrate fully and the fats to firm up, leading to a chewier cookie with less spread. I’ve tested this with chilled dough and un-chilled, and the chilled version is always superior in terms of chewiness and richness.
Baking Time and Temperature: Ovens can be finicky! My oven runs a little hot, so I often set mine about 10-15 degrees Fahrenheit lower than the recipe calls for, or bake for a minute or two less. Keep an eye on your cookies. They’re done when the edges are golden brown and the centers still look slightly underbaked. They will continue to set up as they cool on the baking sheet. This is a universal rule for perfect chocolate chip cookies!
Sea Salt Finish: A sprinkle of flaky sea salt on top of the cookies *before* they go into the oven is a game-changer. It enhances the chocolate flavor and provides a lovely sweet-and-salty contrast. Trust me on this one!
Storing and Reheating Tips
Storing these delightful chocolate chip cookies properly is key to enjoying them at their best, whether they’re a day old or a week old. Since these are made from scratch (even with the mix shortcut!), they have a wonderful homemade quality that we want to preserve.
Room Temperature Storage: For cookies that are still slightly warm or that you plan to eat within a couple of days, storing them in an airtight container at room temperature is ideal. Avoid stacking too many layers directly on top of each other, as this can cause them to stick together. If you find they are getting too soft, you can place a small piece of wax paper between layers. They’ll stay wonderfully chewy and delicious for up to 3-4 days this way.
Refrigerator Storage: If you live in a particularly warm climate, or if you want to extend their shelf life a bit longer, you can store the cookies in the refrigerator. Place them in an airtight container, ensuring they are completely cooled first. Refrigeration can sometimes make cookies a bit firmer, but they should still be quite tasty for up to a week. You might want to gently reheat them for a few seconds in the microwave to bring back some of that fresh-baked softness.
Freezer Instructions: This is where the real magic of the chocolate chip cookie mix shines! You can freeze baked cookies for up to 2-3 months. Make sure they are completely cool before wrapping them. Wrap individual cookies or small batches tightly in plastic wrap, then place them in a freezer-safe bag or container. To thaw, you can leave them at room temperature for a few hours or gently warm them in the oven or microwave. You can also freeze the unbaked cookie dough balls! Place them on a parchment-lined baking sheet and freeze until solid, then transfer to a freezer bag. You can bake them directly from frozen, just adding a few extra minutes to the baking time. This is my absolute favorite way to have cookie dough on hand!
Glaze Timing Advice: Since this recipe doesn’t typically involve a glaze, this advice is more general. However, if you ever do decide to add a simple glaze (like a powdered sugar and milk mix), always apply it to completely cooled cookies, whether they are destined for room temperature, fridge, or freezer storage. Applying glaze to warm cookies will cause it to melt and slide off.
Frequently Asked Questions
Final Thoughts
So there you have it – my favorite way to have delicious, homemade chocolate chip cookies at the ready, all thanks to a simple chocolate chip cookie mix prep. It’s the perfect blend of convenience and classic comfort, allowing you to bypass the measuring when time is short but never sacrificing that incredible homemade taste and texture. It’s a recipe that truly brings joy, whether you’re baking for a crowd, your family, or just yourself. I really hope this method becomes a staple in your kitchen too! If you love this cookie hack, you might also enjoy my recipe for [Link to another related recipe, e.g., “Perfectly Chewy Oatmeal Raisin Cookies”] or my tips for [Link to another related recipe, e.g., “Making the Ultimate Brownies”]. I can’t wait to hear how your cookies turn out, so please leave a comment below and tell me what you think! And if you have any of your own amazing variations or tips, I’d love to hear them!
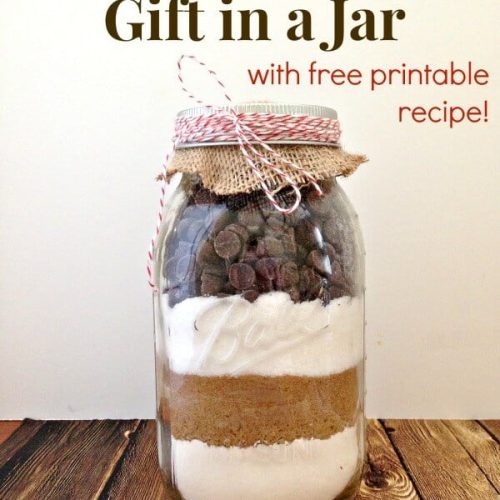
Chocolate Chip Cookie Mix in a Jar
Ingredients
Dry Ingredients
- 1.75 cup all-purpose flour
- 0.75 teaspoon baking soda
- 0.75 teaspoon salt
- 0.5 cup granulated sugar
- 0.75 cup packed brown sugar
- 1.5 cup semi-sweet chocolate chips (9 ounces)
Instructions
Preparation Steps
- Preheat oven to 375 degrees F.
- In a large bowl, beat together 3/4 cup softened butter, 1 large egg, and 3/4 teaspoon vanilla extract until blended.
- In a separate bowl, whisk together the dry ingredients: 1 3/4 cups all-purpose flour, 3/4 teaspoon baking soda, 3/4 teaspoon salt, 1/2 cup granulated sugar, and 3/4 cup packed brown sugar.
- Gradually add the dry mixture to the wet ingredients and mix until well combined.
- Stir in 1 1/2 cups (9 ounces) of semi-sweet chocolate chips.
- Drop rounded tablespoons of dough onto an ungreased baking sheet.
- Bake for 9-11 minutes, or until golden brown.
- Let the cookies cool on the baking sheets for 2 minutes before transferring them to a wire rack to cool completely.
Notes
Featured Comments
“I love this mix—it’s such a thoughtful and practical gift! Makes holidays so much easier.”
“Impressed! Clear steps and quick weeknight win results. Perfect for busy nights.”
“New favorite here — family favorite. crowd-pleaser was spot on.”
“Super easy and turned out amazing! My family asked for seconds. Saving this one.”
“This sweet treat was absolutely loved — the balanced really stands out. Thanks!”
“Made it tonight and wow — absolutely loved! Will definitely make Easy Cookie Mix Homemade Gift again.”


I love this mix—it’s such a thoughtful and practical gift! Makes holidays so much easier.