

If you’re anything like me, the moment you hear “flourless,” your mind jumps straight to cookie recipes or decadent desserts. But what if I told you that flourless can also mean a hearty, crusty bread that’s perfect for breakfast, lunch, or even a cozy dinner? This recipe is one I’ve been messing around with for years—sort of my “secret weapon” on busy mornings when I craving something warm and satisfying but don’t want to fuss over traditional yeasted breads. The smell alone when it’s baking? Oh boy. It’s like a warm hug in the kitchen. Trust me when I say that once you try this flourless bread, it’ll become a staple you turn to over and over. And no, it’s not complicated—just simple ingredients and a little patience. Plus, it’s naturally gluten-free, which makes it almost perfect for sharing with friends who avoid wheat. Ready to bake up a storm? Let’s do this!
What is flourless bread?
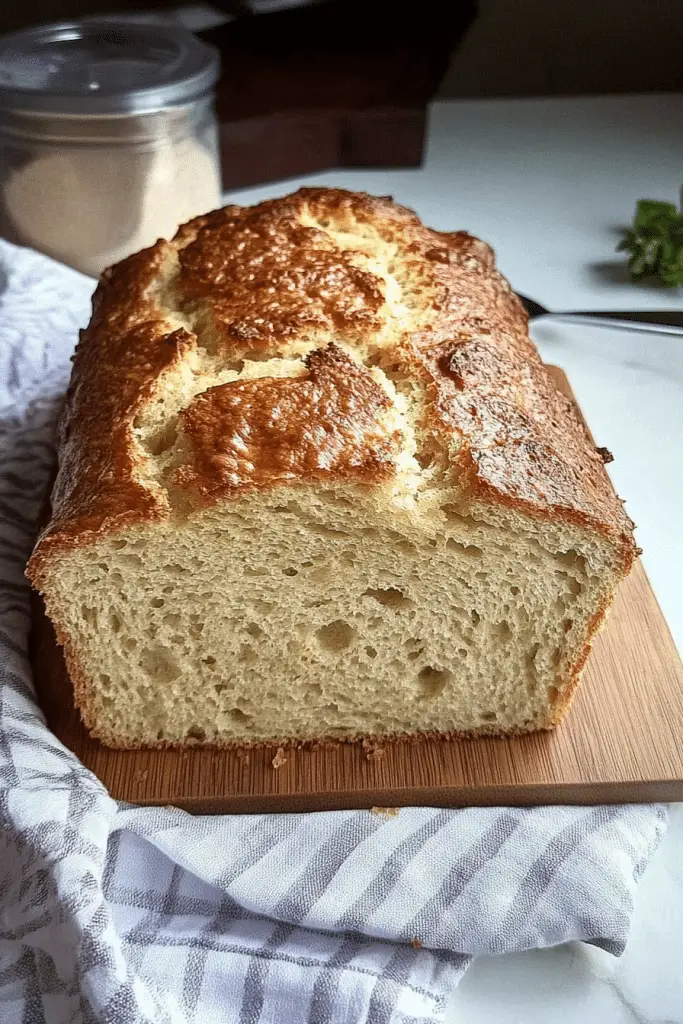
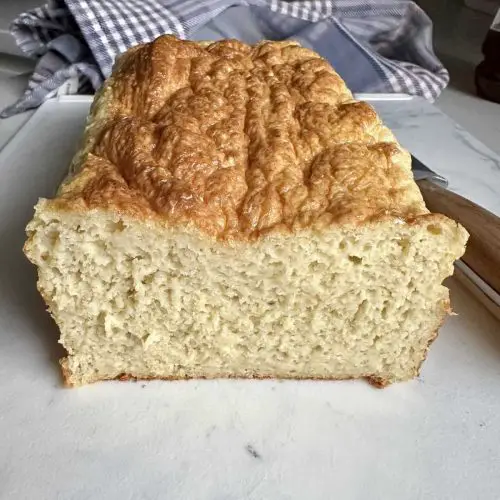
Think of flourless bread as a completely different beast from your typical loaf. It’s essentially a bread made without traditional wheat flour, relying instead on ingredients like eggs, nuts, seeds, or even chickpeas to give it structure. The name is a bit of a misnomer sometimes—because it’s not bread in the classic yeast-risen sense, but more of a dense, rich, and crusty creation that’s perfect for slicing and spreading or toasting. The idea behind it is to create something that’s satisfying and bread-like, but without the gluten. It’s been gaining popularity among those on gluten-free diets, but honestly, I think it appeals to anyone who loves a good, hearty bread that’s a little different. Think of the texture as a cross between a brioche and a scone, but still somehow familiar. It’s a savory, satisfying bread with a little nutty flavor, and once you get the hang of it, you’ll see how versatile it really is.
How do you make flourless bread?
Quick Overview
This flourless bread is one of those recipes where you whisk everything together quickly, pour it into a loaf pan, and bake until it’s golden and crusty. The magic lies in the eggs—think of them as the “glue” that holds everything together—plus the nuts or seeds for flavor and texture. The batter is thick but stirrable, and it requires no kneading or proving. It’s perfect when you’re craving bread without crowding your kitchen or waiting hours for dough to rise. I always do this when I have friends popping over or when I just want a comforting slice to toast with a pat of butter. And if you want to get fancy, you can mix in some herbs or cheese for extra layers of flavor. Basically, this is one of those “set it and forget it” recipes that’s guaranteed to impress.
Ingredients
For the Main Batter:
- 4 large eggs — fresh and at room temperature for better rising
- 1 cup finely chopped nuts (like almonds, walnuts, or pecans) — roasted if you want richer flavor
- ½ teaspoon baking powder — to help it rise just slightly
- ¼ teaspoon salt — enhances overall flavor
- 2 tablespoons honey or maple syrup — optional, for a touch of sweetness
- ¼ cup olive oil or melted butter — adds richness
For the Filling (Optional):
- Cheese, herbs, or sautéed veggies — chopped and ready to mix in or swirl
For the Glaze (Optional):
- Extra egg wash or honey — for a shiny crust
Step-by-Step Instructions
Step 1: Preheat & Prep Pan
Set your oven to 375°F (190°C). Grease a standard loaf pan with butter or line it with parchment paper. I like using parchment because clean-up is a breeze, and the bread comes out smoothly. This step is key to getting that nice crust and ensuring the bread doesn’t stick.
Step 2: Mix Dry Ingredients
In a small bowl, whisk together the chopped nuts, baking powder, and salt. Doing this first ensures even distribution, especially the baking powder, which helps with that little lift. I always do this before adding the wet ingredients—it makes everything easier.
Step 3: Mix Wet Ingredients
In a larger bowl, whisk the eggs until frothy. Add the honey, oil (or melted butter), and any herbs or flavorings you like. Whisking well gives your batter a light, airy texture—think of it as the foundation for a good loaf. If you’re adding cheese or herbs, fold them in now.
Step 4: Combine
Stir the dry mixture into the wet, just until combined. The batter will be thick, almost like a sturdy muffin batter. Be careful not to overmix—overmixing can make the bread dense rather than fluffy.
Step 5: Prepare Filling
If you’re adding a swirl of cheese, herbs, or sautéed veggies, gently fold them into the batter now, or pour half into the loaf pan, add your fillings, and top with the rest. This creates a visual surprise and boosts flavor.
Step 6: Layer & Swirl
Pour the batter into your prepared pan. If you want a pretty swirl pattern, dollop some filling and use a skewer or toothpick to create swirls. Trust me, it looks artistic—and tastes amazing.
Step 7: Bake
Bake for about 40–45 minutes. Look for a golden crust and a toothpick inserted into the center coming out clean. Ovens can vary, so start checking at the 40-minute mark. Keep the lid off for that crispy top.
Step 8: Cool & Glaze
Let it cool in the pan for 10 minutes, then transfer to a wire rack. I like glazing it while it’s still warm—brush with honey or an egg wash for that beautiful shine. The smell, by the way? Heaven. Everyone in my house always gathers around the kitchen at this point.
Step 9: Slice & Serve
Once fully cooled, slice with a serrated knife. The texture is firmer than traditional bread, so take your time. Serve slices warm with butter, jam, or just on their own. I especially love to toast a slice for breakfast—crusty on the outside, tender inside.
What to Serve It With
This flourless bread is really a chameleon—perfect for any occasion. For breakfast, toast it with a generous pat of butter and a drizzle of honey or jam. It’s also fantastic with smoked salmon, cream cheese, and capers—perfect for brunch or a light lunch. I love serving it alongside hearty soups like tomato or minestrone because the dense texture holds up well and adds a satisfying chew. For a cozy dinner, slice it thick and top with sautéed mushrooms and melted cheese—think gourmet crouton! And if you’re craving something sweet, just spreading almond butter and sliced bananas on a warm slice works like a charm. Honestly, my family asks for this all the time—they say it’s better than store-bought gluten-free bread, and I totally agree. It’s a recipe that makes your kitchen smell like a bakery, and it just feels good knowing you whipped it up from scratch.
Top Tips for Perfecting Your Flourless Bread
After making this a dozen times, I’ve learned a few tricks I’d love to share. Firstly, don’t skimp on the eggs—they’re the backbone of this bread. If your batter seems too thick or dry, add a splash of milk (even almond milk works well) to loosen it up. When chopping nuts, I prefer finely chopping rather than leaving big chunks—it creates a more uniform texture. Trust me on the swirl technique: use a skewer or butter knife to make broad, gentle circles—this creates those beautiful marbled patterns. If you want a more savory loaf, swap out honey for a pinch of garlic powder or dried herbs. Baked it too long? The crust can get tough, so start checking around the 40-minute mark, especially if your oven runs hot. Also, I’ve tested brushing the top with an egg wash before baking to give it a glossy, bakery-style shine—that’s a winner in my book. When it comes to fillings, I recommend gently folding in cheese and herbs—too much can sink and weigh it down. For storage, I usually wrap leftovers tightly in foil and store them in the fridge for up to 3 days—warm slices in the toaster to bring back the crunch. Freezing is a game-changer if you want to make this ahead of time: double-wrap in plastic wrap, then with foil, and it will stay good for up to a month. Just thaw in the fridge overnight and reheat. One tip I swear by is to cook it on the middle rack and avoid opening the oven door during baking—patience pays off for that perfect crust!
Storing and Reheating Tips
This bread stays pretty good for a few days, but honestly, it’s usually gone faster than I expect. For short-term storage, wrap slices in plastic wrap or foil and keep them at room temperature. It’s best to consume within 2–3 days, as it can get a little dry otherwise. If you want to keep it longer, my go-to is storing it in an airtight container in the fridge—up to 5 days. Just remember, when you reheat, toast or warm slices gently to keep the crust crispy without drying out the bread. For freezer storage, wrap it tightly in plastic wrap, then foil, and freeze for up to a month. To reheat, I prefer letting it thaw overnight in the fridge, then popping it into a toaster or oven at 350°F for about 10 minutes. That way, it retains that lovely crust and warmth. If you’ve glazed it, I recommend waiting until just before serving to brush on glaze—reheating can sometimes make the glaze slip off or become sticky. Overall, I find this bread leftovers beautifully and it’s just as delicious toasted as fresh.
Frequently Asked Questions
Final Thoughts
This flourless bread has truly become one of my kitchen staples. It’s a no-fuss, wholesome loaf that’s perfect for whenever you need comfort or just want to impress friends with something different. The combination of eggs, nuts, and flavorings creates a dense but airy texture—without the gluten or flour—and the crust? That satisfying crunch makes every bite so worth it. What excites me most is how adaptable it is: add herbs for a savory version, mix in some dried fruit for a hint of sweetness, or top with seeds for extra crunch. I’ve experimented with all kinds of variations, and every time, it reminds me that good bread doesn’t need complicated ingredients or fancy equipment—just a little love and patience. I hope you give this a try, and I’d love to hear how yours turns out! Share your tweaks, your favorite toppings, or simply tell me how much your family enjoyed it. Happy baking!
flourless bread
Ingredients
Main Ingredients
- 2 cups cottage cheese
- 1.5 cups rolled oats
- 4 eggs eggs
- 2 tbs olive oil
- 1 tbs baking powder
- 0.25 tsp salt
Instructions
Preparation Steps
- Preheat your oven to 350°F. Line a 9x5 inch loaf pan with parchment paper.
- Strain the cottage cheese to remove excess liquid and discard the liquid.
- Add all ingredients to a blender and pulse until mostly smooth. Pour the batter into the prepared pan.
- Bake for 35-40 minutes or until a toothpick inserted comes out clean. Loosely cover with foil during the last 15 minutes if necessary.
- Allow the bread to set in the pan for 5 minutes, then transfer to a wire rack to cool for 10 minutes before slicing.
Notes
Featured Comments
“This sounds amazing—who knew you could have a flourless treat that's still a real bread? Can't wait to try it!”
“Impressed! Clear steps and perfect for busy nights results. Perfect for busy nights.”
“New favorite here — so flavorful. crowd-pleaser was spot on.”
“Super easy and turned out amazing! My family asked for seconds. Saving this one.”
“This sweet treat was absolutely loved — the cozy really stands out. Thanks!”
“Made it tonight and wow — absolutely loved! Will definitely make Easy Flourless Bread Recipe: A Simple Treat again.”


This sounds amazing—who knew you could have a flourless treat that’s still a real bread? Can’t wait to try it!