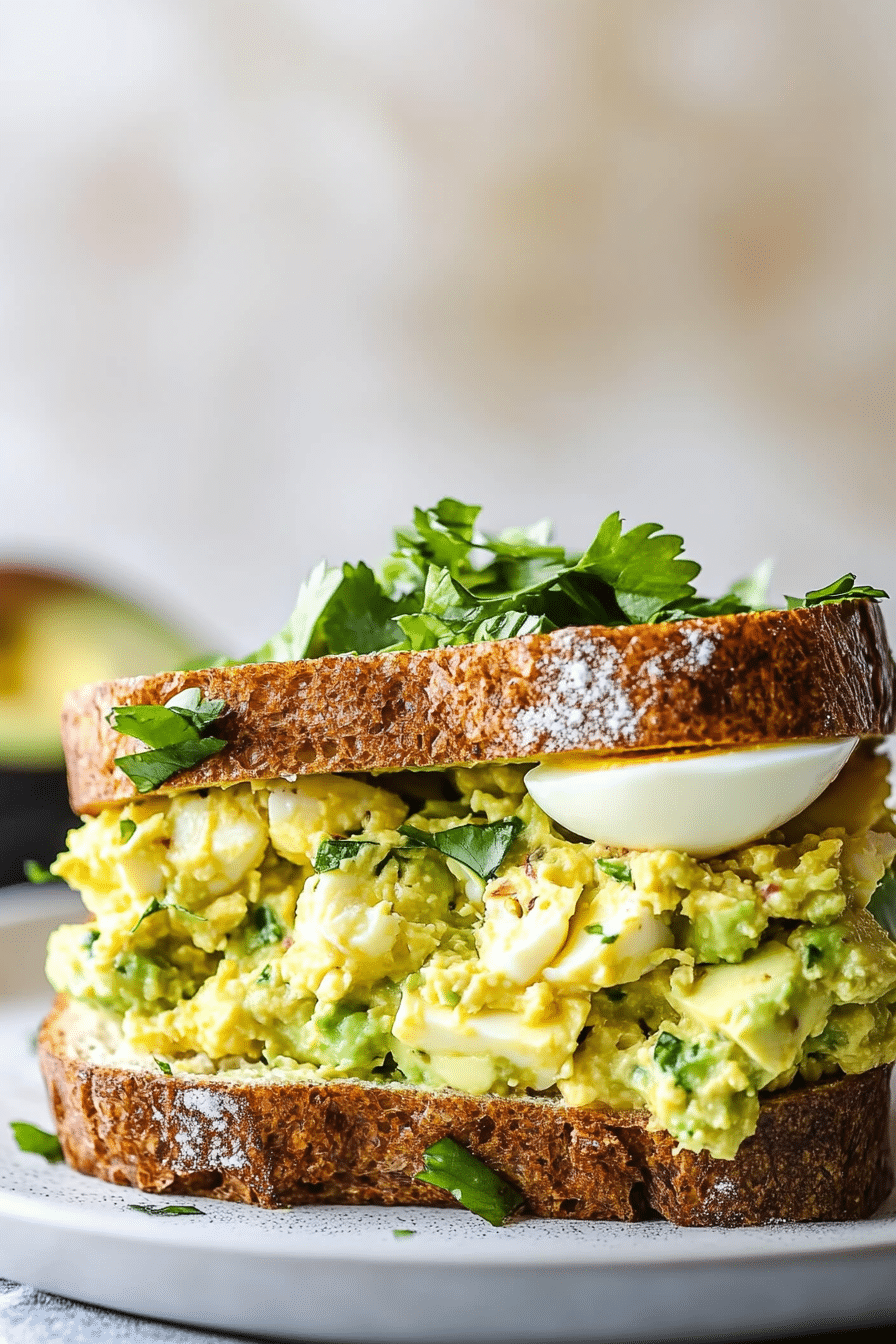
There’s something almost magical about roasted broccoli, right? Maybe it’s the way those bright green crowns turn a little charred and caramelized around the edges, or how the smell of roasted garlic and Parmesan wafts through the kitchen, making every belly rumble in anticipation. I remember when I first tried this recipe—my kids looked at me like I’d just served up a treasure. It’s one of those dishes that’s so simple, yet somehow feels special enough for a family dinner or a friendly potluck. I always do this when I want to add a little green goodness but keep things easy and flavorful. Honestly, I’ve made this so many times that I’ve lost count. It’s become a family favorite, and I swear, it’s the only way my kids will eat broccoli without complaining. Plus, it’s a lifesaver on busy nights—I can prep it while I’m setting the table or helping with homework. And trust me, once you try roasting broccoli this way, you’ll wonder why you ever boiled it plain!
What is Parmesan Roasted Broccoli?
Think of garlic Parmesan roasted broccoli as the cozy, flavor-packed cousin to plain steamed or boiled broccoli. It’s essentially fresh broccoli florets tossed in olive oil, garlic, salt, and pepper, then baked until they’re tender inside and slightly crispy around the edges. The magic happens when you sprinkle a generous handful of grated Parmesan cheese right after roasting, so it melts into all those nooks and crannies. The result? A beautifully caramelized vegetable with a cheesy, savory kick, perfect for sneaking into any meal or just enjoying straight from the pan. The name’s pretty straightforward—roasted broccoli seasoned with garlic and Parmesan—but don’t underestimate how much flavor this humble veggie can hold! It’s one of those recipes that feels like a little luxury, even though it’s so easy anyone can pull it off. Think of it as a quick way to elevate your veggie game—perfect for a busy weeknight or a relaxed weekend side dish.
How do I make Parmesan Roasted Broccoli with Garlic?
Quick Overview
This roasted broccoli recipe is so straightforward, you’ll wonder why you didn’t try it sooner. Basically, you toss fresh broccoli florets in olive oil, minced garlic, salt, and pepper. Spread them on a baking sheet, roast until they’re slightly crispy, then sprinkle with Parmesan cheese as soon as they’re out of the oven. That’s it! The roasting process caramelizes the edges and makes the broccoli tender, while the Parmesan adds a salty, cheesy finish. I love this method because it’s hands-off and leaves you with a fragrant, flavorful side that feels elevated without any fuss. It’s perfect for busy weeknights or when you want to impress without too much effort. Plus, you can prep everything ahead, pop it in the oven, and forget about it for a bit. Once you taste those crispy edges, you’ll see why this is one of my all-time favorites to serve alongside chicken, fish, or even pasta.
Ingredients
For the main roasted broccoli:
– 1-1.5 pounds fresh broccoli florets (buy organic if you can or fresh local)—aim for bright green, firm, and vibrant
– 3 tablespoons good-quality extra virgin olive oil
– 3 cloves garlic, minced (fresh garlic gives it the best flavor)
– 1/2 teaspoon salt (adjust to taste)
– Freshly ground black pepper to taste
For the Finish:
– 1/4 to 1/3 cup grated Parmesan cheese (feel free to use fresh or pre-grated)
– Optional: a squeeze of lemon or a sprinkle of red pepper flakes for extra punch
Note on Ingredients:
I always test this with good-quality olive oil because it really shines through in the roasted flavor. When it comes to cheese, freshly grated Parmesan melts better and tastes richer, but store-bought shredded works fine if you’re in a pinch. As for garlic, don’t skimp—minced garlic fresh from the bulb delivers that punch of aroma that transforms the dish.
Step-by-Step Instructions
Step 1: Preheat & Prep Pan
Set your oven to 425°F (220°C). Line a large baking sheet with parchment paper or a silicone mat—trust me, it keeps things from sticking and makes cleaning a breeze. Rinse the broccoli well, then pat it dry. If you’re using fresh broccoli heads, chop them into bite-sized florets, making sure they’re roughly the same size so everything roasts evenly.
Step 2: Mix Dry Ingredients
In a small bowl, combine the minced garlic, salt, and pepper. You can do this right on the cutting board for convenience. This way, the garlic gets evenly distributed and helps flavor the oil when you toss everything together.
Step 3: Mix Wet Ingredients
In a large bowl, pour the olive oil. Add the garlic mixture and stir until well combined. This is the flavor base—trust me, don’t skip this step! The garlic infuses the oil, which then evenly coats every floret, ensuring a tasty, aromatic roast.
Step 4: Combine
Add the broccoli florets to the bowl with the oil mixture. Toss gently but thoroughly until every piece is coated with the fragrant oil. Sometimes I use clean hands for this—they’re the best tools for getting even coverage without breaking the florets apart.
Step 5: Prepare Filling
While the broccoli is soaking up that garlic-oil goodness, prepare your Parmesan. If you’re grating fresh, do that just before baking so the cheese stays nice and fluffy. If you want a little extra flavor, feel free to mix in a pinch of herbs—thyme, oregano, even a dash of chili flakes.
Step 6: Layer & Roast
Spread the coated broccoli in a single layer on your prepared baking sheet. Don’t overcrowd it—overlapping leads to steaming instead of roasting. Bake for 15-20 minutes, shaking the pan halfway through, until the edges turn golden brown and the stems are tender when poked with a fork. The smell alone will draw everyone into the kitchen!
Step 7: Add Parmesan & Finish
As soon as it comes out of the oven, sprinkle the Parmesan cheese generously over the hot broccoli. The heat will melt the cheese into every nook and cranny, creating that irresistible cheesy crust. If you like, squeeze a little lemon on top for brightness or sprinkle some red pepper flakes for a gentle heat burst.
Step 8: Cool & Serve
Let it rest for a couple of minutes while the cheese sets slightly. Serve warm or at room temperature. This dish looks great in a big bowl, sprinkled with a little fresh parsley if you have it. Honestly, it’s just so good, it disappears in minutes at my house!
Step 9: Slice & Serve
For family-style sharing, just spoon it onto a platter or serve straight from the baking sheet. If you want individual bites, use tongs or a slotted spoon to dish it up. Pair it with grilled chicken, some baked salmon, or even toss it with pasta for a quick veggie-boosted dinner.
What to Serve It With
This roasted broccoli is so versatile, I love pairing it with all kinds of dishes. For breakfast, I sometimes serve it alongside a scrambled egg scramble—warm, hearty, and so colorful. It’s also a hit at brunch, especially when paired with a light, fruity white wine or sparkling water infused with lemon and mint. For a cozy dinner, it goes perfectly with roasted chicken or baked fish—those crispy edges and cheesy bits add just enough richness. And honestly, my kids ask for this all the time—they’ll happily eat their vegetables when they’re roasted like this! Once they discovered it, I didn’t even have to fuss; just roast and serve. I’ve made it for potlucks too, sprinkled with a little chopped basil or a drizzle of balsamic vinegar for an extra zing. It’s such a crowd-pleaser, and I love how it brightens up any table with its bold, cheesy aroma and vibrant green color.
Top Tips for Perfecting Your Garlic Parmesan Roasted Broccoli
Here are some secrets I’ve learned over the years that make this dish even better:
- Prep your broccoli well: Rinse and dry thoroughly to avoid steaming and ensure crispy edges.
- Use fresh garlic: The difference in aroma and flavor is huge—skip the jarred stuff if you can.
- Don’t overcrowd the pan: Leave space between florets to allow for proper roasting. Crowding causes steaming puddles instead of crispy bits.
- Adjust salt and pepper: Taste at the end and add more if needed—broccoli has a natural bitterness that the seasoning cuts through beautifully.
- Cheese application: Sprinkle Parmesan immediately after roasting, while everything is still hot, for perfect melting.
- Experiment with toppings: Want a smoky flavor? Try a sprinkle of smoked paprika or a dash of hot sauce before serving.
- Variations: For a vegan version, substitute nutritional yeast for Parmesan. It adds that cheesy umami without the dairy!
Over time, I’ve learned that the key is to keep an eye on that oven—every oven is a little different, so check around the 15-minute mark to prevent burning. Also, don’t forget to toss the broccoli halfway through so each piece gets evenly roasted. Trust me on this—little tweaks make all the difference, and it’s worth experimenting until you get it just right for your family’s taste buds.
Storing and Reheating Tips
This dish keeps well, but the crispy edges are truly at their best right out of the oven. After dinner, let leftovers cool completely in an airtight container. You can store roasted broccoli in the refrigerator for up to 3 days. When reheating, I prefer the oven over the microwave—spread it on a baking sheet and reheat at 375°F (190°C) for about 10 minutes until warm and a little crispy again. If you’re in a rush, a quick stir-fry in a hot skillet can help revive the texture, just add a splash of oil and cook until heated through. For freezer storage, spread cooled broccoli flat in a freezer bag, squeeze out air, and freeze for up to 2 months. To reheat, give it a few extra minutes in the oven, watching for those edges to crisp back up. If you plan to add more cheese or fresh herbs later, wait until just before serving so they stay vibrant. Overall, this dish is forgiving—just keep an eye on it, and it will always turn out delicious.
Frequently Asked Questions
Final Thoughts
If you haven’t tried roasting broccoli this way yet, I honestly think it’ll become your new favorite side in no time. It’s quick, flavorful, and so much more exciting than plain steamed or boiled broccoli—plus, the crispy edges and cheesy topping give it that little something special. I always keep a batch in the fridge because it’s perfect for reheating, adding to salads, or even tossing into pasta. Every time I make it, I get a little burst of happiness watching my family dig in. Food that’s both easy and rewarding—that’s what I love about this recipe. Plus, it’s a great way to get your kids to eat more greens without them knowing how sneaky you’ve been. I encourage you to experiment with seasonings and toppings—make it your own, and I’d LOVE to hear how yours turns out! Happy roasting, and don’t forget to leave a comment or share your tweaks. Here’s to simple, soulful cooking—one crispy, cheesy broccoli at a time!

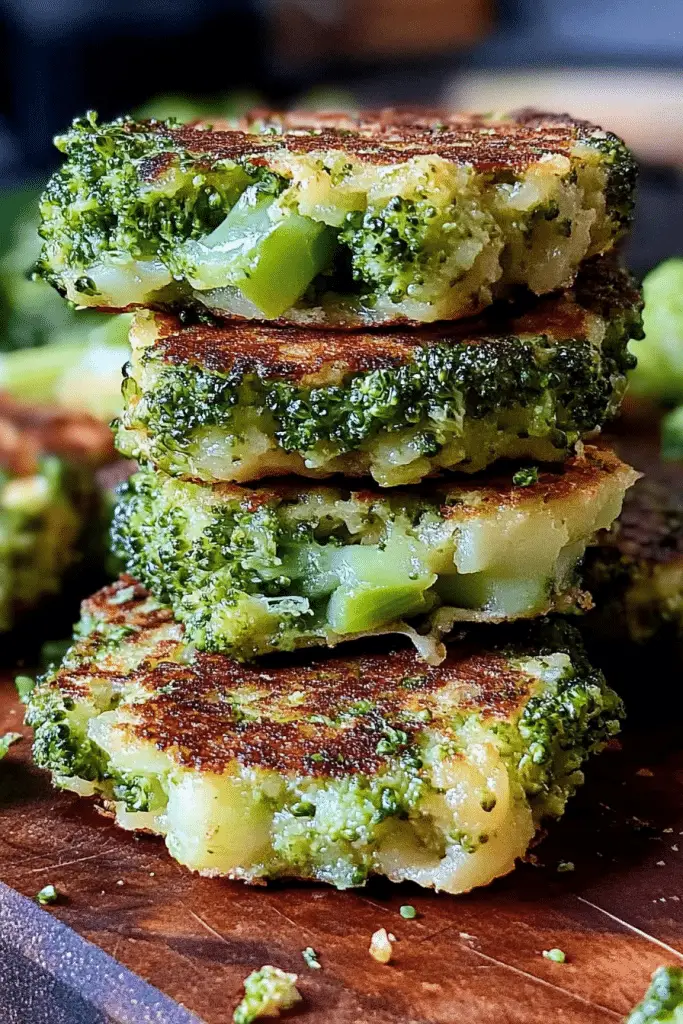
broccoli
Ingredients
Main Ingredients
- 4 small crowns broccoli
- 3 units eggs lightly beaten
- 5 tbs all purpose flour
- 0.33 cup mozzarella shredded
- 3 oz feta cheese crumbled
- 2 cloves garlic minced
- 3 tbs dill chopped
- 1 tsp onion powder
- 0.5 tsp chili pepper flakes
- to taste salt and pepper
Instructions
Preparation Steps
- Steam the broccoli crowns in about 1 inch of water for 7 minutes or until fork tender. Remove to paper towel and allow to cool slightly. Pat dry with towel. Chop into tiny pieces.
- In a large bowl, combine steam cooked broccoli, eggs, flour, mozzarella, feta, garlic, dill, onion powder, chili flakes, salt, and pepper. Mix until well incorporated. Form into small patties.
- Heat 2-3 tablespoons of olive oil in a skillet over medium heat. Cook each patty for approximately 6 minutes per side until golden brown. Adjust heat to prevent burning.
Notes
Featured Comments
“Impressed! Clear steps and turned out amazing results. Perfect for busy nights.”
“New favorite here — so flavorful. crowd-pleaser was spot on.”
“Super easy and turned out amazing! My family asked for seconds. Saving this one.”
“This sweet treat was absolutely loved — the zingy really stands out. Thanks!”
“Made it tonight and wow — comforting! Will definitely make Easy Green Fritters with Feta again.”
“Packed with flavor and so simple. Exactly what I wanted from Easy Green Fritters with Feta.”