

There’s this cozy little corner of my kitchen where I’ve spent countless Saturday mornings, mixing, baking, and sneaking tastes of my latest batch of dog treats. If you’re like me, your furry friend is more family than pet, and I always do my best to whip up something special—something wholesome, natural, and a lot tastier than the store-bought stuff. I remember the first time I made these dog treats; my pup’s nose was practically pressed against the oven window, eyes full of anticipation. The smell alone is enough to make any dog go wild, and honestly, I get excited knowing I’m offering a snack that’s just as healthy as it is delicious. They’re simple to make, budget-friendly, and my dog can’t get enough. Trust me on this one: once you make these, they’ll be pawing at your hand for more, and you’ll have a batch that keeps their tail wagging for days. If you’re looking for a treat that’s easy, natural, and just downright lovable, you’ve come to the right place—your dog’s new favorite is right here!
What are some good home made dog treats?
Think of homemade dog treats as your way of saying “I love you” in the form of a tasty, healthy snack. It’s essentially just a batch of wholesome, human-grade ingredients baked into a little crispy, chewy bite-sized delight for your pup. These treats often get a bad rap because of those overly commercial, chemical-filled options at the pet store—stuff I definitely wouldn’t want to share with my furry best friend. That’s why I prefer simple recipes where I control what goes in. The name “dog treats” isn’t fancy; it’s just a way of saying a snack that’s crafted with love and designed specifically for canine tastes and dietary needs. Think of them as dog-friendly cookies—snacks packed with flavor, minus the artificial preservatives or fillers. Once you see how easy they are to make, you’ll wonder why you ever bought store-bought treats. Plus, making your own lets you add those secret ingredients your dog loves—like a splash of peanut butter or a dash of turmeric for extra health benefits. An added bonus? You get to bond with your pup during the process, which makes snack time even more special.
How do I make homemade dog treats?
Quick Overview
This recipe is a wonderfully forgiving process—mix your ingredients, roll them out, cut into shapes, and bake until golden. What makes it special is how customizable it is: you can swap ingredients, add your pup’s favorite flavors, or make them more or less crunchy. Honestly, once you have your batter ready, it’s just a matter of patience and a watchful eye while they bake. It’s perfect for busy weekdays or lazy weekends when you want to shower your dog with something homemade and wholesome. Trust me, the smell alone will have your fur baby sitting right next to the oven, waiting for those treats to come out. You can even prepare a big batch and store some for later—these treats stay fresh for quite a while and always seem to disappear in minutes at my house!
Ingredients
For the Main Batter:
- 1 ½ cups rolled oats (gluten-free if needed) — I like to use organic oats for extra flavor and nutrition.
- 1 ripe banana — mashed, for natural sweetness and moisture.
- ½ cup natural peanut butter — creamy and unsweetened, preferably xylitol-free for safety.
- ¼ cup chicken or beef broth — low sodium, or water if you prefer.
- 1 egg — for binding and extra richness.
For the Filling:
- Optional: blueberries, shredded carrots, or small pieces of apple — for added flavor and nutrients.
For the Glaze:
- Egg wash (1 beaten egg mixed with a teaspoon of water) — for a shiny finish.
- Optional: small sprinkle of grated Parmesan or turmeric—flavor boosters and healthful additions.
Step-by-Step Instructions
Step 1: Preheat & Prep Pan
Set your oven to 350°F (175°C). Line a baking sheet with parchment paper or a silicone mat—trust me, this makes cleanup way easier! If your batter feels too sticky, you can lightly flour your countertop or rolling pin, but I usually just use a little oat flour. I always do this when I’m batch-making treats; it saves me from having half the dough stick to everything.
Step 2: Mix Dry Ingredients
In a large bowl, combine the oats and any powdered add-ins like turmeric or cinnamon. Mix well so everything’s evenly distributed. This step helps prevent clumps and ensures a consistent texture in every treat. I’ve learned to give the oats a quick blitz with a food processor if they’re a bit coarse—makes the treats smoother and easier to shape.
Step 3: Mix Wet Ingredients
In a separate bowl, mash the banana until smooth, then whisk in the peanut butter, egg, and broth. I tested this with almond milk once, and it actually made the dough even creamier, but chicken broth gives better flavor for dogs. Whisk everything until it’s nicely combined—this is your treat batter.
Step 4: Combine
Pour the wet mixture into the dry ingredients and stir until just combined. Don’t overmix—that can make the treats tough. The dough should be moist but manageable. If it’s too sticky, sprinkle in a little extra oats. If it’s too crumbly, add a splash more broth or water. Good texture means easy handling and a perfect bite.
Step 5: Prepare Filling
If you’re adding extras like blueberries or shredded carrots, fold them into the dough now. You can also create a layered effect by set-aside small portions to mix in different flavors for variety. My kids ask me to make treats with bits of bacon or cheese—just a tiny sprinkle makes all the difference.
Step 6: Layer & Swirl
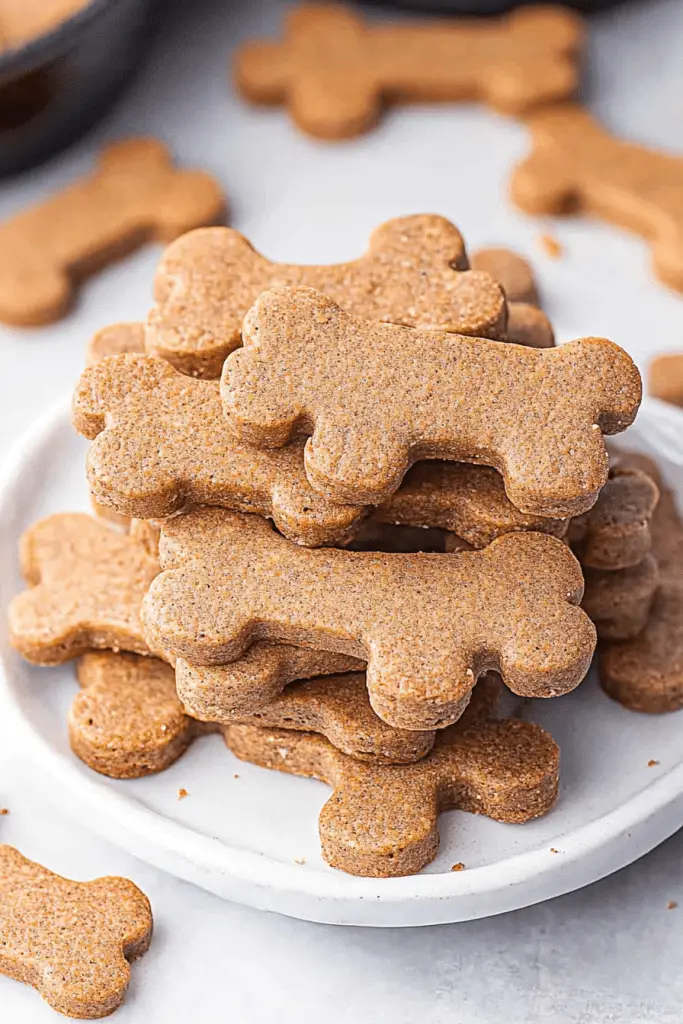
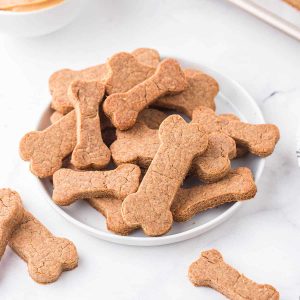
Roll the dough out to about a quarter-inch thickness, then cut into shapes—bones, hearts, circles, or whatever your pup prefers. For a playful twist, swirl in some peanut butter or add a few extra blueberries on top. I love using cookie cutters; it makes the treats look adorable and totally homemade.
Step 7: Bake
Place the treats on your prepared baking sheet and brush with the egg wash for that shiny finish. Bake for about 15-20 minutes, or until they turn golden brown. I always peek at the 15-minute mark; every oven is a little different, and I’d rather underbake than overbake. The smells that fill my kitchen during these minutes are simply irresistible!
Step 8: Cool & Glaze
Let the treats cool on a wire rack for at least 10 minutes—this helps them crisp up a little more. If you want an extra touch of shine or flavor, lightly brush with a little more egg wash or sprinkle with grated cheese while still warm. My dog loves when I add a dash of turmeric on top; it makes them look pretty and adds an anti-inflammatory boost.
Step 9: Slice & Serve
Once cooled completely, break or cut into snack-sized pieces. They store great in an airtight container—trust me, they don’t last long around here. I prefer to serve them at room temperature to bring out the smell and crunch, but my pup loves them straight from the fridge if it’s hot outside.
What to Serve It With
This homemade dog treats are wonderful on their own, but I often serve them alongside other favorite dog-friendly snacks. For breakfast, I toss one or two in with their morning kibble—my dog’s eyes light up at breakfast time! Sometimes I lay them on a plate with a little bit of plain yogurt or mashed banana for a special treat. For a more elegant touch at a cozy brunch, I arrange them on a pretty platter with some sliced apples (for us humans) and a side of pet-safe veggies like carrots and cucumber.
They’re also perfect as an indulgent after-dinner snack—my dog’s tail wags so hard they nearly fall off—and my kids ask for “puppy cookies” all the time for their stuffed animals or as part of their pretend tea parties. I love making these treats for a quick reward during training sessions—they feel good knowing I’m giving my pup something natural and healthy. Plus, these treats can be customized for every season or special occasion. Add some pumpkin puree in fall or a few tiny bits of cooked sweet potato during winter, and they become festive, wholesome goodies.
Top Tips for Perfecting Your Homemade Dog Treats
Over the years, I’ve learned a few tricks that make these treats even better:
- Zucchini Prep: If you decide to add shredded zucchini, squeeze out the excess moisture first. Moisture can make your dough sticky and difficult to work with. Plus, zucchini adds hydration and nutrition—my dog loves the subtle flavor!
- Mixing Advice: Avoid overmixing once you add the eggs because that can make the treats tough instead of chewy. I look for a dough that’s just combined—smooth but still a bit crumbly, like pie crust. Patience makes perfect.
- Swirl Customization: For eye-catching treats, try swirling in some natural food coloring (like beet juice or turmeric mixed with a little water). It gives your treats a vibrant look and is a little fun for the humans too!
- Ingredient Swaps: I’ve experimented with flaxseed meal or coconut flour as substitutes—just reduce the liquids slightly, and you’ll get a different texture, which my pup seems to love.
- Baking Tips: Always bake on the middle rack and rotate the tray halfway through. This prevents uneven baking and ensures a crisp, golden finish without burning—experience talking here!
- Glaze Variations: A drizzle of strained pumpkin or a light brushing of chicken broth can make treats look even more appealing or add extra flavor. Just keep it light; too much moisture can make them soggy if stored later.
After countless batches, I’ve found these tweaks can elevate your homemade dog treats from good to absolutely irresistible. Just trust your nose and your intuition—your dog’s reactions will tell you everything you need to know.
Storing and Reheating Tips
To keep these treats fresh and crunchy, I usually store them in an airtight container at room temperature for up to a week. If it’s hot or humid outside, I pop them into the refrigerator—they stay crispy and fresh for another 10 days or so. Freezing is great if you want to make a big batch—I wrap them tightly in plastic wrap and then pop them into a freezer-safe bag. They’ll keep for up to three months, and I just let them thaw at room temperature for a quick snack fix. When reheating, I prefer letting them come back to room temp rather than microwaving, which can make them rubbery. And honestly, I think they taste best at room temperature—more aromatic, more flavorful. If you decide to add a fresh glaze or toppings later, do that just before serving to keep everything nice and crisp. The key is not to bother with reheating in the oven unless you want to crisp them up again; just enjoy them as they are!
Frequently Asked Questions
Final Thoughts
Honestly, there’s something so satisfying about making homemade dog treats. It’s like giving a hug in snack form—knowing exactly what’s inside and seeing your pup’s happy face when they get their special reward. These treats are versatile, easy to customize, and made with love—my favorite way to spoil my furry family member. Plus, once you get the hang of it, you’ll find yourself experimenting with even more ingredients and shapes, turning every batch into a little pet-friendly masterpiece. If you’re anything like me, you might even start making bigger batches to gift to friends or donate at your local shelter—I promise, your dog (and your friends’ pets) will thank you! So grab those ingredients, put on some music, and enjoy the process. Happy baking, and I can’t wait to hear how yours turn out—don’t forget to share your favorite flavor combos or tips in the comments!
dog treats
Ingredients
Main Ingredients
- 1 cup creamy peanut butter
- 1 egg egg
- 0.5 ripe banana banana (mashed)
- 1 tablespoon maple syrup
- 1 cup whole wheat flour
Instructions
Preparation Steps
- Preheat the oven to 350 degrees Fahrenheit and set aside a baking pan that is lined with parchment paper.
- In a mixer, beat together the peanut butter, egg, banana, and maple syrup until fully combined. Slowly beat in the whole wheat flour.
- Take the dough and roll it out on a floured surface until it is ½ inch thick. If desired, add 2-3 tablespoons of water to firm up the dough.
- Use a dog-inspired cookie cutter to cut out treats and place them on the prepared sheet pan.
- Bake for 15-25 minutes until golden brown. Remove from oven and allow to cool before serving.
Notes
Featured Comments
“So much love in every batch—my dog can’t wait for Saturday mornings too!”
“Impressed! Clear steps and perfect for busy nights results. Perfect for busy nights.”
“New favorite here — absolutely loved. crowd-pleaser was spot on.”
“Super easy and turned out amazing! My family asked for seconds. Saving this one.”
“This sweet treat was absolutely loved — the zingy really stands out. Thanks!”
“Made it tonight and wow — turned out amazing! Will definitely make Easy Nutty Dog Treats Your Pup Will Love again.”


So much love in every batch—my dog can’t wait for Saturday mornings too!