

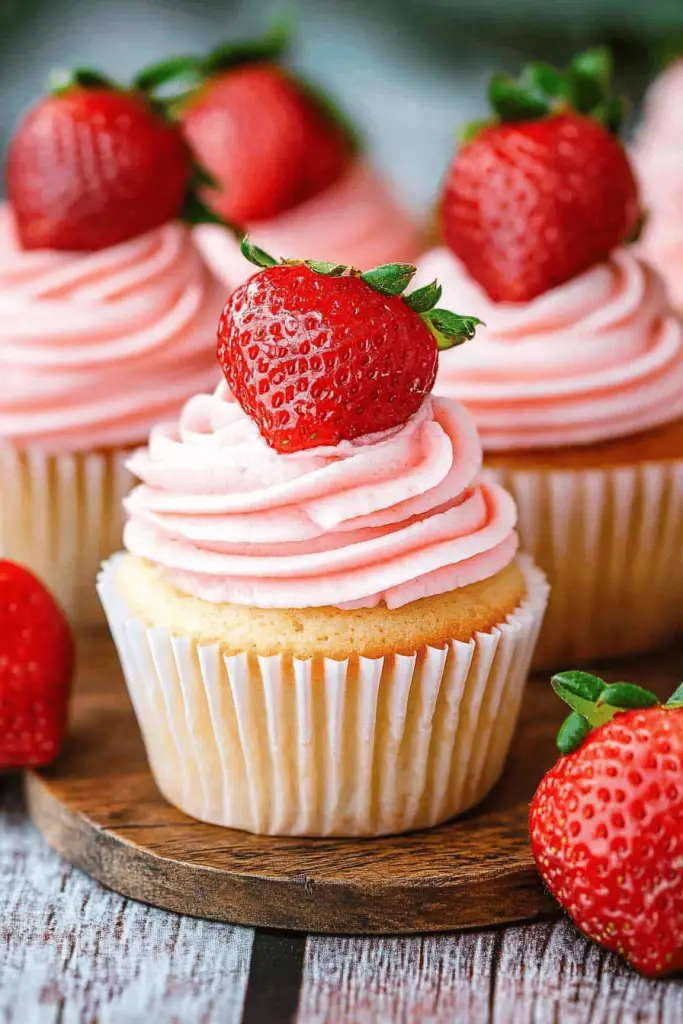
There are some recipes that just feel like a warm hug, aren’t there? This one for Oreo cheesecake cupcakes is definitely one of those for me. I remember the first time I tried making something similar, it was a complete accident. I was trying to make regular cupcakes and had a tub of cream cheese left over from a cheesecake attempt that didn’t quite go as planned (don’t worry, I’ll tell you about that disaster later!). My kids were giving me “the look,” the one that says “Mom, we need something sweet RIGHT NOW.” So, I just sort of threw things together, crushed up some Oreos, and hoped for the best. What I ended up with was pure magic. These little Oreo cheesecake cupcakes are everything you could want: a rich, creamy cheesecake center swirled into a tender chocolate cupcake, all topped with crushed Oreos. They’re like a decadent dessert dream come true, and honestly, they’re way easier to make than a full-sized cheesecake, but they give you all those amazing flavors. If you love a good chocolate cupcake or a classic New York cheesecake, you’re going to fall head over heels for these. They’re the perfect bite-sized indulgence that never fails to impress.
What are Oreo Cheesecake Cupcakes?
So, what exactly are these little gems? Think of them as the best of both worlds, condensed into a perfect, portable package. We’re taking the beloved, slightly tangy, wonderfully smooth creaminess of cheesecake and merging it with the rich, comforting flavor of a classic chocolate cupcake. And the star of the show? Those iconic, chocolatey, crème-filled Oreos! We’re crumbling them into the batter and sometimes even tucking them into the filling for an extra burst of that familiar cookie flavor. It’s essentially a mini cheesecake baked right inside a tender chocolate cake. The magic happens when you get a bite that has both the fluffy cake and the dense, creamy cheesecake – it’s a textural and flavor party in your mouth! They’re not just cupcakes; they’re a delightful fusion that brings together the best elements of two classic desserts, making them incredibly satisfying and utterly addictive. They’re that treat you reach for when you want something truly special without the fuss of a large dessert.
Why you
What are some of the best things to do in a day?flavor is just out of this world. You get that deep, rich chocolate from the cupcake base, which is perfectly balanced by the sweet and slightly tangy cream cheese filling. Then you have those little crunches of Oreo goodness scattered throughout, adding another layer of texture and that unmistakable cookie flavor. It’s a symphony of deliciousness!
Second, the simplicity. Now, I know “cheesecake” can sound intimidating, but these Oreo cheesecake cupcakes are surprisingly straightforward. The cheesecake filling is easy to whip up, and the cupcake batter comes together in no time. You don’t need any fancy equipment or tricky techniques. I’ve found that even beginner bakers can nail these, which is always a huge win in my book. They’re a lifesaver when you want something impressive but don’t have a ton of time or energy.
What is the importance of talking about the environment?cost-efficiency! Most of the ingredients are pantry staples or easily found at any grocery store. Compared to buying fancy desserts or even a single slice of cheesecake from a bakery, making a batch of these at home is incredibly budget-friendly. You get a dozen (or more!) delicious treats for a fraction of the price.
Finally, the versatility. These are fantastic as they are, but you can totally play around with them. Add a dollop of whipped cream, a drizzle of chocolate ganache, or even some extra Oreo crumbles on top. They’re perfect for bake sales, birthday parties, potlucks, or just a quiet afternoon tea. My kids ask for these all the time, especially when they have friends over. They’re just universally loved, and that’s saying a lot!
How to Make Oreo Cheesecake Cupcakes
Quick Overview
Making these delightful Oreo cheesecake cupcakes is a two-part process, but it’s incredibly manageable! First, you’ll mix up a simple, rich chocolate cupcake batter. While that’s happening, you’ll whip up a wonderfully smooth and creamy cheesecake filling. Then comes the fun part: layering the batter and filling in your cupcake liners, often with a surprise Oreo at the bottom. They bake up beautifully, giving you a moist chocolate cake surrounding a luscious cheesecake center. The whole thing is surprisingly quick, making them perfect for a spontaneous baking session or a planned treat.
Ingredients
For the Main Batter:
This is your classic, dependable chocolate cupcake base, but we’re making it extra moist and delicious!
- All-purpose flour: 1 ½ cups. I always use unbleached, it just seems to make cakes a bit lighter.
- Granulated sugar: 1 cup. Make sure it’s fine enough so it dissolves nicely.
- Unsweetened cocoa powder: ⅓ cup. Use a good quality one; it makes all the difference in that deep chocolate flavor.
- Baking soda: 1 teaspoon. This gives us that lovely lift.
- Salt: ½ teaspoon. Balances out the sweetness and enhances the chocolate.
- Large eggs: 2. Room temperature is best for emulsifying!
- Vegetable oil: ½ cup. Keeps things super moist.
- Buttermilk: ½ cup. This is key for tenderness! If you don’t have any, you can make a quick substitute by adding a tablespoon of lemon juice or white vinegar to regular milk and letting it sit for 5 minutes.
- Vanilla extract: 1 teaspoon. The classic flavor enhancer.
- Hot water or hot brewed coffee: ½ cup. Coffee really deepens the chocolate flavor without making it taste like coffee, trust me!
For the Filling:
This is the creamy, dreamy cheesecake part that makes these so special. Easy peasy!
- Cream cheese: 8 ounces, softened. Make sure it’s fully softened, this is crucial for a smooth filling. I usually take it out of the fridge an hour or two before.
- Granulated sugar: ¼ cup. Just enough to sweeten it nicely.
- Large egg yolk: 1. This adds richness and helps the filling set perfectly.
- Vanilla extract: ½ teaspoon. A little extra vanilla never hurts!
For the Extras:
These are what give it that signature Oreo flair!
- Oreos: About 12-15 cookies, finely crushed. You can use a food processor or just pop them in a zip-top bag and crush them with a rolling pin – it’s a great stress reliever!
- Optional: A few whole Oreos for topping if you’re feeling fancy.
Step-by-Step Instructions
Step 1: Preheat & Prep Pan
First things first, let’s get our oven all warmed up and ready to go. Preheat your oven to 350°F (175°C). Line a standard 12-cup muffin tin with cupcake liners. I always like to use pretty liners, it just makes them feel more festive. If you’re planning on making a full dozen, I suggest having all 12 liners ready to go.
Step 2: Mix Dry Ingredients
In a medium-sized bowl, whisk together the flour, sugar, cocoa powder, baking soda, and salt. Whisking well ensures everything is evenly distributed and there are no clumps of cocoa powder. This step is important for an even bake and consistent flavor throughout your cupcakes.
Step 3: Mix Wet Ingredients
In a separate, larger bowl, whisk together the eggs, oil, buttermilk, and vanilla extract until well combined. Don’t overmix, just get it all nicely incorporated. Making sure your eggs and buttermilk are at room temperature will help everything emulsify beautifully, leading to a tender crumb.
Step 4: Combine
Now, let’s bring those wet and dry ingredients together. Gradually add the dry ingredients to the wet ingredients, mixing on low speed or by hand until just combined. Be careful not to overmix! Overmixing can develop the gluten too much, resulting in tough cupcakes. Once it’s mostly mixed, slowly pour in the hot water or coffee and mix on low speed until the batter is smooth and slightly thin. This is normal for this type of chocolate cake batter and it contributes to its moistness. The hot liquid ‘blooms’ the cocoa, intensifying its flavor.
Step 5: Prepare Filling
While your batter is resting for a minute, let’s make that luscious cheesecake filling. In a clean bowl, beat the softened cream cheese with a mixer (handheld or stand mixer) until it’s completely smooth and creamy. This might take a minute or two, but don’t rush it! Then, beat in the sugar until well combined. Finally, add the egg yolk and vanilla extract, and beat until just incorporated. Again, don’t overbeat once the egg is in; we just want it mixed through.
Step 6: Layer & Swirl
Now for the assembly! Spoon about a tablespoon of the chocolate batter into the bottom of each cupcake liner. Then, spoon about 1 to 1 ½ tablespoons of the cheesecake filling over the batter. Finally, top with another tablespoon or so of the chocolate batter, covering the cheesecake filling completely. If you’re adding crushed Oreos to the batter, now’s the time to gently fold them in. Some people like to swirl a bit of the cheesecake filling into the chocolate batter with a toothpick. You can also press a whole Oreo into the top of each cupcake before baking if you like!
Step 7: Bake
Place the muffin tin in your preheated oven. Bake for 20-25 minutes, or until a toothpick inserted into the cupcake portion (avoiding the cheesecake center) comes out clean. The tops should look set, and the edges should be pulling away slightly from the liners. Don’t overbake, or your cupcakes will be dry!
Step 8: Cool & Glaze
Once baked, let the cupcakes cool in the muffin tin for about 5-10 minutes before carefully transferring them to a wire rack to cool completely. This is super important! If you try to frost or glaze them while they’re warm, everything will melt. Once they are completely cool, you can dust them with powdered sugar, add a drizzle of chocolate ganache, or even top with a dollop of whipped cream and a sprinkle of crushed Oreos. I personally love a simple dusting of powdered sugar for these, it lets the cake and cheesecake shine.
Step 9: Slice & Serve
These are best served at room temperature, so if you’ve refrigerated them, let them sit out for about 30 minutes before enjoying. Slice into one and marvel at that beautiful swirl of chocolate cake and creamy cheesecake. They’re perfect as is, or with a glass of milk. Enjoy every single bite!
What to Serve It With
These Oreo cheesecake cupcakes are pretty much a complete package on their own, but serving them up just right can elevate the experience! For a casual breakfast (yes, I’m a firm believer that dessert can sometimes be breakfast!), a cup of strong, black coffee or a creamy latte is perfect. The bitterness of the coffee cuts through the sweetness beautifully, and the warmth is just comforting.
When it comes to brunch, these little beauties add a touch of elegance. I love plating them on a tiered stand with some fresh berries – raspberries or strawberries add a lovely pop of color and a touch of tartness. A mimosa or a sparkling rosé would be a delightful beverage pairing to make it feel extra special.
As a show-stopping dessert, they’re ideal. Imagine serving these after a nice dinner. A sprinkle of extra Oreo crumbs or a swirl of chocolate ganache on top makes them feel restaurant-worthy. A tiny scoop of vanilla bean ice cream on the side is always a crowd-pleaser, or a glass of milk for the purists.
And for those cozy snack moments, when you just need a little something sweet? Honestly, just grab one (or two!) straight from the container. They pair perfectly with a warm cup of tea, or honestly, just by themselves while you curl up with a good book. My family tradition is to have these on a Friday night after a long week – it’s our little reward! They’re so versatile; you can dress them up or down depending on the occasion, but they always deliver on deliciousness.
Top Tips for Perfecting Your Oreo Cheesecake Cupcakes
Over the years, I’ve definitely learned a few tricks that help make these Oreo cheesecake cupcakes turn out perfectly every time. For the Oreo prep, make sure you’re crushing them finely. If they’re in big chunks, you’ll get uneven bursts of flavor and texture, which isn’t quite as delightful as a more distributed crunch. I often pulse them in a food processor until they’re like coarse sand, but not so fine that they turn into dust.
Regarding mixing advice, the biggest pitfall is overmixing the cupcake batter. Seriously, just mix until you don’t see any dry streaks of flour. A few tiny lumps are okay; they’ll disappear in the oven. For the cheesecake filling, it’s all about the softened cream cheese. If it’s cold, you’ll get lumps, and nobody wants lumpy cheesecake! I always take mine out at least an hour, sometimes two, before I plan to make the filling. Beat it until it’s truly smooth before adding anything else.
When it comes to swirl customization, you don’t need to be an artist! I often just drop spoonfuls of the cheesecake filling onto the chocolate batter and then use a toothpick to gently swirl them together in a figure-eight motion. You don’t want to over-swirl, or you’ll lose the distinct layers. Just a few gentle passes is enough to create a beautiful marbled effect. For visual appeal, I love adding a couple of finely crushed Oreos on top of the cheesecake layer before adding the final bit of chocolate batter – it peeks through nicely after baking.
In terms of ingredient swaps, I’ve tested this recipe with dairy-free cream cheese and it works quite well, though the texture can be slightly different. For the buttermilk, as I mentioned, the milk + acid substitute is a lifesaver. If you’re out of oil, melted butter can work in a pinch, but it does change the texture slightly, making them a bit more cake-like and less tender. And definitely try the hot coffee instead of water; it’s a game-changer for chocolate flavor!
For baking tips, make sure your oven rack is in the center of the oven. This ensures even heat distribution. If your oven tends to run hot, you might want to reduce the temperature by about 10-15 degrees Fahrenheit. To test for doneness, the cupcake part should spring back lightly when touched, and a toothpick inserted into the cakey part should come out clean. The cheesecake part will still be a little soft in the center, and that’s okay – it will firm up as it cools.
Finally, for glaze variations, if you don’t want to use a traditional glaze, a dusting of cocoa powder or powdered sugar is elegant and simple. You can also melt some dark chocolate chips with a teaspoon of coconut oil for a quick ganache. For consistency, if your glaze is too thick, add a teaspoon of milk or water at a time; if it’s too thin, add a bit more powdered sugar.
Storing and Reheating Tips
These Oreo cheesecake cupcakes are so good, you’ll want to savor them! For room temperature storage, they are best enjoyed within 1-2 days. If you’ve frosted or glazed them, keep them covered in an airtight container or under a cake dome. This prevents them from drying out and also keeps any stray crumbs from getting everywhere. They hold up pretty well at room temp for short periods, especially if it’s not too warm in your kitchen.
When it comes to refrigerator storage, these cupcakes will last longer, usually up to 4-5 days. Make sure they are completely cooled before refrigerating. Store them in an airtight container or wrap them well with plastic wrap, then foil. The cold can sometimes dry them out a bit, so good covering is key. When you’re ready to eat them, I highly recommend taking them out of the fridge about 30-60 minutes beforehand to let them come back to room temperature. This makes a huge difference in texture and flavor; nobody likes a cold, hard cupcake!
For freezer instructions, these are surprisingly freezer-friendly! If you want to store them for longer, up to about 2-3 months, wrap each cooled, unglazed cupcake individually in plastic wrap, making sure it’s sealed tightly. Then, place them in a freezer-safe bag or container. Thawing is simple: just transfer the wrapped cupcakes from the freezer to the refrigerator and let them thaw overnight. Once thawed, unwrap them and let them sit at room temperature for about 30 minutes before serving. This method works best for cupcakes without a delicate cream cheese frosting, but even then, it’s usually fine.
Regarding glaze timing advice, if you plan to refrigerate or freeze your cupcakes, it’s often best to add the glaze or topping *after* thawing or just before serving. Glazes can sometimes become sticky or uneven when frozen and thawed. However, a simple dusting of powdered sugar or cocoa powder is perfectly fine to do before freezing. For cupcakes staying at room temperature for a day or two, glazing right away is usually perfectly fine.
Frequently Asked Questions
Final Thoughts
Honestly, I could talk about these Oreo cheesecake cupcakes all day! They are such a perfect combination of textures and flavors, and the fact that they’re so approachable for home bakers makes them even more special. They truly hit that sweet spot between a comforting chocolate cupcake and a rich, decadent cheesecake. They’re the kind of treat that makes people’s eyes light up when they take their first bite, and that’s exactly what I love most about baking.
If you adore classic chocolate desserts and the creamy goodness of cheesecake, these are an absolute must-try. They’re consistently a huge hit at parties, family gatherings, or even just for a Tuesday afternoon pick-me-up. You really can’t go wrong with them.
I hope you give these Oreo cheesecake cupcakes a try in your own kitchen. I’m so excited for you to experience them! If you do make them, please leave a comment below and let me know how they turned out – I love hearing your feedback and seeing your variations! Happy baking!
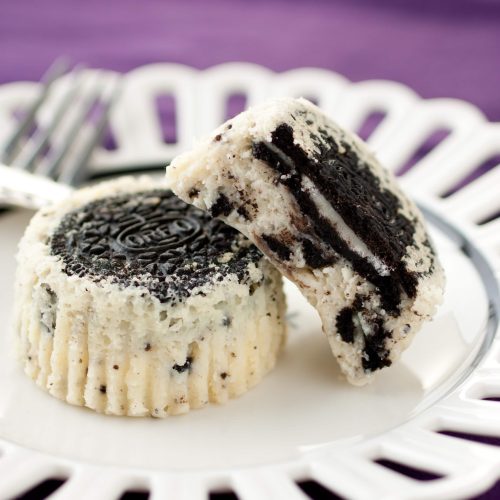
Oreo Cheesecake Cupcakes
Ingredients
Main Ingredients
- 28 Oreo cookies Oreo cookies divided
- 2 packages cream cheese softened
- 0.5 cup granulated sugar
- 2 large eggs
- 1.33 cups white chocolate chips about 8 oz
- 0.33 cup heavy cream
- 1 tsp vanilla extract
Instructions
Preparation Steps
- Preheat oven to 300 degrees. Line 20 muffin cups with paper liners and place one Oreo in the bottom and center of each of the 20 cups, set aside.
- Chop remaining 8 Oreo cookies into small pieces, set aside.
- In a mixing bowl, using an electric hand mixer set on medium speed, whip together cream cheese and sugar until smooth, about 1 minute. Blend in eggs.
- In a microwave safe bowl, combine white chocolate chips and cream and heat mixture on 50% power in 30 second intervals, stirring after each interval until melted and smooth.
- Pour melted white chocolate chip mixture into cream cheese mixture, along with vanilla extract. Blend mixture until combined.
- Tap mixing bowl forcefully against counter top several times to release some of the large air bubbles in the cheesecake mixture, then fold in remaining 8 chopped Oreos.
- Divide mixture among 20 muffin cups (right over the top of each Oreo), filling each cup about 3/4 full (about 0.25 cup in each). Bake in preheated oven about 20 minutes, or until filling is set.
- Remove from oven and allow cupcakes to rest in muffin tin for 10 minutes before transferring to a wire rack to cool.
- Cool completely on a wire rack, about 1 hour, then transfer to an airtight container, in a single layer, and refrigerate 4 hours or overnight. Store cupcakes in refrigerator and serve chilled.
Notes
Featured Comments
“Impressed! Clear steps and quick weeknight win results. Perfect for busy nights.”
“New favorite here — perfect for busy nights. crowd-pleaser was spot on.”
“Super easy and turned out amazing! My family asked for seconds. Saving this one.”
“This sweet treat was absolutely loved — the buttery really stands out. Thanks!”
“Made it tonight and wow — family favorite! Will definitely make Easy Oreo Cheesecake Cupcakes How To again.”
“Packed with flavor and so simple. Exactly what I wanted from Easy Oreo Cheesecake Cupcakes How To.”


