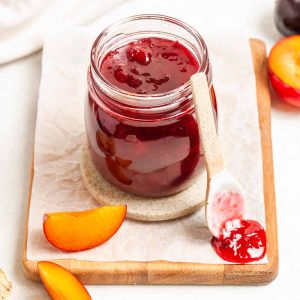
Oh, plum jam. Just saying the words brings back a flood of memories. I can practically smell the sweet, slightly tart aroma filling my grandmother’s tiny kitchen, can hear the gentle bubbling of the pot on the stove, and feel the warmth of the summer sun streaming through the window. This easy plum jam isn’t just a recipe; it’s a little jar of sunshine, a taste of pure nostalgia that I’ve been making for years. It’s the kind of thing that seems a bit daunting at first, like maybe you need some secret family handshake or a special degree in preserving, but trust me, it’s so ridiculously simple. If you’ve ever looked at a bushel of ripe plums and thought, “What am I going to do with all these?” then this recipe is your new best friend. It’s a far cry from some of those complicated preserves you see online that require hours of stirring and constant vigilance. This is the jam that makes you feel like a kitchen magician without breaking a sweat.
What is easy pistachio jam?
What is this magical stuff we’re talking about?easy plum jam as the laid-back, approachable cousin of the more intimidating, perfectly set, fancy-pants jams you might find in gourmet shops. It’s essentially just ripe plums, a bit of sugar, maybe a squeeze of lemon for brightness, and some patient simmering until everything thickens into a glorious, spreadable delight. The “easy” part comes from its forgiving nature. We’re not fussing with pectin or complicated ratios here. It’s all about letting the natural goodness of the plums shine through, with just enough sweetness to balance their inherent tang. It’s the kind of jam that spreads like a dream on toast, dollops beautifully onto yogurt, and frankly, is perfectly acceptable to eat straight from the spoon when no one’s looking. It’s uncomplicated, honest, and utterly delicious.
How to Make Easy Plum Jam
Quick Overview
Making this easy plum jam is a wonderfully straightforward process. You’ll start by preparing your plums, then gently cook them down with sugar and lemon juice until they soften and release their juices. The magic happens as this mixture simmers, thickening naturally into a luscious jam. It’s a hands-off kind of simmer for the most part, allowing you to catch up on emails or just relax with a cup of tea while your kitchen fills with an incredible aroma. This method is foolproof and yields a beautifully textured jam every single time, making it perfect for beginners and seasoned preservers alike.
Ingredients
For the Jam:
About 2 pounds ripe plums (any variety works, but I find a mix of sweet and tart like Santa Rosa and Black Splendor gives the best flavor). Wash them thoroughly and remove the pits. You can leave the skins on; they add great color and nutrients. If you prefer a smoother jam, you can peel them, but it’s really not necessary for this easy version.
1 ½ cups granulated sugar (you can adjust this slightly depending on the sweetness of your plums and your preference. I find this amount creates a nice balance.)
2 tablespoons fresh lemon juice (this brightens the flavor and helps with the setting process). Make sure it’s fresh-squeezed for the best taste!
Step-by-Step Instructions
Step 1: Prepare the Plums
Start by washing your plums under cool water. Then, cut them in half and remove the pits. If the plums are very large, you can cut them into quarters. Don’t worry about being too precise here; the goal is just to get them ready for cooking. I often find myself just squishing them a bit with my hands after pitting to help break them down even further, which I find speeds up the cooking process. For this easy plum jam, perfect uniformity isn’t the aim!
Step 2: Combine Ingredients
Place your prepared plums into a large, heavy-bottomed pot or Dutch oven. Add the granulated sugar and the fresh lemon juice. Give everything a good stir to combine. Let this mixture sit for about 15-20 minutes. You’ll notice the sugar starts to draw out some juice from the plums, which is exactly what we want!
Step 3: Cook the Jam
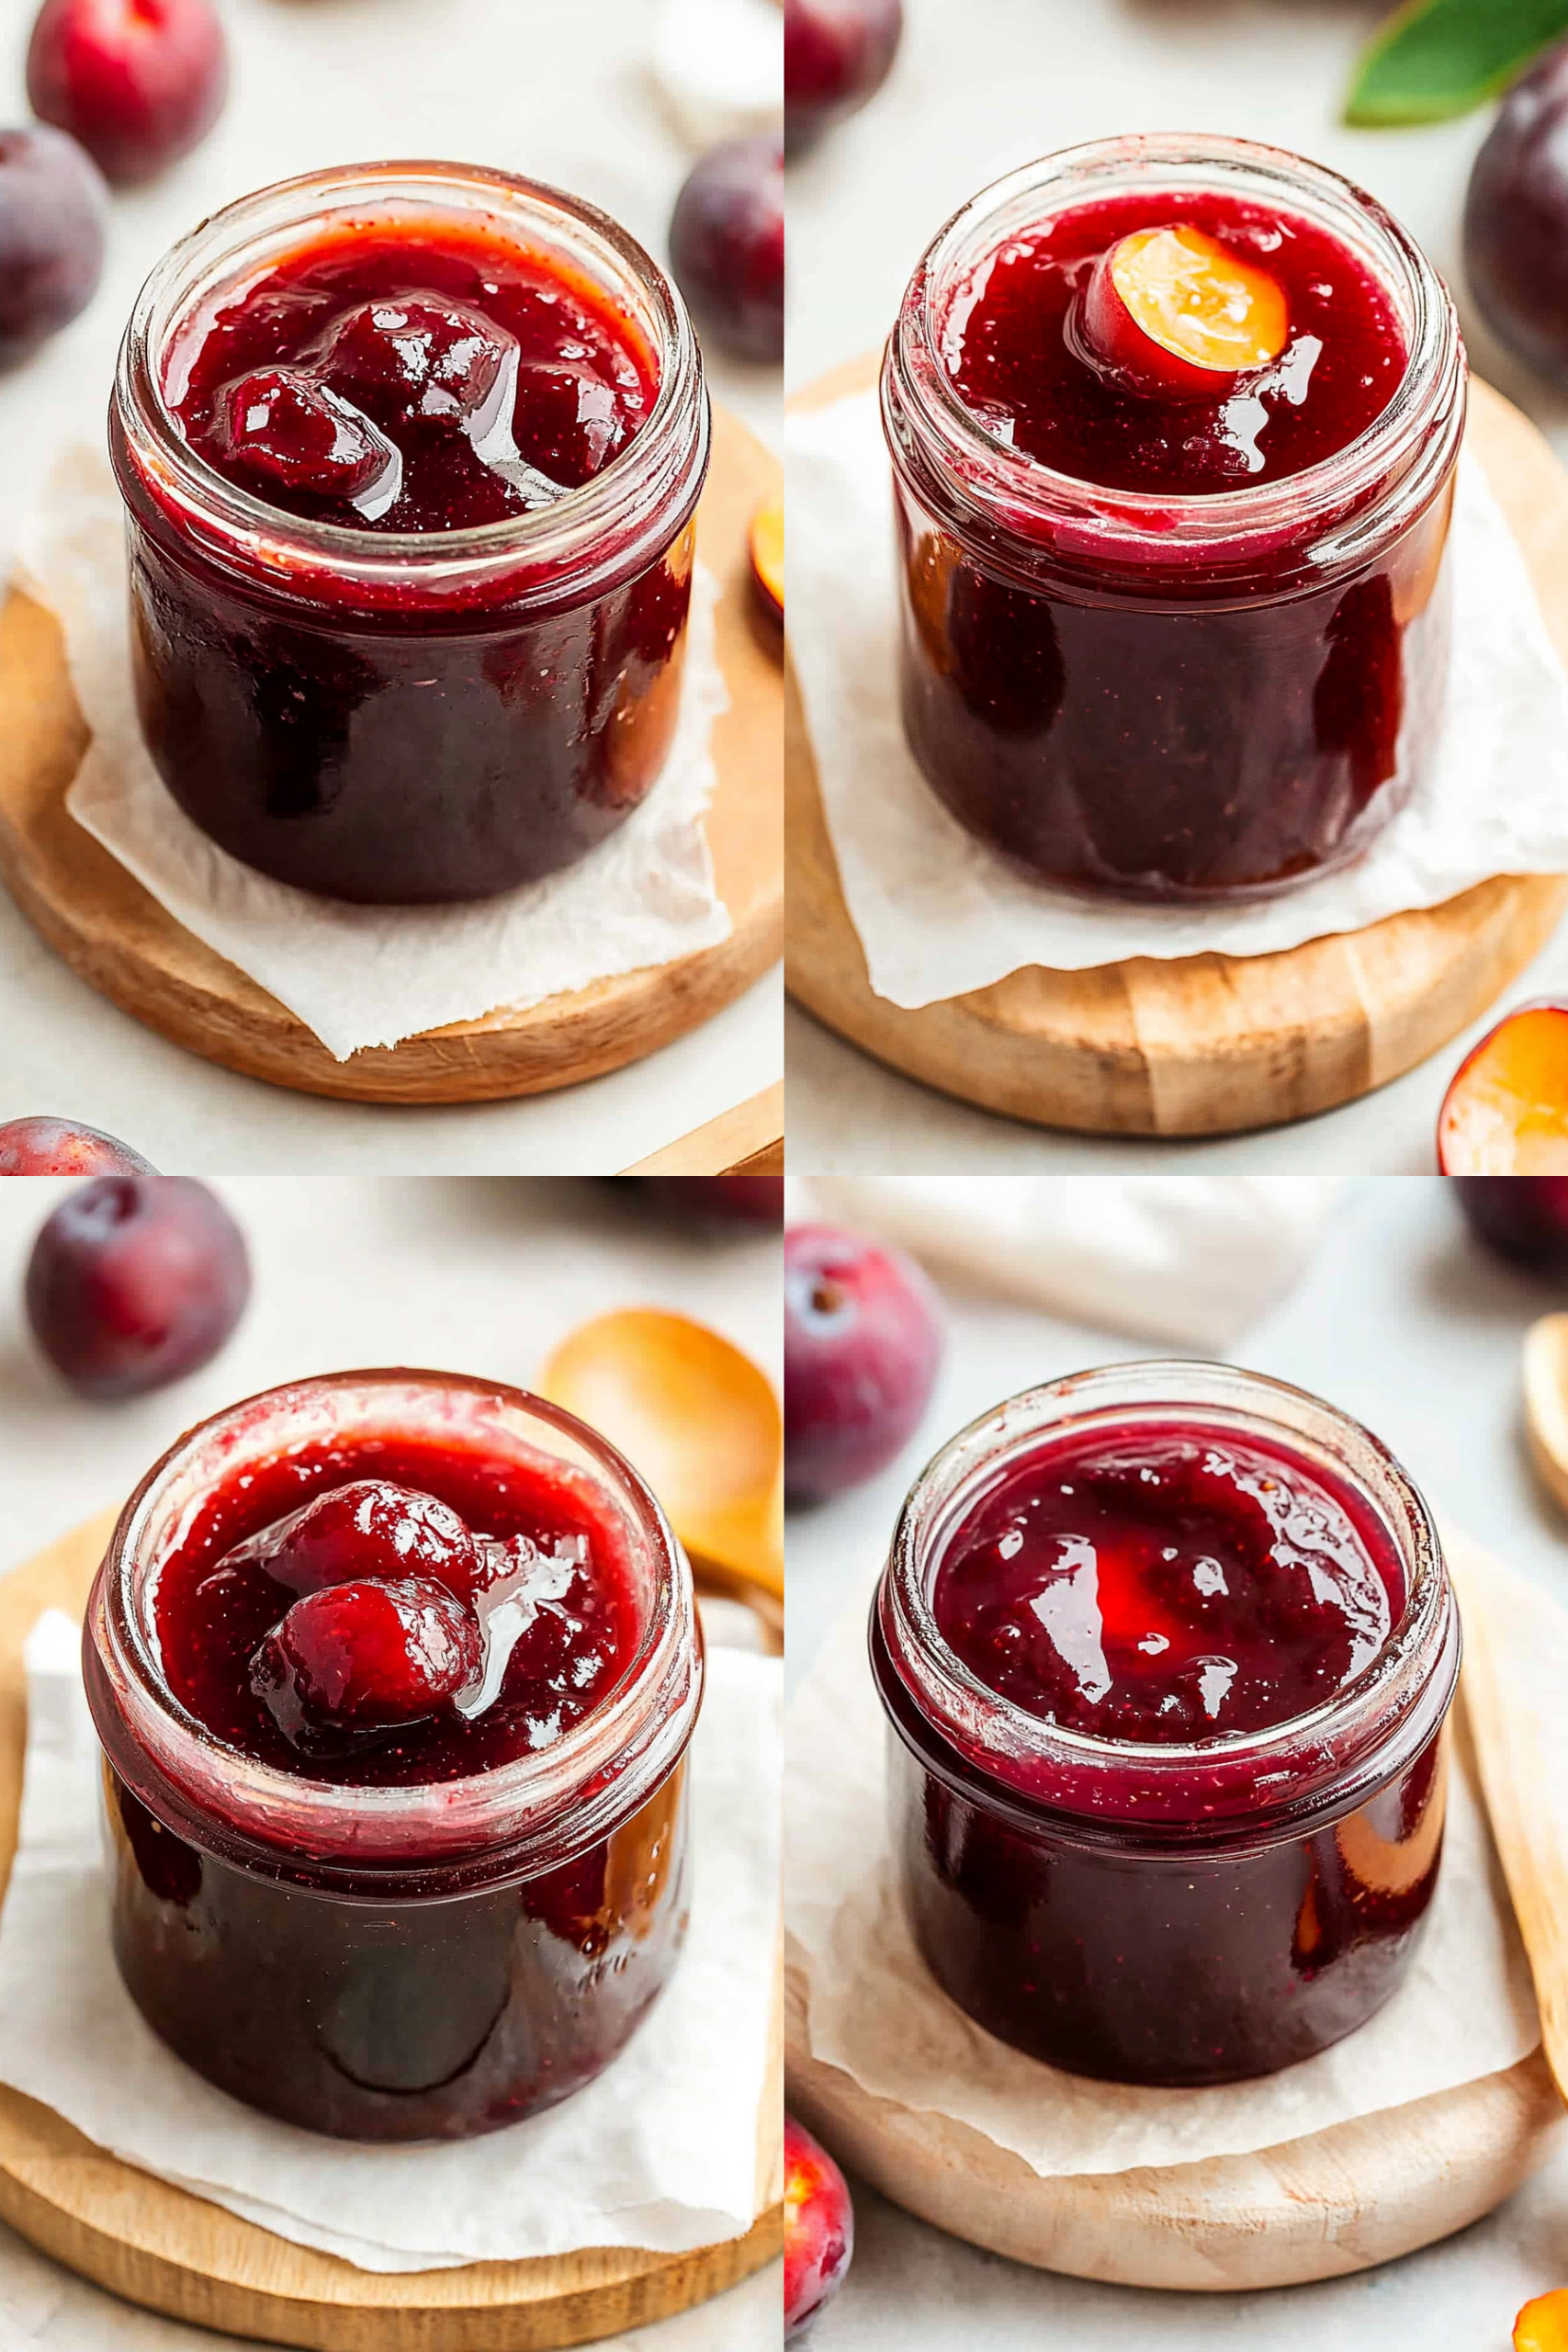
Place the pot over medium-high heat and bring the mixture to a boil, stirring occasionally. Once it reaches a rolling boil, reduce the heat to medium-low and let it simmer. You’ll want to stir more frequently now to prevent sticking and burning. Skim off any foam that rises to the surface – it’s mostly just air and impurities and skimming makes for a clearer, prettier jam. Keep simmering, stirring often, for about 30-45 minutes. The plums will break down, and the mixture will start to thicken.
Step 4: Test for Set
This is the crucial step for jam! To test if your easy plum jam is ready, place a small plate in the freezer before you start cooking. Once you think the jam is getting thick, spoon a tiny bit onto the cold plate. Let it sit for about 30 seconds, then gently push it with your finger. If the surface wrinkles slightly, it’s ready! If it’s still runny, continue to simmer for another 5-10 minutes and test again. Don’t overcook it, or you’ll end up with a very stiff jam.
Step 5: Jar the Jam
Once your jam has reached its perfect set, carefully ladle it into clean, sterilized jars. Leave about ¼ inch of headspace at the top. Wipe the rims of the jars with a damp cloth to ensure a good seal. Place the lids on and screw the bands on until fingertip tight. For immediate enjoyment, you can let them cool and then refrigerate. If you plan to store them for longer, process them in a boiling water bath according to standard canning guidelines (typically 10 minutes for half-pint jars).
Step 6: Cool and Enjoy
Let the jars of easy plum jam cool completely on the counter. You’ll often hear a satisfying “pop” as the lids seal. Once cooled, check that the lids are firm. Store any unsealed jars in the refrigerator. This jam is truly best after it’s had a day or two to sit, allowing the flavors to meld and the texture to fully set. But honestly, I can never wait that long!
What to Serve It With
This easy plum jam is so versatile, it deserves to be showcased in all sorts of delicious ways! For breakfast, it’s simply divine spread generously on warm, buttery toast or a freshly baked scone. A dollop on your morning oatmeal or yogurt adds a burst of fruity sweetness that’s far more exciting than plain fruit. If you’re planning a leisurely brunch spread, think about using it as a filling for delicate crêpes or as a sweet counterpoint to savory elements like sharp cheddar cheese on a platter. As a dessert, it’s a winner. It makes an incredible filling for simple tarts, a perfect swirl into vanilla ice cream, or even a sweet sauce for a rich pound cake. My kids absolutely love it spooned over simple vanilla bean ice cream – it’s their favorite treat on a warm evening. And for those cozy snack times, don’t underestimate its power. It’s wonderful with a mug of tea and a slice of good bread, or even as a topping for quick homemade biscuits. My absolute favorite way, though, is alongside a sharp, crumbly cheese like aged cheddar or a creamy brie. The sweet-tartness of the plum jam cuts through the richness beautifully. It’s a tradition at our family gatherings, and everyone always asks for more!
Top Tips for Perfecting Your Easy Plum Jam
Over the years, I’ve picked up a few tricks that make this easy plum jam even more foolproof. When you’re selecting your plums, don’t shy away from ones that are a little soft or have a few bruises; they are often sweeter and more flavorful, and those imperfections won’t matter once they’re cooked down. If you’re using a mix of plum varieties, this actually adds a wonderful depth of flavor, so embrace it! For instance, I often use a combination of tart damsons and sweet red plums for a really balanced taste. When you’re cooking the jam, a heavy-bottomed pot is your best friend. It distributes heat more evenly, which significantly reduces the risk of scorching. I learned this the hard way after burning a batch in a thin-bottomed pan! Stirring is key, especially as it thickens. Don’t walk away for too long! The freezer plate test for set is crucial; I always have one chilling in the back of the freezer, ready to go. If you’re unsure if it’s set, it’s always better to simmer for a few more minutes than to end up with runny jam. You can always re-boil it later, but it’s a bit of extra work. For a smoother jam, you can always pulse the cooked plums a few times with an immersion blender *before* testing for set, but I personally love the slightly chunky texture this easy recipe provides. And for those who are a bit more adventurous, a tiny pinch of cinnamon or a star anise pod simmered with the plums can add a lovely subtle warmth, though I often keep it pure to let the plum flavor shine. Remember to sterilize your jars properly if you plan on storing the jam for any length of time; it’s a simple step that ensures your delicious jam lasts!
Storing and Reheating Tips
Once your beautiful easy plum jam is made and cooled, proper storage is key to keeping it delicious for as long as possible. If you’ve processed your jars in a water bath and they’ve sealed properly, you can store them in a cool, dark pantry for up to a year. Always check the seal before opening; if the lid flexes when pressed, it’s not sealed and should be refrigerated immediately. Once opened, or if you haven’t processed your jam, it needs to be kept in the refrigerator. It should stay fresh and delicious for about 3-4 weeks when stored properly in a sealed container. Make sure you’re using a clean spoon every time you dip into the jar to avoid introducing any bacteria that could spoil it. If you find yourself with an abundance of jam and know you won’t get through it all within that timeframe, don’t hesitate to freeze it! You can freeze it directly in its jars (make sure they are freezer-safe and leave some headspace) or in smaller, airtight containers. Frozen plum jam will keep well for up to 6 months, and the flavor remains excellent. When you’re ready to use frozen jam, the best way to thaw it is in the refrigerator overnight. Reheating isn’t usually necessary for jam unless you want to thin it out for a sauce, in which case, a gentle warming in a small saucepan over low heat will do the trick. For storage, I always recommend labeling your jars with the date you made the jam – it’s an easy way to keep track!
Frequently Asked Questions
Final Thoughts
So there you have it – my absolutely favorite easy plum jam! It’s proof that you don’t need to be a master preserver to create something truly special and delicious. This jam is more than just a condiment; it’s a little jar of summer that you can enjoy all year round. It’s a reminder of simple pleasures, the joy of making things from scratch, and the incredible flavor that comes from ripe, seasonal fruit. I really hope you give this recipe a try. It’s so forgiving and so rewarding. Once you taste how wonderfully fresh and pure it is, you’ll wonder why you ever bought jam from the store! If you enjoy this recipe, you might also love my easy raspberry cordial or my quick strawberry jam. They’re all made with that same ‘easy’ philosophy. I can’t wait to hear how your plum jam turns out! Please leave a comment below and let me know your favorite ways to enjoy it, or any fun variations you come up with. Happy jamming!
Easy Plum Jam
Ingredients
Main Ingredients
- 1 kg Plums Pitted and halved
- 0.75 kg Granulated Sugar
- 1 piece Lemon Juiced
Instructions
Preparation Steps
- Combine the halved plums, granulated sugar, and lemon juice in a large, heavy-bottomed pot. Stir gently to coat the plums.
- Place the pot over medium heat and stir until the sugar dissolves. Bring the mixture to a rolling boil, stirring frequently to prevent sticking.
- Cook the jam for about 45-60 minutes, stirring occasionally. Skim off any foam that rises to the surface.
- The jam is ready when it has thickened and a small amount poured onto a cold plate sets. You can test this by putting a small spoonful of jam onto a chilled plate; let it sit for a minute, then push it with your finger. If the surface wrinkles, it's ready.
- Carefully ladle the hot jam into sterilized jars, leaving about 0.5 cm of headspace. Wipe the rims clean and seal with lids.
- Allow the jars to cool completely. The jam will thicken further as it cools. Store in a cool, dark place.
Notes
Featured Comments
“Impressed! Clear steps and so flavorful results. Perfect for busy nights.”
“New favorite here — super easy. crowd-pleaser was spot on.”
“Super easy and turned out amazing! My family asked for seconds. Saving this one.”
“This sweet treat was absolutely loved — the buttery really stands out. Thanks!”
“Made it tonight and wow — spot on! Will definitely make easy plum jam again.”
“Packed with flavor and so simple. Exactly what I wanted from easy plum jam.”