

There’s something about the aroma of a freshly baked coffee cake that instantly makes my house feel warm and welcoming. I remember growing up, my grandma’s kitchen was always filled with the sweet scent of cinnamon, buttery batter, and maybe a hint of coffee from her mug. But what really makes this raspberry coffee cake special isn’t just how it tastes — though, trust me, that’s incredible — it’s also how effortless it is to throw together on a lazy weekend or a busy weekday morning. I love that I can make this with berries I froze last summer or fresh from my garden, whatever’s easier. Honestly, I’ve tested this with all sorts of modifications — almond milk instead of dairy, gluten-free flour — and it never fails to turn out moist, flavorful, and utterly addictive. It’s my go-to when I want a treat that feels like a big hug. My kids actually ask for this all the time, and it disappears in minutes at my house. Just wait, you’ll see — once you try it, this raspberry coffee cake will become a staple in your kitchen too.
What is a raspberry coffee cake?
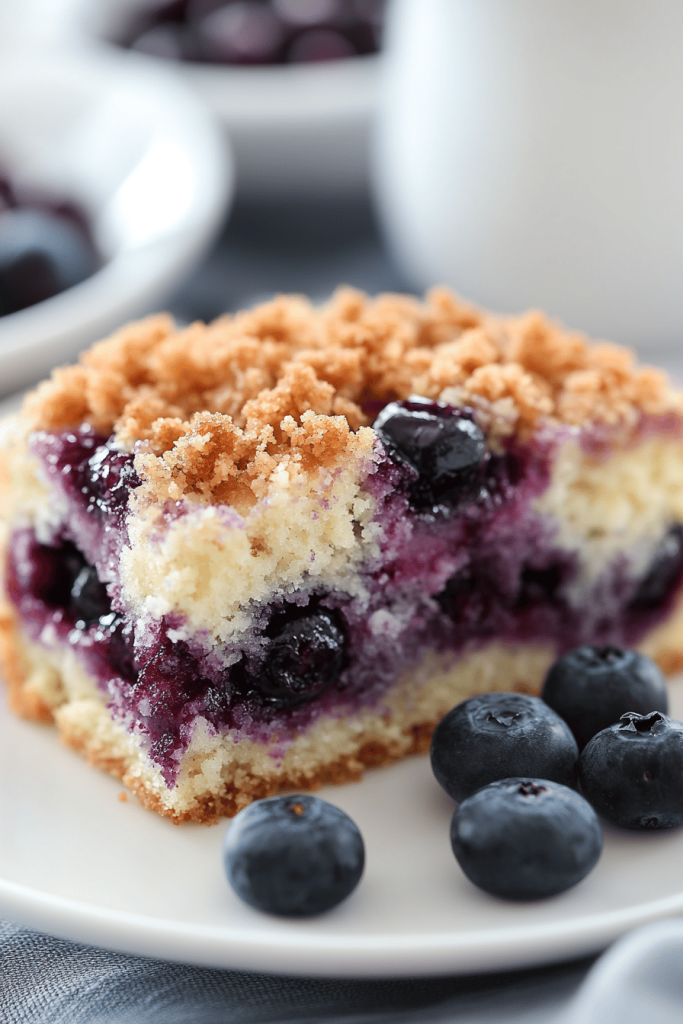
Think of this raspberry coffee cake as a mash-up of your favorite breakfast pastry and a cozy dessert. It’s essentially a tender, buttery cake layered with fresh or frozen raspberries, which burst with juiciness with every bite. The term “coffee cake” might make you think of a crumbly topping, and you’d be right — but in my version, I lean toward a tender, slightly tangy fruit filling complemented by a cinnamon-sugar swirl that’s soft and slightly crispy on top. The name comes from how it’s traditionally served alongside a cup of coffee or tea — perfect for lazy mornings, brunches, or even a quick snack. Think of it as a versatile crowd-pleaser that’s elegant enough to serve at a brunch but simple enough to whip up on a weekday. The best part? It’s all about balance — sweet, tart, buttery, with a hint of cinnamon that makes every bite cozy and addictive. If you’ve ever loved a blueberry muffin or a classic cinnamon roll, this will feel like a natural next step — comfort food that feels fancy.
How do I make a Raspberry Coffee Cake?
Quick Overview
This raspberry coffee cake is a straightforward bake, perfect for when you want something sweet but don’t want to spend hours in the kitchen. You start by mixing a simple, buttery batter, then layer fresh or frozen raspberries on top. Swirl a cinnamon-sugar mixture through the batter for that beautiful marbled effect and crunch. Bake until golden, cool just slightly, then drizzle with a simple glaze. The result is a moist, flavorful cake with pockets of berry goodness that everyone will love. Best of all, it comes together quickly and is endlessly customizable. I swear, once you master this basic method, you’ll make it again and again — maybe with blueberries next time or a sprinkle of chopped nuts on top for added crunch. It’s versatile, forgiving, and downright delicious.
Ingredients
For the Main Batter:
– 2 cups all-purpose flour (I love using unbleached or organic if I can find it)
– 1 cup granulated sugar
– 1/2 cup unsalted butter, softened (trust me on this, softened butter mixes much better)
– 1/2 cup sour cream or Greek yogurt for extra moistness
– 2 large eggs
– 1 teaspoon vanilla extract
– 1 teaspoon baking powder
– 1/2 teaspoon baking soda
– Pinch of salt
For the Filling:
– 1.5 cups fresh or frozen raspberries (do not thaw if frozen)
– 2 tablespoons sugar (optional, for sweetness enhancement)
– 1 tablespoon all-purpose flour (to coat berries and prevent sinking)
For the Glaze:
– 1 cup powdered sugar
– 2-3 tablespoons milk (or lemon juice for a citrus twist)
– Optional: a few drops of vanilla or lemon zest for flavor
Step-by-Step Instructions
Step 1: Preheat & Prep Pan
Set your oven to 350°F (175°C). Grease a 9-inch round or square baking pan liberally with butter or spray with non-stick spray. Line with parchment paper if you like for easier removal — I always do this because it makes clean-up a breeze. Remember, all ovens vary, so start checking for doneness around the 30-minute mark.
Step 2: Mix Dry Ingredients
In a large bowl, whisk together the flour, baking powder, baking soda, salt, and sugar. Doing this step first ensures even distribution of the leavening agents and sugar, preventing lumps. It feels satisfying to see everything combine into a uniform, pale mixture.
Step 3: Mix Wet Ingredients
In another bowl, cream the softened butter with the sugar until fluffy — I use a fork or a whisk, but a mixer works wonders here. Then add eggs one at a time, beating well after each. Mix in vanilla and sour cream until smooth. This mixture should look creamy and slightly airy, almost like a thick pudding.
Step 4: Combine
Pour the wet mixture into the dry ingredients. Gently fold everything together with a spatula or wooden spoon, taking care not to overmix — a few lumps are okay! Overmixing can make the cake dense. The batter should be thick but spreadable. If it feels stiff, you can add a splash of milk.
Step 5: Prepare Filling
In a small bowl, toss the berries with a tablespoon of flour and sugar if using. This coating helps prevent them from sinking and keeps them evenly distributed for that lovely burst of berry in each bite.
Step 6: Layer & Swirl
Spread half the batter into your prepared pan. Scatter the coated berries evenly on top. Dollop the remaining batter over the berries, then use a toothpick or a skewer to gently swirl the berries into the batter for a marbled effect — don’t overdo it, just a few gentle twists are perfect.
Step 7: Bake
Pop it into your preheated oven and bake for about 35-40 minutes, or until the top is golden and a toothpick inserted in the center comes out clean. Keep an eye on it — if the top browns too quickly, tent it with foil halfway through baking. Every oven is different, so start checking around the 30-minute mark.
Step 8: Cool & Glaze
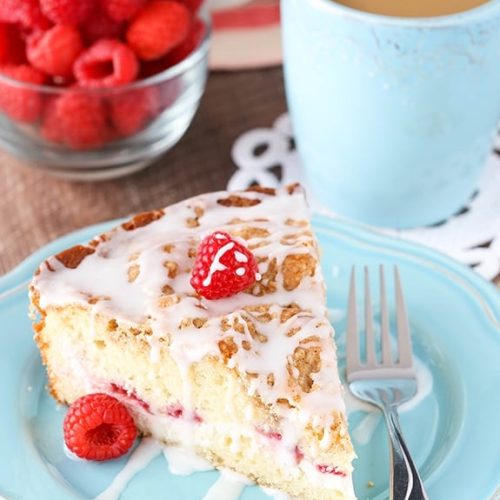
Allow the cake to cool in the pan for about 10-15 minutes. Then transfer to a wire rack and let it cool completely before drizzling with your simple powdered sugar glaze. Pour and spread, then let it set for a few minutes. The glaze makes it feel extra special, like a bakery treat.
Step 9: Slice & Serve
Using a sharp knife, cut slices only after the cake has cooled well. Serve slightly warm or at room temperature, maybe with a dollop of whipped cream or a side of fresh berries. Trust me, it’s best enjoyed fresh but leftovers keep surprisingly well for a day or two. Just keep in an airtight container — if you can resist eating it all first!
What to Serve It With
Honestly, this cake is such a crowd-pleaser that it doesn’t need much. For breakfast, pair it with a strong cup of coffee or a glass of milk — the richness of the cake balances perfectly with a good brew. If you’re hosting brunch, serve slices alongside a fruit salad or a cheesy quiche for a full meal. It also makes an elegant dessert; warm slices with a scoop of vanilla ice cream or a drizzle of extra berry sauce turns this into a showstopper. When I make it on lazy Sunday mornings, I love simply dusting it with powdered sugar or adding a splash of lemon glaze for a fresh twist. My family always asks for seconds — I wouldn’t blame you if you do too.
Top Tips for Perfecting Your Raspberry Coffee Cake
Over the years, I’ve learned a few tricks that make this cake turn out just right every time. First, use room temperature butter and eggs — it blends more smoothly and gives you a lighter batter. When I make the swirl, I try not to overmix; swirling too much can blur the marbling and make the berries sink — a gentle touch is best. Speaking of berries, fresh or frozen works equally well, but if you’re using frozen, don’t thaw them first — moisture can make the batter watery and cause uneven baking. I tested this with blueberries, blackberries, and even a mix of all three, and they all came out delicious. For a richer flavor, I sometimes substitute half the butter with cream cheese or add a dash of lemon zest to the batter for a zing. Baking time can vary depending on your oven, so keep a close eye on it after 30 minutes. When it’s done, a toothpick should come out clean or with just a few moist crumbs attached. And for the glaze, I’ve played around with adding a splash of vanilla or almond extract — it adds a subtle depth that makes the cake feel even more special.
Storing and Reheating Tips
This cake keeps well for a couple of days at room temperature if covered loosely with foil or a clean cloth — perfect for easy mornings. For longer storage, wrap it tightly in plastic wrap or keep it in an airtight container in the fridge for up to 3 days. I love that the flavors actually deepen overnight — berries seep into the cake and make each bite even better. To reheat, just microwave a slice for about 15-20 seconds or warm it gently in your oven at 325°F until warm. If you like the glaze to stay shiny, add it just before serving — the moisture can soften the glaze if stored together. Freezing is also a great option: wrap slices tightly in plastic, then foil, and keep for up to a month. Thaw at room temperature or warm gently in the microwave. I do recommend adding the glaze after thawing for that fresh, bakery-like finish. Honestly, leftovers are practically a whole new experience — it’s almost like eating cake twice!
Frequently Asked Questions
Final Thoughts
This raspberry coffee cake isn’t just another recipe on my blog — it’s a little piece of my weekend mornings, shared moments over coffee, and happy family gatherings. Its perfectly moist crumb, bursting berries, and warm cinnamon swirl make every bite feel like a cozy hug. Whether you’re baking it for yourself or sharing with loved ones, I promise it’ll bring a smile to anyone’s face. Once you get the hang of the simple steps, you’ll see how versatile and forgiving it is — I’ve made it with frozen berries, reduced sugar, and even gluten-free flour, and every version still turned out delicious. Keep it in your rotation, experiment with toppings or fruits, and don’t forget to enjoy the process as much as the finished slice. I can’t wait to hear how yours turns out! Happy baking!
raspberry coffee cake
Ingredients
Main Ingredients
- 0.25 cup all-purpose flour
- 0.25 cup brown sugar
- 0.125 teaspoon cinnamon
- 2 tablespoons butter (melted)
- 8 ounces cream cheese
- 0.25 cup sugar
- 1 egg white egg white
- 0.5 teaspoon vanilla extract
- 1 cup raspberries (cut in half)
- 0.75 cup sugar
- 9 tablespoons unsalted butter (room temperature)
- 0.0625 cup sour cream
- 0.0625 cup milk
- 1 egg egg
- 1 egg yolk egg yolk
- 1.5 teaspoons vanilla extract
- 1.5 cups all-purpose flour
- 2 teaspoons baking powder
- 0.25 teaspoon salt
- 0.75 cup powdered sugar
- 1 to 2 tablespoons milk
- 0.5 teaspoon vanilla extract
Instructions
Preparation Steps
- Preheat oven to 350°F. Prepare a 9-inch cake pan with parchment paper and grease it.
- Make the streusel by combining flour, brown sugar, cinnamon, and melted butter in a bowl. Mix until crumbly and set aside.
- In a mixing bowl, beat cream cheese and sugar until smooth. Add egg white and vanilla extract, mix well.
- In another bowl, cream together sugar and butter until fluffy. Mix in sour cream, milk, egg, egg yolk, and vanilla.
- In a separate bowl, whisk together flour, baking powder, and salt. Gradually add to wet mixture and mix until just combined.
- Pour half of the batter into the prepared pan. Spread cream cheese mixture evenly over it. Arrange raspberries over the cream cheese.
- Top with remaining batter and sprinkle streusel over the top.
- Bake for 40-45 minutes until golden. Allow to cool before removing from pan.
- Optional: Mix powdered sugar with milk and vanilla to make glaze. Drizzle over cooled cake.
Notes
Featured Comments
“Impressed! Clear steps and creamy results. Perfect for busy nights.”
“New favorite here — so flavorful. crowd-pleaser was spot on.”
“Super easy and turned out amazing! My family asked for seconds. Saving this one.”
“This sweet treat was absolutely loved — the fresh really stands out. Thanks!”
“Made it tonight and wow — turned out amazing! Will definitely make Easy Raspberry Cream Cheese Coffee Cake again.”
“Packed with flavor and so simple. Exactly what I wanted from Easy Raspberry Cream Cheese Coffee Cake.”


