

There’s something about that sweet, tropical coconut and caramel combo that just feels like a warm hug—especially when it’s baked into something as luscious as a cheesecake. I remember the first time I made this Samoa Cheesecake, it was a busy Saturday, and I wanted a treat that felt indulgent but didn’t take hours. As soon as I bit into that creamy, caramel-topped slice, I was transported back to lazy afternoons watching my kids devour a box of Samoa cookies—except now, I had a new, ultra-decadent way to enjoy those flavors. Honestly, it’s one of those desserts I keep coming back to, not just because it tastes like a piece of paradise, but because it’s surprisingly simple to make at home. Trust me, this one’s a lifesaver on busy nights or when you’re craving something sweet but want to impress without stress. It’s rich, it’s cozy, and it’s downright addictive. Plus, the smell alone when it’s baking makes the whole house smell like a tropical vacation—what’s not to love?
What is a Samoa cheesecake?
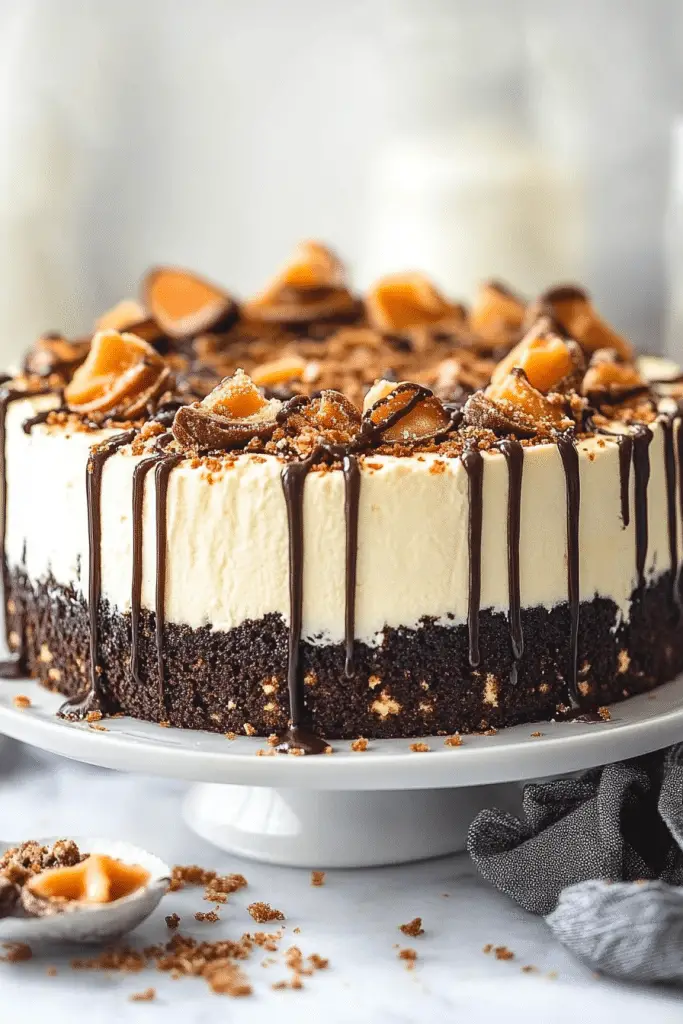
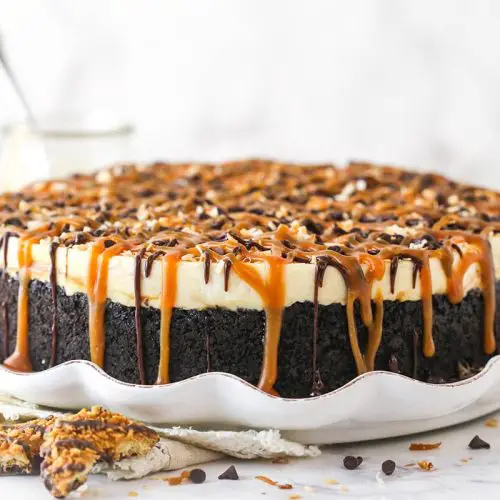
Think of Samoa Cheesecake as a creamy, dreamy tribute to those beloved Girl Scout cookies—the ones with coconut, caramel, and chocolate. It’s essentially a cheesecake topped with swirls of caramel and toasted coconut, all nestled on a buttery crust that melts in your mouth. The name “Samoa” comes from the popular cookie flavor, and if you’re a fan of that sweet, chewy, slightly crunchy combo, this cheesecake will become your new go-to. What I love most about it is how it combines textures: the smooth, velvety cheesecake base contrasted with the gooey caramel and crispy toasted coconut topping. It’s like a little slice of tropical paradise, all in one forkful. This dessert is perfect for special occasions, family gatherings, or even just a lazy weekend treat—you don’t have to be a professional baker to pull it off. It’s comforting, indulgent, and best of all, deeply satisfying.
How do I make Samoa cheesecake?
Quick Overview
This Samoa Cheesecake is a layered masterpiece—starting with a buttery graham cracker crust, topped with a smooth, tangy cream cheese filling. Swirl in some rich caramel before baking, and finish with a toasted coconut topping. The trick is to keep things simple: mix, layer, bake, and garnish. No complicated techniques, just a love for flavor and texture. Honestly, it takes about 15 minutes to prepare the crust and filling, and then it’s just a matter of baking and topping. The most time-consuming part is waiting for it to cool and set, but I promise, it’s so worth it. Plus, once you’ve made it a couple of times, you’ll feel like a pro—this recipe is surprisingly forgiving, and the result is restaurant-worthy.
Ingredients
For the Main Batter:
– 2 cups graham cracker crumbs (I love the slightly thick ones for crunch)
– ½ cup melted unsalted butter (use real butter, don’t skip this!){br}
– 3 packs (8 oz each) cream cheese, softened
– 1 cup granulated sugar
– 3 large eggs
– 1 teaspoon vanilla extract
– 1 cup sour cream (makes it extra creamy)
For the Filling:
– ½ cup caramel sauce (I buy good quality or make my own—trust me, homemade is worth it)
– 1 cup toasted unsweetened coconut flakes (toast until golden, watch closely!)
For the Glaze & Topping:
– ¼ cup extra caramel sauce
– Additional toasted coconut for garnish
– Optional: mini chocolate chips or a drizzle of melted chocolate for decoration
Step-by-Step Instructions
Step 1: Preheat & Prep Pan
Preheat your oven to 325°F. Line a 9-inch springform pan with parchment paper and lightly butter the sides. This helps with easy removal later. Trust me, procrastinating on this step always leads to sticking and tears—you want smooth sailing from the start.
Step 2: Mix Dry Ingredients
In a bowl, combine the graham cracker crumbs with the melted butter until the mixture looks like damp sand. Press this evenly into the bottom of your prepared pan to form a solid crust. Use the bottom of a glass or measuring cup to really pack it down. This layer is your foundation, so don’t skimp on pressing—it keeps everything stable and crunchy.
Step 3: Mix Wet Ingredients
In a stand mixer or with a hand mixer, beat the softened cream cheese until smooth and fluffy—about 2-3 minutes. Add sugar and vanilla, then beat again. Mix in eggs one at a time, making sure each is fully incorporated before adding the next. Then, fold in sour cream gently. Your batter should be silky, with no lumps. I’ve tested this with almond milk instead of sour cream—it’s still delicious, just a bit lighter.
Step 4: Combine
Pour the cream cheese batter over the crust. Dollop the caramel sauce in several spots on top, then use a toothpick or a skewer to gently swirl it into the batter. Be careful not to overmix; you want beautiful marbled swirls, not a marbled mess.
Step 5: Prepare Filling
Spread toasted coconut evenly over the batter. You can do this before baking or add more on top after baking, depending on your preference. I like to toast the coconut first—it brings out that warm, nutty flavor that pairs perfectly with the caramel.
Step 6: Layer & Swirl
For an extra pretty effect, gently swirl the caramel and coconut into the batter using a knife, creating a marbled look. This step adds visual interest and distributes flavors throughout.
Step 7: Bake
Bake in the center of the oven for about 50-60 minutes. The edges should look set, but the very center might jiggle slightly—this is okay! It will firm up as it cools. Keep an eye on the crust; if it starts to brown too quickly, tent it with foil.
Step 8: Cool & Glaze
Let the cheesecake cool in the pan on a wire rack for at least an hour. Then, refrigerate for 4 hours (or overnight). When ready, gently run a knife around the edge to loosen, then release the springform ring. Drizzle the extra caramel on top and sprinkle with toasted coconut. I like to serve it chilled, but a little softness at room temperature is lovely too.
Step 9: Slice & Serve
Use a sharp, warm knife to cut clean slices—dipping it in hot water and wiping clean between cuts makes all the difference. Serve with a dollop of whipped cream or a sprinkle of extra toasted coconut. Honestly, it’s a showstopper on any dessert table, and the flavors get even better after a day or two in the fridge—if it lasts that long!
What to Serve It With
This Samoa Cheesecake is a total star on its own, but here are a few ideas to make your presentation even more special:
For Breakfast: Pair a slice with a strong black coffee or a tropical pineapple smoothie. Believe me, it’s a decadent way to start the day—if you’re into sweet mornings.
For Brunch: Serve alongside fresh fruit like mango or pineapple, with a chilled glass of Prosecco or iced tea. The contrast of bright flavors and bubbly makes everything feel festive.
As Dessert: Top with a drizzle of melted chocolate or a dusting of cocoa powder, along with a scoop of vanilla ice cream or some fresh berries. My kids always ask for seconds—trust me, this one disappears in minutes at my house.
For Cozy Snacks: Warm a slice in the microwave and enjoy with a mug of hot cocoa or a splash of bourbon for the grown-ups—a perfect treat for a chilly evening.
Whatever way you decide to serve it, I guarantee this cheesecake will be the star of the show—and it’s one I keep making because everyone asks for it. It’s comfort food with a fancy twist, and once you get the hang of it, it’s surprisingly easy to whip up whenever that coconut-caramel craving hits.
Top Tips for Perfecting Your Samoa Cheesecake
Over the years I’ve made this, I’ve picked up a few tricks to make sure it’s always perfect:
Zucchini Prep: If you decide to incorporate zucchini (yes, I’ve experimented!), make sure to squeeze out all the excess moisture—otherwise, your batter might be too wet. Grate with a fine grater, then wrap in a clean dish towel and squeeze until all the water’s out.
Mixing Advice: Don’t overmix once you add the eggs; that can lead to a dense cheesecake. Mix just until combined for a light, airy texture. Also, room temperature ingredients help everything blend smoothly—trust me on this.
Swirl Customization: When swirling caramel or any fruit sauces, use a toothpick or a skewer in a gentle figure-eight pattern. This creates a beautiful marbled look without blending everything into a muddy mess.
Ingredient Swaps: Want to make it dairy-free? Use coconut cream instead of sour cream and coconut oil in the crust. You can also swap out caramel sauce for a fruit compote—just adjust the sweetness accordingly. Tested substitutions are my jam, and I love tinkering to suit different diets!
Baking Tips: If your oven runs hot, lower the temperature slightly and keep an eye on the crust—overbrowning is the enemy of a perfect cheesecake. My trick is to rotate the pan halfway through baking for even heat distribution.
Glaze Variations: For a more intense caramel flavor, simmer the sauce with a pinch of sea salt before drizzling. Or dust the top with cocoa powder for a fancy look. The possibilities are endless—and delicious.
Learning what works best in your oven and your kitchen tools makes all the difference. I’ve learned to check the cheesecake by gentle jiggle—if the center moves like a jello wobble, it’s just right. Overbaking makes it dry, so always aim for that soft, slightly jiggly middle.
Storing and Reheating Tips
This cheesecake keeps beautifully, and the flavors actually develop after a day or two in the fridge. Here’s how I store and enjoy leftovers:
Room Temperature: If it’s a hot day, you can leave slices out for about 2 hours wrapped loosely with foil or plastic wrap—just don’t leave it out longer, especially with the caramel topping, which gets melty.
Refrigerator Storage: Wrap the whole cheesecake or individual slices tightly with plastic wrap or store in an airtight container. It’ll stay fresh for up to 4 days. The chilled, firm texture is sometimes my favorite—especially with a little extra coconut on top.
Freezer Instructions: Wrap slices individually in plastic wrap, then pop them in a freezer-safe bag or container. They’ll last about a month. Thaw overnight in the fridge before serving. I’ve found that allowing it to come to room temperature for about 20 minutes before slicing makes a smoother, prettier cut.
Glaze Timing Advice: Add the caramel glaze just before serving for the best gooey effect. If freezing, wait to add the glaze until a few minutes before serving—the thawed cheesecake can sometimes make the glaze slightly less sticky.
Frequently Asked Questions
Final Thoughts
Honestly, this Samoa Cheesecake has become a favorite in my home—not just because it tastes divine, but because it’s so forgiving and fun to make. The layered flavors of coconut, caramel, and rich cheesecake create a harmonious balance that’s perfect for celebrating or just indulging on a lazy Sunday. I love how adaptable it is—swap out the coconut for chopped nuts or add a splash of rum to the caramel for extra flair. Every time I make this, I feel like I’ve whipped up a little piece of comfort and sunshine, no matter the weather outside. If you give this a try, I’d love to hear how it turns out—trust me, your family and friends will be begging for it again and again. Happy baking, and don’t forget to share a slice and a smile!
Samoa Cheesecake
Ingredients
Main Ingredients
- 24 oz cream cheese
- 0.5 cup powdered sugar
- 0.25 cup light brown sugar
- 1 tsp vanilla extract
- 0.5 tsp coconut extract
- 1 cup caramel sauce
- 1 cup vanilla wafer cookies broken in half
- 0.75 cup toasted sweetened coconut flakes
- 1.25 cups heavy whipping cream
- 0.5 cup powdered sugar (for whipped cream)
- 0.25 cup mini chocolate chips
- 3 oz semi-sweet chocolate chips
- 0.25 cup heavy whipping cream (for ganache)
Instructions
Preparation Steps
- Line a 9-inch springform pan with parchment paper and lightly grease the sides.
- Combine Oreos crumbs and melted butter. Press into the bottom of the prepared pan to form the crust. Chill in the fridge.
- In a large mixing bowl, beat the cream cheese, powdered sugar, brown sugar, vanilla, and coconut extract until smooth.
- Mix in half of the caramel sauce and fold in broken cookies and toasted coconut.
- In a separate bowl, whip the heavy cream and powdered sugar until stiff peaks form. Gently fold into the cream cheese mixture.
- Spread the filling over the crust and smooth the top. Drizzle with remaining caramel sauce and swirl gently.
- Refrigerate for at least 4 hours or until firm.
- For the ganache, heat the heavy cream until just boiling, pour over the chocolate chips, and stir until smooth. Drizzle over the cheesecake before serving.
Notes
Featured Comments
“Impressed! Clear steps and super easy results. Perfect for busy nights.”
“New favorite here — perfect for busy nights. crowd-pleaser was spot on.”
“Super easy and turned out amazing! My family asked for seconds. Saving this one.”
“This sweet treat was absolutely loved — the balanced really stands out. Thanks!”
“Made it tonight and wow — absolutely loved! Will definitely make Easy Samoa Cheesecake Without Baking again.”
“Packed with flavor and so simple. Exactly what I wanted from Easy Samoa Cheesecake Without Baking.”


