

If there’s one thing my kids look forward to every St. Patrick’s Day, it’s this shamrock cake. It’s basically like a giant, soft pot of gold—bright, cheerful, and just sweet enough to make everyone smile. I swear, this cake has been a family tradition for years now; I always do this when I want to bring a sprinkle of joy into our home. And honestly, it’s so easy to whip up that I often make it on a whim—especially when I’m craving something homemade but don’t want to fuss over a complicated recipe. The smell alone when it’s baking? Pure heaven. It’s friendly enough for beginners, but also impressive enough for a special celebration. Plus, it’s a great way to get the kids involved—they love swirling the batter and decorating the top. Honestly, this shamrock cake disappeared in minutes at my house, and I’ve made it countless times with different twists. Trust me on this one: if you haven’t tried it yet, you’re about to discover your new favorite family dessert!
What is a Shamrock Cake?
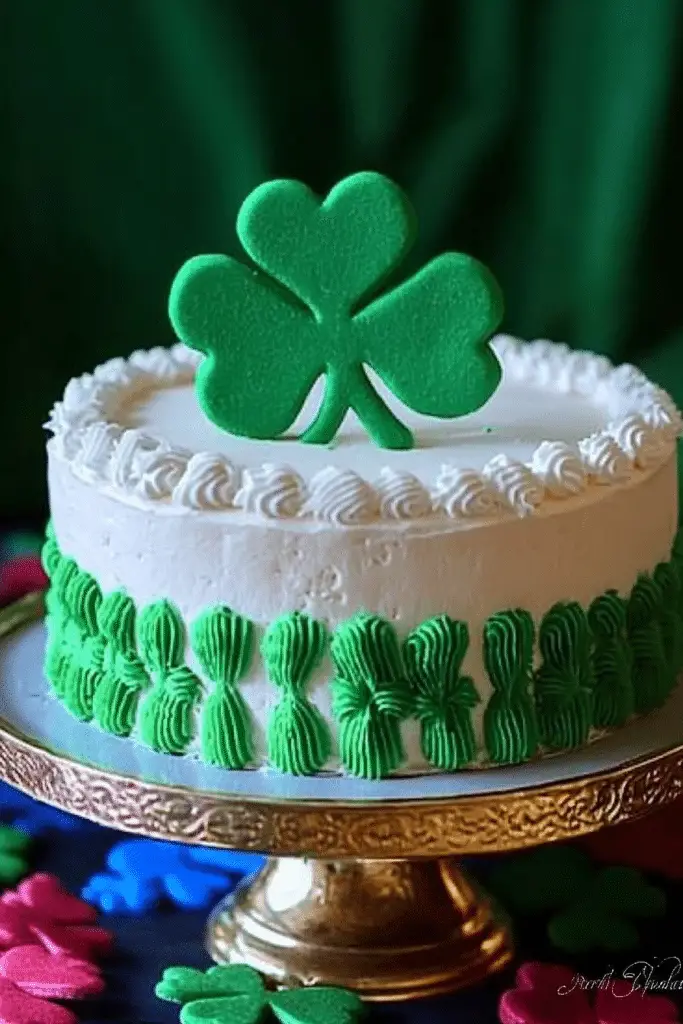
Think of a shamrock cake as a delightful green sponge cake, often flavored with hints of vanilla and a touch of lemon zest, to keep it light and fresh. The ‘shamrock’ part comes from its signature decoration—usually shaped or topped with cute little edible shamrocks, or sometimes just the vibrant green color that screams St. Patrick’s Day. It’s essentially an easy sheet cake or layer cake that’s vibrant enough to add a splash of festivity to any gathering. The name might make you think it’s complicated, but honestly, it’s just a fun way to celebrate Irish roots or any springtime occasion. I love that you can make this with simple pantry ingredients—flour, sugar, eggs, butter—and turn it into something that feels almost magical when you slice into it. Think of it as a sprinkle of happiness in cake form, perfect for kids’ parties, a casual brunch, or even just a cozy night in when you want a little cheer in your day.
How do I make a shamrock cake?
Quick Overview
This shamrock cake is a straightforward, one-bowl wonder that’s perfect for both busy weeknights and special celebrations. You start by preparing a simple batter—think fluffy, vanilla-scented goodness—and pouring it into a prepared baking pan. While it’s baking, you can make a quick glaze or frosting to add that shiny, sweet finish. Once baked and cooled, I like to swirl on a ganache or sprinkle with powdered sugar for that picture-perfect look. What’s nice? The batter comes together in minutes, and the whole process is fuss-free, making it ideal whether you’re a seasoned baker or just starting out. Plus, the vibrant green hue is naturally appealing and adds a playful touch that kids absolutely love. I’ve tested this with different oven temps and minor ingredient swaps, and it always turns out tender, flavorful, and fun to serve.
Ingredients
For the Main Batter:
– 2 cups all-purpose flour (I swear, always fresh—makes a huge difference!)
– 1 ½ cups granulated sugar
– 1 teaspoon baking powder
– ½ teaspoon baking soda
– ¼ teaspoon salt
– ½ cup unsalted butter, softened (trust me, softened butter is the secret to fluffy cake!)
– 3 large eggs
– 1 teaspoon vanilla extract
– 1 cup buttermilk or whole milk (I sometimes do almond milk—made it creamier, believe it or not!)
– A few drops of green food coloring (or you can use natural spinach puree if you’re feeling fancy)
For the Filling (Optional but fun):
– Cream cheese or lemon curd (for a surprise center, if you like a little zing!)
– Chopped nuts or chocolate chips (for texture and flavor!)
For the Glaze:
– 1 cup powdered sugar
– 2-3 tablespoons milk or lemon juice
– Green food coloring (for matching the cake’s color) or a splash of vanilla extract for flavor
Step-by-Step Instructions
Step 1: Preheat & Prep Pan
I always start by preheating my oven to 350°F (175°C). I grease my baking pan—either a round cake pan or a rectangle sheet pan—and line it with parchment paper. This makes taking the cake out super easy, especially if you’re short on time or baking with kids. Trust me, a little butter and flour or parchment paper works wonders for a perfect release.
Step 2: Mix Dry Ingredients
In a mixing bowl, whisk together the flour, baking powder, baking soda, and salt. This step is crucial because it helps distribute the leavening agents evenly, giving your cake that nice rise and airy crumb. I always do this first—it’s like laying a solid foundation for a house.
Step 3: Mix Wet Ingredients
In a separate large bowl, beat the softened butter and sugar until fluffy—about 2-3 minutes. Then, add in eggs one at a time, mixing well after each. Stir in vanilla extract and a few drops of green food coloring. I’ve learned that starting with a small amount and adding more until you get that vibrant hue is better than dumping a whole bottle at once—it’s easier to control. Now, add in the buttermilk and mix until smooth. The batter will look a little fluffy and vibrant, ready for the dry ingredients.
Step 4: Combine
Gradually add the dry ingredients into the wet mixture, gently folding with a spatula or wooden spoon. Don’t overmix—just until there’s no streak of flour. Overmixing can make the cake dense, and honestly, nobody wants that! The batter will be a lovely, bright green now—so pretty I almost don’t want to bake it, but it tastes better than it looks.
Step 5: Prepare Filling
If you’re using a filling like lemon curd or cream cheese, prepare it now. Keep it in the fridge until you’re ready to fill or swirl. If you’re just making a straightforward cake, you can skip this step or add extras in the batter itself.
Step 6: Layer & Swirl
Pour the batter into your prepared pan. If you want to add a filling, spread it in the middle then pour over more batter. For a fun swirl effect, gently drop spoonfuls of contrasting batter (like chocolate or lemon) on top and use a toothpick or skewer to swirl gently through. It’s like painting with flavors and makes each slice a little surprise.
Step 7: Bake
Bake for about 35-40 minutes, or until a toothpick inserted in the center comes out clean. Oven temperatures vary, so start checking at 33 minutes if you’re unsure. The top should be golden, and the edges slightly pulling away from the pan. I always do the toothpick test—it’s simple and foolproof.
Step 8: Cool & Glaze
Let the cake cool in the pan for at least 15 minutes, then transfer to a wire rack. Wait until it’s completely cool before glazing or decorating; otherwise, the glaze will melt away. Mix your glaze ingredients until smooth, adding more powdered sugar if it’s too runny or extra milk if it’s too thick. Pour or spread evenly across the top—watch out for drips down the sides!
Step 9: Slice & Serve
Once the glaze has set a little, slice with a serrated knife. I like to serve this with a dollop of whipped cream or a splash of fresh berries—adds a little tartness that balances the sweetness perfectly. A neat trick I learned? Chill the cake for an hour before slicing—it helps get those pretty clean cuts!
What to Serve It With
This shamrock cake is so versatile, I always have ideas ready. For breakfast, I love pairing a slice with a hot cup of coffee and fresh fruit—kind of like a festive coffee cake. For brunch, serve it as part of a colorful spread with mimosas and fresh juice; the greenery really pops against eggs and bacon. It’s gorgeous on the dessert table, topped with whipped cream and sprinkles, or just enjoyed plain with a hot cup of tea. And honestly, I’ve been known to keep a slice in the fridge for late-night cravings—because, let’s face it, who can resist a quick, sweet pick-me-up? We often do a family movie night and serve this alongside popcorn and homemade hot cocoa—next level cozy. Whatever the occasion, this cake brings smiles and a touch of magic. Plus, the kids feel like they’re part of some fun, green-themed adventure—win-win all around!
Top Tips for Perfecting Your Shamrock Cake
Here’s a scoop from my baking vault after making this countless times:
- Zucchini Prep: I’ve tested this with pureed zucchini, and it actually made the cake irresistibly moist! Just make sure to squeeze out excess moisture—trust me, wetter batter doesn’t bake as nicely.
- Mixing Advice: Overmixing is the enemy. Fold gently until just combined. The spoon-test: if it feels smooth and no dry flour shows, you’re good.
- Swirl Customization: Want a marbled effect? Drop dollops of contrasting batters—like chocolate or lemon—then swirl gently. Practice makes perfect — I learned to make swooping, even patterns over time.
- Ingredient Swaps: Coconut oil instead of butter works beautifully, but it changes the flavor note. I also try honey or maple syrup for a subtler sweetness, just reduce the liquid a bit.
- Baking Tips: Oven racks matter. Middle rack is safest, but if your cake browns unevenly, rotate halfway through. The toothpick test is your best friend here.
- Glaze Variations: For an elegant touch, add a bit of food-grade glitter or edible gold dust. It really elevates the presentation for special occasions. I’ve also done a cream cheese frosting when I want something richer or a simple dusting of powdered sugar for a more understated look.
Honestly, I’ve learned a lot from experimenting, and every mistake made me better at anticipating how my oven reacts or which ingredient swap makes the best flavor. Just have fun with it, and don’t be afraid to add your own personal touch!
Storing and Reheating Tips
This cake keeps surprisingly well. If you’re not serving it all at once, cover it tightly with plastic wrap or store in an airtight container. At room temperature, it’s good for about 2 days—just keep it away from direct sunlight. I prefer refrigerating it if I want it to last longer; it stays moist and fresh for up to 4 days. Just bring it back to room temp before slicing for the best texture. Never freeze the glazed cake—glaze tends to crack when thawed—but you can freeze unfrosted layers wrapped tightly in plastic. When you’re ready to eat, thaw overnight in the fridge, then decorate. If I’ve added filling, I sometimes re-heat slices in the microwave for 10-15 seconds to bring out the flavor. Just make sure the glaze is set enough so it doesn’t run off—patience pays off here.
Frequently Asked Questions
Final Thoughts
If you’re looking for a cheerful, easy-to-make dessert that spreads a little luck and lots of smiles, this shamrock cake is it. Its simple ingredients and playful presentation make it perfect for celebrations, but honestly, it’s just as good for an ordinary Tuesday when the mood needs a boost. Every time I bake this, it reminds me of childhood St. Patrick’s Day parades, green clovers twirling in the breeze, and the warmth of sitting around the table with family, sharing something sweet. Once you get the hang of it, you’ll find yourself experimenting with flavors, fillings, and toppings—you can truly make it your own. I hope you give it a try and find as much joy in baking it as I do. Happy baking—can’t wait to hear how yours turns out! And hey, don’t forget to leave a comment or share your tweaks—let’s keep the magic going.

Shamrock cake
Ingredients
Main Ingredients
- 2 cups all-purpose flour
- 1.5 cups granulated sugar
- 1 cup unsalted butter softened
- 4 large eggs
- 1 teaspoon vanilla extract
- 0.5 cup buttermilk
- 1 teaspoon baking soda
- 1 pinch green food coloring gel or liquid
Instructions
Preparation Steps
- Preheat your oven to 350°F (175°C). Grease and flour your shamrock-shaped cake pan.
- In a large mixing bowl, cream together the softened butter and sugar until light and fluffy.
- Beat in the eggs one at a time, then mix in vanilla extract.
- In a separate bowl, whisk together the flour and baking soda.
- Gradually add the dry ingredients to the wet mixture, alternating with buttermilk, beginning and ending with the dry ingredients.
- Add green food coloring to the batter and mix until evenly colored.
- Pour the batter into the prepared shamrock pan and smooth the top.
- Bake for 30 to 35 minutes or until a toothpick inserted into the center comes out clean.
- Allow the cake to cool in the pan for 10 minutes, then turn out onto a wire rack to cool completely.
Notes
Featured Comments
“So cute! My kids would love this—simple and festive. Perfect for a little St. Patrick’s celebration.”
“Impressed! Clear steps and super easy results. Perfect for busy nights.”
“New favorite here — spot on. crowd-pleaser was spot on.”
“Super easy and turned out amazing! My family asked for seconds. Saving this one.”
“This sweet treat was absolutely loved — the fresh really stands out. Thanks!”
“Made it tonight and wow — restaurant-level! Will definitely make Easy St. Patrick’s Mini Heart Cake again.”


So cute! My kids would love this—simple and festive. Perfect for a little St. Patrick’s celebration.