

If I had to pick just one recipe that screams sunshine, comfort, and a little bit of nostalgic magic, it’d be my homemade stuffed tomatoes. I remember standing in my grandma’s kitchen as a kid, eagerly waiting for her to dish out these little bites of heaven. The smell of ripe tomatoes baking with aromatic herbs and melted cheese? Honestly, it’s like a warm hug from the inside out. This dish has that rare ability to make you feel fancy but it’s so simple you can whip it up on a weeknight when life gets busy. My kids ask for this all the time, especially during summer when garden-fresh tomatoes are bursting with flavor. I always do this when I want something nourishing yet light — it’s like a healthy comfort food that never disappoints. Trust me, once you try stuffing tomatoes like this, it becomes a go-to for family dinners, picnics, or even a fancy brunch. It’s surprising how a humble vegetable can turn into something so spectacular. Ready to get cooking? Let’s dive in.
What is stuffed tomato?
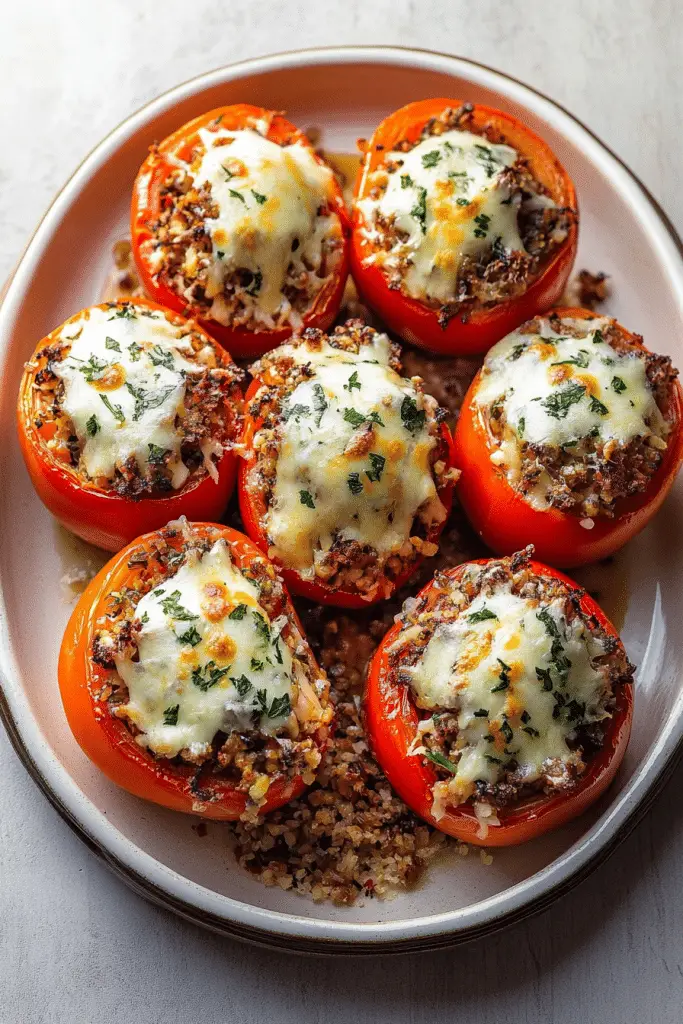
Think of stuffed tomatoes as a little edible package of sunshine. It’s essentially hollowed-out ripe tomatoes filled with a savory mixture — often bread crumbs, herbs, cheese, and sometimes protein like cooked sausage or chickpeas. The name is pretty straightforward; these tomatoes are “stuffed” with tasty fillings and then baked until tender and gooey. The idea is age-old, probably dating back centuries when farmers would make use of their bounty without wasting a single drop. These days, they’re a staple in Mediterranean kitchens, but honestly, every culture seems to have its version — from stuffed veggies in Middle Eastern cuisine to cheesy stuffed cherry tomatoes at summer barbecues. The beauty of stuffed tomatoes is how adaptable they are. You can make them vegetarian, vegan, or loaded with meat depending on what you’re craving. And because tomatoes can be so sweet and tangy, they bring that perfect balance of acidity and richness to each bite. Think of it as a portable, single-serving feast — no fuss, just pure flavor.
How do I make stuffed tomatoes?
Quick Overview
This recipe is basically a three-step dance: scoop, mix, and bake. First, you hollow out some ripe tomatoes — be gentle, they’re delicate! While they’re draining a bit, you whip up a flavorful filling with bread crumbs, herbs, and cheese. Then, you stuff those tomato cavities, top with a little more cheese or breadcrumbs for crunch, and bake until bubbling and golden. The beauty is how forgiving and quick it is — I usually have everything prepped in about 30 minutes, making this perfect for busy nights or a last-minute get-together. No fancy gadgets needed, just a sharp spoon, a mixing bowl, and your oven ready to go. Once baked, the tomatoes soften perfectly, and the filling develops a beautiful crust. It’s one of those dishes where everything comes together in harmony — fresh, warm, and bursting with flavor. Trust me, once you get the hang of it, it becomes a family favorite in no time.
Ingredients
For the Main Filling:
– 6 large ripe tomatoes (choose ones that are firm but giving with a deep color)
– 1 cup cooked quinoa or rice (for a heartier touch)
– 1/2 cup grated Parmesan or mozzarella (whatever melts best for you)
– 3 tbsp chopped fresh basil or parsley
– 2 cloves garlic, minced
– 1/2 cup bread crumbs (preferably toasted for extra crunch)
– 2 tbsp olive oil
– Salt and pepper to taste
For the Filling:
– The mixture above, combined and seasoned to taste. Feel free to toss in chopped olives, sun-dried tomatoes, or cooked sausage for a twist.
For the Glaze:
– 2 tbsp olive oil mixed with a little grated Parmesan or herbs
– Optional: a splash of balsamic vinegar for that extra zing
Step-by-Step Instructions
Step 1: Preheat & Prep Pan
Start by preheating your oven to 375°F (190°C). Lightly grease a baking dish with olive oil or non-stick spray. Gently wash your tomatoes, then using a sharp spoon or small melon baller, carefully scoop out the insides, leaving about a ¼-inch border to keep the shape intact. Place the hollowed-out tomatoes upside down on paper towels to drain excess moisture — this keeps your filling from getting soggy!
Step 2: Mix Dry Ingredients
In a large bowl, combine the bread crumbs, Parmesan, chopped herbs, garlic, salt, and pepper. Toast your bread crumbs beforehand if you want a crispier topping. This step makes sure every bite has that perfect flavor and texture — trust me, it’s worth it.
Step 3: Mix Wet Ingredients
In a separate bowl, blend the cooked rice or quinoa with a splash of olive oil, and mix in a little chopped sun-dried tomato or olives if you like. This is your filling’s flavor base. Now, fold in the dry mixture and cheese. The goal is a moist but not ooey-gooey consistency — the filling should be hearty but manageable.
Step 4: Combine
Add your seasoned filling to the hollowed tomatoes, packing it in gently. Leave a small mound on top; it’ll shrink slightly as it bakes. You can add a sprinkle of cheese on top for that golden crust. Gently press down so everything’s snug but not overcrowded. If some filling spills over, no worries — it’s part of the rustic charm.
Step 5: Prepare Filling
If you want extra flavor, mix a little extra olive oil with Parmesan and herbs to brush on before baking. This creates a lovely crispy top and enhances the flavor — trust me on this one.
Step 6: Layer & Swirl
If you’re feeling artistic, arrange the stuffed tomatoes in your baking dish and swirl a bit of the oil-herb mixture over them. If you like, sprinkle some extra bread crumbs or shredded cheese for crunch. Sometimes I even add a few sprigs of fresh herbs on top — makes it pretty and fragrant.
Step 7: Bake
Pop them into the oven and bake for about 25-30 minutes until the tops are bubbly and golden. Keep an eye on them — every oven is different. You’ll know they’re done when the edges of the tomato start to blister slightly, and the filling is set. If you used cheese on top, it should be melted and crispy around the edges. If you feel they need a little more color, broil for the last 2 minutes — just watch closely!
Step 8: Cool & Glaze
Once baked, let the stuffed tomatoes cool for about 5 minutes before serving — they’re hot! For an extra touch, brush a little of that herb-infused olive oil or balsamic glaze over the top. It adds a glossy finish and a burst of flavor. I love these warm but they’re also fantastic at room temp if you’re making them ahead.
Step 9: Slice & Serve
Use a gentle knife to cut through and serve these stuffed beauties on a platter. You can garnish with fresh herbs or a drizzle of olive oil. I love serving them alongside grilled chicken or as part of a veggie platter. The pops of colorful filling peek through the tomato shells — so pretty! These are even great cold, so make extras if you want a picnic snack the next day.
What to Serve It With
This dish is so flexible that it pairs well with almost everything. In the summer, I love serving it with a crisp green salad and a glass of chilled white wine or sparkling water with lemon. For brunch, try it alongside scrambled eggs or a fresh fruit salad — it feels fancy but is super easy. If you’re looking for something more filling, serve these with a side of roasted potatoes or a warm loaf of crusty bread. And hey, they’re perfect for a light dinner or as part of a tapas spread. I often make a batch on Sunday and enjoy leftovers throughout the week. My family especially loves it with a dollop of Greek yogurt or a splash of balsamic vinegar drizzled on top for added richness. It’s one of those dishes that turns simple ingredients into a celebration — your friends will be impressed, I promise!
Top Tips for Perfecting Your Stuffed Tomatoes
After making this dozens of times, I’ve learned a few tricks to make sure they turn out just right. First, when scooping out the insides, avoid going all the way through the bottom — you want the filling to stay inside but still let the juices escape. I learned this the hard way when my tomatoes leaked all over the baking dish! When mixing the filling, don’t overmix — a light hand keeps it fluffy. If your filling feels too dry, add a splash of olive oil or a little bit of beaten egg; it helps everything stick together without becoming dense. The swirl and layering with cheese? That’s key for a crispy top — I always sprinkle extra Parmesan before baking for that irresistible crust. If you’re making these ahead, I recommend stuffing the tomatoes and keeping them covered in the fridge overnight — just add a few extra minutes if they’re chilled when they go in the oven. Also, keep an eye on the baking time — every oven bakes differently, so check about 5 minutes early to avoid burning the cheese or over-softening the tomato shells. Finally, feel free to experiment with fillings — roasted veggies, feta, pine nuts, or even crumbled sausage all work beautifully. I tested with almond milk instead of regular milk in the filling once, and it actually made it creamier — who knew plant-based milks could work so well here? It’s all about honing your own perfect version!
Storing and Reheating Tips
If you have leftovers (though, honestly, they disappear fast at my house!), storing is simple. Keep the stuffed tomatoes in an airtight container in the refrigerator. They’re best enjoyed within 2 days but can last up to 3 if stored properly. To reheat, pop them in a 350°F (175°C) oven covered with foil for about 10 minutes or until heated through. I avoid microwaving them because the tomatoes tend to get soggy and the cheese loses its crispness — but if you’re in a rush, it’s okay. For freezing, I recommend freezing unbaked stuffed tomatoes on a tray first, then transferring them to a freezer bag. They keep well in the freezer for up to 3 months. When you’re ready to bake, add 10-15 minutes to the baking time—just cover with foil to prevent burning. If you want to add fresh glaze or herbs, do it after reheating so they stay vibrant and crisp. This way, you’ll enjoy the flavors as bright as the day you made them. Honestly, these are so adaptable that even after freezing, they taste just as fresh, and my family never complains about reheated leftovers!
Frequently Asked Questions
Final Thoughts
I truly believe stuffed tomatoes are one of those recipes that make cooking feel special without the stress. They’re humble enough for a weeknight but fancy enough to serve at company — a little showcase of how simple ingredients can create something truly memorable. Every summer, I look forward to tomatoes bursting with flavor from my garden, filling the kitchen with a sweet, tangy aroma as they bake. There’s something so satisfying about preparing a dish that’s colorful, healthy, and incredibly delicious all at once. My family requests these all the time, and I love experimenting with different fillings — from classic cheese and herbs to spicy sausage or even vegan options like chickpeas and roasted veggies. If you try this recipe, I’d love to hear how it turns out or if you put your own twist on it. Happy baking — can’t wait to hear how yours turns out!

stuffed tomatoes
Ingredients
Main Ingredients
- 8 medium ripe tomatoes
- 2 teaspoons olive oil
- 1 cup quinoa
- 6 cups fresh baby spinach
- 3 cloves garlic minced
- 1 teaspoon chopped fresh parsley
- 1 cup shredded mozzarella cheese
- 0.33 cup grated parmesan cheese
Instructions
Preparation Steps
- Preheat oven to 375°F.
- Slice off 1/2 inch of the stem end of the tomatoes and hollow out the inside.
- Slice just a small section off of the bottom of the tomatoes so they sit flat.
- Sprinkle salt in the hollow portion of each tomato and place hollow side up on a baking sheet. Set aside.
- Cook quinoa in water; bring to a boil, lower to a simmer, cover, and cook for 15 minutes.
- Heat olive oil in a pan, add spinach, season with salt and pepper; cook until wilted.
- Add minced garlic and chopped parsley; cook for 1 minute and remove from heat.
- Mix cooked quinoa into the spinach mixture.
- Adjust salt and pepper to taste.
- Distribute filling evenly among the hollowed tomatoes.
- Cover with foil and bake for 20 minutes.
- Remove foil, sprinkle with Parmesan and mozzarella cheese.
- Bake uncovered for 5 more minutes until cheese melts.
- Serve hot and enjoy!
Notes
Featured Comments
“Impressed! Clear steps and turned out amazing results. Perfect for busy nights.”
“New favorite here — restaurant-level. crowd-pleaser was spot on.”
“Super easy and turned out amazing! My family asked for seconds. Saving this one.”
“This sweet treat was absolutely loved — the light really stands out. Thanks!”
“Made it tonight and wow — creamy! Will definitely make Easy Stuffed Tomatoes with Spinach & Quinoa again.”
“Packed with flavor and so simple. Exactly what I wanted from Easy Stuffed Tomatoes with Spinach & Quinoa.”


