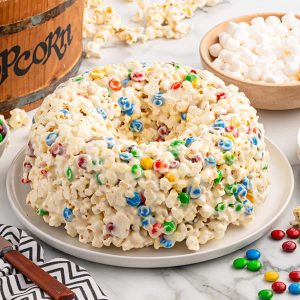
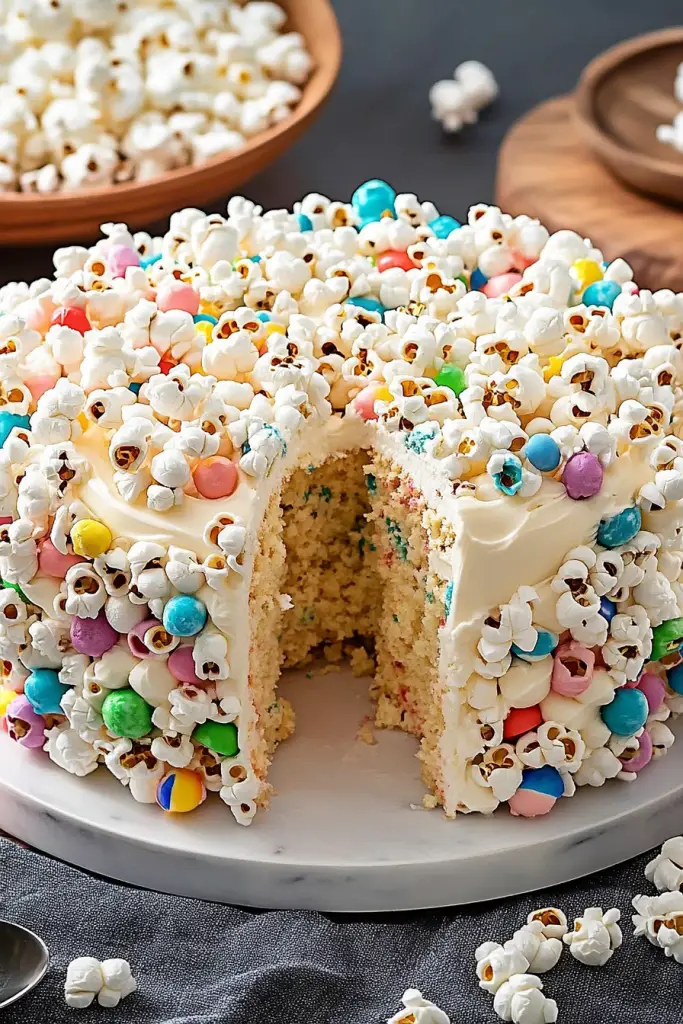
Okay, so picture this: it’s a rainy Saturday afternoon, the kids are restless, and I’m craving something a little sweet but definitely not something that requires a two-hour commitment in the kitchen. You know those days, right? Well, this sweet popcorn cake is my absolute lifesaver. It’s not a traditional cake in the fluffy, frosted sense, but it’s so much more fun and, honestly, way more delicious. Think of it like a giant, shareable treat that uses simple ingredients you probably already have. I first stumbled upon a version of this years ago, and it quickly became a family favorite, the kind of thing my little ones ask for *all the time*. It’s got that perfect balance of sweet, a little bit salty from the popcorn, and it’s just… joyful. If you’ve ever loved those crispy rice cereal treats, but wanted something a little more sophisticated (but still super easy!), then this sweet popcorn cake is going to be your new best friend.
What is Sweet Popcorn Cake?
So, what exactly is this magical sweet popcorn cake? It’s essentially a delightful confection that brings together the airy crunch of popcorn with a sweet, binding glaze, often with additions like marshmallows or a caramel-like sauce to hold it all together. It’s not baked in a traditional oven like a flour-based cake; instead, it’s more like a pressed or molded treat. Imagine a giant, elevated popcorn ball that you can slice and serve. The name itself evokes a sense of comfort and sweetness, and that’s exactly what it delivers. It’s the kind of dessert that brings smiles to faces, no matter the age. It’s the perfect answer when you want something decadent and satisfying without the fuss of complex baking. It’s simple, it’s fun, and it’s utterly addictive.
Why you’ll love this recipe?
I love this popcorn cake. It’s a favorite in my kitchen. I’ve made it several times now.flavor is just out of this world. You get that satisfying salty-sweet combo that’s impossible to resist. The popcorn provides a light, airy crunch, and the gooey binder just melts in your mouth. It’s a flavor profile that appeals to pretty much everyone. Then there’s the simplicity. I’m not kidding when I say this is one of the easiest “cakes” you’ll ever put together. There’s no complicated creaming of butter and sugar, no worrying about overmixing, and certainly no frosting drama. You can whip this up in under 30 minutes (plus cooling time, of course!). It’s a lifesaver when unexpected guests pop over or when you just need a quick sweet fix. And let’s talk about Cost-efficiency: What is the best way to measure cost-efficiency?! The main ingredients are popcorn, marshmallows, and a few pantry staples. It’s incredibly budget-friendly, especially compared to buying a fancy dessert. Plus, it’s so versatile. I’ve tweaked this recipe countless times, adding different mix-ins or changing up the glaze, and it always turns out great. It’s perfect for parties, movie nights, or even as a fun addition to a potluck. What I love most about this is that it feels special and indulgent, but it’s so approachable for any home cook. It reminds me a bit of those classic no-bake bars you might have had as a kid, but elevated with that delightful popcorn base.
How to Make Sweet Popcorn Cake
Quick Overview
Making this sweet popcorn cake is incredibly straightforward. You’ll essentially be popping popcorn, melting a binder (usually marshmallows or a similar base), stirring everything together until coated, pressing it into a pan, and letting it set. It’s a simple three-step process: pop, melt, mix, press, and chill. The magic really happens when the gooey binder coats every fluffy kernel of popcorn, creating a delightful chew with every bite. It’s the ultimate set-it-and-forget-it kind of treat, perfect for busy evenings or when you need a crowd-pleaser in a flash.
Ingredients
For the Popcorn Base:
You’ll need about 10-12 cups of popped popcorn. I like to use plain, unbuttered, unsalted popcorn for this. You can pop it yourself on the stovetop (my preferred method for the best flavor and control!) or use good quality microwave popcorn, just make sure to discard any unpopped kernels and any excess butter or salt if you’re using a flavored variety. The key is to have plenty of fluffy popcorn to work with. You can also buy pre-popped plain popcorn, but homemade always tastes best to me!
For the Sweet Binder:
This is where the magic happens! I typically use mini marshmallows and a bit of butter. You’ll need about 6 cups of mini marshmallows and 4 tablespoons of unsalted butter. Using mini marshmallows makes them melt more quickly and evenly. The butter adds a lovely richness and helps create a smoother, glossier binder. I’ve experimented with using oil instead of butter, and while it works, the butter really does add that extra layer of flavor that makes this sweet popcorn cake sing. Make sure your butter is unsalted so you can control the saltiness!
For the Glaze (Optional but Highly Recommended!):
This is what takes it to the next level. A simple glaze made with powdered sugar, a splash of milk or cream, and a touch of Vanilla Extract is perfect. You’ll need about 1 cup of powdered sugar, 1-2 tablespoons of milk or cream (start with 1 and add more as needed for consistency), and 1/2 teaspoon of vanilla extract. This adds a beautiful finish and an extra layer of sweetness. You can also add a pinch of salt to the glaze to balance the sweetness, which I almost always do!
Step-by-Step Instructions
Step 1: Preheat & Prep Pan
First things first, grab a 9×13 inch baking pan. You want to prepare it so your sweet popcorn cake doesn’t stick. I like to grease it really well with butter or cooking spray, or even better, line it with parchment paper, leaving some overhang on the sides to help you lift it out later. This step is crucial; nobody wants to be scraping stuck-on goodness out of a pan! Make sure you get into all the corners.
Step 2: Mix Dry Ingredients
This is where your popped popcorn comes in. Make sure all those pesky unpopped kernels are picked out. You want fluffy, airy popcorn goodness. If you pop it yourself, let it cool for just a minute so it’s not steaming hot. Place your popped popcorn into a very large mixing bowl. I mean *very* large – you’ll need room to toss everything. If you’re adding any other dry mix-ins at this stage, like chocolate chips or sprinkles, now’s the time to add them to the bowl with the popcorn.
Step 3: Mix Wet Ingredients
In a medium saucepan, combine your butter and mini marshmallows. Melt them over low heat, stirring constantly. You want them to melt smoothly without scorching. Keep stirring until everything is completely melted and you have a glossy, smooth mixture. If you add a pinch of salt here, it really enhances the flavor balance. Watch it closely, as marshmallows can go from melted to burnt really quickly!
Step 4: Combine
Now for the fun part! Pour the melted marshmallow mixture over the popcorn in your large bowl. Using a rubber spatula or a wooden spoon (something that can handle a little heat), gently toss the popcorn to coat it evenly. You want every piece of popcorn to get a lovely coating of the marshmallow binder. Work quickly but gently, as the marshmallows will start to set as they cool.
Step 5: Prepare Filling
This step is essentially the “Combine” step for the popcorn. If you’re adding any additional “filling” like chocolate chips, nuts, or dried fruit *after* the initial coating, you’d do it here, gently tossing them in with the marshmallow-coated popcorn. My kids sometimes love to have some M&Ms mixed in, and this is the perfect time to add those.
Step 6: Layer & Swirl
Transfer the coated popcorn mixture into your prepared baking pan. Using your greased spatula or your hands (lightly greased works wonders here!), press the mixture down firmly and evenly into the pan. Don’t press too hard, or you’ll end up with a super dense, hard cake. You want it firm enough to hold its shape but still have some airiness. Smooth the top as best you can.
Step 7: Bake
Here’s the twist for this “cake”: no baking required! The “baking” happens as the mixture cools and sets. So, instead of popping it into the oven, we’re just going to let it set. If you *do* want a slightly chewier, more cohesive cake, you can pop it into a very low oven (around 200°F or 95°C) for about 10-15 minutes, but it’s totally optional and I usually skip this step for ease. The primary setting happens at room temperature.
Step 8: Cool & Glaze
Let the pressed popcorn mixture cool and set in the pan for at least 30-60 minutes. It needs time for the marshmallows to firm up. While it’s cooling, you can make your glaze. Whisk together the powdered sugar, vanilla extract, and 1 tablespoon of milk or cream in a small bowl. Add more milk, a teaspoon at a time, until you reach a drizzly consistency. It should be thick enough to drizzle but thin enough to spread. Once the popcorn cake is mostly set, drizzle the glaze all over the top. You can use a spoon or a piping bag for this. Let the glaze set for another 15-20 minutes.
Step 9: Slice & Serve
Once the glaze is set, lift the sweet popcorn cake out of the pan using the parchment paper overhangs. Place it on a cutting board. Use a sharp knife to cut it into squares or bars. I usually cut mine into about 16-20 pieces, depending on how generous I’m feeling! Serve immediately, or store for later. This is best enjoyed at room temperature.
What to Serve It With
This sweet popcorn cake is so wonderfully versatile, it fits in perfectly at almost any gathering or craving situation. For Breakfast, I love a small slice with a strong cup of coffee. It’s a fun alternative to a pastry, especially if you’re in a rush. The slight saltiness from the popcorn is really nice with morning coffee. For Brunch, it’s a delightful addition to a sweet spread. I like to cut it into smaller, bite-sized pieces and arrange them on a platter alongside fresh fruit and perhaps some mini muffins. It adds a playful, whimsical touch. As Dessert, especially after a hearty meal, a slightly larger piece with a scoop of vanilla Ice Cream or a drizzle of chocolate sauce is pure bliss. It’s surprisingly satisfying without being too heavy. And for those Cozy Snacks moments, well, this is its natural habitat! Movie nights, after-school treats, or just because – a slice of this with a glass of cold milk is pure comfort. My family has a tradition of making this on the first chilly day of fall; it just feels like the perfect cozy treat. I’ve also found it’s great for picnics because it travels so well and doesn’t require any fussing once you get there.
Top Tips for Perfecting Your Sweet Popcorn Cake
Over the years, I’ve learned a few tricks that have made this sweet popcorn cake even better, and I’m happy to share them with you! When it comes to the Popcorn Prep, always, always, *always* pick out the unpopped kernels. They’re a serious hazard and a disappointment in an otherwise perfect bite. Also, don’t overfill your popping pan; you want light, airy popcorn, not dense kernels. For Mixing Advice, the key is gentle but quick. Once the marshmallow mixture is melted, pour it over the popcorn and toss immediately. The longer you wait, the harder it will be to coat evenly. Work fast, but don’t smash the popcorn down in the bowl; you want to keep that airiness. For the Swirl Customization, if you’re adding mix-ins like chocolate chips or even a bit of caramel sauce *before* pressing, make sure they are distributed relatively evenly so you get a bit of everything in each slice. If you’re feeling adventurous, you can even drizzle a bit of melted chocolate *onto* the pressed cake before the glaze sets for extra decadence. When it comes to Ingredient Swaps, I’ve had success using light brown sugar mixed with the marshmallows for a slight caramel note, though it does change the texture slightly. For the glaze, if you don’t have powdered sugar, you can make a simple caramel sauce with butter, sugar, and cream to drizzle over the top – just make sure it’s cooled a bit before drizzling so it doesn’t melt the marshmallows too much. Regarding Baking Tips, as I mentioned, I rarely bake this. If you choose to, a very low oven for a short time can help it set a little firmer, but watch it closely to prevent burning. The natural setting time at room temperature is usually sufficient and foolproof. And for Glaze Variations, don’t be afraid to experiment! A little bit of lemon zest in the glaze adds a bright, fresh note that’s fantastic. Or, try a chocolate glaze by melting some chocolate chips with a touch of oil. The possibilities are truly endless!
Storing and Reheating Tips
One of the best things about this sweet popcorn cake is how well it stores, making it perfect for making ahead. For Room Temperature Storage, once fully set and the glaze is dry, I like to cut it into squares and store them in an airtight container. It will stay fresh and delicious for about 2-3 days. Keep it out of direct sunlight or warm spots, as the marshmallows can get a bit melty. If you’re heading to a picnic or need to transport it, this is your best bet. Refrigerator Storage is also an option, especially if you live in a warmer climate or want it to last a bit longer. Store it in an airtight container for up to a week. Just a heads-up, the texture might become a little firmer straight from the fridge, so you might want to let it sit at room temperature for about 15-20 minutes before serving for the best texture. Freezer Instructions are totally doable too! Wrap individual squares tightly in plastic wrap, then place them in a freezer-safe bag or container. It can be frozen for up to a month. To thaw, simply remove the plastic wrap and let it come to room temperature on a plate. It’s like a frozen treat this way, too! For Glaze Timing Advice, I always recommend letting the main cake set completely *before* adding the glaze. If you plan to store it in the fridge or freezer, it’s often best to add the glaze *after* it’s thawed and at room temperature, just to ensure the glaze stays nice and intact.
Frequently Asked Questions
Final Thoughts
There you have it – my absolute favorite sweet popcorn Cake Recipe! It’s a testament to how simple ingredients can come together to create something truly special. This recipe is more than just a treat; it’s about shared moments, easy joy, and delicious memories. I know you’ll love how quickly it comes together and how much everyone devours it. It’s that perfect balance of fun, flavor, and simplicity. If you enjoy this recipe, you might also love exploring other no-bake treats or easy dessert bars! They often share that same fuss-free, crowd-pleasing appeal. I can’t wait to hear how your sweet popcorn cake turns out, or if you discover any amazing variations of your own! Don’t hesitate to leave a comment below with your thoughts or any questions. Happy baking (or rather, happy no-baking)!

Sweet Popcorn Cake
Ingredients
Main Ingredients
- 0.75 cup salted butter
- 20 ounces mini marshmallows (two 10-ounce packages)
- 14 cups unflavored popcorn (bagged, pre-popped, kernels removed) Microwave popcorn can be substituted
- 2 cups plain M&M’s
Instructions
Preparation Steps
- Lightly spray a 10 cup Bundt cake pan with nonstick cooking spray.
- Add the butter and both packages of the mini marshmallows to a medium size microwave safe bowl. Heat on high power in 30 second increments, stirring in between increments until the butter and mini marshmallows are completely melted and smooth.
- In an extra large bowl (6 to 7 quarts) add the popped popcorn.
- Pour the melted mini marshmallow mixture over the popcorn and use a wooden spoon to stir the mixture together.
- Sprinkle in the M&M’s. Try to be as gentle as possible when stirring as the coloring of the M&M’s can smudge and run.
- Scoop the coated popcorn into the prepared Bundt cake pan. Gently press the popcorn mixture down as you scoop more coated popcorn into the pan.
- Allow the popcorn cake to rest at room temperature for 2 hours, or until firm.
- Turn the popcorn cake onto a serving plate, and cut into 12 slices.
Notes
Featured Comments
“Impressed! Clear steps and so flavorful results. Perfect for busy nights.”
“New favorite here — quick weeknight win. crowd-pleaser was spot on.”
“Super easy and turned out amazing! My family asked for seconds. Saving this one.”
“This sweet treat was absolutely loved — the zingy really stands out. Thanks!”
“Made it tonight and wow — comforting! Will definitely make Easy Sweet Popcorn Cake Creations again.”
“Packed with flavor and so simple. Exactly what I wanted from Easy Sweet Popcorn Cake Creations.”


