

There’s something about green beans that just screams comfort, isn’t there? I remember as a kid, my mom would always make a batch of lightly sautéed green beans on busy weeknights—and I’d devour them before even finishing my main dish. It’s funny how something so humble can become such a staple in my own kitchen now. I love how this little veggie can be transformed into something flavorful and satisfying with just a few simple ingredients. Honestly, I’ve cooked countless versions of this recipe, tweaking and perfecting it over the years, and it’s become one of those incredible side dishes that always disappears in minutes at my house. If you’re looking for something that’s quick, budget-friendly, and packed with good-for-you goodness, trust me—green beans are where it’s at. Plus, they’re endlessly versatile—great with just about anything, from roasted chicken to baked fish, or even tossed into pasta. Stick with me, because once you master this simple method, you’ll have a new family favorite on repeat too!
What is green beans?
Think of green beans as those crunchy, vibrant little vegetables that taste like sunshine in your mouth. Also known as string beans or snap beans, they’re part of the legume family and hail from the humble—and pretty much unstoppable—garden vegetable lineup. Their name comes from their bright, emerald-green color and slender shape, and they’re a staple in many cuisines around the world. Usually harvested young, their tender pods pack a mild, slightly grassy flavor that pairs beautifully with garlic, lemon, or even a sprinkle of Parmesan. They’re super versatile — you can eat them raw, steamed, sautéed, roasted, or even tossed into soups and stews. I love how their natural sweetness comes out when you cook them just right, not overdone. Plus, they’re packed with vitamins and fiber, making them a healthy choice that’s also incredibly satisfying. Basically, green beans are one of those ingredients that make you feel good both in flavor and nutrition — and I’ve yet to meet a person who doesn’t love them!
Why do you love this movie?
There’s a lot to love about this simple green bean recipe—trust me, this one’s a lifesaver on busy nights. For starters, the flavor is just unbeatable. I always do this one quick trick of adding a splash of lemon juice or balsamic vinegar right at the end — it wakes everything up and brings out a fresh, zingy taste that makes these green beans stand out. And the best part? It’s super easy to make, which means you’re not stuck in the kitchen for ages. Honestly, I’ve made this countless times and I still get surprised by how little effort it takes to turn a bunch of basic green beans into something so delicious. Plus, it’s surprisingly budget-friendly; most of us already have these ingredients in the fridge! What I love most about this is its versatility—you can serve it as a simple side, jazz it up with toasted almonds or crispy bacon, or even toss it into salads or pasta. Whenever I need a quick side, this recipe is my go-to, especially when I want something fresh, tasty, and healthful without spending hours chopping or simmering. It’s perfect for weeknights, weekend dinners, or when you just want a burst of green in your meal. And honestly, once you master it, you’ll find yourself making this all the time — it’s just that good.
How do I make green beans?
Quick Overview
This dish comes together in just three main steps: blanching the green beans briefly to preserve their bright color and crunch, sautéing them with garlic and a bit of butter or olive oil for flavor, and finishing with a squeeze of lemon or a splash of vinegar to brighten everything up. It’s a simple process, but the key lies in not overcooking the beans—they should be tender but still have a satisfying bite. I like to keep it straightforward because honestly, the real magic is in the freshness of the ingredients and the quick cooking. It’s perfect when you want something flavorful in a matter of minutes, with ingredients you probably already have lying around. Plus, once you see how vibrant and delicious the green beans look right out of the pan, you’ll understand why minimal fuss makes all the difference.
Ingredients
For the Main Sauté:
- 1 pound fresh green beans, trimmed
- 2 cloves garlic, minced
- 2 tablespoons olive oil or butter
- Salt and freshly ground black pepper, to taste
- Juice of half a lemon or a splash of balsamic vinegar
Optional Add-ins:
- Toasted almonds or chopped walnuts for crunch
- Crumbled feta or Parmesan for a cheesy kick
- Crispy bacon bits or pancetta for depth
Step-by-Step Instructions
Step 1: Preheat & Prep Pan
Start by heating your skillet over medium heat and add a tablespoon of olive oil or butter. While that’s warming up, bring a large pot of water to boil, salt it generously—think of it as sea water. Once boiling, add your green beans and cook for about 2-3 minutes until they’re just tender but still have their lovely crunch. Drain them immediately and set aside; this step, called blanching, keeps their color vibrant and texture perfect.
Step 2: Mix Dry Ingredients
Not really a dry ingredient step here, but it’s worth mentioning—salt your cooking water generously and make sure your garlic is minced finely so it cooks evenly and infuses its flavor nicely into the beans. The prep work is minimal but key for that fresh flavor burst.
Step 3: Mix Wet Ingredients
In the skillet, warm up your oil or melt butter over medium heat. Toss in the garlic and cook for about 30 seconds until fragrant—that sweet, almost nutty smell is the sign you’re good to go. Be careful not to burn it; garlic is fast!
Step 4: Combine
Add the drained green beans to the skillet. Toss everything to coat evenly with the garlic and oil. Let them cook for about 2-3 minutes, just enough to soak up that aromatic flavor. If you find they’re sticking a bit, a splash of water or broth can help loosen things up.
Step 5: Prepare Filling
At this stage, I often add a squeeze of lemon or a splash of balsamic vinegar for brightness. Feel free to sprinkle on some salt and pepper to taste, or even a handful of toasted nuts if you’re feeling fancy. My kids love when I toss in a little shredded Parmesan — it melts slightly into the warm beans and makes everything richer.
Step 6: Layer & Swirl
If you’re adding swirls of balsamic or lemon, do so at this point. Swirl it around so every bean gets a zesty flavor hit. For that pretty presentation, I sometimes transfer everything to a serving dish and give it a final drizzle on the plate — it’s all about the little details that make it look just as good as it tastes.
Step 7: Bake
No baking here—this is a quick stovetop magic! But if you’re roasting green beans instead, toss them with olive oil, salt, and pepper, spread on a roasting pan, and bake at 425°F for about 10-12 minutes until slightly charred and blistered.
Step 8: Cool & Glaze
If you want a glossy finish, I sometimes drizzle a little more lemon juice or olive oil once off the heat. Letting the beans cool just slightly helps set that glaze — plus, it keeps everything from getting soggy.
Step 9: Slice & Serve
This dish is best served warm or at room temperature. For presentation, I like to pile them high on a pretty platter, sprinkle with Parmesan or nuts, and serve alongside a grilled chicken or fish. It’s gorgeous, simple, and tastes like summer whenever I make it.
What to Serve It With
Family dinners are the best when this green bean dish is on the table. For breakfast or brunch, I love serving it alongside scrambled eggs or a fluffy quiche — it adds a fresh, green touch that’s so inviting. When I do a casual weekend lunch, I toss these beans into a big salad with cherry tomatoes, mozzarella, and a balsamic vinaigrette. And for dinner, they go absolutely perfectly with roasted chicken or baked salmon, especially when topped with a squeeze of lemon or a sprinkle of fresh herbs. I’ve even put leftovers into pasta the next day—tossed with some olive oil and a sprinkle of Parmesan, they’re just as good cold as hot. Kids ask for seconds every single time, especially when I throw a bit of crispy bacon on top or a handful of toasted almonds. Trust me, this green bean recipe isn’t just a side—it’s a centerpiece in disguise!
Top Tips for Perfecting Your Green Beans
After cooking these so many times, I’ve learned a few tricks that make all the difference. First, always trim and wash the green beans thoroughly — dirt can hide in the stem ends. If they’re particularly thick, you can snap them in half so they cook more evenly. When blanching, don’t overdo it—your goal is vibrant green, not mush. I find 2-3 minutes is perfect; they should be bright and crisp-tender.
In the sauté step, keep the heat at medium—not too high—to prevent garlic from burning. Once the garlic is fragrant, toss in the green beans quickly, and don’t overcrowd the pan. If you’re making a larger batch, do it in two rounds. For flavor variations, I love adding red pepper flakes for a kick or tossing in a handful of chopped sun-dried tomatoes for extra depth.
When it comes to the glaze, I’ve tested everything from honey to maple syrup to balsamic reduction. Honestly, a simple squeeze of lemon brightens everything. If you prefer a sweeter note, a drizzle of honey does wonders. Just remember to balance the acidity so it doesn’t overpower the dish. Also, don’t skip the final tasting — I often adjust salt, pepper, or acidity levels at this stage. Over the years, I’ve learned that the small touches, like scoring some fresh herbs or toasting your nuts, really elevate this dish from good to wow.
My biggest lesson? Don’t overcook the green beans. I used to cook them for 5-6 minutes and end up with limp, dull-tasting veggies. Now, I stick to the quick blanch and sauté method, which keeps them vibrant, flavorful, and just tender enough. Trust me on this, once you get the timing right, it’s a game-changer. And a tip I swear by: always taste before serving — the final tweak makes all the difference!
Storing and Reheating Tips
This green bean dish is fantastic because it keeps well for a day or two. Keep leftovers in an airtight container in the fridge — I recommend using glass containers for the best freshness. If you want to reheat, I prefer doing it gently on the stovetop over low heat, just tossing the beans in a skillet with a splash of water or broth to refresh their texture. Microwaving works too, but keep an eye on them — they tend to dry out if overdone. I usually add a squeeze of lemon or a drizzle of fresh olive oil after reheating to bring back the flavor and shine. If you’re planning to store cooked green beans with a glaze or cheese, do so separately, as the glaze can sometimes get soggy and lose its punch. For freezing, I recommend blanching the beans first, then packing them in freezer bags and tossing them in quick in the freezer—great for those days when you want something quick and healthy. Thaw in the fridge overnight and reheat gently. Trust me, the freshness might not be quite the same, but it’s still a great way to enjoy those green goodness anytime.
Frequently Asked Questions
Final Thoughts
This simple green bean recipe has become a staple in my weekly meal lineup, and I really believe it can become yours too. It’s one of those dishes that feels both effortless and impressive — perfect for weeknights or special gatherings. Its bright flavors and crisp texture bring a fresh vibe to any table, and I love how adaptable it is. Want it spicier? Toss in a pinch of cayenne or red pepper flakes. Need it more decadent? Add some crispy pancetta or shredded cheese. The real beauty is how forgiving and customizable it is, so don’t be afraid to experiment! This dish reminds me of childhood summers when my mom would serve it with roast chicken, and now I get to pass those memories along to my own kids. I hope you try it and fall in love the way I have. Make sure to leave a comment below sharing your tips or variations — I’d love to hear how yours turns out! Happy cooking, and enjoy those fresh, green bites of happiness!
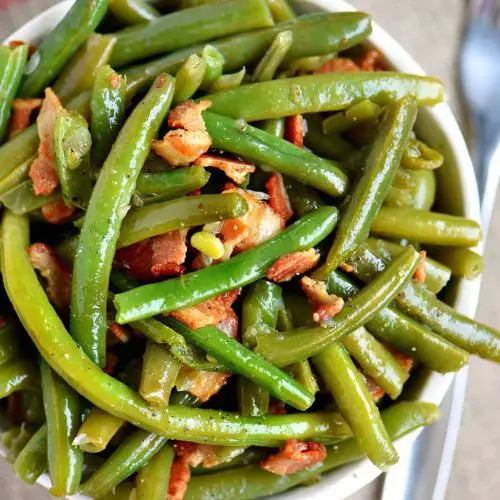
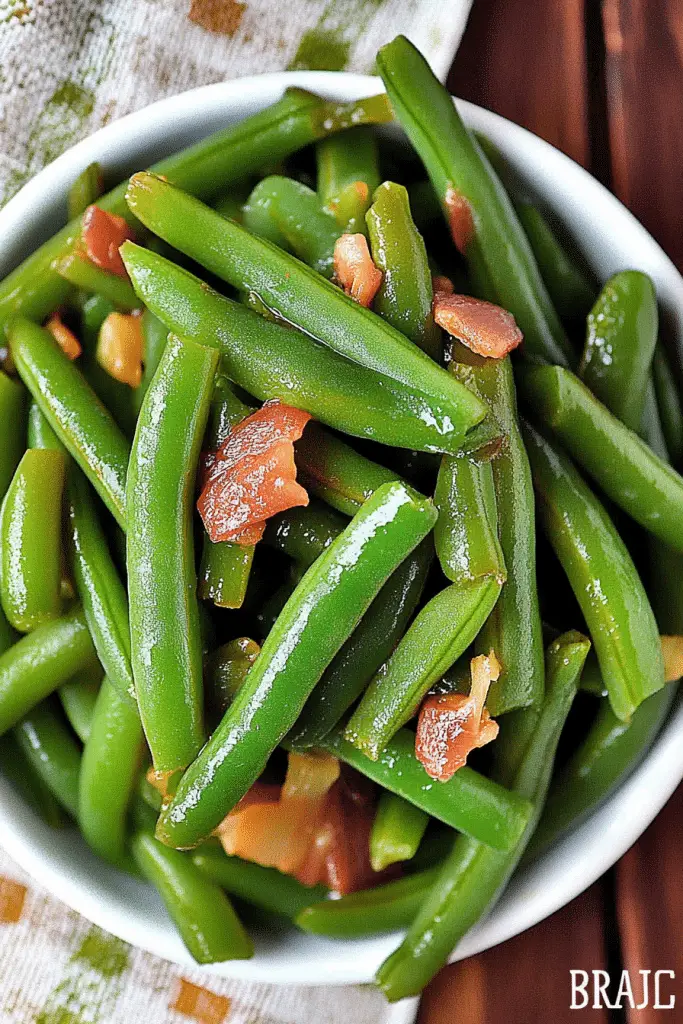
green beans
Ingredients
Main Ingredients
- 6 slices bacon
- 2 pounds fresh green beans
- 0.5 cup diced yellow onion
- 1.5 cups chicken broth
- salt and pepper to taste
Instructions
Preparation Steps
- Cut the bacon into small pieces and cook over medium heat in a heavy saucepan until the bacon is fully rendered.
- Do not remove the bacon grease; it's what makes these green beans so delicious!
- Add diced yellow onions and sauté with bacon until transparent.
- Add green beans and pepper, stirring to coat with bacon drippings.
- Pour in chicken broth and reduce heat to low.
- Cover and cook for 30 minutes, stirring occasionally. Ensure there's enough liquid in the bottom to prevent burning.
- Check seasoning and add salt and pepper if necessary.
- Serve hot and enjoy!
Notes
Featured Comments
“Impressed! Clear steps and absolutely loved results. Perfect for busy nights.”
“New favorite here — family favorite. crowd-pleaser was spot on.”
“Super easy and turned out amazing! My family asked for seconds. Saving this one.”
“This sweet treat was absolutely loved — the buttery really stands out. Thanks!”
“Made it tonight and wow — creamy! Will definitely make Easy Vintage Green Bean Recipe again.”
“Packed with flavor and so simple. Exactly what I wanted from Easy Vintage Green Bean Recipe.”


