

There’s nothing quite like the magic of a Fourth of July morning, waking up to the smell of fresh dew and sizzling outside grills. Growing up, summer always meant two things in my house: fireworks and that tangy, sweet promise of a homemade berry pie cooling on the windowsill. I remember my mom lining up all the berries—strawberries, blueberries, blackberries—and carefully tossing them in a little sugar and lemon. We’d sit at the picnic table, watching the sunset turn everything golden, and I’d sneak a taste of the warm filling. It’s funny — I think that pie is my culinary love letter to summer. And honestly, it’s just as incredible now as it was when I was a kid. Plus, this pie feels like a celebration — easy to make, beautiful to serve, and guaranteed to bring a smile to everyone’s face. Trust me, if you’re looking for a show-stopping, patriotic dessert that’s as fun to make as it is to eat, this Fourth of July berry pie will be your new go-to.
What is a berry pie?
This Fourth of July berry pie is a classic homemade dessert that’s bursting with all those fresh, vibrant berries that scream summer. Think of it as a homage to red, white, and blue — but with a flavor that’s really what makes the holiday special. It’s essentially a flaky, buttery pie crust topped with a juicy, sweet-tart berry filling that you can customize to your heart’s content. Whether you’re serving it at a backyard barbecue or as the sweet finale to fireworks night, this pie combines ease and elegance perfectly. The name kind of says it all — it’s a pie designed for celebrating Independence Day, but honestly, it’s a timeless summer treat anyone can enjoy. Think of it as your edible fireworks—sparkling with berry goodness and a hint of citrus that just makes everything feel festive!
How do I make a berry pie for the Fourth of July?
Quick Overview
This pie is pretty straightforward. You start by making or buying a flaky pastry crust, then toss a medley of berries with a little sugar, cornstarch, and lemon juice to create the filling. Pour that into your crust, topping with a lattice or streusel if you like, then bake until golden and bubbly. The best part? It’s mostly hands-off, with just the right amount of fuss for a homemade feel. My favorite part? The smell of baked berries filling the kitchen—so good, it’s almost festive by itself. Trust me, once you get the hang of it, this pie will be your summer signature, and it’s perfect for gatherings or just a cozy weekend at home.
Ingredients
For the Main Filling:
– 4 cups mixed berries (strawberries, blueberries, blackberries — use what you love or have!)
– 3/4 cup granulated sugar (adjust for sweetness)
– 2 tablespoons cornstarch (for thickening)
– 1 tablespoon fresh lemon juice and zest (for brightness)
– 1 teaspoon vanilla extract (adds depth)
For the Crust:
– 1 box of store-bought or homemade pie crust (makes things easier, but I’ve made my own and it’s a game changer!)
For the Topping (optional):
– Coarse sugar (for sprinkling on top)
– Streusel topping (a simple mixture of butter, sugar, flour, cinnamon if you like)
For the Glaze:
– A quick mix of apricot jam or berry preserves heated with a splash of water or lemon juice — it gives that irresistible shiny finish.
Step-by-Step Instructions
Step 1: Preheat & Prep Pan
Set your oven to 375°F (190°C). While it heats, line your pie dish with a crust—either roll out your store-bought one or make your own. Chill it in the fridge while you prepare the filling. I always do this because it helps keep that perfect flaky texture—plus, it makes handling the dough a lot easier.
Step 2: Mix Dry Ingredients
In a big bowl, combine the sugar, cornstarch, and lemon zest. This dry mixture is your secret to a thick, juicy filling that isn’t runny. I’ve tried skipping this step once, and let me tell you — it ended up more like berry soup. Definitely don’t skip the cornstarch; it’s what gives the filling that perfect, slightly gelled consistency.
Step 3: Mix Wet Ingredients
In another small bowl, squeeze the lemon juice and add vanilla. This combo adds a fresh zing to the berries and makes everything taste lively. I like to taste the mix before tossing it in the berries — if it’s too tart, add a little more sugar. If it’s too sweet, a squeeze of lemon brightens it right up.
Step 4: Combine
Toss your berries with the sugar mixture until everything’s coated evenly. If you’re using strawberries, I slice them up so they blend into the filling nicely. Be gentle — you don’t want to crush the berries; just coat them well and set aside while you prepare the pie.
Step 5: Prepare Filling
Once coated, you can add a handful of fresh herbs like mint or basil if you’re feeling adventurous. Just a tiny sprinkle adds a hint of surprise flavor. Otherwise, stick with the classics!
Step 6: Layer & Swirl
If you’re feeling fancy, you can layer a few berries in the crust before dumping the filling. Or, if you prefer a more rustic look, just pour in the mixture and use a spoon to spread and swirl a little for a marbled effect. This adds visual interest and makes each slice feel special.
Step 7: Bake
Pop it into the oven and bake for about 45-50 minutes, or until the crust is golden brown and the filling is bubbling up through the vents or lattice. Keep an eye on it—if the edges brown too quickly, you can tent it with foil. Every oven is different, so start checking around 40 minutes.
Step 8: Cool & Glaze
Once out of the oven, let the pie cool on a wire rack for at least 2 hours. This helps the filling set so you don’t have a mess when slicing. When it’s cool enough, brush with your warm jam glaze—this gives that glossy, irresistible finish. I love to add a little zest of lemon or berry essence to the glaze for extra flavor.
Step 9: Slice & Serve
Use a sharp, slightly warm knife to cut clean slices. For the best presentation, wipe the blade between slices. Serve with a dollop of whipped cream or a scoop of vanilla ice cream — oh, yum! And don’t forget—this looks gorgeous on a picnic table or a fancy dessert plate. Make sure to include some fresh berries on top for the ultimate patriotic look!
What to Serve It With
For me, this berry pie just screams summer and celebration. It’s perfect with a tall glass of iced tea or bubbly lemonade on the side. At breakfast, I love a warm slice with a drizzle of cream and a cup of fresh coffee — it’s like an early morning party! For a more decadent dessert, serve it warm with vanilla ice cream melting over the top, creating that perfect sweet-sour contrast. It also pairs beautifully with a light sparkling wine or a cold rosé if you want an adult version of the celebration.
My family loves having this pie at backyard barbecues. We cut it into big slices and share among friends, often ending the night with sparklers and memories. I find that the simple, bright flavors make it feel like a festive occasion no matter what else is happening around us. Plus, it’s easy enough that the kids can help layer berries or brush on the glaze — turning it into a fun, family activity. I always serve a few extra berries on the side for garnish and that burst of fresh flavor with each bite. Honestly, I think this pie is as much about enjoying summer as it is about making memories in the kitchen. Give it a try, and I’m pretty sure it’ll become a favorite for your own Fourth of July celebrations!
Top Tips for Perfecting Your Fourth of July Berry Pie
Over the years, I’ve picked up some tricks that make this pie turn out just perfect every time. First, get your berries as fresh as possible. Frozen berries work in a pinch, but fresh summer berries give that bright, juicy flavor that no frozen fruit can match. When chopping strawberries, go for even slices — uneven sizes can cause uneven baking. To prevent a soggy crust, I always blind-bake it for about 10 minutes before adding the filling — that way, it stays crisp even under all those juicy berries.
Mixing your berries gently is key — over-mixing can turn your filling into a purple, mushy mess. Use a big spoon and fold everything carefully. When it’s time to bake, keep an eye on the crust edges — loose foil or a pie shield can help prevent over-browning. For the glaze, heat it until it’s just warm; this helps it spread evenly and creates that gorgeous shine. As for ingredient swaps, I’ve tested coconut sugar and it works beautifully for a slightly caramelized flavor, and you can swap in honey or maple syrup for the sweetener, just reduce the other liquids slightly to compensate.
And here’s a little tip — if you want a less sweet pie, cut back on the sugar and let the berries shine. A good trick I learned after years of trial and error is to brush the crust with a little beaten egg before baking — it gives that extra sheen and helps keep the crust crispy. I’ve also experimented with adding a pinch of cinnamon or a dash of balsamic vinegar to the berries, and wow — those little extras really punch up the flavor. Most importantly, remember to let the pie cool thoroughly before slicing. This step is what makes your filling set nicely and prevents that embarrassing ooze on the first cut. Trust me, patience is key!
Storing and Reheating Tips
This pie is best enjoyed fresh, but it can be stored for later too. If you have leftovers, cover the cooled pie with plastic wrap or store it in an airtight container in the fridge for up to 2 days. It’s still delicious cold, but I actually love reheating individual slices in the microwave for about 10-15 seconds — just enough to warm it up and soften the berries again. For longer storage, the freezer is a good option. Wrap the slices tightly in plastic wrap, then foil, and freeze for up to 2 months. When you’re ready to eat, thaw in the fridge overnight and warm gently in the microwave or oven.
If you plan to add the glaze later, hold off until just before serving. The shine and freshness of the glaze are best enjoyed with a freshly baked or reheated slice. Be aware that the fruit might release a little juice after storage, so serve slices on plates with a paper towel underneath if you want to keep things tidy. Overall, this pie keeps well, and I’ve even had success reassembling and re-glazing slices for a second round of celebration. Just remember, the key to a good pie—whether fresh or reheated—is patience and a gentle touch.
Frequently Asked Questions
Final Thoughts
Honestly, this Fourth of July berry pie has become a little piece of my summer heart. It’s the kind of dessert that brings everyone together — kids scraping the last dollop of filling, grandparents reminiscing about childhood Independence Day celebrations, friends marveling over the burst of flavor with every bite. It’s simple, beautiful, and tastes like sunshine wrapped in a flaky crust. I love how adaptable it is; you can swap berries, add a splash of liqueur, or even turn it into a galette if you’re feeling artistic. Most importantly, I want you to know that making this pie is almost as fun as eating it. So gather your ingredients, put on some music, and enjoy the process — and then sit back, slice it up, and watch your loved ones smile. Happy baking, and I can’t wait to see how yours turns out!
Fourth of July
Ingredients
Main Ingredients
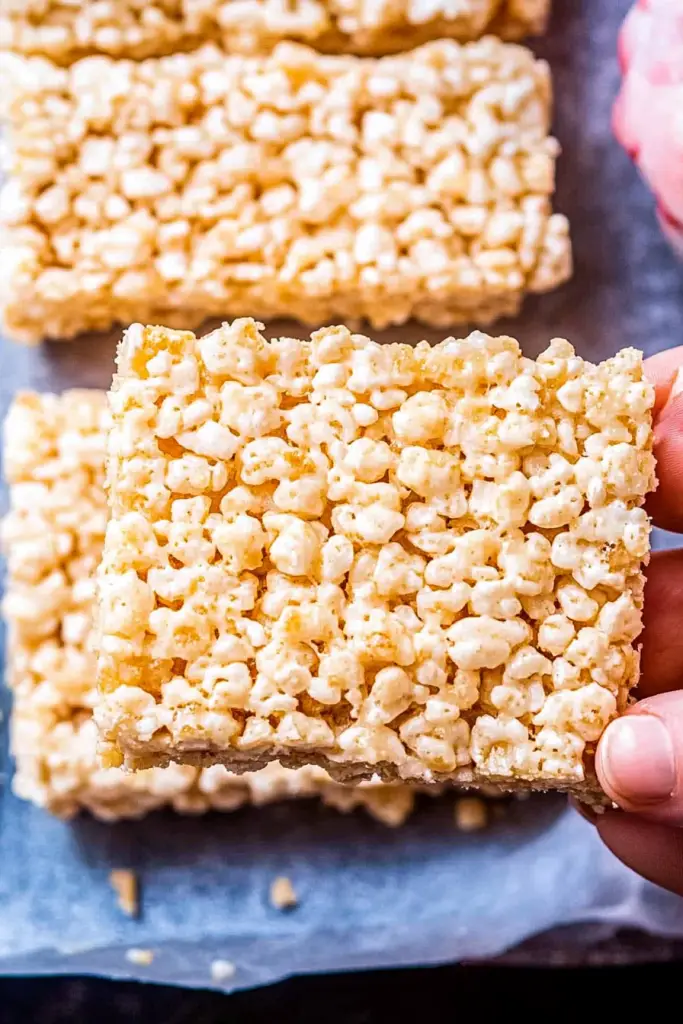
- 9 cups Rice Krispies Cereal
- 15 ounces mini marshmallows
- 8 tablespoons unsalted butter
- 1 teaspoon vanilla extract
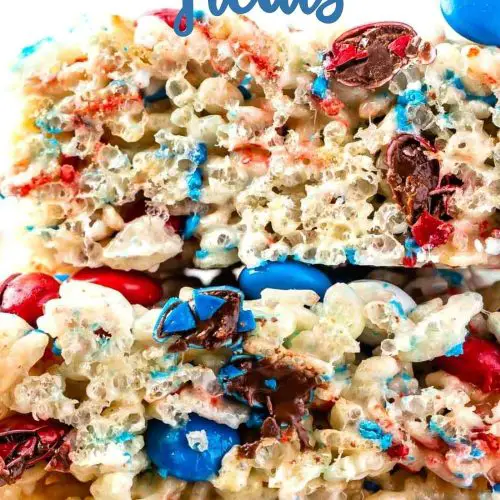
- 1 cup 4th of July M&Ms
- 0.5 cup 4th of July sprinkles
Instructions
Preparation Steps
- Line a 9x13-inch pan with foil or parchment and spray with nonstick cooking spray.
- Measure out cereal and place in a large bowl.
- Melt the butter in a large pot over medium low heat.
- Add the marshmallows and stir until melted. Remove from heat and stir in vanilla extract.
- Add cereal and stir to coat with the marshmallow mixture. Stir in M&Ms and sprinkles and immediately pour into prepared pan. Press firmly to compact. Spray wax paper with nonstick cooking spray for easier pressing.
- Let set until firm then slice into bars. Store in an airtight container for up to 3 days. To freeze, let cool completely, then cut into bars, wrap each in wax paper, and freeze in an airtight container for up to 3 months.
Notes
Featured Comments
“Impressed! Clear steps and turned out amazing results. Perfect for busy nights.”
“New favorite here — restaurant-level. crowd-pleaser was spot on.”
“Super easy and turned out amazing! My family asked for seconds. Saving this one.”
“This sweet treat was absolutely loved — the buttery really stands out. Thanks!”
“Made it tonight and wow — absolutely loved! Will definitely make Festive Rice Krispie Treats for Summer again.”
“Packed with flavor and so simple. Exactly what I wanted from Festive Rice Krispie Treats for Summer.”


