Oh, how I love a good chocolate cake. But let’s be real, sometimes the thought of sifting, creaming, and all that jazz feels like a marathon I just don’t have the energy for, especially after a long day. That’s where this flourless chocolate cake recipe comes in. It’s become my absolute go-to when that deep, chocolatey craving hits, but I need something incredibly satisfying without a whole lot of fuss. Honestly, it’s the kind of dessert that makes people think you spent hours slaving away, but the truth is, it’s shockingly straightforward. It’s the ultimate indulgence that’s perfect for a special occasion or just a Tuesday night when you need a little magic. This flourless chocolate cake is proof that you don’t need a pantry full of fancy ingredients or a culinary degree to create something truly show-stopping.
What is flourless chocolate cake?
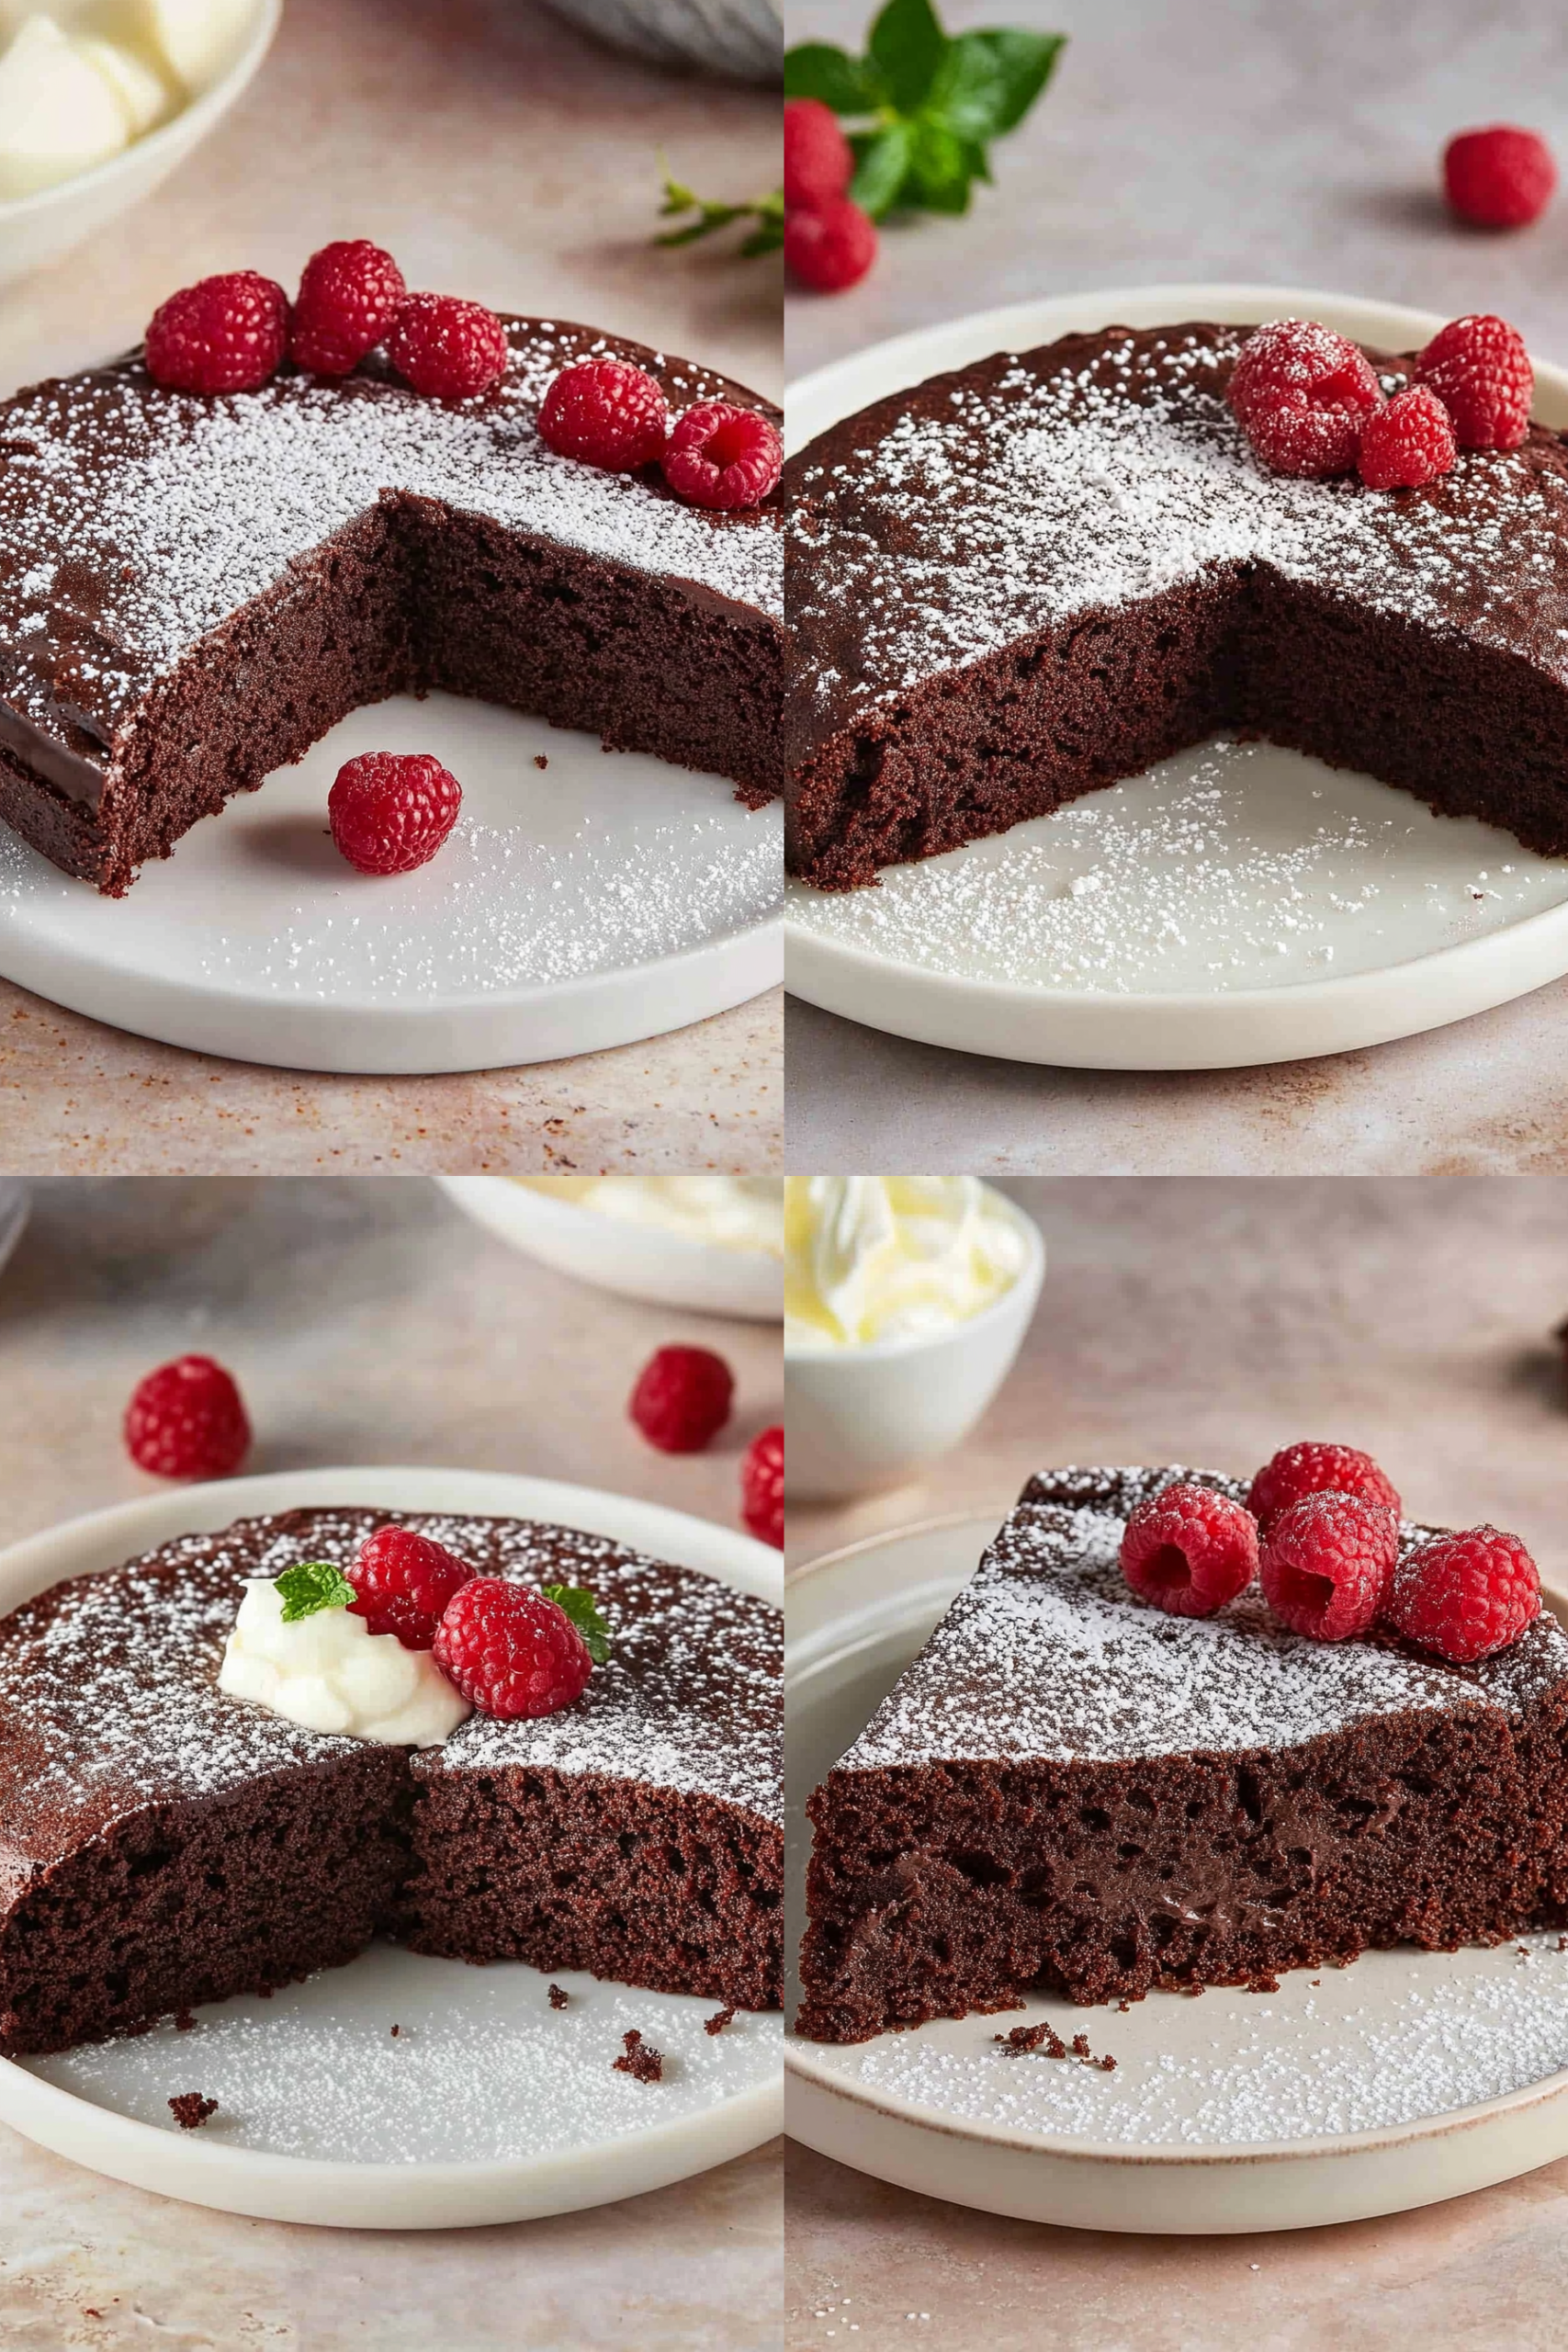
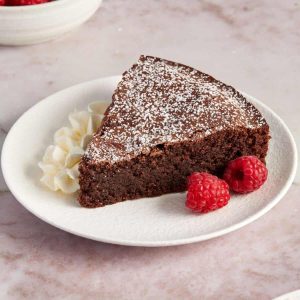
So, what exactly is this magical thing we call a flourless chocolate cake? Think of it as the purest expression of chocolate in cake form. Instead of relying on flour for structure, it gets its incredible richness and dense, fudgy texture from eggs, chocolate, and butter. It’s essentially a rich chocolate custard baked into a cake shape. The result is a dessert that’s incredibly moist, intensely chocolatey, and has a delicate crumb that just melts in your mouth. It’s not your typical airy, fluffy cake; this one is more about deep, satisfying decadence. It’s elegant enough for a dinner party but also comforting enough for a cozy night in with a good book and a cup of tea. It’s a celebration of simple, high-quality ingredients coming together to create something extraordinary.
How do you make a flourless chocolate cake?
Quick Overview
This cake is all about gentle melting, careful folding, and patient baking. We’ll start by melting good quality chocolate with butter until smooth and glossy. Then, we’ll whisk eggs with sugar until they’re pale and fluffy, creating the lift. The two are combined, and then a touch of espresso powder and vanilla extract enhances the chocolate flavor beautifully. It bakes into a rich, dense masterpiece. The key is to not overmix and to bake it until just set. It’s really that simple!
Ingredients
For the Main Batter:
This is where the magic truly happens! Using good quality ingredients makes all the difference here. I always opt for a bittersweet or semi-sweet dark chocolate, around 60-70% cocoa solids. If you use milk chocolate, it might become a bit too sweet. Melted chocolate is the backbone of this cake, so choose one you love to eat on its own!
- 8 ounces (about 225g) good quality bittersweet or semi-sweet chocolate, finely chopped
- 1 cup (2 sticks or 227g) unsalted butter, cut into cubes
- 6 large eggs, room temperature
- 1 cup (200g) granulated sugar
- 1 teaspoon vanilla extract
- 1 teaspoon instant espresso powder (optional, but highly recommended for depth of flavor)
- Pinch of salt
For the Filling:
While this cake is incredible on its own, sometimes a little something extra is nice. This filling adds another layer of indulgence and can be completely customized. It’s optional, but it takes the cake to a whole new level for special occasions.
- 4 ounces (about 115g) cream cheese, softened
- 1/4 cup (50g) granulated sugar
- 1/4 cup (60ml) heavy cream
- 1 teaspoon vanilla extract
For the Glaze:
A simple ganache is my go-to. It’s easy to make and adds a beautiful, glossy finish. You can adjust the consistency based on how you like it.
- 4 ounces (about 115g) good quality semi-sweet chocolate, finely chopped
- 1/2 cup (120ml) heavy cream
- 1 tablespoon unsalted butter (optional, for extra shine)
Step-by-Step Instructions
Step 1: Preheat & Prep Pan
First things first, let’s get our oven ready. Preheat it to 350°F (175°C). This is a crucial step for even baking. Now, grab an 8-inch or 9-inch springform pan. I always grease mine thoroughly with butter, then line the bottom with parchment paper. This is a lifesaver when it comes time to release the cake. Then, I’ll lightly dust the sides with cocoa powder – it helps prevent sticking and adds a subtle chocolatey edge. Trust me, skipping this part can lead to heartbreak when you try to get the cake out!
Step 2: Mix Dry Ingredients
In a medium bowl, whisk together the finely chopped chocolate and the cubed butter. You can do this in a microwave-safe bowl in 30-second intervals, stirring between each, until it’s mostly melted and smooth, or use a double boiler over simmering water. Once it’s smooth, stir in the vanilla extract, instant espresso powder (if using), and the pinch of salt. Give it a good stir until everything is beautifully combined and glossy. Set this aside to cool slightly while you work on the eggs.
Step 3: Mix Wet Ingredients
In a large, clean bowl, crack your 6 large eggs. Add the granulated sugar. Now, this is where you want to whisk these together until they’re pale yellow and slightly thickened. I usually use an electric mixer for this, on medium-high speed, for about 3-5 minutes. You’re looking for a consistency where the mixture falls from the whisk in thick ribbons and holds its shape for a moment before disappearing. This aeration is what gives our flourless cake a bit of its lift.
Step 4: Combine
Now for the moment of truth! Gently pour the slightly cooled chocolate-butter mixture into the whisked eggs. Fold them together with a spatula. Be gentle here; you want to incorporate the chocolate without deflating all that lovely air you just whipped into the eggs. Fold until just combined and no streaks of egg remain. It’s okay if it looks a little swirly, that’s normal!
Step 5: Prepare Filling (Optional)
If you’re going for the cream cheese swirl, now’s the time to whip it up! In a separate bowl, beat the softened cream cheese and sugar together until smooth and creamy. Then, beat in the heavy cream and vanilla extract until just combined. Don’t overmix here; we just want it smooth and luscious.
Step 6: Layer & Swirl
Pour about two-thirds of the chocolate batter into your prepared springform pan. If you’re using the cream cheese filling, dollop spoonfuls of it over the chocolate batter. Then, spoon the remaining chocolate batter over the cream cheese. Now, grab a knife or a skewer and gently swirl the cream cheese into the chocolate batter. Don’t overdo it; you want distinct swirls, not a muddy mess. Think pretty marbling!
Step 7: Bake
Carefully place the springform pan in the preheated oven. Bake for 30-40 minutes. The edges should be set and slightly puffed, but the center will still be a little soft and jiggly. This is exactly what you want for that fudgy texture. A toothpick inserted into the center should come out with moist crumbs attached, not wet batter. Ovens vary, so keep an eye on it. I’ve learned that an extra few minutes can sometimes turn it into a bit of a hockey puck, so err on the side of underbaking!
Step 8: Cool & Glaze
Once baked, carefully remove the cake from the oven. Let it cool in the pan on a wire rack for about 15-20 minutes. The center might sink slightly, which is perfectly normal for this kind of cake! Once it’s had a little time to firm up, carefully run a knife around the edge and release the springform sides. Let it cool completely on the wire rack. While it’s cooling, you can make the glaze. Heat the heavy cream in a small saucepan until it just starts to simmer. Pour it over the chopped chocolate in a bowl. Let it sit for a minute, then whisk until smooth and glossy. Stir in the butter, if using. Let the glaze cool slightly until it’s pourable but not too hot.
Step 9: Slice & Serve
Once the cake is completely cool, pour the glaze over the top, letting it drip down the sides. You can also skip the glaze and just dust it with cocoa powder or powdered sugar – it’s delicious either way! For the cleanest slices, use a sharp knife dipped in hot water and wiped dry between each cut. Serve at room temperature or slightly chilled. It’s truly divine.
What to Serve It With
This flourless chocolate cake is so rich and decadent, it can honestly stand on its own as a glorious dessert. But if you’re feeling fancy or want to create a whole experience, here are some ideas that I’ve tried and loved:
For Breakfast: Believe it or not, this cake is fantastic for a special breakfast or brunch! I love serving a small, thin slice with a strong cup of black coffee. It’s the perfect way to start a weekend. You could also pair it with some fresh berries on the side to cut through the richness. It feels so indulgent, but in moderation, it’s a delightful treat.
For Brunch: Elevate it with a dollop of freshly whipped cream and a scattering of raspberries or a drizzle of raspberry coulis. The tartness of the berries is a wonderful contrast to the deep chocolate flavor. For drinks, a mimosa or a glass of sparkling rosé complements the richness beautifully.
As Dessert: This is where it truly shines. A scoop of good quality vanilla bean ice cream or a dollop of crème fraîche is classic for a reason. A sprinkle of flaky sea salt on top just before serving can also enhance the chocolate flavor and add a sophisticated touch. Serve it after a lovely dinner with coffee or a digestif.
For Cozy Snacks: On a chilly evening, a thick slice of this cake warmed slightly in the microwave (just for a few seconds!) is pure comfort. I often pair it with a warm glass of milk or a mug of herbal tea. It’s the ultimate treat when you need a hug in cake form. My kids go absolutely wild for this, especially when I add a spoonful of peanut butter to the batter before swirling!
Top Tips for Perfecting Your Flourless Chocolate Cake
I’ve made this flourless chocolate cake more times than I can count, and over the years, I’ve picked up a few tricks that help ensure it comes out perfectly every single time. Don’t be afraid to learn from my little oopsies!
Chocolate Quality Matters: I’ve said it before, but I’ll say it again – use the best quality chocolate you can afford. It’s the star of the show, and a cheap chocolate will definitely show in the final taste. I prefer using chocolate bars that I chop myself rather than chips, as chips can sometimes have stabilizers that affect melting and texture.
Room Temperature Eggs are Key: Cold eggs don’t whip up as well, and you won’t get that lovely volume in your batter. If you forget to take them out of the fridge, you can quickly warm them by placing them in a bowl of warm (not hot!) water for about 5-10 minutes. This simple step makes a big difference in the cake’s structure.
Don’t Overmix the Batter: Once you combine the chocolate and egg mixtures, fold gently. Overmixing can lead to a tougher cake, and we’re going for melt-in-your-mouth here! Just mix until you no longer see streaks of egg. A few swirls are perfectly fine and even add to the charm.
Know Your Doneness Test: The toothpick test is your best friend. Remember, you want moist crumbs, not wet batter. It’s better to slightly underbake this cake than to overbake it, as it will continue to set as it cools. A gently jiggly center is a good sign.
Cooling is Crucial: Let the cake cool in the pan for a bit before releasing the sides. This allows it to firm up and prevents it from breaking. Then, allow it to cool completely on a wire rack before glazing. Trying to glaze a warm cake will result in a melted mess!
Glaze Consistency: For a thicker, ganache-like glaze, use equal parts chocolate and cream. For a thinner, more drizzly glaze, use a little more cream. If your glaze gets too thick, you can gently warm it up for a few seconds. If it’s too thin, let it sit at room temperature for a bit to thicken.
Serving Temperature: This cake is delicious at room temperature. However, if you prefer a firmer, more fudgy texture, chilling it for an hour or two before serving is a great option. Just make sure to let it sit out for about 15 minutes before slicing if it’s been in the fridge.
Embrace Imperfection: This cake is rustic and beautiful. Don’t stress if it sinks in the middle (it’s supposed to!) or if your swirls aren’t perfect. The beauty of a flourless chocolate cake is its honest, rich simplicity.
Storing and Reheating Tips
This flourless chocolate cake is surprisingly forgiving when it comes to storage, and that’s a big win in my book! Here’s how I usually keep it fresh and delicious:
Room Temperature: If it’s not too warm in your house, you can keep this cake at room temperature, uncovered, for up to 2 days. I usually store it in a cake dome to protect it from dust and humidity. This is perfect if you plan on finishing it off fairly quickly – the texture is often at its best at room temperature.
Refrigerator Storage: For longer storage, or if you live in a warmer climate, I recommend refrigerating it. Wrap the cooled cake (without glaze, or with a set glaze) tightly in plastic wrap, then place it in an airtight container. It will keep well in the fridge for up to 5 days. The texture will become denser and more fudgy when chilled, which many people absolutely love!
Freezer Instructions: Yes, you can freeze this cake! It’s a great make-ahead option. First, ensure the cake is completely cooled. If it’s glazed, let the glaze set completely. Wrap the cake tightly in a layer of plastic wrap, then a layer of aluminum foil. You can also place it in a freezer-safe container for extra protection. It will keep well in the freezer for up to 2-3 months. Thaw it overnight in the refrigerator, then let it come to room temperature before serving for the best texture.
Glaze Timing Advice: If you plan to freeze the cake, I highly recommend glazing it *after* it has been thawed. Glazing it before freezing can sometimes lead to a slightly less appealing texture in the glaze. For refrigerator storage, glazing before storing is usually fine, as long as the glaze has set completely.
Frequently Asked Questions
Final Thoughts
Honestly, this flourless chocolate cake is more than just a recipe for me; it’s a little slice of pure joy. It’s the kind of dessert that consistently delivers, making everyone who tries it incredibly happy. It’s proof that you don’t need to be a professional baker to create something truly spectacular. The deep, rich chocolate flavor, combined with that melt-in-your-mouth texture, is simply divine. It’s perfect for those moments when you need something special but don’t have a lot of time or energy. If you love chocolate, you simply must give this a try. I promise it won’t disappoint!
If you found yourself drawn to this recipe, you might also enjoy my Rich Dark Chocolate Brownies or my Decadent Chocolate Lava Cakes – they’re all about that deep chocolatey goodness!
I’d absolutely love to hear how your flourless chocolate cake turns out! If you give it a go, please leave a comment below and share your experience, or tag me on social media with your photos. Happy baking, my friends!
Flourless Chocolate Cake
Ingredients
Main Ingredients
- 226 grams dark chocolate chopped
- 226 grams unsalted butter cut into cubes
- 0.5 cup granulated sugar
- 4 large eggs separated
- 0.125 teaspoon salt
- 0.5 teaspoon vanilla extract
Instructions
Preparation Steps
- Preheat your oven to 350°F (175°C). Grease and line a 9-inch springform pan with parchment paper.
- In a heatproof bowl set over a saucepan of simmering water (double boiler), melt the chopped dark chocolate and butter together, stirring until smooth.226 grams dark chocolate
- Remove the bowl from the heat and whisk in the granulated sugar until well combined. Let the mixture cool slightly.226 grams dark chocolate
- In a separate bowl, whisk together the egg yolks, salt, and vanilla extract. Gradually whisk this mixture into the cooled chocolate mixture.226 grams dark chocolate
- In a clean bowl, beat the egg whites until stiff peaks form.
- Gently fold about a third of the whipped egg whites into the chocolate mixture to lighten it. Then, carefully fold in the remaining egg whites until just combined. Do not overmix.
- Pour the batter into the prepared springform pan and smooth the top.
- Bake for 30-35 minutes, or until the edges are set and the center is still slightly soft. A toothpick inserted into the center should come out with moist crumbs, not wet batter.
- Let the cake cool in the pan on a wire rack for 10 minutes before releasing the sides of the springform pan. Allow to cool completely on the rack.
Notes
Featured Comments
“Impressed! Clear steps and super easy results. Perfect for busy nights.”
“New favorite here — creamy. crowd-pleaser was spot on.”
“Super easy and turned out amazing! My family asked for seconds. Saving this one.”
“This sweet treat was absolutely loved — the cozy really stands out. Thanks!”
“Made it tonight and wow — turned out amazing! Will definitely make Flourless Chocolate Cake again.”
“Packed with flavor and so simple. Exactly what I wanted from Flourless Chocolate Cake.”