

I still remember the first time I watched my mom whip up something that looked almost too simple to be good: a crusty loaf, slices to cradle a fragrant tomato sauce, a shower of mozzarella, and a quick kiss of Garlic Butter. The kitchen smelled like a warm hug, and my plate felt like a little celebration. That memory echoes every time I make French bread pizza, because it’s the kind of dish that tastes like a favorite memory—simple, cozy, and wholly satisfying. This isn’t fancy restaurant fare; it’s the kind of weeknight magic you pull out when you’re juggling homework, work emails, and a craving that won’t quit. French bread pizza brings the comfort of classic pizza with the cross-town ease of a grocery-store staple, and it somehow tastes even better when you make it with a little extra love—and a lot less stress. This one’s a lifesaver on busy nights, and yes, my kids actually ask for seconds.
What is French bread pizza?
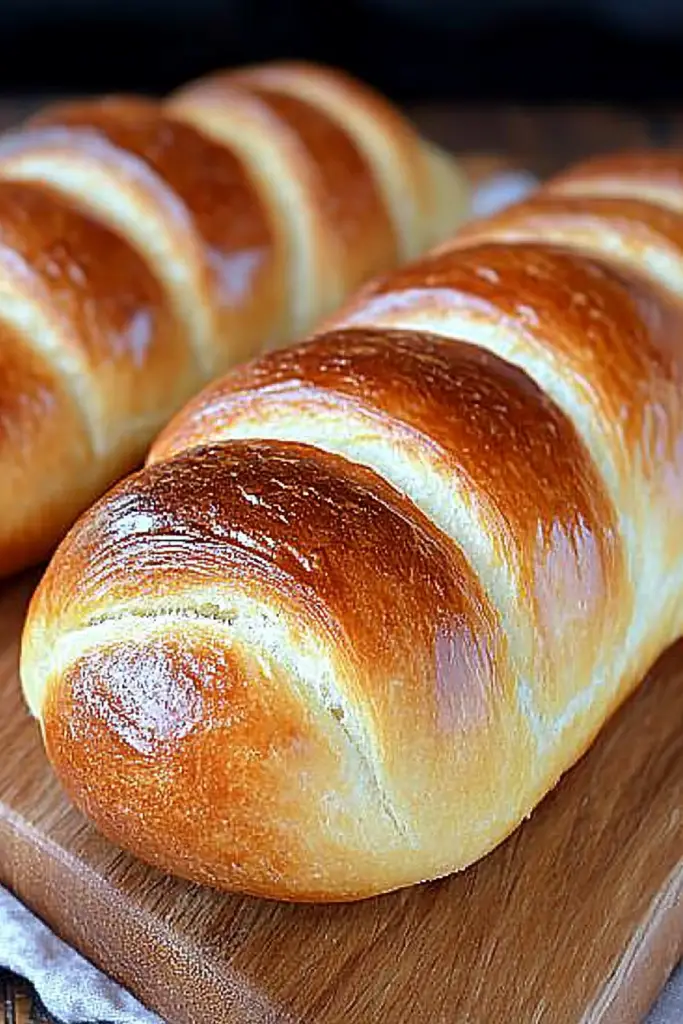
Think of french bread pizza as a love-letter to everyday dinners. It’s essentially a crusty loaf, halved and toasted, then topped with your favorite sauce, cheese, and toppings. The base is hearty enough to stand up to a generous layer of sauce without becoming soggy, which is why it’s so forgiving on rushed evenings. The term “French bread pizza” isn’t about a fancy Italian technique; it’s about using a familiar, bakery-worthy loaf as the star performer. It’s a smart, approachable way to feed a crowd, customize portions, and use up odds and ends from the fridge. It’s the idea of pizza energy, but with the texture and flavor you get from a sturdy French loaf. In other words, it’s pizza’s friendly cousin, and it’s ready in a flash.
How do you make French bread pizza?
Quick Overview
In a nutshell, you’re turning a sturdy French loaf into a two-slice canvas for sauces and cheese. The process is straightforward: toast the cut surfaces to set the crust, brush with garlicky butter for flavor and aroma, spread a bright tomato sauce, shower with cheese and toppings, and bake until bubbling and golden. The result snaps into place in about 20 minutes, give or take. It’s a recipe you can do with your eyes closed after you’ve made it a handful of times, and the kitchen fills with that comforting, almost nostalgic scent—garlic, oregano, melted cheese, and toasted bread. French bread pizza doesn’t pretend to be fancy; it honors all the best things about simple weeknight cooking: it’s fast, it tastes like home, and it leaves you with a glorious, crisp bite every time.
Ingredients
For the Main Batter:
– 1 loaf French bread, sliced in half lengthwise
– 3 tablespoons unsalted butter, melted
– 2 cloves garlic, minced
– 1/2 teaspoon dried oregano
– Pinch of sea salt
– 1/4 cup grated parmesan (optional, for a little savory crust)
For the Filling:
– 1 cup pizza sauce or marinara (quality matters here; I like a bright, not-too-sweet sauce)
– 2 cups shredded mozzarella cheese
– Assorted toppings: pepperoni slices, sliced bell peppers, mushrooms, black olives, red onion, cooked sausage, fresh basil
For the Glaze:
– 2 tablespoons olive oil
– 1 teaspoon Italian seasoning or a pinch of Red Pepper flakes for a kick
– Optional: a light drizzle of balsamic glaze after baking
Step-by-Step Instructions
Step 1: Preheat & Prep Pan
Heat your oven to 425°F (220°C). Line a large baking sheet with parchment or lightly oil it. If you want extra crisp edges, place the bread halves cut-sides up on the sheet and give them a quick spritz of olive oil spray or a brush of melted butter. I always tell myself to go easy on the sauce in the center—the edges should stay crisp and not soggy.
Step 2: Mix Dry Ingredients
In this recipe, the “dry” aspect is really the garlic butter plan. Mix the melted butter with minced garlic, oregano, and a pinch of salt. This is the base that will perfume the bread and set the flavor tone for everything else. It’s the simplest part, but trust me, it makes a noticeable difference in aroma and taste. If you’re feeling fancy, grate a little parmesan into the butter—it creates a faint crust that’s pure joy on the first bite.
Step 3: Mix Wet Ingredients
No separate wet batter here, which is the beauty of this method. The tomato sauce and cheese do the talking. Pick a sauce you actually like—don’t settle for bland canned stuff. A bright marinara or a simple, well-seasoned tomato sauce will carry the toppings and keep everything from turning one-note.
Step 4: Combine
Brush the cut sides of the bread with the garlicky butter mix. Slide the sheet back into the oven for 5–7 minutes until the cut sides are lightly toasted and the butter has bubbled a bit. This step is magical—it brings out the bread’s sweetness and helps the toppings cling beautifully later on.
Step 5: Prepare Filling
While the bread pre-toasts, stir together your sauce and arrange toppings in small bowls. If you’re serving a crowd, it’s a good idea to have a topping bar so everyone can customize. Don’t overdo it with wet toppings; moisture can make the crust soggy, so pat mushrooms and vegetables dry if they’ve released liquid.
Step 6: Layer & Swirl
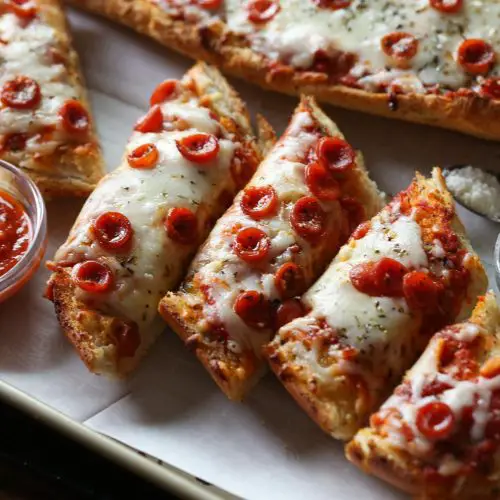
Spread a generous layer of sauce across the toasted bread. Then sprinkle mozzarella evenly, and lay on toppings of choice. If you want a pretty marble effect, swirl a few spoonfuls of extra sauce into the cheese before laying toppings. A light swirl gives it a rustic look and a touch more sauce impact where you want it.
Step 7: Bake
Bake for 10–12 minutes, or until the cheese is melted and bubbling and the edges are crisp. If you like a darker crust, switch to the broil setting for the last 1–2 minutes, watching closely so you don’t burn. Oven temperatures vary, so use your best judgment—the goal is a glossy, lightly browned top and a crisp, tender bottom.
Step 8: Cool & Glaze
Let the bread sit for about 3–5 minutes before slicing; this helps the cheese set a little and makes it easier to cut clean slices. If you like a finishing sheen, whisk together oil and Italian seasoning for a quick glaze and brush lightly over the hot pizza. A small drizzle of balsamic glaze after baking also adds a wonderful sweet-tangy note that brightens the flavors.
Step 9: Slice & Serve
Slice into generous portions and pile onto a platter. If you’re feeding kids, cut into smaller shapes or stars—they love a little whimsy. A sprinkle of fresh basil leaves right before serving adds color and a fresh aroma that makes this French bread pizza feel even more inviting. This dish is best enjoyed warm, with a little crust crack and a gooey, melty center.
What to Serve It With
French bread pizza is a little culinary victory on its own, but it shines with the right accompaniments. Here are a few ideas organized by mood.
For Breakfast: Serve slices with a bright coffee or a latte, and pair with a fruit salad for a savory start. I love a quick breakfast version where you top with a light scramble and a touch of fresh herbs for a morning twist on this classic.
For Brunch: A small plate of olives, a few marinated vegetables, and a sparkling beverage makes this feel chic and approachable. Slice and plate with a side green salad for contrast.
As Dessert: Not your traditional route, but a drizzle of honey over a cheese-and-tresh topping can work in a pinch for a sweet-savory end, especially when you’re feeding a big crowd who’s already making room for cake later. Alternatively, pick up a lighter fruit tart to finish the meal.
For Cozy Snacks: This is perfect with a simple bowl of miso soup or a warm cup of tea. It’s also a wonderful companion to a casual movie night—crunchy crust, melty cheese, and a comforting aroma.
In our house, French bread pizza is the go-to for busy weeknights and lazy weekends alike. It travels well on a sheet pan for potlucks, too. We’ve even done a mini version for kids by making two smaller halves of the loaf and letting everyone build their own face-topping masterpieces. It’s a small ritual that turns ordinary evenings into something a little warm and memorable.
Top Tips for Perfecting Your French Bread Pizza
Here are practical tricks I’ve learned after making this dish a hundred times—yes, I’ve burned a few edges (and learned from them) so you don’t have to. These tips cover technique, flavor, and a few substitutions so you can tailor the recipe to what’s in your fridge.
Zucchini Prep: If you want to sneak in more vegetables, grate a zucchini and squeeze out the moisture. It adds moisture without making the crust soggy, and it turns into a hidden veggie win for kids. Season lightly and pat dry before you sprinkle on top.
Mixing Advice: Don’t overdo it with the sauce or toppings. A little goes a long way on a bread base. Too much moisture is what sinks the crust. If you’ve got extra sauce, reserve it for dipping so the bread stays crisp.
Swirl Customization: For a fun pattern, try a light ribbon of sauce across the cheese in a zigzag or loop. It looks elegant and creates little pockets of savory flavor that surprise you when you bite in.
Ingredient Swaps: Use whole-milk mozzarella for a creamier melt, or try fontina for a deeper nutty note. If you want a lighter option, mix part-skim mozzarella with one-third ricotta for a creamy, cohesive melt that’s less stringy.
Baking Tips: Place the pan in the middle rack for even heat, and watch the bake closely during the last few minutes. Every oven is different; if your crust browns too fast, lower the heat a bit and bake a little longer. If you like a crispier bottom, slide the rack down one notch and bake just a touch longer.
Glaze Variations: If you want a glossy finish, brush with a garlic-herb oil or a balsamic reduction. A simple drizzle of honey over pepperoni adds a sweet balance to the tomato and cheese. The glaze is optional but adds a nice finish if you’re serving it as a centerpiece for guests.
My lessons learned are simple: the bread makes or breaks the texture, so don’t skip toasting the cut side and buttering it generously; the rest of the toppings are easier to adapt than you think; and always taste your sauce before you bake—bright tomato with a touch of herbs is exactly what this dish needs to sing. This is the kind of recipe I’ve made for friends who popped by at the last minute, and I’m always surprised by how much joy it brings to the table. It’s not about chasing perfection; it’s about sharing something warm, familiar, and delicious. Trust me on this one—French bread pizza has a way of turning a quiet weeknight into a little celebration.
Storing and Reheating Tips
Leftovers? They happen in our house, even when we swore there’d be none. Here’s how I handle storage and reheating so the bread stays crisp and the cheese still glistens a bit when you take it out of the fridge.
Room Temperature: Best enjoyed the same day. If you must store, wrap the slices tightly in foil or place them in a resealable container for up to 2 hours. The bread loses its crispness the longer it sits at room temperature, but the flavors still hold.
Refrigerator Storage: Transfer cooled slices to a shallow container with a small piece of parchment between layers to prevent sticking. Refrigerate up to 3 days. Reheat in the oven at 350°F (175°C) for about 8–10 minutes, or until cheese bubbles and crust re-crisps.
Freezer Instructions: Freeze unbaked halves after toasting and buttering, wrapped tightly in plastic wrap and then foil. They’ll keep for up to 2 months. Thaw overnight in the fridge and bake as you normally would, adding a couple of minutes to the bake time if needed. If you freeze after baking, reheat gently at 325°F (165°C) for 10–12 minutes to avoid drying out the bread.
Glaze Timing Advice: If you’re freezing, skip the glaze and add after reheating. The glaze can soften during freezing, and you’ll want that fresh gloss when you serve it again.
These tips have kept French bread pizza tasting almost as good as the first bake, even after a night in the fridge. It’s a quiet win when you don’t want to waste dinner, and it’s still a crowd-pleaser the next day.
Frequently Asked Questions
Final Thoughts
This French bread pizza has become one of those dishes I reach for when I want something comforting that still feels like a little celebration. The texture of the crust, the way the cheese blankets the slices, and the aroma of garlic butter all come together in a way that reminds me of weekend family dinners and quiet conversations around the kitchen island. It’s not a complicated recipe, but it’s reliable, flexible, and deeply satisfying. If you’re craving something hearty yet quick, this is your answer. It pairs beautifully with a green salad, a glass of something sparkling, and a handful of shared stories. I’ve shared this with neighbors who dropped by unannounced, and it always disappears in minutes—proof that sometimes the simplest ideas are the very best. If you try variations, I’d love to hear what works for you. Happy baking!
French Bread Pizza
Ingredients
Main Ingredients
- 1 large loaf French bread See note in original recipe for specific type
- 6 tablespoons butter
- 0.5 teaspoon garlic powder
- 0.5 teaspoon kosher salt
- 0.5 teaspoon black pepper
- 2 teaspoons dried parsley
- 2 cups grated (low moisture) mozzarella cheese
- 1 cup pizza sauce
- 1 cup sliced pepperoni
- 2 tablespoons Parmesan cheese
- 1 teaspoon Italian seasoning
Instructions
Preparation Steps
- Preheat oven to 400°F. Line a large baking sheet with parchment paper.
- Slice French bread in half lengthwise. Gently press down on the bread to make it less airy and more compact.
- In a microwave-safe bowl, melt butter with garlic powder, salt, pepper, and parsley. Stir to combine.
- Brush the melted butter mixture evenly on top of the bread halves.
- Place the bread on the prepared baking sheet and bake for 7 minutes, or until lightly toasted.
- Remove from oven. Sprinkle about 1/4 cup of mozzarella cheese on each half. This helps prevent a soggy crust. Top with pizza sauce, spreading evenly. Sprinkle the remaining mozzarella cheese over the sauce.
- Add pepperoni slices, then sprinkle each half with 1 tablespoon of Parmesan cheese and 1/2 teaspoon of Italian seasoning.
- Return pizzas to the oven and bake for 11-12 minutes, or until the cheese is melted and lightly browned.
Notes
Featured Comments
“Impressed! Clear steps and so flavorful results. Perfect for busy nights.”
“New favorite here — so flavorful. crowd-pleaser was spot on.”
“Super easy and turned out amazing! My family asked for seconds. Saving this one.”
“This sweet treat was absolutely loved — the balanced really stands out. Thanks!”
“Made it tonight and wow — creamy! Will definitely make French bread pizza again.”
“Packed with flavor and so simple. Exactly what I wanted from French bread pizza.”


