

You know those mornings, right? The ones where you hit snooze maybe a *little* too many times, and suddenly you’re scrambling to get out the door? Yeah, I’ve been there. More times than I’d care to admit! And on those days, my coffee is basically my lifeline. But sometimes, the store-bought stuff just feels… a bit lackluster. It’s fine, but it doesn’t have that special something. That’s why I started experimenting, trying to recreate that perfect, rich, subtly sweet flavor you get from a really good coffee shop. And let me tell you, after countless batches, I finally landed on this French Vanilla Coffee Creamer recipe. It’s not just creamer; it’s liquid gold for your coffee. It’s so good, it makes even the most chaotic morning feel a little bit luxurious. Forget those artificial-tasting syrups; this is the real deal, and it tastes like pure comfort. It’s honestly like a warm hug in a mug, and the smell of it brewing in the kitchen is just heavenly.
What is French Vanilla Creamer?
So, what exactly makes this French Vanilla Coffee Creamer so special? Well, at its heart, it’s a simple, homemade version of that beloved liquid that transforms your morning brew from “meh” to “wowza!” The “French Vanilla” part usually means it has a richer, deeper vanilla flavor, often with a hint of custard notes, compared to regular vanilla. Think of it as vanilla’s sophisticated cousin. My recipe takes that idea and runs with it, using good quality ingredients to create a creamer that’s incredibly smooth, wonderfully aromatic, and perfectly sweet. It’s essentially a creamy, dreamy infusion of real vanilla and a touch of sweetness that’s designed to blend seamlessly into your hot coffee, making every sip a little moment of bliss. It’s not complicated, but the results are just…chef’s kiss!
How do I make French Vanilla Coffee Creamer
Quick Overview
Making this incredible French Vanilla Coffee Creamer is surprisingly straightforward. You essentially combine a few key ingredients – rich dairy (or non-dairy) goodness, pure Vanilla Extract (or vanilla bean paste for an extra kick!), and a touch of sweetener – and whisk them together until perfectly smooth and creamy. That’s it! There’s no cooking involved, no complicated steps. You just need to stir everything together, and you’ve got a batch of delicious, homemade creamer ready to elevate your coffee. It’s so simple that it feels almost magical, and the result is a creamer so much better than store-bought, you’ll wonder why you didn’t make it sooner. This method ensures a consistently smooth texture without any graininess.
Ingredients
What is the creamy base?
1. Heavy Cream: About 1 cup. This is what gives our creamer that luscious, rich texture. You can absolutely substitute with half-and-half if you want something a little lighter, but for ultimate decadence, heavy cream is the way to go. I’ve even experimented with full-fat coconut milk for a dairy-free option, and while it has a slightly different flavor, it works beautifully and makes it super creamy!
2. Milk: About 1 cup. You can use any kind of milk you prefer here – whole milk, 2%, skim, almond milk, oat milk – whatever you have on hand! Whole milk will give you a richer result, but even skim works fine. This helps to thin out the heavy cream just enough to make it pourable and less viscous.
For the Sweetness and Flavor:
3. Sweetener: About 1/4 to 1/2 cup, depending on your preference. I usually start with 1/4 cup of granulated sugar or organic cane sugar. You can also use maple syrup or agave nectar for a slightly different flavor profile. If you like it sweeter, just add a little more! I’ve found that adding sweetener gradually and tasting as you go is the best approach. It’s so easy to adjust!
4. Vanilla Extract: 1 to 2 teaspoons. This is where the magic happens! I always opt for pure vanilla extract; it makes a world of difference compared to imitation. For an even more intense, speckled, and gourmet flavor, you can use 1 teaspoon of vanilla bean paste. It looks beautiful and tastes incredible!
5. Pinch of Salt: Just a tiny pinch helps to enhance all the other flavors and balance the sweetness. It’s a little trick I learned years ago, and it truly makes a difference!
Step-by-Step Instructions
Step 1: Gather Your Ingredients
First things first, let’s get everything ready. Make sure your heavy cream and milk are nice and cold. This helps everything emulsify better. Grab a measuring cup, a whisk, and a clean jar or airtight container for storing your beautiful homemade French Vanilla Coffee Creamer. Having everything prepped before you start makes the whole process even quicker!
Step 2: Combine the Liquids
In a medium bowl or directly in your measuring cup, pour in your heavy cream and your milk. If you’re using a bowl, make sure it’s big enough to comfortably whisk everything together without splashing. This forms the smooth, creamy base for our creamer.
Step 3: Add the Flavor and Sweetness
Now for the star players! Add your chosen sweetener (start with 1/4 cup and you can always add more), your pure vanilla extract (1 teaspoon is a good starting point, but go up to 2 if you love a strong vanilla flavor, or use vanilla bean paste!), and that tiny pinch of salt. Trust me on the salt; it’s a game-changer.
Step 4: Whisk Until Smooth
This is the main “work” involved! Grab your whisk and start stirring everything together. You want to whisk until the sweetener is completely dissolved and the mixture is uniformly smooth and slightly creamy. You shouldn’t see any sugar granules at the bottom. Keep whisking for about 30-60 seconds to ensure everything is beautifully incorporated. The mixture will start to look a little richer and more opaque.
Step 5: Taste and Adjust
This is crucial! Take a little sip of your freshly made creamer. Is it sweet enough? Does it have enough vanilla punch? If you want it sweeter, add another tablespoon or two of sugar (or your preferred sweetener) and whisk again. If you want more vanilla, add another 1/2 teaspoon of extract. This is where you make it perfectly *yours*!
Step 6: Transfer to Storage
Once you’re happy with the taste and consistency, carefully pour your glorious French Vanilla Coffee Creamer into a clean jar or airtight container. A mason jar with a lid works perfectly. This recipe usually yields about 2 cups, but it depends slightly on the fat content of your milk and cream.
Step 7: Chill Before Serving
For the best flavor and texture, I highly recommend chilling the creamer in the refrigerator for at least 30 minutes before using it in your coffee. This allows the flavors to meld together beautifully and gives it that perfect cool temperature that contrasts so nicely with hot coffee. It also ensures the texture is just right!
Step 8: Enjoy Your Perfect Coffee!
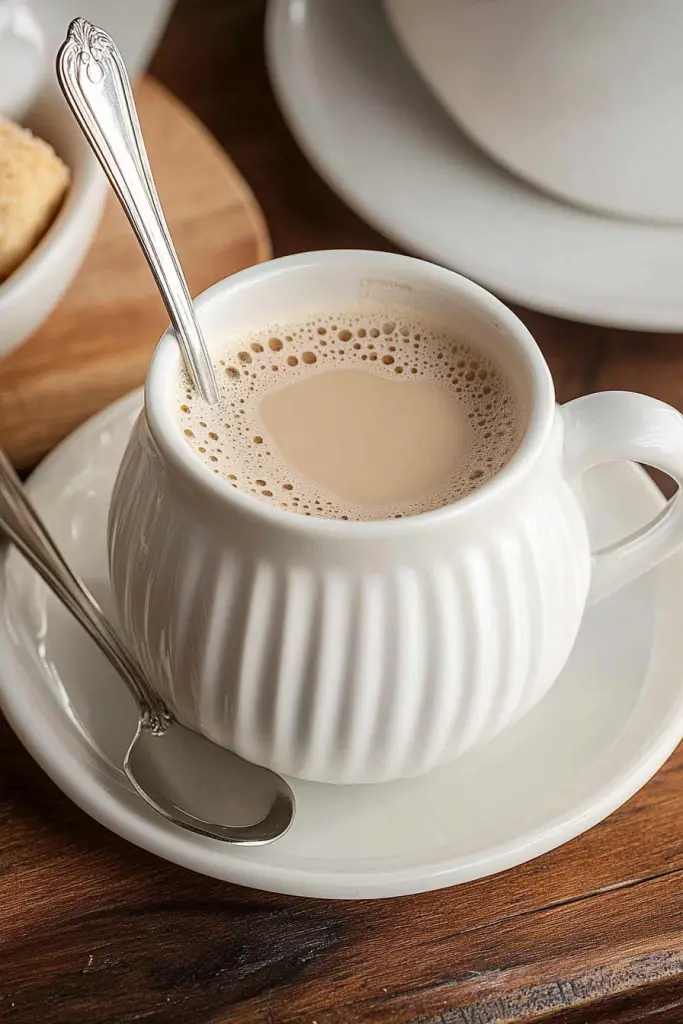
Now comes the best part! Pour yourself a cup of your favorite coffee, add as much of your homemade French Vanilla Coffee Creamer as your heart desires, give it a stir, and savor that first, perfect sip. You’ve just made something truly special!
What to Serve It With
This French Vanilla Coffee Creamer is, of course, the absolute star of the show when it comes to your morning coffee. But it’s surprisingly versatile! For **breakfast**, imagine a steaming mug of dark roast coffee with a generous swirl of this creamer – it’s like dessert for breakfast! It also pairs beautifully with a simple croissant or a slice of toast. If you’re hosting **brunch**, this creamer elevates your coffee station to something truly elegant. You can even offer small carafes of it alongside a beautiful spread of pastries, fruit salad, and maybe some quiche. It adds a touch of homemade luxury that your guests will adore. As a **dessert** companion, while it’s meant for coffee, a tiny drizzle of this creamer over a scoop of plain vanilla Ice Cream or even a panna cotta can be a delightful surprise! For **cozy snacks**, on a chilly afternoon, a warm mug of coffee with this creamer is pure comfort. It’s perfect with a good book and a quiet moment. My family also loves it in iced coffee, especially during the summer. Just make sure your coffee is chilled first!
Top Tips for Perfecting Your French Vanilla Coffee Creamer
Over the years of making this French Vanilla Coffee Creamer, I’ve picked up a few tricks that I think are worth sharing. They might seem small, but they really do make a difference in getting that perfect, café-quality flavor at home. First, when it comes to **sweetness**, don’t be afraid to play around. I’ve found that starting with less and adding more is always the best strategy, because you can always add, but you can’t really take it away! If you’re using liquid sweeteners like maple syrup or agave, remember they have a distinct flavor, so adjust accordingly. For the **vanilla**, seriously, go for pure vanilla extract or vanilla bean paste if you can. The difference in taste is night and day. If you’re using vanilla bean paste, you’ll get those lovely little vanilla bean specks, which look so pretty in the creamer and give it an extra punch of vanilla flavor. I’ve tried using just a tiny amount of almond extract along with the vanilla, and it adds a subtle nutty undertone that’s surprisingly delicious, though you have to be careful not to overdo it! When it comes to **dairy swaps**, I’ve had the most success with full-fat coconut milk for a dairy-free option; it gives that really rich texture. Almond milk and oat milk work too, but they can sometimes make the creamer a little thinner, so you might want to adjust the ratio of milk to cream or add a touch more sweetener to compensate. If your creamer feels a little too thick after chilling, just whisk in a tablespoon or two of milk until it reaches your desired consistency. And a pro tip for storage: always give your creamer a good shake before each use, as the natural ingredients can sometimes separate a little. I learned this the hard way when I first started making it! Lastly, don’t be afraid to get creative with flavors. A tiny dash of cinnamon or a touch of cardamom can add a lovely seasonal twist!
Storing and Reheating Tips
Keeping your homemade French Vanilla Coffee Creamer fresh is super simple, and it’s fantastic because you always have it on hand. For **room temperature storage**, honestly, I don’t recommend it for long periods, especially with dairy. It’s best to keep it chilled. If you’ve just made a fresh batch and plan to use it within a few hours, that’s fine, but for optimal freshness and safety, pop it in the fridge. **Refrigerator storage** is your best bet. Keep it in an airtight container, like a mason jar with a tight-fitting lid. It stays wonderfully fresh in the fridge for about 7 to 10 days. I’ve noticed that the flavor is actually best around day 2 or 3, once all the flavors have really had a chance to meld together. Quality preservation is key, and an airtight container really helps with that. If you make a big batch and know you won’t use it all within that timeframe, **freezer instructions** are a great option! You can freeze it in ice cube trays – once frozen, pop the cubes into a freezer-safe bag. This is brilliant because you can just pop one or two cubes into your coffee as needed. Frozen creamer lasts for about 2 to 3 months. To thaw, just remove the desired number of cubes and let them defrost in the refrigerator overnight. For **glaze timing advice** (if you were using this in a baked good, for example, though it’s primarily for coffee), you’d want to add it fresh. But for coffee, it’s ready to go straight from the fridge or after thawing!
Frequently Asked Questions
Final Thoughts
I really hope you give this French Vanilla Coffee Creamer a try! It’s one of those simple, feel-good recipes that just makes everyday life a little bit brighter. It’s proof that you don’t need fancy ingredients or complicated techniques to make something truly delicious. It’s the perfect way to elevate your morning routine, and I honestly can’t imagine my coffee without it anymore. If you love this, you might also enjoy my recipe for homemade caramel syrup, which is another fantastic way to jazz up your hot or cold beverages! Give this creamer a go, and please, please let me know how it turns out in the comments below! I’d love to hear about your favorite way to use it, or any little twists you’ve added. Happy creamer-making!
French Vanilla Coffee Creamer
Ingredients
Main Ingredients
- 1 cup Heavy cream
- 1 cup Whole milk
- 0.5 cup Granulated sugar
- 1 tablespoon Vanilla extract
- 0.25 teaspoon Almond extract (optional)
Instructions
Preparation Steps
- In a medium saucepan, whisk together the heavy cream, whole milk, and granulated sugar.
- Heat the mixture over medium heat, stirring occasionally, until the sugar is dissolved and the mixture is warm. Do not boil.
- Remove from heat and stir in the vanilla extract and almond extract (if using).
- Let the creamer cool completely, then pour into an airtight container.
- Store in the refrigerator for up to 2 weeks.
Notes
Featured Comments
“Impressed! Clear steps and spot on results. Perfect for busy nights.”
“New favorite here — perfect for busy nights. crowd-pleaser was spot on.”
“Super easy and turned out amazing! My family asked for seconds. Saving this one.”
“This sweet treat was absolutely loved — the balanced really stands out. Thanks!”
“Made it tonight and wow — so flavorful! Will definitely make French Vanilla Coffee Creamer again.”
“Packed with flavor and so simple. Exactly what I wanted from French Vanilla Coffee Creamer.”


