

The Ultimate Buttermilk Fried Chicken (Plus My Best Fried Chicken Tips!)
There is something deeply magical about a lazy Sunday afternoon when the smell of hot oil, seasoned flour, and savory spices fills the kitchen. Growing up, making fried chicken wasn’t just cooking; it was a whole family event. I still remember standing on a little step stool, watching my grandmother expertly toss pieces of chicken in a paper bag full of flour, mesmerized by the rhythm of her hands. For the longest time, I was terrified to try it myself. Deep frying at home? It felt like a messy, intimidating disaster waiting to happen.
But after years of trial, error, and plenty of less-than-perfect batches, I finally cracked the code. I’ve gathered all the best secrets and techniques, and today, I’m sharing my absolute favorite recipe along with my holy grail fried chicken tips so you can get that shatteringly crisp crust and juicy interior every single time. Grab your favorite apron, and let’s make some comfort food magic!
What Is This Classic Buttermilk Fried Chicken?
If you have never experienced the joy of true, homemade Southern-style fried chicken, you are in for a serious treat. At its core, this recipe is a beautiful exercise in simplicity and patience. We start with bone-in, skin-on chicken pieces that take a long, luxurious bath in seasoned buttermilk. The acidity in the buttermilk tenderizes the meat while helping the flavors penetrate all the way to the bone.
After the soak, the chicken is generously coated in a heavily spiced flour mixture. We aren’t just using salt and pepper here; we are building layers of flavor with garlic powder, smoked paprika, cayenne, and a secret ingredient for maximum crunch. Finally, it is pan-fried in hot oil until it transforms into a deeply golden, incredibly crispy masterpiece. It is the kind of meal that makes you close your eyes and sigh after the very first bite.
How to Make The Best Buttermilk Fried Chicken
Quick Overview
Making this recipe is a fun, hands-on process that comes together in four main phases. First, you will whisk together your buttermilk marinade and let the chicken soak (patience is key here!). Next, you will prep your dry ingredients, creating a highly seasoned flour blend. Then comes the dredging process, where you will coat the chicken and let it rest so the breading sticks perfectly. Finally, you will heat your oil and fry the chicken in batches until it reaches golden, crispy perfection.
Ingredients
Here is what you will need to gather before we get started. Don’t worry, these are mostly pantry staples!
- Chicken: 1 whole chicken (about 3-4 lbs), cut into 8 pieces (or use your favorite bone-in, skin-on pieces).
- The Marinade: 2 cups whole buttermilk, 2 tablespoons hot sauce, 1 teaspoon salt, and 1 teaspoon black pepper.
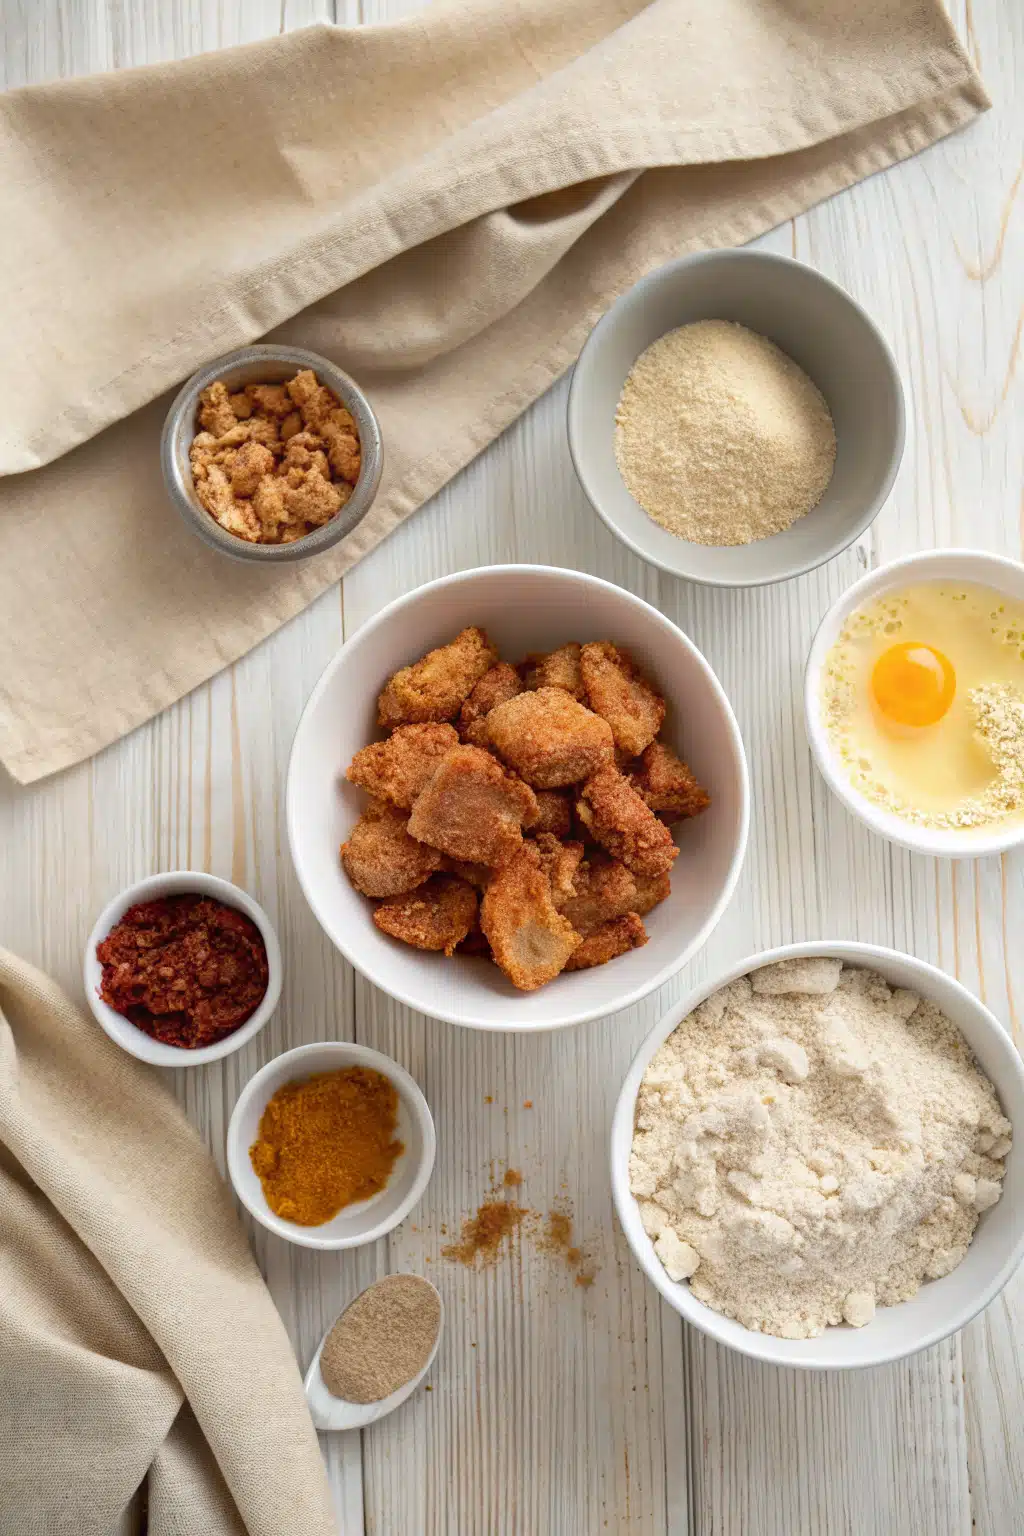
- The Flour Dredge: 2 cups all-purpose flour, 1/2 cup cornstarch (the secret to the crunch!).
- The Spices: 1 tablespoon seasoned salt, 1 tablespoon smoked paprika, 2 teaspoons garlic powder, 2 teaspoons onion powder, 1 teaspoon cayenne pepper, 1 teaspoon black pepper.
- The Oil: Peanut oil or canola oil for frying (about 4-6 cups depending on your pan).
Step-by-Step Instructions
Step 1: Marinate the Chicken
In a large bowl, whisk together the buttermilk, hot sauce, salt, and pepper. Submerge your chicken pieces in the mixture, making sure every piece is covered. Cover the bowl tightly with plastic wrap and pop it in the fridge. For the best flavor, let it marinate for at least 4 hours, but overnight is highly recommended!
Step 2: Prepare the Dredge
In a large, shallow dish (a pie dish works wonderfully for this), whisk together the flour, cornstarch, seasoned salt, smoked paprika, garlic powder, onion powder, cayenne pepper, and black pepper. Drizzle about 3 tablespoons of the buttermilk marinade straight from the chicken bowl into the dry flour mixture. Use a fork to mix it around until little clumps form—these clumps create extra crispy bits on the chicken!
Step 3: Dredge and Rest
Take a piece of chicken from the buttermilk, letting the excess drip off for a second. Drop it into the flour mixture, pressing the flour firmly into the chicken so it adheres well. Shake off the excess flour and place the coated chicken on a wire rack. Crucial tip: Let the breaded chicken sit at room temperature for 15 to 20 minutes before frying. This helps the crust stick to the meat so it doesn’t fall off in the pan.
Step 4: Fry to Perfection
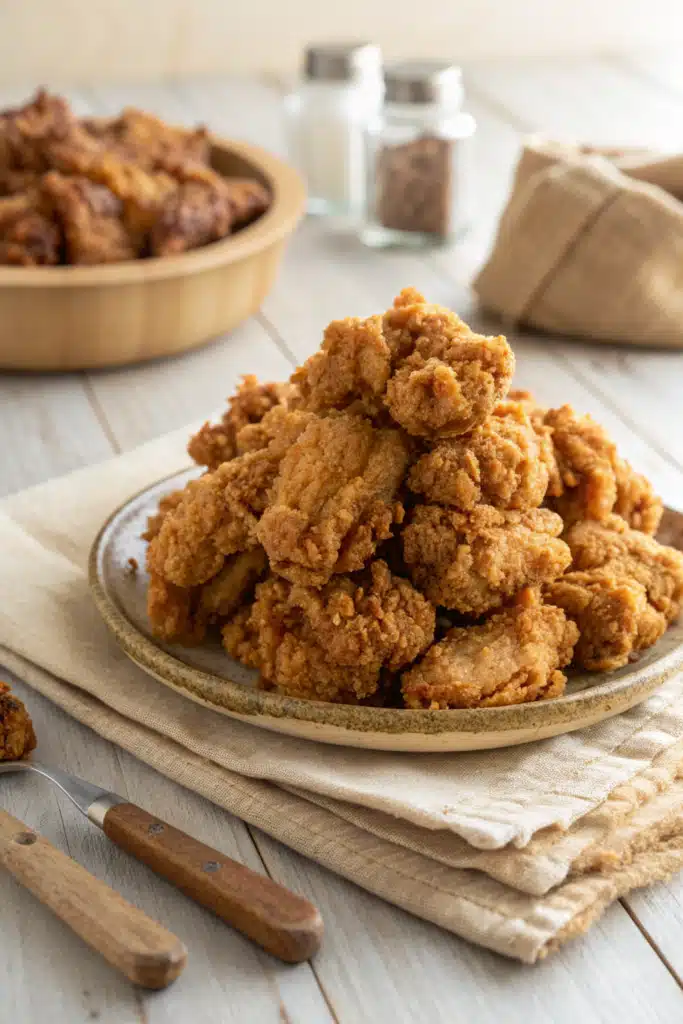
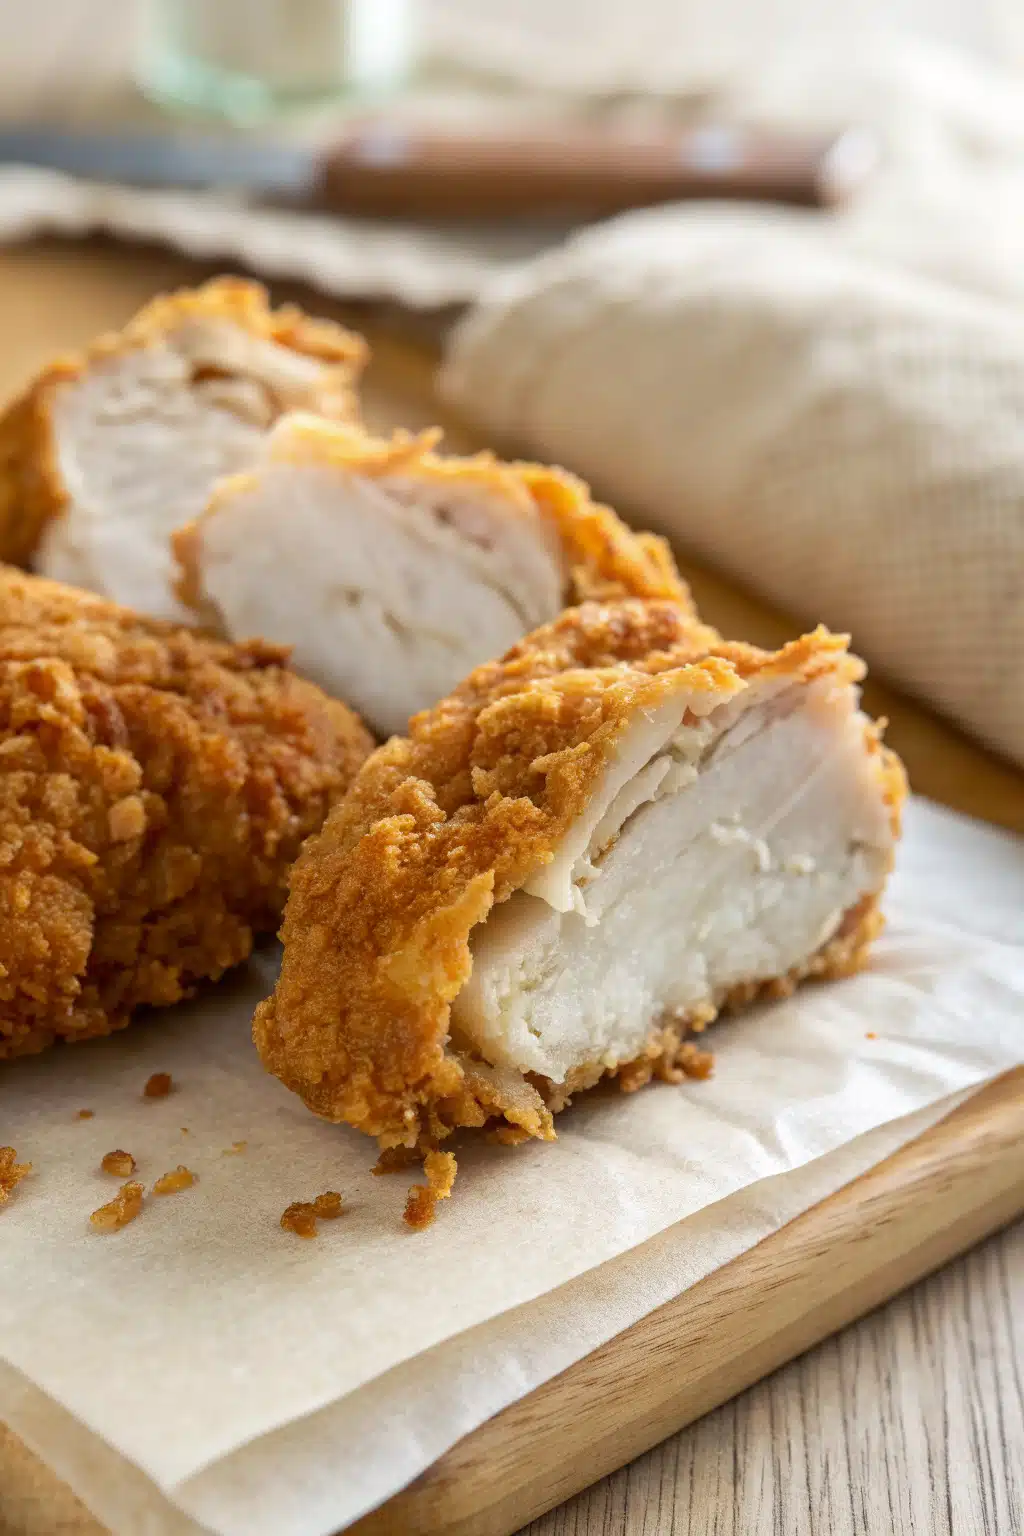
Pour about 2 inches of oil into a heavy-bottomed skillet or Dutch oven. Heat the oil to 350 degrees Fahrenheit. Carefully lower the chicken pieces into the oil, skin-side down. Do not crowd the pan! Fry for about 12 to 15 minutes, turning halfway through, until the crust is deep golden brown and the internal temperature reaches 165 degrees Fahrenheit. Transfer the cooked chicken to a clean wire rack set over a baking sheet to drain.
What to Serve It With
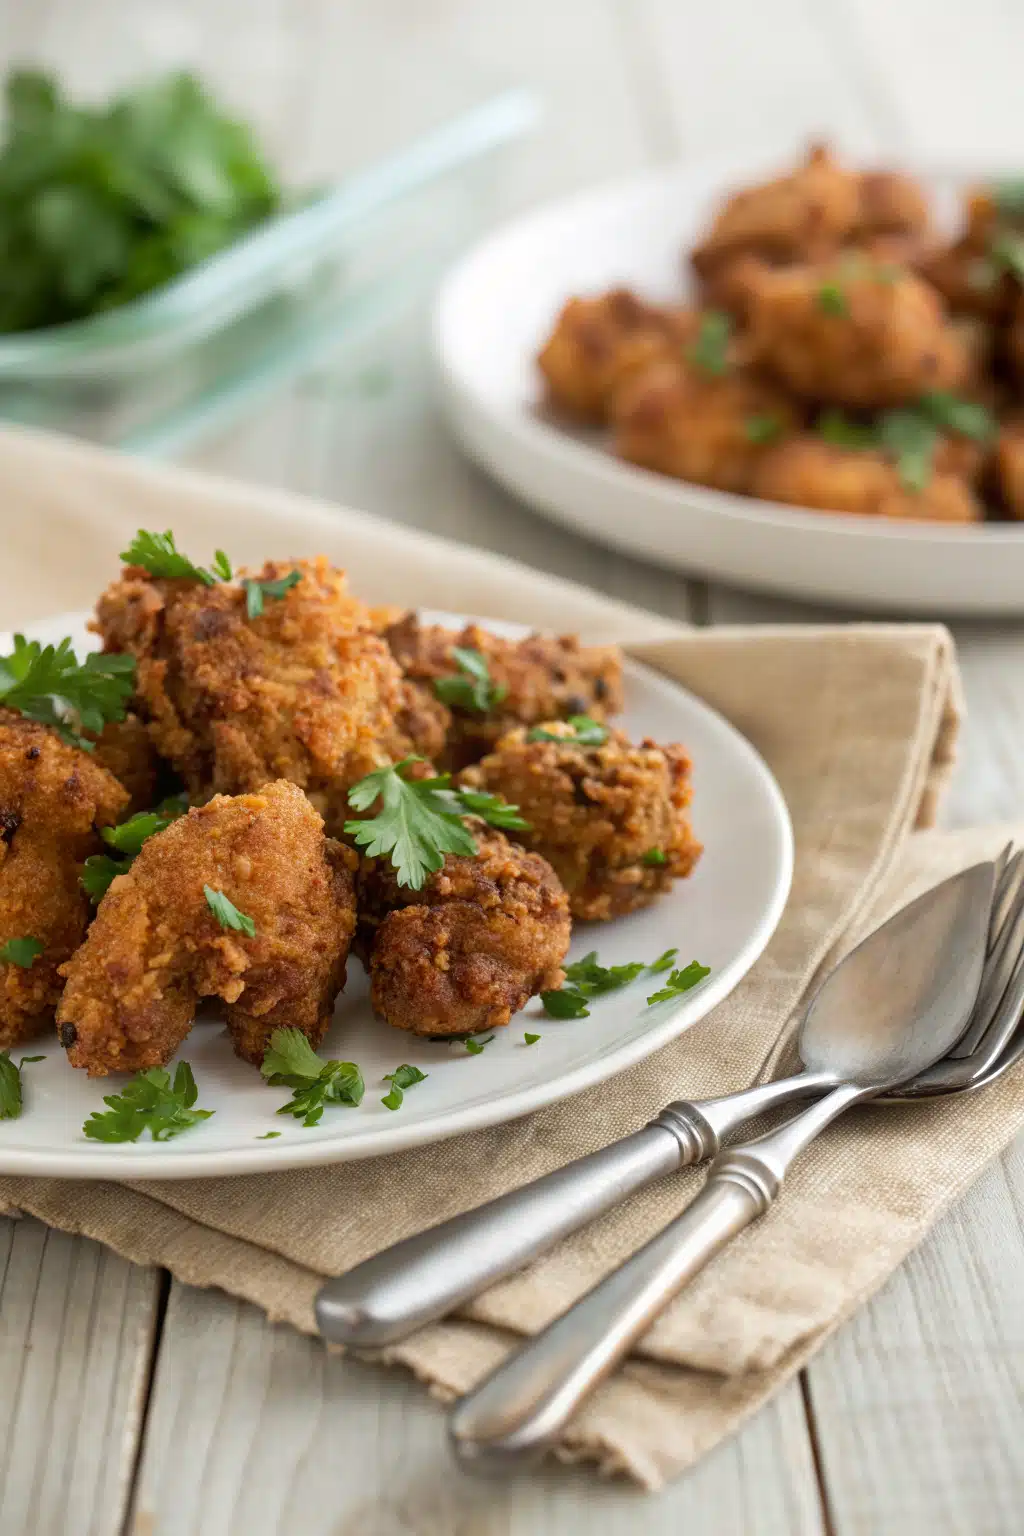
You simply cannot have a plate of crispy fried chicken without some stellar side dishes. I love serving this with a giant mound of buttery, garlic mashed potatoes and a rich, peppery white gravy. If you want some contrast, a tangy, crisp coleslaw cuts right through the richness of the fried food beautifully.
Don’t forget the bread! Warm, flaky buttermilk biscuits are an absolute must for soaking up any leftover gravy or hot honey drizzle. And if you are hosting a summer cookout, a big bowl of creamy macaroni and cheese and some corn on the cob will make you the hero of the neighborhood.
Top Tips for Perfecting Your Fried Chicken
If you want to guarantee success, these are the golden fried chicken tips I swear by. Keep these in your back pocket, and you will look like a professional fry cook!
- Always use a thermometer: Guessing the oil temperature is a recipe for disaster. If the oil is too hot, the outside will burn before the inside cooks. If it is too cold, the chicken will absorb the oil and become greasy. Keep it steadily around 325-350 degrees Fahrenheit.
- Do not skip the resting phase: Letting the breaded chicken rest on a wire rack for 15 minutes before frying allows the flour to hydrate. This is the ultimate secret to keeping your crust glued to the chicken instead of falling off in the oil.
- Use cornstarch: Swapping a little bit of the flour for cornstarch lightens the breading and makes it incredibly crispy.
- Never drain on paper towels: Placing hot, fried chicken directly on paper towels traps the steam and makes the bottom soggy. Always use a wire cooling rack so air can circulate all the way around the chicken.
Storing and Reheating Tips
Got leftovers? You are in luck, because cold fried chicken straight from the fridge is a surprisingly delightful midnight snack. But if you want to bring back that glorious crunch, you need to reheat it properly. Store any leftover chicken in an airtight container in the refrigerator for up to 4 days.
When you are ready to reheat, step away from the microwave! The microwave will turn your beautiful crispy crust into a rubbery mess. Instead, preheat your oven to 400 degrees Fahrenheit. Place the chicken on a wire rack over a baking sheet and bake for about 15 to 20 minutes until it is heated through and the skin is sizzling and crispy again.
Frequently Asked Questions
Final Thoughts
Making your own fried chicken from scratch is truly a labor of love, but the payoff is so incredibly worth it. There is a deep sense of pride that comes from pulling those golden, crackling pieces of chicken out of the hot oil and knowing you made them yourself. By taking your time, respecting the process, and following these essential fried chicken tips, you are going to create a meal that your family will beg you to make again and again.
I hope this guide takes the fear out of frying for you and inspires you to get into the kitchen this weekend. Put on some good music, pour yourself a cold drink, and enjoy the process. If you try this recipe, please let me know how it turns out for you—I always love hearing about your kitchen wins. Happy frying, friends!

Fried Chicken Tips
Ingredients
Main Ingredients
- 1 lb chicken breast tips or tenderloins cut into bite-sized pieces
- 1 cup buttermilk
- 1 cup all-purpose flour
- 1 tsp paprika
- 1 tsp garlic powder
- 1 tsp kosher salt
- 0.5 tsp black pepper
- 2 cups vegetable oil for frying
Instructions
Preparation Steps
- Place the chicken tips in a bowl and pour the buttermilk over them. Cover and let marinate in the refrigerator for at least 30 minutes.
- In a shallow dish, whisk together the all-purpose flour, paprika, garlic powder, kosher salt, and black pepper.
- Heat about 2 inches of vegetable oil in a deep skillet or Dutch oven until it reaches 350°F (175°C).
- Remove the chicken tips from the buttermilk, allowing the excess to drip off, and toss them in the seasoned flour mixture until evenly coated.
- Carefully drop the coated chicken tips into the hot oil. Fry in batches to avoid overcrowding the pan, cooking for 5 to 7 minutes until golden brown and the internal temperature reaches 165°F.
- Use a slotted spoon to remove the fried chicken tips from the oil and transfer them to a wire cooling rack or paper towel-lined plate to drain excess oil before serving.
Notes
Featured Comments
“Impressed! Clear steps and creamy results. Perfect for busy nights.”
“New favorite here — absolutely loved. crowd-pleaser was spot on.”
“Super easy and turned out amazing! My family asked for seconds. Saving this one.”
“This sweet treat was absolutely loved — the balanced really stands out. Thanks!”
“Made it tonight and wow — spot on! Will definitely make fried chicken tips again.”
“Packed with flavor and so simple. Exactly what I wanted from fried chicken tips.”


