

Oh, these fruit popsicles! If there’s one thing that instantly transports me back to carefree summer days, it’s the sweet, icy pop of a homemade popsicle. Remember those sweltering afternoons when your only goal was to find the coolest spot and a delicious way to beat the heat? For me, it always involved raiding the freezer for those colorful, melt-in-your-mouth treats. Now that I’m grown, I’ve discovered the sheer joy and incredible simplicity of making my own fruit popsicles, and let me tell you, they are so much better than anything store-bought. We’re talking about pure, unadulterated fruit flavor without all the weird stuff you can’t pronounce. This recipe is my go-to for a reason – it’s ridiculously easy, incredibly versatile, and always a massive hit with my family. It’s the perfect antidote to a sticky, hot day or when you just need a little burst of sunshine. Forget those complicated dessert recipes; these fruit popsicles are a lifesaver when you want something sweet and refreshing in a hurry!
What are fruit popsicles?
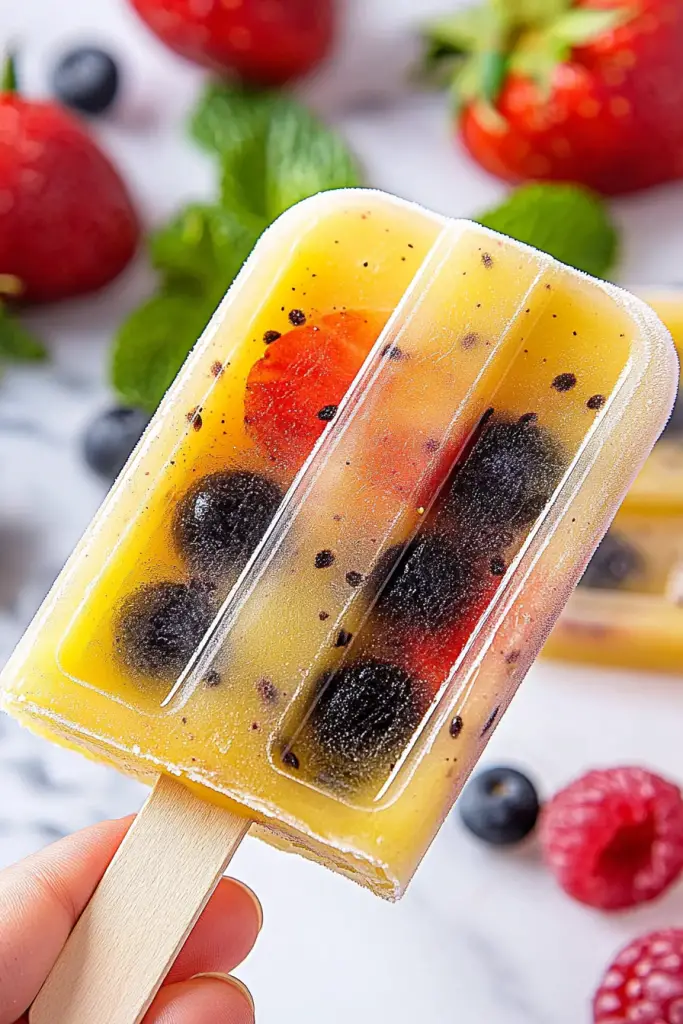
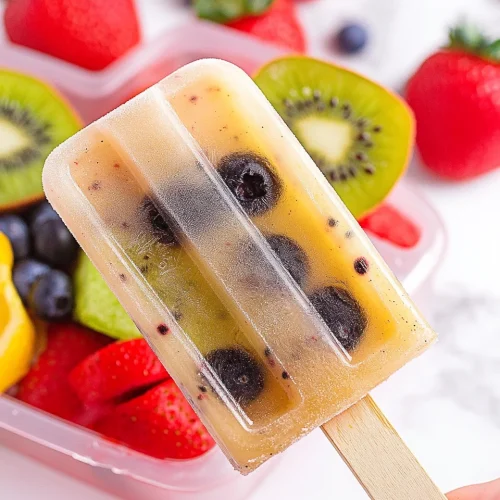
So, what exactly are we talking about when I say “fruit popsicles”? It’s exactly what it sounds like: frozen treats made primarily from fruit! Think of them as the ultimate healthy indulgence. We’re blending fresh or frozen fruit with a liquid base – sometimes a little juice, sometimes a touch of yogurt or coconut milk for creaminess – then pouring it into popsicle molds and freezing them until solid. The magic lies in the simplicity. It’s essentially just fruit, frozen on a stick. This particular version I’m sharing today is wonderfully vibrant and bursting with natural sweetness, letting the real flavor of the fruit shine through. It’s a far cry from those sugary, artificial-tasting popsicles you might remember from childhood (though I have a soft spot for those too, don’t get me wrong!). It’s a pure, delightful way to enjoy summer’s bounty, chilled to perfection.
How do I make fruit popsicles?
Quick Overview
Making these fruit popsicles is ridiculously straightforward. We’re essentially going to blend up your chosen fruit with a liquid base until smooth, pour it into molds, and freeze. That’s it! The beauty is in the minimal effort for maximum reward. No cooking, no complicated techniques, just pure, fruity goodness. It’s the perfect activity to do with kids too – they love helping with the blending and choosing their fruit combinations. You’ll be amazed at how quickly these come together, and the result is a refreshingly delicious treat that tastes like pure summer.
Ingredients
For the Main Fruit Base:
4 cups of your favorite fruit (fresh or frozen works great! I love a mix of berries, mango, and pineapple for a tropical vibe. If using frozen fruit, you might need a splash less liquid.)
For the Liquid Base:
1/2 cup to 1 cup liquid. This can be water, coconut water for extra electrolytes, fruit juice (like apple or orange), or a dairy-free milk like almond or oat milk for a creamier texture. I tested this with almond milk and it actually made it even creamier!
Optional Sweetener:
1-2 tablespoons honey, maple syrup, or agave nectar (only if your fruit isn’t sweet enough. Taste your fruit first! Sometimes, especially with ripe berries, you don’t need any extra sweetener at all.)
Optional Flavor Boosters:
A squeeze of fresh lime or lemon juice (brightens the flavors beautifully!), a sprig of fresh mint, or a pinch of ginger.
Step-by-Step Instructions
Step 1: Prepare Your Fruit
If you’re using fresh fruit, wash it thoroughly. Hull strawberries, pit cherries, peel mangoes, and chop any larger fruits into manageable pieces. If you’re using frozen fruit, you can usually just use it straight from the bag – it’s already prepped! This step is super quick, especially if you’ve got a good sharp knife.
Step 2: Blend the Magic
Place your prepared fruit into a blender. Add your chosen liquid base, starting with the smaller amount (1/2 cup). If you’re adding any optional sweeteners or flavor boosters like mint or lime juice, add them now too. Blend on high speed until the mixture is completely smooth and luscious. If it seems too thick, add a little more liquid, a tablespoon at a time, until you reach your desired consistency. You want it pourable but not watery. Taste it at this point! This is your chance to adjust sweetness or tanginess. Remember, the flavor will be a little less intense when frozen, so make it slightly bolder than you think you need.
Step 3: Pour into Molds
Carefully pour or spoon the fruit mixture into your popsicle molds. Don’t fill them all the way to the very top, as the liquid will expand slightly as it freezes. If you’re using molds that require sticks inserted later, make sure to leave a little room. If your molds have built-in stick holders, insert them now.
Step 4: Freeze Until Solid
Place the filled molds onto a small tray or baking sheet (this makes them easier to move to the freezer and catches any potential drips). Carefully transfer them to the freezer. Let them freeze for at least 4-6 hours, or until completely solid. For best results, I usually leave them overnight. Patience is key here for that perfect icy texture!
Step 5: Unmold and Enjoy!
Once fully frozen, carefully remove the popsicles from their molds. If they’re sticking a bit, you can run the outside of the mold under warm water for a few seconds – just be quick so they don’t start melting too much! Then, gently pull them out. These fruit popsicles are best enjoyed immediately!
What to Serve It With
These fruit popsicles are pretty much a standalone star, but they can also be part of a delightful spread! For Breakfast, imagine cutting one in half and serving it alongside some yogurt and granola for a fun, refreshing start to the day. It’s like a deconstructed parfait! For Brunch, these add a vibrant pop of color to any platter. Serve them in a chilled glass or a little ice bucket to keep them frosty. They’re a fantastic palate cleanser between richer brunch dishes. As Dessert, especially after a summer barbecue, these are a lighter, healthier alternative to heavy cakes or pies. They’re so satisfying and quenching. You can even serve them with a drizzle of melted dark chocolate if you’re feeling a little decadent! For Cozy Snacks, whether it’s an afternoon pick-me-up or a late-night craving for something sweet, a simple fruit popsicle is pure bliss. I love pairing a berry popsicle with a cup of herbal tea. My personal family tradition is to have one after a day at the park – it’s our little reward for surviving the heat!
Top Tips for Perfecting Your Fruit Popsicles
I’ve made more fruit popsicles than I can count, and over the years, I’ve picked up a few tricks that I think make all the difference. Fruit Prep is key – always start with good quality fruit. If it’s out of season, frozen fruit is often your best bet for flavor and affordability. If using fresh, make sure it’s ripe; underripe fruit won’t have that natural sweetness. For blending, Mixing Advice is crucial. Don’t over-blend if you want a little bit of texture, but for a super smooth result, go for it! I always taste my mixture before freezing. If it tastes a little bland, a squeeze of citrus juice can wake everything up. Remember that flavors mellow when frozen, so it’s better to have it slightly over-seasoned than under-seasoned. For Swirl Customization, if you’re feeling adventurous, you can pour half the mixture in, freeze partially, then add a different flavor and swirl with a skewer. It looks so fancy! For Ingredient Swaps, if you don’t have liquid to blend with, water is perfectly fine! It will result in a more icy, sorbet-like texture, which is still delicious. If you want it creamier without dairy, coconut milk or a good quality plant-based yogurt works wonders. When it comes to Baking Tips (wait, no baking here!), think Freezing Tips! Ensure your freezer is cold enough. If your freezer isn’t very cold, the popsicles might take longer to freeze solid and could end up icier. Lastly, for Glaze Variations (if you choose to add any!), I usually skip the glaze for these simple fruit popsicles, but a thin dark chocolate drizzle can be divine. Just make sure the popsicles are fully frozen before dipping!
Storing and Reheating Tips
Storing these homemade fruit popsicles is super simple because they’re meant to be enjoyed as is! For Room Temperature, they obviously don’t stay out for long, maybe 10-15 minutes tops before they become a delightful puddle. If you’re serving them buffet-style, keep them in an insulated cooler or a bowl packed with ice. For Refrigerator Storage, well, that’s not really an option for popsicles! They’ll melt. The freezer is your best friend here. For Freezer Instructions, the best way to store them is still in their molds if you have space, or you can pop them out once frozen solid and store them in a freezer-safe bag or container. This prevents them from getting freezer burn and makes it easy to grab one whenever the craving strikes. They should stay good for at least 2-3 months, though they rarely last that long in my house! For Glaze Timing Advice (if you decide to add one), always add any glaze or dip AFTER the popsicle is completely frozen. If you try to dip a semi-frozen popsicle, it won’t stick properly.
Frequently Asked Questions
Final Thoughts
Honestly, making your own fruit popsicles is one of those little kitchen victories that brings so much joy. It’s a chance to connect with fresh ingredients, create something truly delicious, and give yourself and your loved ones a healthier, more flavorful treat. I hope you give this recipe a try! It’s so rewarding to pull those vibrant, perfectly frozen popsicles out of the freezer and know you made them yourself. They’re perfect for cooling down on a hot day, a fun project with the kids, or just a simple way to brighten your day. If you love this recipe, you might also enjoy my homemade fruit smoothie recipes or my easy no-bake energy balls for more healthy snack ideas. I can’t wait to hear what fruit combinations you come up with! Don’t be shy about sharing your creations in the comments below – I love seeing them! Happy freezing!
Refreshing Fruit Popsicles
Ingredients
Main Ingredients
- 2 cups mixed berries (strawberries, blueberries, raspberries)
- 1 cup chopped pineapple
- 0.5 cup orange juice freshly squeezed preferred
- 0.25 cup honey or maple syrup adjust to taste
Instructions
Preparation Steps
- Wash and prepare all the fruits. Hull strawberries and chop them into smaller pieces if large.
- In a blender, combine the mixed berries, chopped pineapple, orange juice, and honey (or maple syrup).
- Blend until smooth. Taste and adjust sweetness if needed.
- Carefully pour the mixture into popsicle molds.
- Insert popsicle sticks and freeze for at least 4-6 hours, or until completely solid.
- To unmold, run the popsicle molds under warm water for a few seconds.
Notes
Featured Comments
“These look so refreshing! I love how simple and colorful they are—definitely making these for the kids this weekend.”
“Impressed! Clear steps and perfect for busy nights results. Perfect for busy nights.”
“New favorite here — spot on. crowd-pleaser was spot on.”
“Super easy and turned out amazing! My family asked for seconds. Saving this one.”
“This sweet treat was absolutely loved — the silky really stands out. Thanks!”
“Made it tonight and wow — perfect for busy nights! Will definitely make fruit popsicles again.”


These look so refreshing! I love how simple and colorful they are—definitely making these for the kids this weekend.