

There’s something about a bowl of fruit that makes the whole room lighter. I remember summers at grandma’s house—the kitchen smelled like citrus and ripe peaches, and she taught me to chop the fruit so it would glisten in the sunlight coming through the blinds. This Fruit Salad is her spirit, only streamlined for busy weeknights and potlucks. It’s incredibly refreshing, forgiving, and it tastes like a sunlit picnic even on a chilly winter day. The first bite is sweet and tangy, with a minty zing that wakes you up without a bite of guilt. I always reach for this one when I want something sweet but I don’t want to bake a cake or drag out a heavy dessert. It’s the kind of recipe I can assemble in minutes, then forget in the fridge until the craving strikes again. I’ve served it alongside grilled chicken, spooned over yogurt, and even layered into a parfait. This fruit salad truly travels well, and it never fails to make friends and family smile.

What is a Sun-Kissed Fruit Salad?
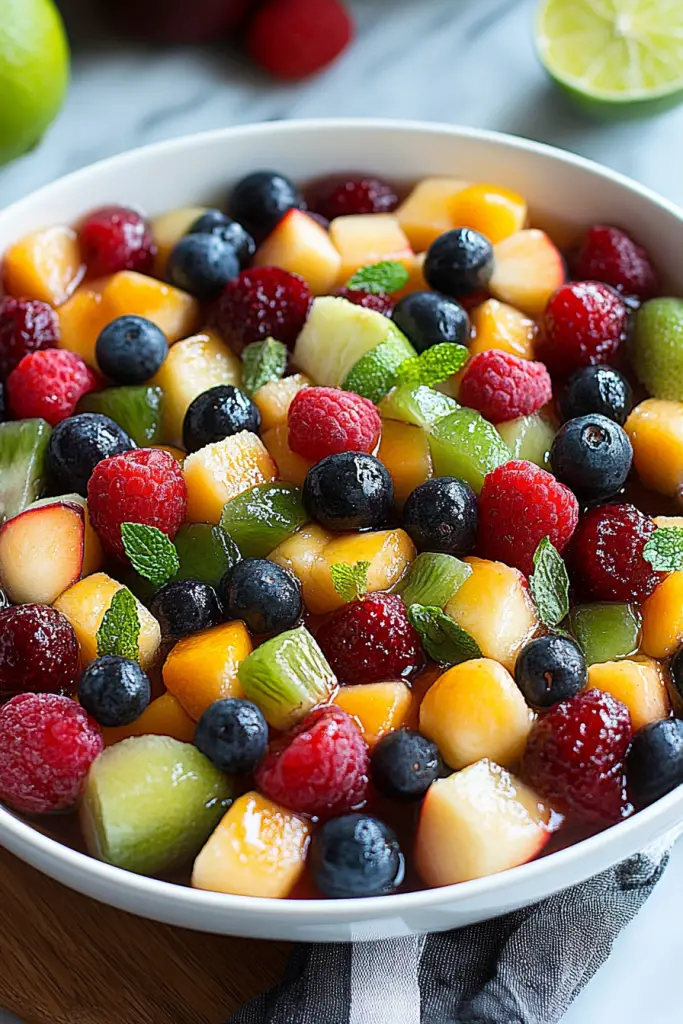
Think of Sun-Kissed fruit salad as summer captured in a bowl. It’s essentially a vibrant mix of seasonal fruits tossed with a light honey-lime dressing, finished with a few fresh touches that can turn it from a simple snack into a showpiece. The name comes from the way the fruits glow when they catch the daylight—like they’ve been kissed by a warm afternoon sun. It’s not fussy, it doesn’t require chasing hard-to-find ingredients, and it’s endlessly adaptable. Think of it as the ultimate blue-jeans-and-coffee dish: reliable, comforting, and a little bit magical.
How do I make a Sun-Kissed Fruit Salad?
Quick Overview
No oven, no fuss. You’ll chop a rainbow of fruit, whisk a bright lime-honey dressing, and toss everything together until it glistens. The magic happens when you let the flavors mingle for a quick chill in the fridge, then finish with a light glaze or a sprinkle of crunchy toppings. It’s as easy as a grocery-store grocery run, but with all the personal touch of a homemade dish. This method keeps textures intact and flavors vibrant, so you’ll get that “this smells like sunshine” moment with every bite.
Ingredients
For the main fruit base:
4 cups mixed fruit, cut into bite-sized pieces (think strawberries, pineapple, mango, blueberries, kiwi, watermelon, grapes—whatever’s ripe and colorful). Use a mix that gives you a little tartness and a little sweetness. A quick tip: aim for a variety of textures—crisp apples, juicy berries, and soft stone fruit make every bite interesting. If you’re prepping ahead, hold off on the juicier fruits (like melon) until just before serving to keep things from getting soggy.
For the Dressing:
2–3 tablespoons honey or maple syrup, to taste; 2 tablespoons fresh lime juice; 1 teaspoon lime zest; pinch of fine sea salt; 1/4 teaspoon vanilla (optional). If you want a brighter bite, swap some lime juice for orange juice to add a sunny citrus note. Trust me, the zing from lime keeps this from tasting too dessert-y.
For the Glaze:
2 tablespoons orange juice; 1 teaspoon honey (or to taste); optional: 1 teaspoon yogurt for a creamier drizzle. Whisk until smooth. The glaze should be pourable but not runny, so adjust with a touch more juice or honey as needed. If you’re planning to chill the salad, you can drizzle the glaze just before serving to keep things crisp and fresh.
Step-by-Step Instructions
Step 1: Preheat & Prep Pan
ovens aren’t involved here, so we’re talking about prep space. Gather two large mixing bowls, a sharp knife, and a sturdy cutting board. Give your fruit a quick rinse and pat dry. If you’re planning to add nuts or seeds for crunch, preheat a small skillet over medium heat so you can toast them just until fragrant—about 2–3 minutes, stirring frequently. This is the moment grandma’s kitchen instincts kick in: you want the toppings to smell toasty, not burnt.
Step 2: Mix Dry Ingredients
In a small bowl, combine optional crunchy add-ins: 1/4 cup sliced almonds or pistachios, 1 tablespoon chia seeds, and a pinch of coconut flakes. I love the way the almond slices toast lightly and add a subtle nutty note. If you’re serving kids, you can skip nuts to keep things simple, or finely chop them so they’re easy to chew.
Step 3: Mix Wet Ingredients
In another small bowl, whisk together the honey (or maple syrup), lime juice, lime zest, salt, and vanilla if you’re using it. The goal is a glossy, balanced dressing that’s not cloying. If your fruit is very sweet, you can dial back the honey a touch—the lime will still keep it bright and fresh.
Step 4: Combine
Pour the dressing over the chopped fruit. Gently toss with a wide spatula or two big spoons, so you coat everything evenly without mashing the fruit. You want each piece to glisten, not break apart. If you plan to add the crunchy mix from Step 2, sprinkle it in now and give it a light toss to distribute. Let the salad sit for 5–10 minutes so the flavors meld; the fruit will release a little juice, which is part of the charm.
Step 5: Prepare Filling
If you like a creamy contrast, whisk together 1/2 cup plain yogurt or coconut yogurt with 1/4 teaspoon vanilla and a pinch of sugar. Dollop or swirl a little here and there as you plate, or serve alongside as a separate topping. My kids actually ask for seconds of this yogurt swirl, so I’m not above a little “kid-friendly cream” on top. It’s optional, but it adds a nice texture and keeps things feeling like a party in a bowl.
Step 6: Layer & Swirl
In a pretty serving dish, start with a layer of the bright fruit, then add a few dollops of the yogurt, and continue layering. Use a spoon to swirl gently, creating little marbled pockets that reveal the colors as you scoop. The marbling isn’t just pretty; it helps every bite carry both fruit and creamy note—without needing a heavy dessert influence.
Step 7: Bake
Not a bake in sight. This is the kind of recipe you chill to let the flavors mingle, so pop the dish in the fridge for 20–30 minutes if you’ve got the time. If you’re serving it right away, that’s fine too—the chill just enhances the refreshing factor and makes the salad feel a little more special for guests.
Step 8: Cool & Glaze
Right before serving, drizzle the glaze over the top in a lazy zig-zag. The glaze adds a glossy finish and a little extra citrus kiss. If you’ve kept the salad plain, this glaze is pure sunshine in a bottle. If you prep ahead, keep the glaze separate and drizzle at service to preserve texture.
Step 9: Slice & Serve
Present the salad in clear glass so the colors shine, or serve in individual bowls for a potluck. A final mint leaf or a light dusting of citrus zest gives a fresh fragrance as you plate. Serve chilled or at room temperature, depending on your mood and the weather. And if you’ve got leftovers, store them in a sealed container in the fridge and enjoy within 24 hours for the best texture and flavor.
What to Serve It With
The beauty of Sun-Kissed Fruit Salad is that it plays nicely with almost anything and elevates the simplest meals. Here are a few pairing ideas to keep on hand for different occasions:
For Breakfast: Nestle a scoop of yogurt or a handful of granola on top, then toast a slice of crusty bread with a smear of ricotta. Coffee or a sparkling tea on the side is perfection. The fruit’s brightness wakes up even the dullest morning. It’s the kind of breakfast that makes you smile before you’ve finished your first sip.
For Brunch: Spoon into small glasses or stems, add a light drizzle of the lime-honey dressing, and pair with a pitcher of citrusy water or a mimosa. A few mint sprigs make it feel extra festive and you can arrange the fruit into a pretty rainbow in the glass. It’s almost too pretty to eat, but you’ll still want seconds.
As Dessert: If you want something lighter after a hearty meal, this fruit salad acts like a bright palate cleanser with a hint of sweetness. Add a scoop of vanilla Ice Cream on the side or a dollop of whipped cream, and you’ve got a casual, crowd-pleasing dessert that won’t leave your kitchen smelling like an oven was in use all day.
For Cozy Snacks: Keep a mason jar of pre-cut fruit in the fridge and a small container of the honey-lime dressing nearby. A quick spoonful whenever you crave something fresh and sweet will satisfy without weighing you down. This is the kind of snack I reach for when I want something wholesome and comforting at the same time—truly a lifesaver on busy days.
Top Tips for Perfecting Your Sun-Kissed Fruit Salad
Here are my best, tried-and-true tips from years of making this with friends and family. Each one helps the salad feel just a touch more special.
Seasonal Fruit: The magic happens when you use what’s in season. If berries are at their peak, double down on them. If citrus is thriving, add segments for zing. The fruit’s natural sweetness needs little help when it’s at its best, so you’ll often need less dressing than you think.
Fruit Prep: Cut fruit into uniform, bite-sized pieces. This not only looks nicer, but it also ensures even flavor distribution in every bite. For fruit that browns quickly (like apples and pears), toss with a touch of lemon juice to keep them vibrant.
Dressing Balance: Start with the minimum honey and lime. You can always add more, but it’s harder to tame over-sweetness. If your fruit is tart, add a touch more honey; if it’s very sweet, lean into the lime zest for brightness.
Garnish & Texture: Toasted nuts, coconut, or chia seeds add crunch that contrasts beautifully with the juicy fruit. Fresh mint or basil leaves give a perfume that elevates the dish. Don’t overdo the toppings—one or two well-chosen accents are enough to make a big impact.
Ingredient Swaps: This salad is incredibly adaptable. Try pineapple and mango for a tropical vibe, or keep it berry-focused with strawberries, blueberries, and blackberries. You can even swap lime for lemon if you prefer a subtler tang. The key is to taste as you go and adjust.
Texture and Pattern: When layering, think in colors and textures. A translucent glaze on top can bring everything together; a marbled swirl of yogurt and fruit looks stunning and tastes creamy without being heavy.
Ingredient Tempers: If you plan to chill for a while, consider adding the juiciest fruit right before serving to keep the texture lively. If you’re prepping in advance, hold back the delicate fruits (like kiwi or melon) and the glaze until serving time for the freshest bite.
Lessons Learned: I’ve learned that shopping with a friend is half the fun. We picked up a big bag of mixed fruit on sale, and we turned it into a colorful, feel-good dish in under 20 minutes. The kids loved picking their own pieces and assembling mini bowls, and the adults loved the balanced sweetness. If you’re ever unsure, start with a small batch to test the dressing and then scale up for a crowd.
Storing and Reheating Tips
Fruit salad is best when fresh, but you can stash it for a short time with a few precautions. Here’s how I handle it at home.
Room Temperature: Not for long. If you’re serving within an hour, you can leave it out covered lightly, but it’s best enjoyed within two hours maximum. The fruit will start to soften and release juice, which is delicious but can make textures feel soggy if left too long.
Refrigerator Storage: Store in an airtight container for up to 24 hours. If you’ve added yogurt, do not leave it out at room temperature for more than two hours; refrigerate promptly and consume within 24 hours. The dressing will intensify in the fridge, so taste and adjust before serving again.
Freezer Instructions: I don’t recommend freezing fruit salad as a finished dish—the texture suffers and the dressing can separate. If you want to prep ahead, freeze individual fruit pieces to use in smoothies later, then make a fresh batch of fruit Salad Dressing when you’re ready to serve.
Glaze Timing Advice: If you’re serving soon, drizzle the glaze right before you plate. If you’re making ahead, keep the glaze separately and add just before serving to preserve texture and color.
Trust me on this: this fruit salad shines brightest when you serve it fresh, with a glossy coat of dressing and a few crisp toppings that offer a little surprise in every bite.
Frequently Asked Questions
Final Thoughts
This Sun-Kissed Fruit Salad is the kind of recipe that travels well, not just on a plate but in your heart. It reminds me of sunny afternoons with friends, of kids trading fruit slices, and of the way a simple bowl of fruit can light up a table more reliably than any dessert. It’s flexible, forgiving, and endlessly shareable—a little bowl of happiness that fits into weeknights as easily as it does into weekend gatherings. If you’ve got a favorite seasonal fruit to spotlight, try it here and tell me how you swapped things up. I’d love to hear your twists and see your colorful photos. Happy eating, friends, and may your fruit salad always glow with sunshine. Can’t wait to hear how yours turns out!

Refreshing Fruit Salad
Ingredients
Main Fruits
- 2 cups Strawberries hulled and sliced
- 2 cups Blueberries
- 2 cups Cantaloupe cubed
- 1 cup Pineapple Chunks
- 1 cup Green Grapes halved
Dressing
- 2 tablespoons Lime Juice freshly squeezed
- 1 tablespoon Honey or maple syrup for vegan option
- 0.5 teaspoon Mint freshly chopped
Instructions
Preparation Steps
- In a large bowl, combine all the prepared fruits: strawberries, blueberries, cantaloupe, pineapple chunks, and green grapes.
- In a small bowl, whisk together the lime juice and honey (or maple syrup). Stir in the chopped fresh mint.
- Pour the dressing over the fruit mixture and gently toss to coat. Ensure all the fruits are evenly covered.
- Cover the bowl and refrigerate for at least 15 minutes to allow the flavors to meld. Serve chilled.
Notes
Featured Comments
“Impressed! Clear steps and turned out amazing results. Perfect for busy nights.”
“New favorite here — restaurant-level. crowd-pleaser was spot on.”
“Super easy and turned out amazing! My family asked for seconds. Saving this one.”
“This sweet treat was absolutely loved — the hearty really stands out. Thanks!”
“Made it tonight and wow — comforting! Will definitely make fruit salad again.”
“Packed with flavor and so simple. Exactly what I wanted from fruit salad.”


