

Oh, you guys, I am SO excited to share this recipe with you today! If there’s one thing that makes my heart sing in the kitchen, it’s creating something ridiculously delicious that disappears almost as fast as I can bake it. And these garlic biscuit bombs? They are the reigning champions in my house. Seriously, the moment the aroma starts wafting from the oven, it’s like a magnet, pulling everyone in. Forget your fancy brunch dishes or your elaborate desserts; sometimes, it’s the simple, comforting, utterly satisfying bites that steal the show. These little guys are like savory Cinnamon Rolls, but with a magical, cheesy, garlicky punch. They’re way easier than they look, and I promise, they’re going to become a staple for you too. If you love those amazing drop biscuits but wish they had a little more *oomph*, you are in for a serious treat with these garlic biscuit bombs!

What are garlic biscuit bombs?
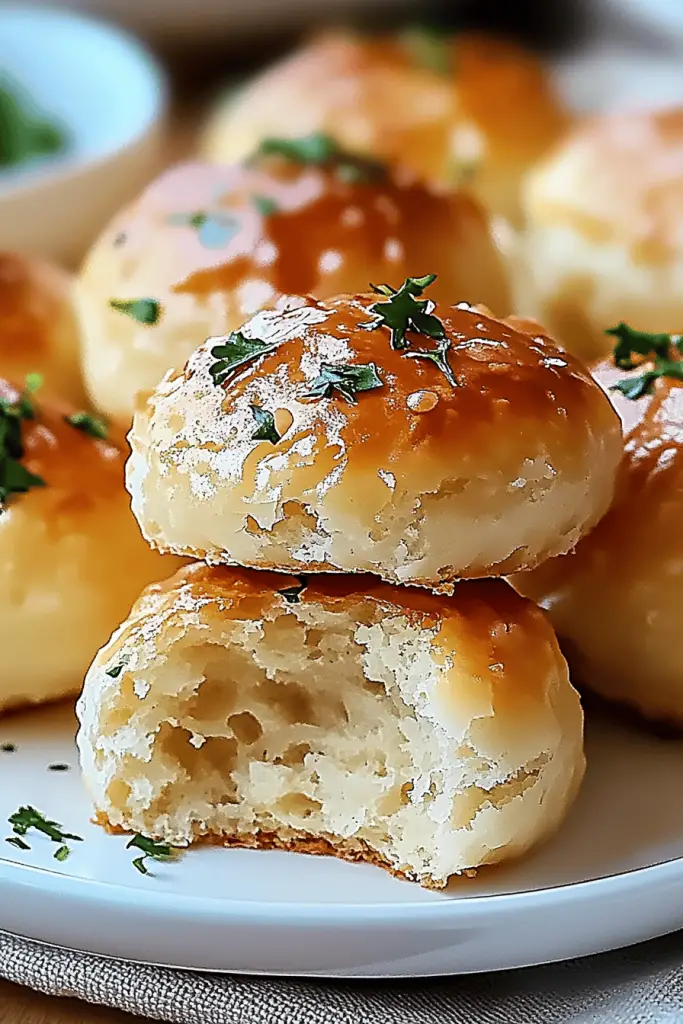
So, what exactly are these delightful little creations? Think of them as the ultimate comfort food embrace in biscuit form. They’re essentially fluffy, tender biscuit dough that’s been swirled with a rich, garlicky, cheesy filling and then baked until golden brown and irresistible. The “bomb” part comes from the way the filling explodes with flavor when you bite into them, almost like a delightful surprise pocket of cheesy goodness. I’ve heard people compare them to a savory pastry, a super-charged biscuit, or even a shortcut to cloud nine. The beauty of these garlic biscuit bombs is that they’re so versatile. They’re not just biscuits; they’re an experience. They’re that perfect bite that makes you close your eyes for a second and just savor the moment. We call them “bombs” because they are so intensely flavorful and addictive – one is never enough!
How do I make garlic biscuit bombs?
Quick Overview
Making these garlic biscuit bombs is a straightforward process that involves preparing a simple biscuit dough, whipping up a flavorful cheesy garlic filling, swirling them together, and baking until golden perfection. The beauty lies in its simplicity. You get maximum flavor with minimal fuss, and the result is a batch of incredibly tender, melt-in-your-mouth bites. Don’t be intimidated; the swirling technique is easy and adds a gorgeous visual appeal, plus it ensures that garlicky, cheesy goodness is distributed throughout every single bite. This is one of those recipes that makes you feel like a kitchen wizard, even if you’re just starting out!
Ingredients
For the Main Batter:
Here’s what you’ll need for that tender, fluffy biscuit base. I always recommend using good quality, cold butter – it’s the secret to flaky biscuits! Don’t skimp on this, it makes all the difference. And make sure your milk is cold too. It’s the little things, right?
- 3 cups all-purpose flour
- 2 teaspoons baking powder
- 1 teaspoon baking soda
- 1/2 teaspoon salt
- 1 teaspoon granulated sugar
- 1 stick (1/2 cup) cold unsalted butter, cut into small cubes
- 1 1/4 cups cold buttermilk (or milk + 1 tablespoon lemon juice or vinegar, let stand 5 minutes)
For the Filling:
This is where the magic happens! The garlic is key here, and I love using freshly minced garlic for the best punch. Don’t be afraid to be generous!
- 1/2 cup (1 stick) unsalted butter, softened
- 4-5 cloves garlic, minced (or more if you’re a garlic fiend like me!)
- 1/4 cup grated Parmesan cheese
- 1 cup shredded sharp cheddar cheese (or a mix of cheddar and Monterey Jack)
- 1 tablespoon chopped fresh parsley (optional, but I love the fresh flavor)
- 1/4 teaspoon black pepper
For the Glaze (Optional, but highly recommended!):
This glaze adds an extra layer of savory goodness and a beautiful sheen. It’s super simple but elevates the whole experience.
- 2 tablespoons unsalted butter, melted
- 1 clove garlic, minced
- Pinch of salt

Step-by-Step Instructions
Step 1: Preheat & Prep Pan
First things first, let’s get our oven ready. Preheat your oven to a nice and hot 400°F (200°C). This high heat is crucial for getting those beautiful, puffy biscuits. While the oven is preheating, grab a 9×13 inch baking pan and give it a light greasing with butter or cooking spray. This helps prevent sticking and ensures those golden edges we all love.
Step 2: Mix Dry Ingredients
In a large mixing bowl, whisk together the flour, baking powder, baking soda, salt, and sugar. Give it a good stir to make sure everything is evenly distributed. This is important because it ensures that your leavening agents are working uniformly to give you those lovely, fluffy biscuits. Don’t rush this step; a well-mixed dry base is the foundation for great biscuits.
Step 3: Mix Wet Ingredients
Now, let’s add the cold butter. You want to cut the cold butter into the dry ingredients using a pastry blender, a fork, or even your fingertips until the mixture resembles coarse crumbs with some pea-sized pieces of butter still visible. Those little butter pockets are what create flakiness! Then, make a well in the center and pour in the cold buttermilk. Stir it gently with a fork until just combined. It’s okay if the dough looks a little shaggy and a bit sticky – overmixing is the enemy of tender biscuits!
Step 4: Combine
Gently bring the dough together with your hands until it just forms a cohesive ball. You don’t want to knead it like bread; we’re just looking to combine everything. If the dough seems too wet, you can add a tablespoon more flour at a time, but be careful not to make it tough. The dough should be soft and slightly sticky, but manageable.
Step 5: Prepare Filling
While your dough is resting for a moment, let’s whip up that incredible filling. In a medium bowl, combine the softened butter, minced garlic, Parmesan cheese, shredded cheddar cheese, chopped parsley (if using), and Black Pepper. Mix it all together until it’s well combined and spreadable. This filling is pure gold, and the smell of the garlic and cheese together is heavenly!
Step 6: Layer & Swirl
Turn the biscuit dough out onto a lightly floured surface. Pat or gently roll it out into a rough rectangle, about 1/2 inch thick. Don’t worry about perfect edges; rustic is good here! Evenly spread the garlic-cheese filling all over the surface of the dough, leaving a small border around the edges. Now, starting from one of the long sides, tightly roll up the dough like you would for a jelly roll. Pinch the seam closed. Then, carefully slice the roll into 12 equal pieces. You can use a sharp knife or even dental floss for a cleaner cut.
Step 7: Bake
Arrange the dough spirals, cut-side up, in your prepared baking pan. They should be nestled somewhat closely together; they’ll puff up and expand as they bake. Pop the pan into your preheated oven and bake for 20-25 minutes, or until the tops are beautifully golden brown and the biscuits are cooked through. You can test for doneness by inserting a toothpick into the center of a biscuit; it should come out clean.
Step 8: Cool & Glaze
Once they’re out of the oven, let the garlic biscuit bombs cool in the pan for about 5-10 minutes. While they’re still warm, melt the 2 tablespoons of butter with the minced garlic and a pinch of salt for the glaze. Drizzle this glorious Garlic Butter mixture evenly over the tops of the warm biscuits. This step adds an extra layer of flavor and makes them even more irresistible!
Step 9: Slice & Serve
These are best served warm, straight from the oven! Use a fork to gently lift them apart. The melted cheese, the garlic aroma, the tender biscuit – it’s pure bliss. They’re perfect for sharing, but I won’t blame you if you want to keep them all to yourself!
What to Serve It With
These garlic biscuit bombs are so versatile, they can truly fit into any meal! For breakfast, I love serving them alongside a pot of freshly brewed coffee. They’re a step up from your average toast and make the morning feel a little bit special, even on a busy weekday. For a weekend brunch, they’re a showstopper! Imagine them on a platter surrounded by scrambled eggs, a fresh Fruit Salad, and maybe some crispy bacon. They add a savory, comforting element that complements all the other brunch favorites. As a dessert, you might think it’s odd, but trust me! Serve them warm with a light dusting of powdered sugar, or even a drizzle of honey or maple syrup. The sweet and savory combination is surprisingly addictive, especially after a hearty meal. And for those cozy nights when you just want something comforting and delicious, these are perfect as a standalone snack. They’re also fantastic for dipping into hearty soups like tomato or lentil, or alongside a creamy pasta dish. I’ve even made a batch for game day, and they disappeared in minutes! My family loves them with chili, and the biscuits soak up all that delicious flavor.
Top Tips for Perfecting Your Garlic Biscuit Bombs
I’ve made these garlic biscuit bombs more times than I can count, and over the years, I’ve picked up a few tricks that I think really make a difference. First, about the butter for the biscuit dough – it MUST be cold. I can’t stress this enough! If your butter is too soft, you won’t get that lovely flaky texture. I sometimes even pop my cut butter cubes into the freezer for 10-15 minutes before I start. For mixing the dough, gentle is key. Overworking it develops the gluten too much, leading to tough biscuits. You want them tender and light, so mix just until the dough comes together. It’s okay if there are still a few dry bits or if it looks a little shaggy. When it comes to the filling, don’t be shy with the garlic! If you’re a garlic lover, feel free to add an extra clove or two. Also, make sure your butter for the filling is softened, not melted, so it spreads easily and evenly. For the swirl, a tight roll is good, but don’t press too hard. You want those layers to have room to expand. If your dough is too sticky to roll easily, just lightly flour your surface and your hands. When it comes to baking, every oven is a little different. Keep an eye on them towards the end of the baking time. You’re looking for a beautiful golden-brown color on top. If the tops are browning too quickly but the inside isn’t cooked, you can loosely tent them with foil. For ingredient swaps, I’ve successfully used whole wheat flour for about a quarter of the all-purpose flour, which adds a nice nutty flavor. For the cheese, feel free to experiment! A sharp white cheddar, Gruyère, or even a bit of smoked gouda would be delicious. If you don’t have buttermilk, the milk and lemon juice or vinegar trick works wonders. Just let it sit for about five minutes to thicken slightly. And for the glaze, if you don’t like garlic in your glaze, a simple melted butter with a pinch of salt is also fantastic, or you could even brush them with a little extra melted butter right after they come out of the oven.
Storing and Reheating Tips
These garlic biscuit bombs are absolutely best enjoyed fresh and warm, but life happens, and sometimes you have leftovers! If you find yourself with any (which is rare in my house!), here’s how to store and reheat them to keep them tasting their best. For room temperature storage, they’ll stay good for about a day, maybe two if it’s cool. Just keep them in an airtight container or covered tightly with plastic wrap. The glaze might make them a little softer on the bottom over time, but they’ll still be delicious. If you need to keep them longer, the refrigerator is your best bet. Store them in an airtight container or wrap them well in plastic wrap and then foil. They should last for about 3-4 days in the fridge. To reheat, my favorite method is in a toaster oven or a regular oven set to around 300°F (150°C) for 5-10 minutes, just until they’re warmed through. This helps them regain some of their crispiness. You can also pop them in the microwave for about 20-30 seconds, but they might lose a bit of that lovely texture and become a bit softer. If you’re planning ahead, these garlic biscuit bombs freeze beautifully! Let them cool completely after baking, then wrap them individually in plastic wrap, followed by a layer of aluminum foil or place them in a freezer-safe bag. They can be stored in the freezer for up to 2-3 months. To reheat from frozen, you can place them directly into a 350°F (175°C) oven for about 15-20 minutes, or until heated through. Thawing them in the refrigerator overnight and then warming them up is also a great option. Remember, if you’ve glazed them, the glaze will absorb a bit into the biscuit during storage, so they might be a touch softer but still packed with flavor!
Frequently Asked Questions
Final Thoughts
So there you have it, my friends! My beloved garlic biscuit bombs. I really hope you give these a try. They’re the kind of recipe that brings a smile to your face and makes everyone around the table happy. They’re proof that sometimes, the simplest things can be the most extraordinary. If you love this recipe, I think you might also enjoy my Cheesy Garlic Breadsticks or my Fluffy Homemade Dinner Rolls – they have that same comforting, crowd-pleasing vibe. Don’t be afraid to experiment with the cheese or add a pinch of red pepper flakes to the filling if you like a little heat. I can’t wait to hear what you think! If you make them, please leave a comment below and let me know how they turned out for you. Sharing your photos and variations is always so much fun. Happy baking, and enjoy every single one of these garlicky, cheesy little bites!


Garlic Biscuit Bombs
Ingredients
Garlic Butter Mixture
- 0.5 cup unsalted butter, melted
- 4 cloves garlic, minced
- 2 tablespoons fresh parsley, chopped
- 0.5 teaspoon salt
- 0.25 teaspoon black pepper
Biscuits
- 1 can refrigerated biscuits 8 count, such as Pillsbury Grands
Instructions
Preparation Steps
- Preheat your oven to 375°F (190°C). Grease a muffin tin with butter or cooking spray.
- In a small bowl, whisk together the melted butter, minced garlic, chopped parsley, salt, and black pepper. Set aside.0.5 cup unsalted butter, melted
- Open the can of refrigerated biscuits. Separate the biscuits and cut each biscuit into quarters.0.5 cup unsalted butter, melted
- Dip each biscuit piece into the garlic butter mixture, ensuring it's well coated.0.5 cup unsalted butter, melted
- Place the coated biscuit pieces into the prepared muffin tin, about 3-4 pieces per cup.
- Pour any remaining garlic butter mixture over the biscuits in the muffin tin.0.5 cup unsalted butter, melted
- Bake for 10-12 minutes, or until golden brown and cooked through. Let cool slightly before serving.
Notes
Featured Comments
“I love these! Garlic biscuits are my weakness—perfect for dipping or just eating straight from the oven. Can't wait to try this recipe!”
“I’ve made these a few times and they’re seriously addictive—golden, fluffy, and packed with garlic flavor. Perfect for any meal!”
“Impressed! Clear steps and restaurant-level results. Perfect for busy nights.”
“New favorite here — crowd-pleaser. crowd-pleaser was spot on.”
“Super easy and turned out amazing! My family asked for seconds. Saving this one.”
“This sweet treat was absolutely loved — the cozy really stands out. Thanks!”


I’ve made these a few times and they’re seriously addictive—golden, fluffy, and packed with garlic flavor. Perfect for any meal!
I love these! Garlic biscuits are my weakness—perfect for dipping or just eating straight from the oven. Can’t wait to try this recipe!