Oh, where do I even begin with this Garlic Butter Shrimp? It feels like just yesterday I was a whirlwind in the kitchen, trying to whip up something impressive for unexpected guests, and this recipe became my absolute secret weapon. The aroma that fills the house when this is cooking… it’s pure magic. Seriously, it’s the kind of smell that has people peeking into the kitchen, asking what that incredible scent is. It’s so simple, yet so decadent. If you’ve ever found yourself craving something elegant but also ridiculously easy, this Garlic Butter Shrimp is your answer. It’s like a fancy restaurant dish, but made right on your stovetop in less time than it takes to decide what to watch on TV. It’s a million times better than a store-bought pre-made meal, and honestly, it rivals some of the best garlic butter shrimp I’ve had out. It’s a lifesaver on busy weeknights, and it’s fancy enough for date nights or when you just want to treat yourself. I’ve made this so many times, I can practically do it with my eyes closed, and every single time, it gets devoured. My kids, who can be the pickiest eaters on the planet, actually ask for this regularly. That’s saying something, right?
What is garlic butter shrimp?
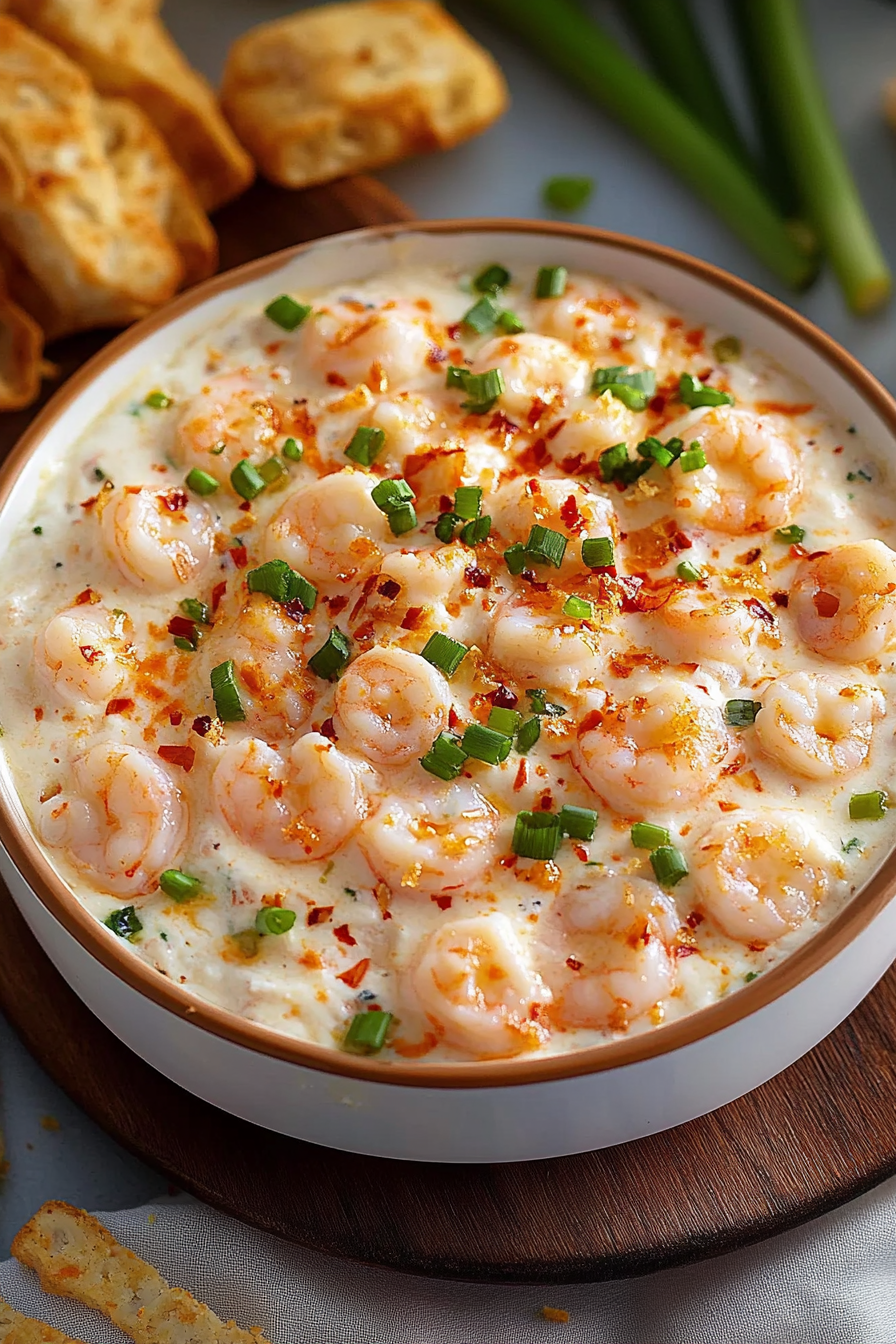
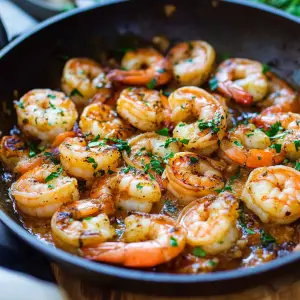
So, what exactly *is* this magical dish we’re talking about? Think of it as succulent, plump shrimp swimming in a luxurious, garlicky, buttery sauce. It’s that simple, and that divine. The “garlic butter” part is pretty self-explanatory – we’re talking about loads of garlic, gently softened and infused into rich butter, creating a sauce that’s both savory and slightly sweet. The shrimp themselves are cooked quickly, just until they’re perfectly tender and pink, so they don’t get rubbery. It’s essentially the ultimate comfort food, elevated. It’s not overly complicated, there are no weird ingredients you have to hunt down at a specialty store. It’s just good, honest ingredients coming together to create something truly spectacular. The name itself, “Garlic Butter Shrimp,” just sounds comforting and delicious, doesn’t it? It’s a dish that brings people together, a dish that makes you want to linger around the table a little longer. It’s versatile, it’s quick, and most importantly, it’s unbelievably tasty.
How do I make garlic butter shrimp?
Quick Overview
The beauty of this Garlic Butter Shrimp recipe lies in its speed and straightforwardness. We’re essentially going to sauté some aromatics, cook the shrimp until just done, and then toss it all in a luscious garlic butter sauce. It’s a one-pan wonder that requires minimal effort but delivers maximum flavor. The key is to not overcook the shrimp; they cook incredibly fast! My method ensures they stay plump and tender every single time. You’ll be amazed at how quickly this comes together, making it an absolute go-to for any occasion.
Ingredients
For the Star of the Show (The Shrimp):
1.5 lbs large shrimp, peeled and deveined. I always go for frozen, wild-caught shrimp. They’re usually more affordable and just as good once thawed. Make sure they’re fully thawed before you start, and pat them *super* dry with paper towels – this is key for getting a nice sear, not just steaming them! You want about 26-30 count per pound for that perfect bite-sized piece.
For the Glorious Sauce:
6 tablespoons unsalted butter. Good quality butter makes a difference here! I sometimes use European-style butter because it’s a bit richer. If you only have salted, just be mindful of the salt you add later.
6-8 cloves garlic, minced. Don’t be shy with the garlic! I like to mince mine really fine so it disperses evenly. If you’re a true garlic lover, you could even go up to 10 cloves.
1/4 cup dry white wine (like Pinot Grigio or Sauvignon Blanc). This adds a lovely subtle acidity and depth. If you don’t drink wine or prefer not to use it, chicken or vegetable broth works too, or even just a splash more lemon juice.
2 tablespoons fresh lemon juice. Absolutely essential for cutting through the richness of the butter and brightening everything up. Freshly squeezed is non-negotiable here!
1/4 teaspoon red pepper flakes (optional). Just a tiny pinch adds a whisper of warmth without making it spicy. You can omit it if you’re sensitive to heat.
Salt and freshly ground black pepper, to taste. I always start with about 1/2 teaspoon of salt and a few grinds of pepper, then adjust at the end.
For Garnish (Optional but Recommended):
2 tablespoons fresh parsley, chopped. Adds a pop of color and freshness. I love flat-leaf parsley for its vibrant flavor.
Lemon wedges, for serving.
Step-by-Step Instructions
Step 1: Preheat & Prep Pan
Grab a large skillet – cast iron or stainless steel works beautifully here because they heat evenly. Place it over medium-high heat. We want it nice and hot, but not smoking. While the pan is heating, make sure your shrimp are completely thawed and patted dry. This is seriously the most crucial step for getting a good sear on your shrimp and preventing them from getting watery and sad.
Step 2: Mix Dry Ingredients
This step is super simple. In a small bowl, I usually just have my salt and pepper ready to go. I’ll give them a quick whisk together so they’re ready to season the shrimp right before they hit the pan. This ensures even distribution of seasoning.
Step 3: Mix Wet Ingredients
This is where the magic for the sauce starts to happen, but we’ll actually do most of it *in* the pan. For now, just have your white wine (or broth), lemon juice, and red pepper flakes (if using) ready to go. These will be added in quick succession to deglaze the pan and create our sauce base.
Step 4: Combine
This step is about preparing the shrimp for cooking. Take your beautifully dried shrimp and toss them in a bowl with a pinch of salt and pepper. You don’t need a lot here because the sauce will add plenty of flavor. Just a little to season the shrimp themselves. Again, make sure they are completely dry! This is the secret to a lovely sear.
Step 5: Prepare Filling
We’re not really preparing a “filling” in the traditional sense for this dish, but this is where we get our garlic ready. Have your minced garlic measured out and waiting right next to the stove. You want to add it when the butter is just melted so it doesn’t burn.
Step 6: Layer & Swirl
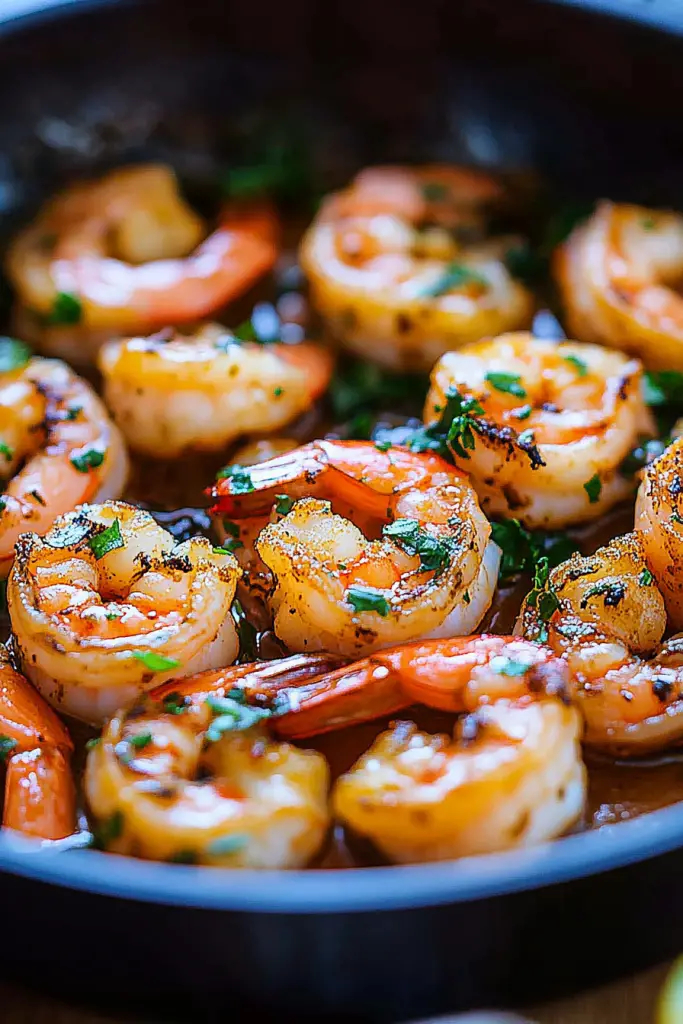
Okay, this is the cooking part! Add the butter to your hot skillet. Once it’s melted and just starting to foam, add your seasoned shrimp in a single layer. Don’t overcrowd the pan; cook in batches if necessary. Cook for about 1-2 minutes per side, until the shrimp are pink and just opaque. Don’t overcook them! Remove the shrimp from the pan and set them aside on a plate. Don’t clean the pan! That little bit of brown stuff left in the pan is pure flavor gold. Add the minced garlic to the pan with the residual butter. Sauté for about 30-60 seconds until fragrant, being careful not to burn it. Pour in the white wine (or broth) and scrape up any browned bits from the bottom of the pan. Let it simmer for about a minute to reduce slightly. Stir in the lemon juice and red pepper flakes (if using). Return the cooked shrimp to the pan. Toss everything together to coat the shrimp in the sauce. Cook for another minute or so, just to heat the shrimp through and let them absorb the sauce. Taste and adjust seasoning with more salt and pepper if needed.
Step 7: Bake
This recipe is cooked entirely on the stovetop, so no baking is required! That’s part of what makes it so incredibly fast and convenient.
Step 8: Cool & Glaze
Once the shrimp are coated in the glorious garlic butter sauce and heated through, remove the pan from the heat immediately. We don’t want the shrimp to overcook. The sauce should be glossy and coating the shrimp beautifully. This is the time to stir in your fresh parsley, if you’re using it. The residual heat will wilt it slightly and release its fresh aroma. Let it sit for just a minute before serving so the flavors meld.
Step 9: Slice & Serve
Serve your Garlic Butter Shrimp immediately! It’s best enjoyed hot off the stove. Spoon the shrimp and plenty of that delicious sauce over pasta, rice, or with crusty bread for dipping. Garnish with extra parsley and serve with lemon wedges on the side for anyone who wants a little extra zing.
What to Serve It With
This Garlic Butter Shrimp is so wonderfully versatile, it practically begs to be paired with all sorts of delicious things! For a simple, yet elegant breakfast, I’ve actually had leftover shrimp and sauce and tossed it into some scrambled eggs with a little extra parsley – surprisingly delicious and a great way to start the day if you’re feeling adventurous. For a proper brunch, I love serving this over creamy polenta or even a bed of fluffy couscous. It feels fancy without being complicated. A crisp, dry white wine or a light sparkling water with a twist of lemon is the perfect beverage pairing for brunch. When I’m craving something a little more decadent, I serve it as a seafood pasta. Just toss it with your favorite cooked pasta – linguine or spaghetti are classics – and make sure to get plenty of that sauce tangled up in the noodles. This is also fantastic as a light dessert course, especially if you’ve had a heavier main. Serve it in small, elegant bowls with a tiny drizzle of extra lemon juice. For those cozy snack moments, or as a quick appetizer when friends drop by unexpectedly, serving it with warm, crusty bread for dipping is an absolute must. You could also serve it alongside some lightly steamed asparagus or green beans for a healthier, lighter feel. My family has a tradition of having this with garlic bread on the side, and let me tell you, it’s pure bliss. The bread soaks up every last drop of that amazing sauce!
Top Tips for Perfecting Your Garlic Butter Shrimp
I’ve made this Garlic Butter Shrimp more times than I can count, and over the years, I’ve picked up a few little tricks that make it absolutely perfect every single time. First, shrimp prep is non-negotiable. Always, always, always pat your shrimp completely dry. I’m talking seriously dry, like you’re trying to win a staring contest with a paper towel. This is the secret to getting a beautiful, golden sear on your shrimp, rather than just steaming them in their own juices. If you can, buy shrimp that are labeled “easy-peel” or “butterflied” if you want to save a few minutes, but peeling and deveining them yourself is totally doable and often cheaper. For mixing advice, remember that shrimp cook super fast. You want to get them in the hot pan, cook them for a minute or two per side until they’re just pink and opaque, then *out*. Overcooking is the quickest way to tough, rubbery shrimp, and nobody wants that! Keep an eye on them; they’ll curl into a C-shape when they’re done. For sauce customization, I love to play with adding a pinch of smoked paprika along with the garlic for a subtle smoky note. If you’re feeling daring, a tiny bit of finely chopped shallot sautéed before the garlic adds another layer of complexity. For ingredient swaps, if you don’t have white wine, a good quality chicken or vegetable broth will work in a pinch, or even just a splash more lemon juice and a little extra butter. For the garlic, while fresh is best, you can use about 2 teaspoons of pre-minced garlic from a jar in a real pinch, but the flavor won’t be quite as bright. When it comes to baking tips, well, there’s no baking for this one! It’s all stovetop magic. Just ensure your pan is hot enough to get a nice sizzle when the shrimp hit it. For glaze variations, if you’re feeling fancy and want to add a little creaminess, a tablespoon or two of heavy cream stirred in at the very end can create a slightly richer, more decadent sauce, but honestly, the classic butter and wine version is perfection on its own. Trust me, these little tweaks will elevate your Garlic Butter Shrimp from good to absolutely unforgettable!
Storing and Reheating Tips
I love having leftovers of this Garlic Butter Shrimp because it’s just as delicious the next day, and sometimes even better as the flavors have had a chance to meld. If you have any that makes it to tomorrow, here’s how I like to store and reheat it. For room temperature, honestly, this dish is best eaten fresh. I wouldn’t leave it out for more than an hour or two, especially with the butter. It’s really meant to be enjoyed right away. For refrigerator storage, the best way is to put any leftovers into an airtight container. You can put a piece of plastic wrap directly on top of the shrimp before sealing the container to minimize air exposure. It will stay good in the fridge for about 2-3 days. The sauce might solidify a bit because of the butter, but don’t worry, that’s completely normal! For freezer instructions, I don’t typically freeze this dish, as shrimp can get a bit mushy when thawed after freezing. If you absolutely had to, I’d recommend storing the cooked shrimp and the sauce separately in airtight containers or freezer bags, and then thawing them gently in the refrigerator overnight before reheating. However, for the best texture, I strongly advise against freezing this recipe. Glaze timing advice is simple: the “glaze” is the sauce itself! You want to serve this right after you’ve tossed the shrimp in the sauce and it’s all glossy and delicious.
Frequently Asked Questions
Final Thoughts
So there you have it, my absolute favorite Garlic Butter Shrimp recipe! It’s more than just a recipe to me; it’s a reminder that sometimes, the most incredible meals come from the simplest ingredients and a little bit of love. I truly hope you give this a try, whether you’re looking for a quick weeknight dinner that feels like a treat, an impressive appetizer for guests, or just a way to bring a little bit of deliciousness into your day. The combination of tender shrimp, fragrant garlic, and rich butter is just unbeatable. If you loved this, you might also enjoy my Lemon Herb Roasted Chicken or my Creamy Tuscan Salmon – they have that same wonderful balance of flavor and relative ease! I can’t wait to hear how yours turns out! Please leave a comment below and let me know your thoughts, or if you’ve tried any fun variations. Happy cooking!
Garlic Butter Shrimp
Ingredients
Main Ingredients
- 1.5 pounds large shrimp peeled and deveined
- 4 tablespoons unsalted butter
- 4 cloves garlic minced
- 0.5 cup chicken broth
- 0.25 cup lemon juice freshly squeezed
- 0.25 cup fresh parsley chopped
- 0.5 teaspoon salt
- 0.25 teaspoon black pepper
Instructions
Preparation Steps
- Pat the shrimp dry with paper towels and season with salt and pepper.
- Melt butter in a large skillet over medium heat. Add minced garlic and cook until fragrant, about 1 minute.
- Add the shrimp to the skillet and cook for 2-3 minutes per side, until pink and cooked through.
- Pour in the chicken broth and lemon juice. Bring to a simmer and cook for 1-2 minutes, scraping up any browned bits from the bottom of the pan.
- Stir in the chopped parsley. Taste and adjust seasoning if needed.
- Serve immediately over pasta, rice, or with crusty bread.
Notes
Featured Comments
“Impressed! Clear steps and quick weeknight win results. Perfect for busy nights.”
“New favorite here — restaurant-level. crowd-pleaser was spot on.”
“Super easy and turned out amazing! My family asked for seconds. Saving this one.”
“This sweet treat was absolutely loved — the silky really stands out. Thanks!”
“Made it tonight and wow — crowd-pleaser! Will definitely make Garlic Butter Shrimp again.”
“Packed with flavor and so simple. Exactly what I wanted from Garlic Butter Shrimp.”