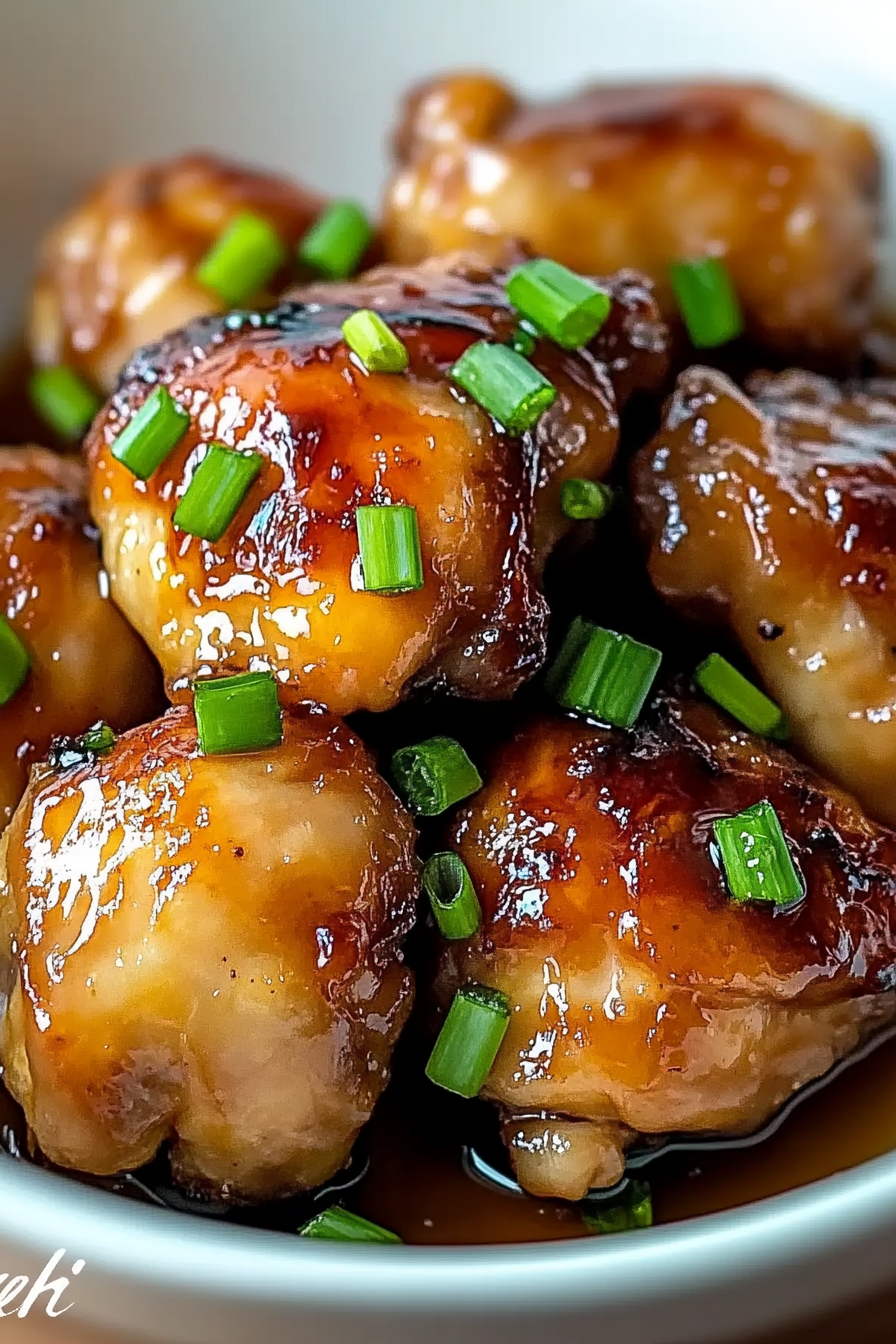
Oh, you guys. I’ve been keeping a little secret, and it’s time to spill the beans (or, in this case, the garlic!). This Garlic Parmesan Chicken? It’s the one I whip up when I need a guaranteed win. You know, those nights when the calendar is packed, the kids are buzzing, and you just need something delicious that doesn’t require a culinary degree or a trip to a specialty store. It’s that magical dish that makes everyone at the table happy, from picky eaters to grown-ups who appreciate a good flavor bomb. Honestly, it rivals some of the fanciest chicken dishes I’ve had in restaurants, but it’s so ridiculously easy to pull off at home. It’s like the comforting hug of a home-cooked meal, but with a sophisticated, savory twist that always impresses. If you love chicken and you love garlic and Parmesan, then buckle up, because this is going to be your new go-to. Seriously, I can’t wait for you to try it!
What is Garlic Parmesan Chicken?
So, what exactly *is* this magnificent creation we call Garlic Parmesan Chicken? Think of it as your favorite crispy, juicy chicken, elevated to a whole new level with a rich, savory coating that’s absolutely bursting with garlic and the nutty, salty goodness of Parmesan cheese. It’s not just chicken breast, either; you can use thighs too, which I sometimes do when I want extra moisture and richness. The magic really happens in that flavorful crust, which gets beautifully golden and slightly crisp in the oven (or even in a pan, if you prefer!). It’s a dish that’s both comforting and elegant, making it perfect for a weeknight dinner or even a casual get-together with friends. The name itself says it all, doesn’t it? Garlic and Parmesan. Two of my absolute favorite flavors, working together in perfect harmony. It’s simple, it’s honest, and it’s ridiculously delicious.
How do I make Parmesan Chicken with Garlic?
Quick Overview
This recipe is all about building layers of flavor and getting that perfect crispy exterior. We’ll start by prepping our chicken, then tossing it in a simple, flavorful coating. After a quick bake, we’ll finish it off with a luscious Garlic Parmesan glaze that melts into the chicken, making it impossibly juicy and delicious. It’s really that straightforward – minimal effort, maximum reward. You’ll be amazed at how quickly this comes together, making it an absolute weeknight warrior.
Ingredients
For the Chicken:
1.5 – 2 lbs boneless, skinless Chicken Breasts or thighs, cut into bite-sized pieces (I like using thighs because they stay so moist, but breasts work beautifully too!)
1/2 cup all-purpose flour (or gluten-free blend)
1 teaspoon salt
1/2 teaspoon black pepper
1/4 teaspoon paprika (for a little color and warmth)
2 tablespoons olive oil or your preferred cooking oil
For the Garlic Parmesan Coating:
1/2 cup grated Parmesan cheese (use the good stuff, it makes a difference!)
1 tablespoon dried parsley (or 2 tablespoons fresh, finely chopped)
1 teaspoon garlic powder (or 2 cloves fresh garlic, minced very finely)
For the Glaze:
4 tablespoons unsalted butter
3-4 cloves garlic, minced (this is where the real garlic flavor comes from!)
1/4 cup grated Parmesan cheese
2 tablespoons fresh parsley, chopped (for garnish and freshness)
A squeeze of lemon juice (optional, but it brightens everything up beautifully)
Step-by-Step Instructions
Step 1: Preheat & Prep Pan
First things first, get your oven preheating to 400°F (200°C). While that’s heating up, grab a large baking sheet. I like to line mine with parchment paper or foil for super easy cleanup – a little trick I learned after scrubbing way too many sticky pans! If you’re not using parchment, give the pan a light greasing with a little olive oil or cooking spray.
Step 2: Mix Dry Ingredients
In a medium bowl, whisk together the flour, salt, pepper, and paprika. This is your dredging station! Make sure everything is well combined so you get an even coating on your chicken. If you’re feeling fancy, you can add a pinch of cayenne pepper here for a little kick!
Step 3: Mix Wet Ingredients
This recipe doesn’t have a traditional “wet” ingredient step in the way some breaded chicken recipes do, but we’re going to prepare our chicken pieces to go into that flour mixture. Make sure your chicken pieces are patted dry with paper towels. This helps the flour mixture adhere better.
Step 4: Combine
Add your chicken pieces to the bowl with the flour mixture. Toss them around until each piece is lightly and evenly coated. Don’t overdo it; we’re not looking for a thick batter, just a nice light dusting. Then, drizzle the olive oil over the floured chicken and toss again until the chicken is lightly coated in oil and flour. This helps create a beautiful golden crust. Spread the coated chicken in a single layer on your prepared baking sheet. Make sure the pieces aren’t overlapping too much, or they’ll steam instead of crisping up!
Step 5: Prepare Filling
While the chicken is baking, let’s get our garlic Parmesan coating ready. In a small bowl, combine the 1/2 cup of Parmesan cheese, dried parsley, and garlic powder (or minced fresh garlic if you’re using it). Give it a good stir. This will be sprinkled over the chicken halfway through baking to give it that extra punch of flavor and golden color.
Step 6: Layer & Swirl
This step is actually part of the baking process! We’re going to bake the chicken for about 15-20 minutes, until it’s starting to turn golden brown. Then, we’ll carefully remove the pan from the oven and sprinkle our prepared garlic Parmesan coating evenly over the chicken pieces. Give the pan a gentle shake or use tongs to nudge the pieces around a bit so the coating adheres. Return to the oven for another 10-15 minutes, or until the chicken is cooked through and the coating is golden and delicious.
Step 7: Bake
Continue baking the chicken for the remaining time, about 10-15 minutes, until it’s cooked through and the topping is golden brown and irresistible. The internal temperature should reach 165°F (74°C). If it looks like it’s browning too quickly, you can always loosely tent it with foil. I usually find the total baking time to be around 30-35 minutes, depending on the size of your chicken pieces and your oven.
Step 8: Cool & Glaze
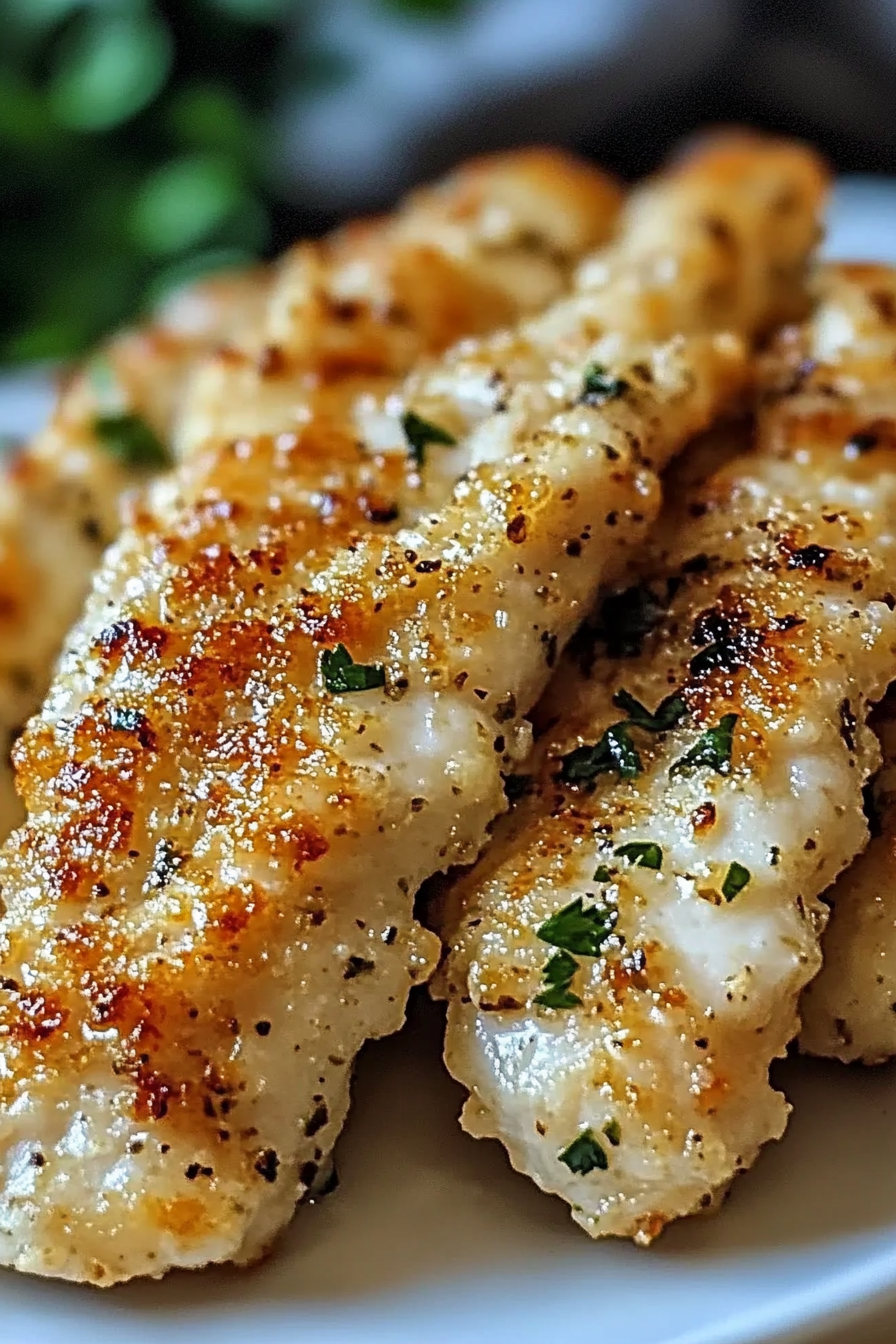
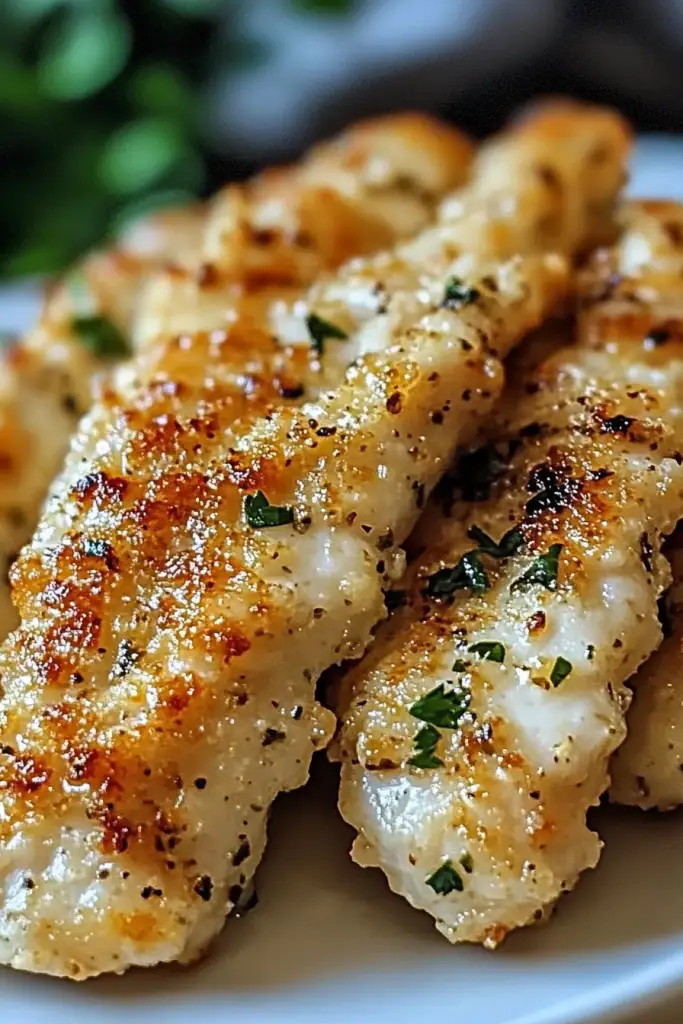
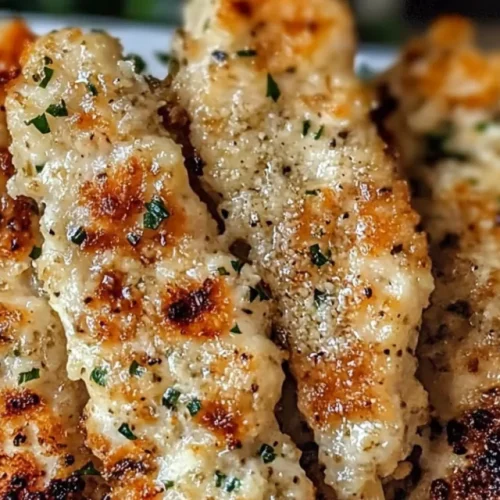
Once the chicken is cooked, take it out of the oven. While the chicken is still hot on the baking sheet, it’s time for the glorious glaze! In a small saucepan over medium heat, melt the butter. Add the minced garlic and sauté for about 1 minute until fragrant – don’t let it burn! Remove from heat and stir in the 1/4 cup of Parmesan cheese. Add a squeeze of lemon juice if you’re using it, and stir until the cheese is melted and the glaze is smooth. Pour this warm, garlicky, cheesy goodness all over the chicken on the baking sheet. Use a spoon or spatula to gently coat each piece. The heat from the chicken will help the glaze meld beautifully.
Step 9: Slice & Serve
Garnish with the fresh chopped parsley for a pop of color and freshness. Let the chicken rest on the baking sheet for just a few minutes – this allows the glaze to set slightly and the chicken to reabsorb its juices. Then, it’s ready to be devoured! I usually just serve it right off the pan, but if you prefer, you can transfer it to a serving platter. The aroma that fills your kitchen at this point is just incredible!
What to Serve It With
This Garlic Parmesan Chicken is so wonderfully versatile, it truly shines with a variety of pairings! For a simple yet satisfying breakfast (yes, I’ve totally had leftovers for breakfast!), I love serving it with a perfectly poached egg and some avocado toast. The richness of the chicken is surprisingly delightful in the morning. When it comes to brunch, this dish adds a touch of elegance without being fussy. Picture it served alongside a fresh, vibrant arugula salad with a light lemon vinaigrette, or maybe some roasted asparagus. For a more substantial brunch spread, it pairs wonderfully with fluffy scrambled eggs and some crispy breakfast potatoes. And if you’re thinking dessert – okay, maybe not *dessert* dessert, but this is fantastic as a late-night snack! Imagine it alongside some warm, crusty bread for dipping into any leftover glaze. My family absolutely loves it with a big bowl of pasta, tossed with a bit of the extra glaze and maybe some steamed broccoli. It’s also fantastic over creamy mashed potatoes or a simple side of rice. It’s really a chameleon dish, adapting to whatever meal you’re creating!
Top Tips for Perfecting Your Garlic Parmesan Chicken
I’ve made this Garlic Parmesan Chicken more times than I can count, and over the years, I’ve picked up a few tricks that really help make it extra special. When it comes to the chicken itself, don’t be afraid to trim any excess fat, but leave a little on the thighs for extra flavor and moisture. For the flour coating, I always make sure my chicken is patted really dry first – this is crucial for getting that nice, even coating to stick. If your flour mixture seems a bit clumpy, just give it a good whisk before you start dredging. And when you’re coating the chicken, don’t overwork it. A light, even coating is all you need. For the garlic Parmesan topping, I swear by freshly grated Parmesan. It melts and crisps up so much better than pre-shredded stuff, which often has anti-caking agents. If you’re using fresh garlic instead of garlic powder in the topping, make sure it’s minced *super* finely, almost to a paste, so it distributes evenly. When it comes to baking, keeping the chicken in a single layer on the baking sheet is key. If pieces are crowded, they’ll steam instead of getting that lovely golden crisp. I often find myself checking on it around the halfway mark and giving the pan a little nudge to ensure even browning. For the glaze, the fresher the garlic, the more potent the flavor, so don’t be shy! Sautéing it gently in the butter for just about 30-60 seconds is enough to release its aroma without burning. And that squeeze of lemon juice? It sounds small, but it really makes a difference by cutting through the richness and brightening up all those savory flavors. Don’t skip it if you can help it!
Storing and Reheating Tips
One of the things I love most about this Garlic Parmesan Chicken is how well it keeps, making it a fantastic candidate for leftovers. If you happen to have any (which is rare in my house!), you can store it at room temperature for up to two hours. For longer storage, transfer the cooled chicken to an airtight container and pop it in the refrigerator. It should stay delicious for about 3-4 days. When you’re ready to reheat, I find the best way to recapture some of that delicious crispiness is to gently warm it in a skillet over medium-low heat with a tiny bit of extra butter or olive oil. You can also reheat it in the oven at around 350°F (175°C) for about 10-15 minutes, or until heated through. Microwaving is also an option, but it can sometimes make the chicken a little softer. If you’re planning to freeze portions, I recommend doing so before you add the final glaze. Wrap individual portions tightly in plastic wrap, then place them in a freezer-safe bag or container. It should keep well in the freezer for about 2-3 months. When you’re ready to enjoy, thaw it overnight in the refrigerator, then add the glaze before reheating as usual. For the glaze itself, it’s best to add it right after the chicken is baked and still hot on the baking sheet for optimal melty, gooey perfection. If you’re reheating frozen or refrigerated chicken, you can re-make the glaze or gently warm the leftover glaze from when you first made it.
Frequently Asked Questions
Final Thoughts
So there you have it, my absolute favorite Garlic Parmesan Chicken! I truly hope you give this recipe a try. It’s more than just a meal; it’s a little bit of comfort, a whole lot of flavor, and a guaranteed way to get smiles around your dinner table. It’s one of those recipes that reminds me why I love cooking – the joy of creating something delicious from simple ingredients and sharing it with the people I care about. If you’re a fan of savory, cheesy, garlicky goodness, this is going to become a staple in your kitchen, just like it has in mine. I can’t wait to hear how yours turns out! Please, please leave a comment below and tell me what you think, or share any amazing variations you come up with. And if you make it, don’t forget to share a pic on social media and tag me – I’d love to see it! Happy cooking!
Garlic Parmesan Chicken
Ingredients
Main Ingredients
- 4 piece boneless, skinless chicken breasts
- 2 tablespoon olive oil
- 4 clove garlic, minced
- 0.5 cup grated Parmesan cheese
- 0.25 cup heavy cream
- 2 tablespoon butter
- 0.5 teaspoon dried Italian seasoning
- 0.25 teaspoon salt
- 0.125 teaspoon black pepper
- 2 tablespoon fresh parsley, chopped for garnish
Instructions
Preparation Steps
- Preheat your oven to 400°F (200°C).
- Pat the chicken breasts dry with paper towels and season them with salt and pepper.4 piece boneless, skinless chicken breasts
- Heat olive oil in an oven-safe skillet over medium-high heat.4 piece boneless, skinless chicken breasts
- Sear the chicken breasts for 2-3 minutes per side until golden brown.4 piece boneless, skinless chicken breasts
- Remove the chicken from the skillet and set aside.
- Add butter to the skillet and melt it over medium heat. Add minced garlic and cook until fragrant, about 1 minute.4 piece boneless, skinless chicken breasts
- Stir in the heavy cream and Italian seasoning. Bring to a simmer, then reduce heat and cook for 2-3 minutes until slightly thickened.4 piece boneless, skinless chicken breasts
- Stir in the grated Parmesan cheese until melted and smooth.4 piece boneless, skinless chicken breasts
- Return the chicken breasts to the skillet, spooning the sauce over them.4 piece boneless, skinless chicken breasts
- Transfer the skillet to the preheated oven and bake for 15-20 minutes, or until the chicken is cooked through and the sauce is bubbly.
- Garnish with fresh chopped parsley before serving.4 piece boneless, skinless chicken breasts
Notes
Featured Comments
“Impressed! Clear steps and absolutely loved results. Perfect for busy nights.”
“New favorite here — quick weeknight win. crowd-pleaser was spot on.”
“Super easy and turned out amazing! My family asked for seconds. Saving this one.”
“This sweet treat was absolutely loved — the buttery really stands out. Thanks!”
“Made it tonight and wow — turned out amazing! Will definitely make Garlic Parmesan Chicken again.”
“Packed with flavor and so simple. Exactly what I wanted from Garlic Parmesan Chicken.”