

You know those nights? The ones where the fridge looks a little bare, everyone’s hungry, and you just need something comforting, something that feels like a warm hug in a bowl? This green chile chicken casserole is exactly that. It’s not just a meal; it’s my secret weapon for busy weeknights, a dish that smells incredible as it bakes, filling the whole house with the most amazing aromas. It’s the kind of recipe that makes my kids ask for seconds (and sometimes thirds!), and honestly, it’s become a staple at our family gatherings. If you’ve ever loved a Creamy Chicken bake or a hearty enchilada casserole, imagine those flavors married together with a little kick from some Hatch green chiles. This is *that* dish. I’ve tinkered with this green chile chicken recipe more times than I can count, and I’m finally ready to share the version that gets rave reviews every single time. Seriously, get ready to fall in love.
What is green chili chicken casserole?
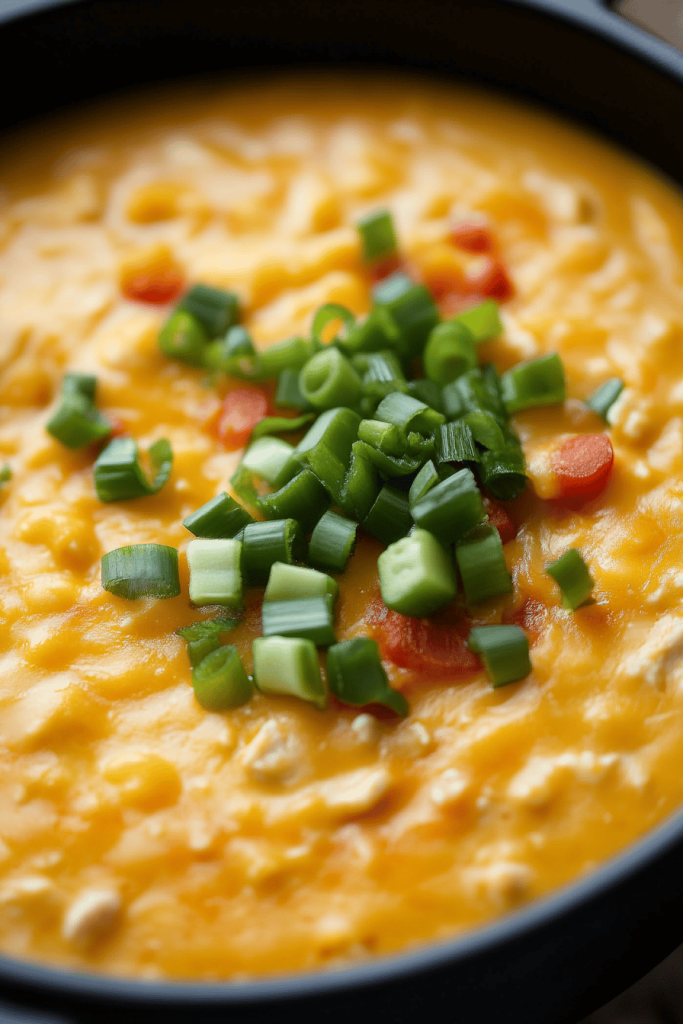
So, what exactly is this magical dish we’re talking about? Think of it as a deeply satisfying, wonderfully creamy baked casserole that’s packed with tender chicken, savory green chiles, and a rich, cheesy sauce, all nestled under a crispy topping. It’s the ultimate comfort food, but with a Southwestern flair that makes it truly special. The “green chile” part refers to the star ingredient – roasted green chiles, usually from New Mexico (Hatch chiles are my absolute favorite if you can find them!). They bring a smoky, slightly spicy, and wonderfully earthy flavor that just can’t be beat. It’s not just a plain old chicken bake; it’s got personality and a depth of flavor that will have you hooked from the first bite. It’s essentially comfort food, elevated.
How do I make green chili chicken casserole?
Quick Overview
Making this green chile chicken casserole is a straightforward process that results in maximum flavor with minimal fuss. You’ll essentially be combining cooked chicken with a luscious green chile and Cream Cheese sauce, then layering it all into a baking dish with some extra cheese, topping it with a crispy element, and baking until golden and bubbly. It’s designed to be forgiving, so don’t stress too much about perfection. The goal is deliciousness, and this recipe delivers on that promise every time.
Ingredients
For the main casserole: For the main sauce: For the main sauce: For the main sauce: For the main sauce: For the main sauce: For
Here’s what you’ll need to bring this magic to life. I always try to use good quality ingredients, but honestly, this recipe is pretty forgiving! You’ll need about 3 cups of cooked, shredded or diced chicken. Rotisserie chicken is my absolute go-to for speed and convenience, but you can also boil and shred chicken breasts or thighs. Then, we’ve got a 10-ounce can of diced green chiles (mild or hot, depending on your preference – I usually go for mild and add a pinch of cayenne if I want more heat). Next up, a block of Cream Cheese, about 8 ounces, softened. This is what makes it so wonderfully creamy and rich. For extra cheesy goodness, we’ll use about 2 cups of shredded Monterey Jack cheese, and another cup for topping. A small onion, finely chopped, adds a nice savory base. And of course, seasoning: salt and black pepper to taste. Sometimes, I’ll throw in a pinch of garlic powder or a dash of cumin for an extra layer of flavor, but it’s not strictly necessary.
For the Topping:
This is where we get that satisfying crunch! My absolute favorite topping is crushed buttery crackers, like Ritz or Saltines. You’ll need about 1.5 cups of crumbs. I like to mix these with a couple of tablespoons of melted butter to help them crisp up beautifully in the oven. Sometimes, if I’m feeling fancy or just want something a little different, I’ll mix in some panko breadcrumbs for extra crispiness, or even a handful of toasted pepitas for a nutty crunch.
Step-by-Step Instructions
Step 1: Preheat & Prep Pan
First things first, let’s get your oven preheating to 375°F (190°C). While the oven is warming up, lightly grease a 9×13 inch baking dish. You can use cooking spray, butter, or a little bit of oil. This just helps ensure nothing sticks and makes cleanup a breeze.
Step 2: Sauté Aromatics
In a skillet over medium heat, add a tablespoon of olive oil or butter. Once it’s shimmering, toss in your finely chopped onion. Cook, stirring occasionally, until the onion is softened and translucent, about 5-7 minutes. You don’t want it browned, just tender. This step really builds a nice foundation of flavor for the casserole.
Step 3: Mix Wet Ingredients & Chiles
In a large mixing bowl, combine the softened Cream Cheese, the drained diced green chiles, and the shredded Monterey Jack cheese (reserving about 1 cup for the topping). Add the sautéed onions to the bowl. Stir everything together until it’s well combined and creamy. It might look a little thick at this stage, and that’s perfectly fine.
Step 4: Combine with Chicken
Now, add your cooked, shredded, or diced chicken to the bowl with the cheese and chile mixture. Add your salt and pepper to taste. If you’re adding any optional spices like garlic powder or cumin, now’s the time to mix them in. Gently fold everything together until the chicken is evenly coated with the creamy sauce. Make sure all that yummy goodness gets into every nook and cranny of the chicken.
Step 5: Assemble the Casserole
Pour the chicken and cheese mixture into your prepared baking dish. Spread it out evenly, making sure it fills the dish. Now, sprinkle the reserved 1 cup of shredded Monterey Jack cheese evenly over the top of the chicken mixture. This extra layer of cheese is always a good idea, in my opinion!
Step 6: Prepare and Add Topping
In a small bowl, mix together the crushed crackers (or your chosen topping) with the melted butter. Stir until the crumbs are evenly moistened. Sprinkle this buttery crumb mixture evenly over the cheese layer in the baking dish. This is what gives you that irresistible crispy, golden-brown topping!
Step 7: Bake
Pop the casserole into your preheated oven. Bake for 25-30 minutes, or until the casserole is hot, bubbly around the edges, and the topping is golden brown and crispy. You’ll know it’s done when you see those delightful bubbles peeking out from under the topping!
Step 8: Cool Slightly
Once it’s out of the oven, resist the urge to dive in immediately! Let the casserole sit for about 5-10 minutes before slicing and serving. This allows the flavors to meld together and the casserole to set slightly, making it much easier to serve neat portions.
Step 9: Slice and Serve
Using a spatula or knife, cut the casserole into portions and serve it warm. It’s absolutely delicious on its own, but I’ll tell you more about what to pair it with next!
What to Serve It With
This green chile chicken casserole is wonderfully self-sufficient, but serving it with a few thoughtful sides can really elevate the meal. For a classic breakfast or brunch, it’s fantastic alongside some scrambled eggs and a side of fresh fruit. The creaminess of the casserole is a lovely contrast to the lightness of the eggs and the sweetness of the fruit. If you’re serving this for a more substantial brunch spread, a simple green salad with a light vinaigrette or some roasted sweet potato cubes would be divine. For a dessert-like feel, after a hearty dinner, I sometimes like to serve a small portion with a dollop of sour cream and a sprinkle of fresh cilantro – it’s just pure comfort. And for those cozy snack moments? I often just serve it as is, maybe with a few extra tortilla chips for scooping. It’s amazing how versatile this dish is! My kids also love it piled into soft tortillas for an impromptu chicken taco night, so that’s another fun option. It truly adapts to whatever you’re craving.
Top Tips for Perfecting Your Green Chile Chicken Casserole
Over the years, I’ve picked up a few tricks that help make this green chile chicken casserole absolutely perfect every time. When it comes to the chicken, using rotisserie chicken is a lifesaver, but make sure it’s truly shredded or diced into bite-sized pieces. If you’re boiling chicken, don’t overcook it; just until it’s done through, then shredding it while it’s still warm is so much easier! For the green chiles, draining them well is key. Nobody wants a watery casserole. I’ve found that using canned diced green chiles is the most consistent way to get that signature flavor, and you can usually find them mild, medium, or hot. If you can get your hands on fresh roasted Hatch chiles, even better – just make sure to peel and dice them! When you’re mixing the cheese and cream cheese, letting the cream cheese soften at room temperature for about 30 minutes makes it so much easier to combine smoothly. Don’t try to force it if it’s too cold; you’ll end up with lumps. For the topping, crushing your crackers or breadcrumbs to a medium consistency is best; not too fine that they turn to dust, and not too chunky. Mixing them with melted butter before sprinkling ensures they get beautifully golden and crispy. And a crucial tip: don’t overbake! Once the edges are bubbly and the topping is golden, it’s done. Overbaking can make the casserole dry. If you find your topping is browning too quickly, you can always loosely tent the dish with foil for the last 10 minutes of baking. I’ve learned that a little patience during the cooling phase (that 5-10 minutes) really makes a difference in how the casserole holds its shape when you serve it. And finally, don’t be afraid to adjust the seasoning. Taste the chicken mixture before you put it in the dish and add more salt or pepper if you think it needs it!
Storing and Reheating Tips
This green chile chicken casserole is fantastic for leftovers, which is a huge win in my book! If you have any that is! If you do manage to have some, it’s best to store it covered tightly with plastic wrap or aluminum foil, or transferred into an airtight container. It will keep well in the refrigerator for up to 3-4 days. The flavors actually tend to deepen and meld together even more overnight, making it even tastier the next day. When you’re ready to reheat, the oven is your best friend for preserving that crispy topping. You can reheat individual portions or the whole casserole in a preheated oven at around 350°F (175°C) for about 15-20 minutes, or until heated through. If you’re in a real rush, you can microwave a portion, but the topping won’t be as crispy. For the topping specifically, if you notice it’s getting a bit soft after refrigeration, you can pop the uncovered casserole under the broiler for a minute or two (watch it closely!) to re-crisp it. I haven’t really tried freezing this one because it’s usually gone too quickly, but if you wanted to freeze it, I’d recommend baking it without the crumb topping, letting it cool completely, wrapping it tightly in plastic wrap and then foil, and freezing for up to 2 months. You’d then thaw it in the fridge overnight and add the buttered crumb topping before baking as directed. For the glaze timing advice, you definitely want to add the crumb topping *just before* baking for the best results. If you’re storing leftovers, the topping might get a little soft, but it’s still delicious!
Frequently Asked Questions
Final Thoughts
Seriously, if you’re looking for a dish that’s packed with flavor, comforting, and surprisingly easy to make, this green chile chicken casserole is it. It’s the kind of recipe that makes you feel like a kitchen rockstar, and the smiles it brings to the table are absolutely priceless. The smoky warmth of the green chiles combined with the creamy, cheesy goodness is just pure magic. It’s become one of those dishes that I know I can count on, whether it’s for a busy weeknight or a special gathering. If you’re a fan of hearty, flavorful casseroles, I really hope you give this one a try. I’m always so excited to hear when you make one of my recipes, so please, let me know in the comments below how yours turned out, or if you tried any fun variations! Happy baking!

Green Chile Chicken Chilaquiles
Ingredients
Main Ingredients
- 15 corn tostadas Corn tostadas or as necessary
- 24 ounces Salsa Verde or your favorite
- 3 cups Cooked Shredded Chicken use rotisserie chicken to save time
- 12 ounces Pepper Jack Cheese Blend
Optional Garnishes
- Cilantro for garnishing
- Tomatoes for garnishing
Instructions
Preparation Steps
- Preheat oven to 375°F (use convection if you have it) and spray a 10-inch oven-proof skillet with cooking spray.
- To the bottom of the skillet, add 4 to 5 tostadas, enough to completely cover the base of the skillet. Break them slightly if necessary to get complete coverage (it does not have to be perfect).
- Evenly top with one-third of the salsa (8 ounces), one-third of the chicken (1 cup), and one-third of the cheese (4 ounces).
- Repeat the layering process twice: Tostadas, salsa, chicken, cheese.
- Bake for about 25 to 30 minutes, or until the cheese is lightly golden browned as desired.
- Optionally garnish with cilantro, tomatoes, or your favorite garnishes. Serve immediately. Chilaquiles are best fresh.
Notes
Featured Comments
“I love this idea—green chile chicken is so versatile and comforting! Do you have a go-to weeknight recipe for it?”
“Love this recipe—it’s perfect for those busy weeknights when I need something hearty and ready fast.”
“Impressed! Clear steps and spot on results. Perfect for busy nights.”
“New favorite here — turned out amazing. crowd-pleaser was spot on.”
“Super easy and turned out amazing! My family asked for seconds. Saving this one.”
“This sweet treat was absolutely loved — the fresh really stands out. Thanks!”


Love this recipe—it’s perfect for those busy weeknights when I need something hearty and ready fast.
I love this idea—green chile chicken is so versatile and comforting! Do you have a go-to weeknight recipe for it?