

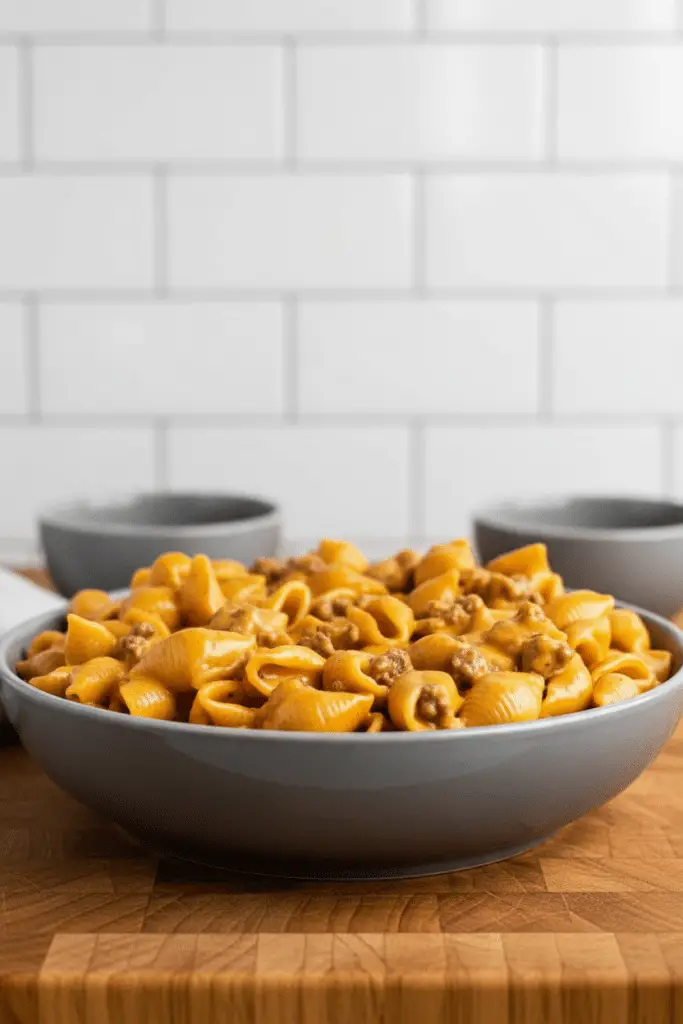
The Best Homemade Hamburger Helper
Let’s be real for a second—who doesn’t have a massive soft spot for those classic boxed dinners we grew up eating? I certainly do. When Jorge and I first got married, we practically lived on boxed meals because they were cheap, fast, and incredibly filling. But as we spent more time in the kitchen over the years, we had a huge realization: we could recreate that exact same cozy, nostalgic flavor entirely from scratch. And honestly? It tastes about a million times better.
This Homemade Hamburger Helper recipe completely ditches the mystery powder packets and replaces them with real, wholesome ingredients like heavy cream, sharp cheddar cheese, and rich tomato sauce. Every single bite is packed with tender pasta and savory ground beef, all smothered in a luscious cheese sauce that will have your family scraping their bowls clean. It still has that brilliant one-pot magic and takes just 30 minutes to throw together, making it the ultimate weeknight savior. If you have picky eaters at the table, trust me, this is going to be your new secret weapon. Grab your favorite skillet, and let’s get cooking!
What Is Homemade Hamburger Helper?
If you somehow missed out on this childhood staple, let me paint a picture for you. Traditionally, Hamburger Helper was a hugely popular pantry staple introduced decades ago to help stretch a single pound of ground beef into a full family dinner. It came with dry pasta and a little packet of powdered seasoning that magically turned into a sauce when you added water and milk.
Our Homemade Hamburger Helper takes that brilliant, budget-friendly concept and gives it a massive, delicious upgrade. Instead of relying on dehydrated cheese and artificial thickeners, this from-scratch version uses a simple roux, rich beef broth, real tomato sauce, and freshly grated cheddar cheese to create a velvety, luxurious sauce. The seasoned ground beef and tender macaroni noodles cook together right in that beautiful liquid, soaking up all the incredible savory flavors. It’s the absolute definition of comfort food—hearty, cheesy, and deeply satisfying. Plus, you still get the convenience of a quick, one-pot dinner, but with the peace of mind that comes from knowing exactly what’s going into your family’s food.
How to Make Homemade Hamburger Helper
Quick Overview
Making this dish is wonderfully straightforward, and the best part is how incredibly fast it comes together. You’ll start by browning your ground meat in a large skillet, then setting it aside while you sauté a little diced onion and garlic. Next, you’ll create a simple base by sprinkling in some flour, which helps thicken our sauce beautifully.
After whisking in the beef broth and tomato sauce, you just add your seasonings and the dry pasta right into the pan. Let the whole thing simmer until the noodles are perfectly tender. Finally, you’ll stir in the heavy cream and lots of shredded cheddar cheese, add the beef back in, and let it rest for a minute to reach maximum creamy perfection.
Ingredients
Here is everything you need to grab from the pantry and fridge to make this magic happen:
- Ground Beef: I love using lean ground beef, but ground turkey or chicken works wonderfully too. If you use a fattier cut, just drain the excess grease!
- Yellow Onion & Garlic: Fresh aromatics build the perfect savory foundation.
- All-Purpose Flour: Just two tablespoons to help thicken the sauce.
- Beef Broth: Low-sodium is best so you can control the saltiness. Chicken broth is a totally fine substitute if that’s what you have on hand.
- Tomato Sauce: An 8-ounce can gives us that classic, slightly tangy flavor profile.
- Seasonings: A mix of Italian seasoning, seasoned salt, smoked paprika, and garlic powder. The smoked paprika is the secret star here!
- Small Pasta: Grab 8 ounces (about half a standard box) of small shells or classic elbow macaroni.
- Heavy Cream: For the most luxurious, velvety texture. Half and half works in a pinch.
- Sharp Cheddar Cheese: Please grate it fresh from the block! Pre-bagged cheese has anti-caking powders that can make your sauce grainy.

Step-by-Step Instructions
Step 1: Brown the Meat
Grab a large sauté pan or Dutch oven with a fitted lid. Place it over medium-high heat and brown your ground beef until it’s fully cooked and wonderfully crumbly. Once it’s done, remove the beef from the pan and set it aside on a plate, but leave about two tablespoons of that flavorful grease right there in the skillet.
Step 2: Sauté the Aromatics
Lower your heat down to medium. Toss in the diced yellow onion and let it cook for about 5 minutes until it gets nice and soft. Stir in the minced garlic and let it cook for just 30 seconds more until your kitchen smells absolutely heavenly.
Step 3: Build the Sauce Base
Sprinkle the all-purpose flour over the onions and garlic, stirring constantly for about a minute to cook off the raw flour taste. Slowly pour in your beef broth, whisking as you go, and bring the mixture up to a gentle boil.
Step 4: Add Pasta and Simmer
Pour in the tomato sauce, Italian seasoning, seasoned salt, smoked paprika, garlic powder, and your dry uncooked pasta. Give everything a really good stir to combine. Bring the liquid to a simmer, pop the lid on, and let it cook for 12 to 15 minutes. Check it occasionally and give it a stir. If the liquid gets too low before the noodles are tender, just splash in an extra quarter to half cup of broth.
Step 5: Make It Cheesy
Once the pasta is perfectly tender, pour in the heavy cream and sprinkle in the freshly shredded cheddar cheese. Stir gently until every last bit of cheese has melted into a gorgeous, smooth sauce.
Step 6: Combine and Rest
Add the cooked ground beef back into the skillet. Let it heat through for about 2 to 3 minutes. Finally, remove the pan from the heat and let it sit undisturbed for just a minute or two. This crucial resting time allows the sauce to thicken up and cling perfectly to every single noodle. Serve it up hot and enjoy!
What to Serve It With
Honestly, this Homemade Hamburger Helper is so incredibly hearty and filling that it completely stands on its own as a main meal. You really don’t need to stress about elaborate side dishes! However, if you want to stretch the meal a bit further or just love a good pairing, you absolutely can’t go wrong with some warm, crusty garlic bread or homemade garlic knots to mop up every last drop of that amazing cheese sauce.
If you’re looking to add a pop of color and some fresh greens to the table, a crisp Greek salad with a light vinaigrette cuts through the richness of the pasta perfectly. My family also loves it when I serve this alongside some simple sautéed green beans, roasted broccoli, or pan-seared Brussels sprouts. The veggies add a lovely textural crunch that complements the creamy, tender pasta beautifully.
Top Tips for Perfecting Your Homemade Hamburger Helper
Over the years of making this dish, I’ve picked up a few little secrets that guarantee absolute perfection every single time:
- Shred Your Own Cheese: I can’t stress this enough! Pre-shredded cheese from a bag is coated in starches to prevent clumping, which means it won’t melt smoothly into your sauce. Grab a block of sharp cheddar and grate it yourself for the creamiest results.
- Don’t Rush the Beef: When browning your ground meat, let it sit undisturbed in the hot pan for a minute or two before stirring. This creates those beautiful caramelized, browned bits that add massive flavor to your final dish.
- Watch the Liquid: Different pasta brands absorb liquid at different rates. Keep an eye on your skillet while it simmers. If your noodles aren’t quite done but the pan is looking dry, don’t panic! Just stir in an extra splash of beef broth to keep things nice and saucy.
- Let It Rest: It’s so tempting to dive right in, but letting the skillet sit off the heat for two minutes before serving is the secret to a thick, clingy sauce. It thickens as it cools slightly!
Storing and Reheating Tips
If you’re lucky enough to have leftovers, you’re in for a treat because the flavors continue to meld together beautifully in the fridge! Just keep in mind that the pasta will continue to absorb the creamy sauce as it sits, so the texture will be a little different the next day.
To store, let the dish cool down to room temperature, then transfer it to an airtight container. It will stay fresh and delicious in the refrigerator for up to 4 days. I strongly advise against freezing this recipe, as dairy-based sauces and cooked pasta tend to become mushy and separate when thawed.
When you’re ready to reheat, you can use the microwave in short bursts, stirring in between. However, my favorite method is warming it gently on the stovetop over medium-low heat. Because the noodles have soaked up the moisture, I highly recommend stirring in a splash of beef broth or a little extra heavy cream while it heats. This simple trick brings the sauce right back to its original, velvety glory!
Frequently Asked Questions
Final Thoughts
There’s just something incredibly magical about taking a beloved childhood memory and recreating it in your own kitchen. This Homemade Hamburger Helper recipe has brought so much joy and comfort to our dinner table, and I am so thrilled to pass it along to you. It proves that you don’t need complicated techniques or a million ingredients to make a deeply satisfying, soul-warming meal from scratch. The rich, velvety cheese sauce, the perfectly seasoned beef, and the tender pasta all come together in one single pot to create absolute weeknight perfection.
I really hope this dish becomes as much of a staple in your home as it is in ours. Whether you’re making it for a busy Tuesday night dinner or serving it up for a cozy weekend lunch, it’s guaranteed to bring a smile to everyone’s face. Don’t forget to play around with the recipe—add a dash of hot sauce if you like a kick, or try it with ground turkey! If you give this recipe a try, please let me know how much your family loved it. Happy cooking, friends!
Homemade Hamburger Helper
Ingredients
Main Ingredients
- 1 pound lean ground beef or ground turkey
- 1 large yellow onion diced
- 1 clove garlic minced
- 2 tablespoons all-purpose flour
- 2 cups low-sodium beef broth or chicken broth
- 8 oz tomato sauce 1 can
- 1 teaspoon Italian seasoning
- 1 teaspoon seasoned salt
- 0.5 teaspoon smoked paprika
- 0.5 teaspoon garlic powder
- 8 oz small pasta shells or small elbow pasta (Keep in mind 8 oz is 0.5 of a normal 1lb box of pasta.)
- 0.5 cup heavy cream or half and half
- 2 cups shredded cheddar cheese
- salt and pepper to taste
Instructions
Preparation Steps
- In a large sauté pan with a lid, brown the ground beef over medium high heat. Remove cooked ground beef from pan and set aside, reserving 2 tablespoons of grease in the pan.
- Lower the heat to medium and add the onion. Cook the onion until soft, about 5 minutes. Add the garlic for the last 30 seconds.
- Add the flour and stir to cook for about 1 minute, slowly stir in the beef broth and bring the mixture to a boil.
- Pour in the tomato sauce, Italian seasoning, seasoned salt, smoked paprika, garlic powder and pasta, stirring to combine. Bring to a simmer, cover with lid and cook for 12 to 15 minutes or until pasta is tender, stirring occasionally. If your noodles are not cooked through and you're running out of liquid, add an extra 0.25 to 0.5 cup broth as needed.
- Add in the cream and cheese and stir until all the cheese melted. Add back in ground beef, cook for 2 to 3 minutes more to re-heat ground beef. Remove from the heat and let it rest for a minute or two so the sauce can thicken, then serve immediately!
Notes
Featured Comments
“Impressed! Clear steps and spot on results. Perfect for busy nights.”
“New favorite here — so flavorful. crowd-pleaser was spot on.”
“Super easy and turned out amazing! My family asked for seconds. Saving this one.”
“This sweet treat was absolutely loved — the light really stands out. Thanks!”
“Made it tonight and wow — super easy! Will definitely make Hamburger Helper again.”
“Packed with flavor and so simple. Exactly what I wanted from Hamburger Helper.”


