

There are some recipes that just stick with you, aren’t there? The ones that feel like a warm hug on a chilly morning, or the star of your family’s weekend brunch spread. For me, that recipe is this homemade waffle recipe. It’s the kind of recipe I scribbled down years ago, tweaked a hundred times, and now, it’s my absolute go-to. It’s so much more than just batter and heat; it’s memories of my kids’ sticky fingers, the smell wafting through the house on a lazy Saturday, and the pure joy of a perfectly crisp, fluffy waffle. When people ask me for a simple, crowd-pleasing waffle, this is the one I immediately think of, and honestly, it’s a lifesaver when I need something special without a fuss. It’s a world away from those bland, pre-packaged options, and trust me, once you try it, you’ll understand why I’m so passionate about it.
What is the best home made waffle recipe?
So, what exactly makes this my go-to homemade waffle recipe? Think of it as the ultimate comfort food in breakfast form. It’s not overly complicated, but it delivers on all the waffle dreams: light and airy on the inside, with a glorious, crispy exterior that just begs for butter and syrup. It’s essentially a perfectly balanced batter that bakes up beautifully in any waffle maker you might have. The magic is in the simplicity and the thoughtful little touches that elevate it from just “a waffle” to “that amazing waffle I can’t stop thinking about.” It’s the kind of recipe that makes you feel like a culinary hero, even if you’re still in your pajamas!
How do I make homemade waffles?
Quick Overview
Making these amazing homemade waffles is surprisingly straightforward. We’ll mix up a few simple dry and wet ingredients separately, then bring them together to create a smooth batter. The key is to not overmix, which keeps those waffles wonderfully tender. Then, it’s just a matter of cooking them in your waffle maker until they’re golden brown and gloriously crispy. The whole process from start to finish is pretty quick, making it perfect for even a rushed weekend morning. It’s the kind of recipe that feels impressive but is genuinely easy.
Ingredients
For the Main Batter:
All-Purpose Flour: 2 cups. I like to use a good quality all-purpose flour. Sifting it is an optional step, but if you have the time, it can make your waffles even lighter.
Granulated Sugar: 2 tablespoons. Just enough to give them a touch of sweetness without being overpowering.
Baking Powder: 2 teaspoons. This is our leavening agent, crucial for that fluffy texture. Don’t skimp on this!
Salt: 1/2 teaspoon. Salt isn’t just for savory dishes; it really enhances the sweetness and balances the flavors here.
Eggs: 2 large. Make sure they’re at room temperature; they incorporate better into the batter.
Milk: 1 ¾ cups. Whole milk is my preference for richness, but I’ve tested this with almond milk and it actually made it even creamier! You can use whatever you have on hand.
Melted Butter: ½ cup (1 stick). Unsalted is best so you can control the saltiness. Let it cool slightly before adding it to the batter so it doesn’t cook the eggs.
Vanilla Extract: 1 teaspoon. A good quality vanilla extract really makes a difference in the overall aroma and taste. It’s that little something extra.
For the Filling:
This is where we get creative! Think of the filling as optional but highly recommended for that extra wow factor. For a classic approach, I love to have some fresh berries on hand, like blueberries or raspberries. You could also do thinly sliced bananas or even a dollop of jam. The idea is to add pops of flavor and texture right into the waffle as it cooks.
For the Glaze:
Powdered Sugar: 1 cup. This forms the base of our simple glaze.
Milk or Cream: 2-3 tablespoons. Start with 2 and add more as needed to reach your desired drizzling consistency.
Vanilla Extract: ½ teaspoon. Again, for that lovely aroma and flavor.
Optional: A tiny pinch of salt to balance the sweetness.
Step-by-Step Instructions
Step 1: Preheat & Prep Pan
First things first, get your waffle maker plugged in and preheating according to its manufacturer’s instructions. Most waffle makers have an indicator light that tells you when they’re ready. While that’s heating up, lightly grease the waffle iron plates with a little cooking spray or melted butter, even if it’s non-stick. This ensures those beautiful waffles release perfectly and get that gorgeous golden color.
Step 2: Mix Dry Ingredients
In a large mixing bowl, whisk together the flour, sugar, baking powder, and salt. Give it a good whisk to make sure everything is evenly distributed. This step is super important because it ensures the leavening agents are spread throughout the batter, which means your waffles will rise evenly and have that perfect light texture. You want to see a uniform color, no lumps of baking powder!
Step 3: Mix Wet Ingredients
In a separate, medium-sized bowl, whisk together the eggs until they’re lightly beaten. Then, stir in the milk, melted butter (make sure it’s cooled slightly!), and vanilla extract. Whisk until everything is just combined. You don’t need to go crazy here; just make sure the egg is fully incorporated.
Step 4: Combine
Now, pour the wet ingredients into the bowl with the dry ingredients. Here’s the critical part: mix *just* until combined. Seriously, stop as soon as you don’t see any dry flour streaks. A few small lumps are perfectly fine, even desirable! Overmixing develops the gluten in the flour, which can lead to tough, dense waffles. We want light and fluffy, remember?
Step 5: Prepare Filling
If you’re adding a filling, now’s the time to get it ready. Wash and dry your berries, slice your bananas, or get your jam spooned out. For berries, I like to gently toss them with a teaspoon of flour to help prevent them from sinking to the bottom of the waffle. This is a trick I learned after a few unfortunate soggy-bottomed waffles!
Step 6: Layer & Swirl
Once your waffle maker is hot, pour about ½ to ¾ cup of batter onto the center of the hot grids (the exact amount will depend on your waffle maker’s size and model). Immediately, if you’re using fillings like berries, gently scatter them over the batter. Then, carefully pour a little more batter over the top of the filling to cover it. If you want to get fancy, you can use a skewer to gently swirl the filling into the batter for a marbled effect, but honestly, just scattering them is pretty foolproof.
Step 7: Bake
Close the lid of your waffle maker and cook according to its instructions. This usually takes anywhere from 3 to 6 minutes, depending on how powerful your machine is and how crispy you like your waffles. You’ll know they’re ready when the steam stops coming out of the sides and the waffle is a beautiful golden brown. Resist the urge to peek too early, as this can cause them to tear.
Step 8: Cool & Glaze
Carefully lift the waffle out of the iron using a fork or spatula and place it on a wire rack. This is important! If you place them directly on a plate, the steam will make the bottoms soggy. If you’re making a batch, you can keep the cooked waffles warm in a single layer on a baking sheet in a low oven (around 200°F or 95°C) while you cook the rest. For the glaze, whisk together the powdered sugar, milk (start with 2 tablespoons), and vanilla extract in a small bowl until smooth. Add more milk a teaspoon at a time if it’s too thick. Drizzle this over your warm waffles just before serving. It’s that perfect sweet finish!
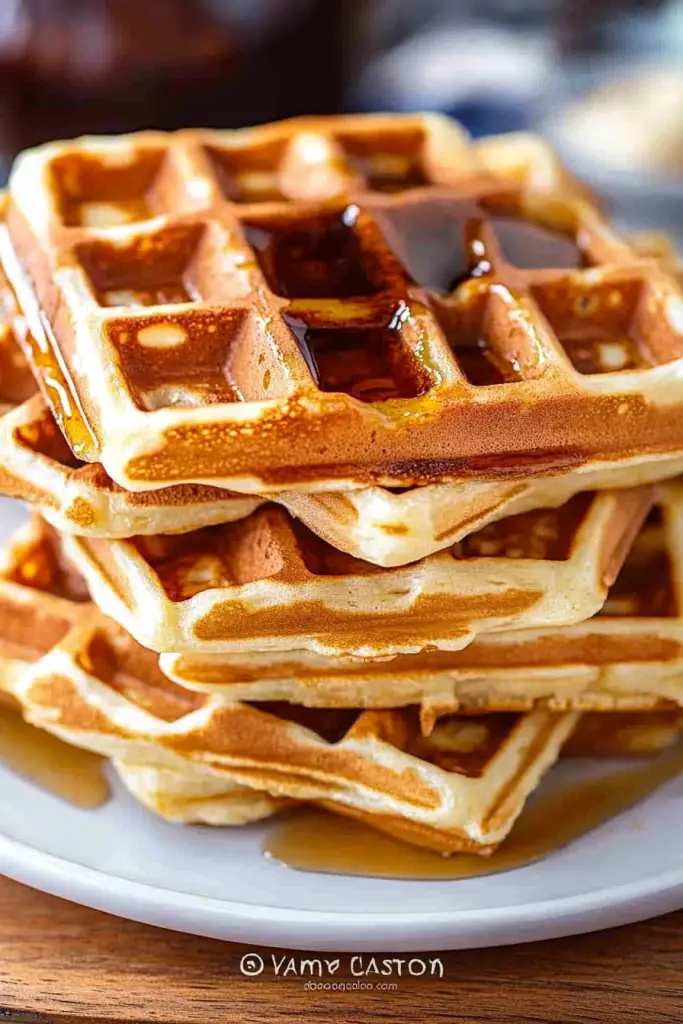
Step 9: Slice & Serve
Once glazed, slice your homemade waffles into wedges or squares, depending on your preference. Serve them immediately while they’re warm and crispy for the ultimate experience. This is the best way to enjoy them, in my opinion!
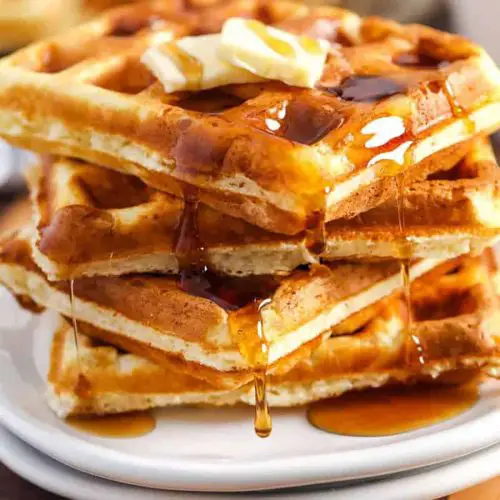
What to Serve It With
These homemade waffles are fantastic on their own, but they truly shine when paired with the right accompaniments. For a classic Breakfast, you can’t go wrong with a strong cup of coffee and a pat of good quality butter. A simple drizzle of maple syrup is always a winner. For a more elaborate Brunch spread, I love to serve these alongside some crispy bacon or sausage, maybe a side of fresh fruit salad. A mimosa or a fancy iced coffee makes it feel extra special. If you’re in the mood for a decadent Dessert, try topping your waffles with a scoop of vanilla bean Ice Cream, a spoonful of warm berry compote, or a dusting of cocoa powder. The possibilities are endless! And for those Cozy Snacks when you just need a little pick-me-up, a simple dusting of powdered sugar and a glass of milk is pure comfort. My family often requests them after dinner when we’re craving something sweet but don’t want to bake a whole cake. It’s that perfect compromise.
Top Tips for Perfecting Your Homemade Waffles
I’ve made these homemade waffles countless times, and over the years, I’ve picked up a few tricks that really make a difference. Here are my top tips to help you achieve waffle perfection every single time:
Zucchini Prep: (Wait, did I mention zucchini? Oh, that must be from a different recipe! My apologies, this waffle recipe doesn’t use zucchini! My brain must be in holiday mode. Let’s stick to the waffle magic!) Okay, back to the waffles. The key is not to overmix. I’ve learned this the hard way. When you combine the wet and dry ingredients, stop mixing as soon as you don’t see any dry flour. A few lumps are your friend here! Overmixing develops the gluten, making your waffles tough. Aim for a batter that’s thick but pourable, with a few small lumps. It’s better to have a slightly lumpy batter than a smooth, overmixed one.
Mixing Advice: Seriously, don’t overmix. It’s the most common mistake and the easiest one to avoid. Mix the wet into the dry until *just* combined. You can even use a whisk initially, and then switch to a spatula to gently fold it together. The goal is to incorporate, not to homogenize into oblivion. You want to see streaks of wet and dry, and then gently coax them together. This ensures a tender waffle.
Swirl Customization: If you’re adding fillings, like fresh berries or chocolate chips, scatter them evenly on top of the batter in the waffle iron before closing the lid. For a swirled effect, you can use a skewer or toothpick to gently drag the filling through the batter a couple of times. Don’t overdo the swirling, or you’ll end up with a mashed mess. A few elegant swirls are all you need for visual appeal and bursts of flavor. This is also where you can get creative with different fruit combinations or even a spoonful of Nutella!
Ingredient Swaps: While the recipe is fantastic as is, I’ve experimented a lot! For a richer waffle, you can substitute some of the milk with heavy cream. If you’re out of regular milk, buttermilk works beautifully for a slight tang. For a dairy-free option, almond milk or oat milk are excellent substitutes. I tested this with almond milk and it actually made it even creamier! For the sugar, you can reduce it slightly if you prefer a less sweet waffle, or substitute with a bit of honey or maple syrup, though this might affect the color and texture slightly.
Baking Tips: Make sure your waffle maker is fully preheated. A hot iron is crucial for that crispy exterior. Don’t overcrowd the waffle iron; use the amount of batter recommended for your specific model. If your waffles aren’t browning evenly, your iron might have hot spots. Try rotating them halfway through if your iron allows, or simply adjust your cooking time. The steam indicator is your best friend here – when the steam stops, they’re usually done.
Glaze Variations: The simple powdered sugar glaze is lovely, but you can jazz it up! Add a squeeze of lemon or orange juice for a citrusy tang, a tablespoon of cocoa powder for a chocolatey drizzle, or even a dash of cinnamon or nutmeg for warmth. For a thinner glaze, add milk gradually; for a thicker one, add more powdered sugar. Apply it just before serving so it doesn’t soak into the waffle and make it soft.
Storing and Reheating Tips
These homemade waffles are best enjoyed fresh off the iron, but I know life happens, and sometimes you’ll have leftovers! Here’s how to store them so they stay delicious:
Room Temperature: If you have a few leftover waffles and plan to eat them within a day, you can leave them out at room temperature, uncovered, on a wire rack. This allows air to circulate and prevents them from getting soggy. They should stay pretty crisp for a few hours this way.
Refrigerator Storage: For longer storage, let the waffles cool completely on a wire rack. Once cool, you can store them in an airtight container or a resealable plastic bag in the refrigerator for up to 3-4 days. To prevent them from sticking together, you can place parchment paper between layers.
Freezer Instructions: These waffles freeze beautifully! Again, make sure they are completely cooled. Wrap individual waffles tightly in plastic wrap, then place them in a freezer-safe bag or container. You can also lay them flat on a baking sheet lined with parchment paper, freeze until solid, then transfer to a bag. They’ll stay good in the freezer for about 2-3 months.
Glaze Timing Advice: For the best results, store waffles *without* the glaze. Glaze them right before you’re ready to reheat and serve them. If you plan to reheat frozen waffles, add the glaze *after* reheating.
Frequently Asked Questions
Final Thoughts
I really hope you give this homemade waffle recipe a try. It’s more than just a set of instructions; it’s a gateway to some seriously delicious mornings and happy memories. The combination of crispy exterior and fluffy interior is just divine, and the fact that it’s so easy to make means you can enjoy this little bit of heaven without a lot of stress. Whether you’re serving it for a special occasion or just because, it’s guaranteed to be a hit. If you love this recipe, you might also enjoy my fluffy pancake recipe or my easy Cinnamon Roll recipe for more weekend treat inspiration! I can’t wait to hear how your waffles turn out, so please leave a comment below and let me know your favorite toppings or any fun twists you tried. Happy baking!
Homemade Waffle Recipe
Ingredients
Main Ingredients
- 2 cups all-purpose flour
- 2 tablespoons granulated sugar
- 2 teaspoons baking powder
- 0.5 teaspoons salt
- 2 large eggs separated
- 1.75 cups milk
- 0.5 cup vegetable oil
- 1 teaspoon vanilla extract
Instructions
Preparation Steps
- In a large bowl, whisk together the flour, sugar, baking powder, and salt.
- In a separate bowl, whisk together the egg yolks, milk, vegetable oil, and vanilla extract.
- In another clean bowl, beat the egg whites until stiff peaks form.
- Pour the wet ingredients into the dry ingredients and mix until just combined. Do not overmix.
- Gently fold in the beaten egg whites.
- Preheat your waffle iron according to the manufacturer's instructions. Grease if necessary.
- Pour batter onto the hot waffle iron and cook until golden brown and crispy.
- Serve immediately with your favorite toppings.
Notes
Featured Comments
“Impressed! Clear steps and perfect for busy nights results. Perfect for busy nights.”
“New favorite here — turned out amazing. crowd-pleaser was spot on.”
“Super easy and turned out amazing! My family asked for seconds. Saving this one.”
“This sweet treat was absolutely loved — the fresh really stands out. Thanks!”
“Made it tonight and wow — comforting! Will definitely make homemade waffle recipe again.”
“Packed with flavor and so simple. Exactly what I wanted from homemade waffle recipe.”


