

There are some mornings, aren’t there? The kind where the alarm feels particularly rude, the to-do list is already a mile long, and the thought of wrangling a proper sit-down meal feels… well, impossible. On those days, what I wouldn’t give for a stack of golden, fluffy, utterly irresistible homemade waffles to magically appear. And you know what? I can actually make that happen! This recipe for homemade waffles is my absolute secret weapon. It’s the one I turn to when I want something truly special, but also surprisingly quick and easy. Forget those sad, cardboard-like frozen waffles; this recipe will change your life, and I’m so excited to share it with you, like a warm hug on a chilly morning. It’s the kind of breakfast that feels like a treat, a little bit of luxury you can whip up right in your own kitchen, and honestly, it’s just pure joy in every bite.
What are home made waffles?
So, what exactly are these magical homemade waffles we’re talking about? Think of them as the elevated, soul-satisfying cousin of the pancake. They’re made from a simple batter, yes, but the magic happens in the waffle iron. This specialized appliance creates those iconic deep pockets that are just begging to be filled with syrup, butter, or anything else your heart desires. They get this incredible texture – wonderfully crispy on the outside, thanks to a little trick I’ll share, and delightfully tender and fluffy on the inside. It’s like a culinary cloud that’s perfectly engineered to hold all your favorite toppings. Unlike some more complicated baked goods, these waffles are all about that immediate gratification; you mix, you cook, and you eat, all within minutes. It’s essentially the perfect canvas for your breakfast dreams.
How do I make homemade waffles?
Quick Overview
Making these incredible homemade waffles is a joyously simple process. You’ll whisk together your dry ingredients, then your wet ingredients separately, before gently combining them into a smooth, pourable batter. The real magic happens when that batter hits a preheated waffle iron, transforming into golden perfection in just a few minutes. It’s a recipe designed for speed and delicious results, meaning you can go from craving to enjoying a warm, fluffy waffle in under 20 minutes. The crispy exterior is a result of a few key techniques I’ve honed, ensuring that delightful crunch with every bite. It’s truly one of the most satisfying quick breakfasts you can make.
Ingredients
For the Main Batter:
2 cups all-purpose flour (I always use unbleached for a better rise)
2 tablespoons granulated sugar (just enough for a hint of sweetness)
2 teaspoons baking powder (this is crucial for that fluffy texture!)
1/2 teaspoon baking soda (works with the baking powder for extra lift)
1/4 teaspoon salt (enhances all the flavors)
2 large eggs (room temperature eggs incorporate better)
1 ¾ cups milk (whole milk gives the richest flavor, but I’ve tested with 2% and even a touch of almond milk, and it works beautifully!)
½ cup unsalted butter, melted and slightly cooled (this is key for crispiness!)
1 teaspoon Vanilla Extract (don’t skip this – it adds so much warmth)
Step-by-Step Instructions
Step 1: Preheat & Prep Pan
First things first, get your waffle iron heating up. Most irons have an indicator light, so follow your manufacturer’s instructions. It’s important that the iron is fully preheated before you add any batter; this is a big secret to getting those wonderfully crispy edges! Give it a good 5-10 minutes. While it’s heating, lightly grease your waffle iron with a little butter or cooking spray. I like to do this even if my iron is non-stick, just to be absolutely sure nothing sticks. You want a nice, even coating.
Step 2: Mix Dry Ingredients
In a large mixing bowl, whisk together the flour, sugar, baking powder, baking soda, and salt. Give it a good whisk for at least 30 seconds. This step is more important than you might think! It ensures that all your leavening agents and salt are evenly distributed throughout the flour, which means you’ll get a uniform lift and flavor in every single waffle. No lumpy bits of baking powder, I promise!
Step 3: Mix Wet Ingredients
In a separate medium bowl, whisk the eggs until they’re lightly beaten. Then, pour in the milk, melted butter, and vanilla extract. Whisk everything together until it’s well combined. Make sure your melted butter isn’t scorching hot – you don’t want to cook the eggs! Letting it cool for a minute or two after melting is usually sufficient.
Step 4: Combine
Now for the magic part! Pour the wet ingredients into the bowl with the dry ingredients. Using a whisk or a rubber spatula, gently mix everything together until *just* combined. A few small lumps are perfectly okay! Seriously, don’t overmix. Overmixing develops the gluten in the flour too much, which can lead to tough, dense waffles instead of the light, fluffy ones we’re aiming for. Stop as soon as you don’t see any large dry patches of flour. A minute of mixing, tops.
Step 5: Prepare Filling
While your waffle iron is doing its thing, you can get any fillings ready. This step is optional, but it adds an extra layer of deliciousness! If you’re adding fruit, chop it up nicely. If you’re making a quick Chocolate Chip waffle, have them at the ready. Some people like to add a spoonful of batter, then a sprinkle of the filling, then another spoonful of batter on top. It’s a fun way to customize!
Step 6: Layer & Swirl
Once your waffle iron is hot and ready, ladle about ½ to ¾ cup of batter onto the center of the iron. The exact amount will depend on the size and type of your waffle iron, so don’t be afraid to experiment a little. Close the lid and let it cook. If you’re adding fillings, now’s the time to gently place them onto the batter (if your iron allows for it) or sprinkle them on top before closing the lid. I sometimes like to gently swirl a little jam or chocolate spread onto the batter with a toothpick for a marbled effect – it’s so pretty!
Step 7: Bake
Cook the waffle for about 3-5 minutes, or until golden brown and crispy. The cooking time will vary greatly depending on your waffle iron, so keep an eye on it. You’ll know it’s ready when the steam coming from the iron starts to subside. The best way to tell is to carefully lift the lid. If it’s golden brown and easily releases, it’s done. If it’s still pale or seems stuck, give it another minute or two. For extra crispy waffles, I sometimes like to pop them onto a wire rack for a minute after they come out of the iron.
Step 8: Cool & Glaze
As soon as your waffle is cooked, carefully remove it from the iron and place it on a wire rack. Don’t stack them directly on top of each other while they’re hot, or they can steam and lose their crispiness. If you’re using a glaze (which I highly recommend!), now is the perfect time to drizzle it over your warm waffle. The warmth helps the glaze spread beautifully. Make sure the glaze is the right consistency – not too thin, not too thick. I’ll talk more about that later!
Step 9: Slice & Serve
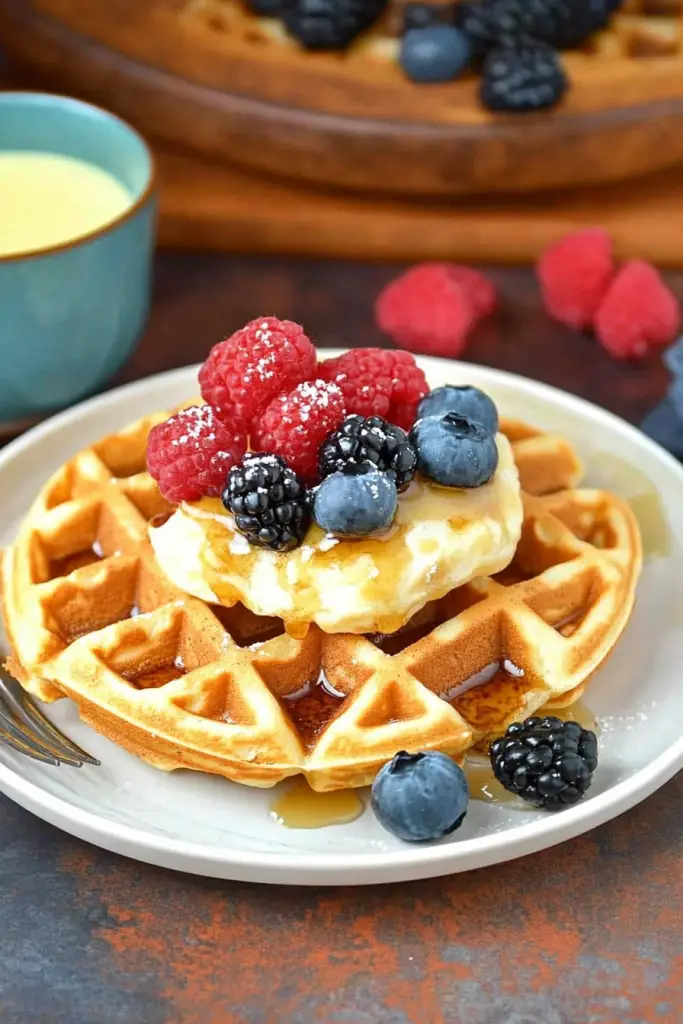
Serve your beautiful homemade waffles immediately! They are best enjoyed fresh off the iron, still warm and fragrant. You can slice them into halves or quarters, depending on how you like to eat them. This is the moment of truth, where all your hard work pays off. Grab your favorite toppings and dig in!
What to Serve It With
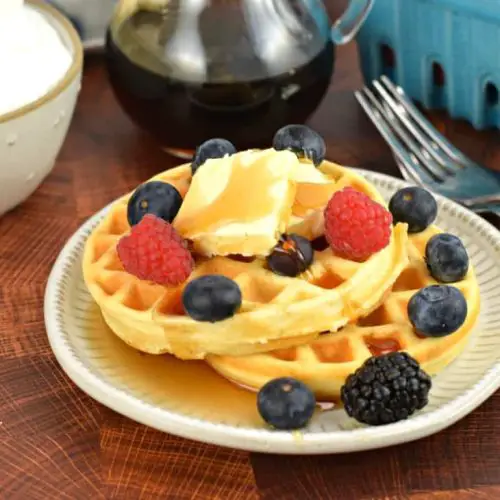
The beauty of these homemade waffles is their incredible adaptability. They’re not just for a special weekend brunch; they can truly fit into any meal or occasion. For a classic Breakfast, you can’t go wrong with a generous pat of good quality butter and a drizzle of pure maple syrup. A hot cup of coffee or a glass of freshly squeezed orange juice is the perfect accompaniment. If you’re planning a more elaborate Brunch spread, consider serving them alongside a fresh fruit salad, some crispy bacon or sausage, and maybe even a creamy hollandaise sauce for a savory twist. For an indulgent Dessert, I love to top them with a scoop of vanilla bean Ice Cream, a swirl of chocolate sauce, and a sprinkle of toasted nuts. They’re also fantastic with a side of berries and a dollop of whipped cream. And for those impromptu Cozy Snacks when a sweet craving strikes in the evening, a warm waffle with just a dusting of powdered sugar is pure comfort. My family also loves them with a smear of Nutella, or even as a base for some fried chicken – talk about a sweet and savory combo that just works!
Top Tips for Perfecting Your Homemade Waffles
Over the years, I’ve learned a few tricks that make a world of difference in achieving waffle perfection. For that irresistible crispy exterior, ensure your melted butter is properly incorporated. It coats the batter and helps create that delightful crunch when it hits the hot iron. Don’t be tempted to skimp on the baking powder; it’s your best friend for achieving that light and airy texture. When mixing the batter, remember the golden rule: don’t overmix! A few lumps are not only acceptable, they’re actually desirable. Overworking the batter will result in tough waffles, which is just heartbreaking. My secret for extra crispiness? After they come off the iron, I’ll often place them on a wire rack for a minute or two. This allows air to circulate all around them, preventing them from steaming and getting soggy. If you’re looking to customize the swirl effect, be gentle! A toothpick is your best friend for creating those pretty patterns without disturbing the batter too much. For ingredient swaps, I’ve found that Whole Wheat flour can be used, but you might need an extra splash of milk as it tends to absorb more liquid. If you don’t have buttermilk, you can easily make a substitute by adding a tablespoon of lemon juice or white vinegar to a cup of regular milk and letting it sit for 5-10 minutes; it adds a lovely tang and tenderness. And when it comes to baking, trust your waffle iron, but also trust your senses. If it’s golden brown and releasing easily, it’s ready. Ovens and irons can vary, so don’t be afraid to adjust the cooking time. For the glaze, if it’s too thick, a tiny splash of milk or water will loosen it right up. If it’s too thin, a bit more powdered sugar should do the trick.
Storing and Reheating Tips
The best way to enjoy these homemade waffles is undoubtedly fresh, but knowing how to store and reheat them is a lifesaver. If you happen to have leftovers (which is rare in my house!), you can store them at room temperature in an airtight container for about a day. Just make sure they’ve cooled completely first. For longer storage, pop them into the refrigerator. Layer them between sheets of parchment paper in an airtight container to prevent them from sticking together. They should stay fresh in the fridge for up to 3-4 days. My personal favorite method for truly long-term storage is freezing. Once they’re completely cool, stack them on a baking sheet and freeze them in a single layer until firm. Then, transfer them to a freezer-safe bag or container. They’ll keep beautifully for up to 2-3 months. When you’re ready to reheat, the toaster is your absolute best friend! Pop frozen waffles into the toaster, and they’ll come out wonderfully crisp and warm, just like they were freshly made. If you’re reheating refrigerated waffles, you can do the same, or even pop them in a toaster oven or a regular oven at a moderate temperature (around 350°F or 175°C) for a few minutes until heated through. I advise adding the glaze right before serving, regardless of your storage method, as it tends to soften the waffles over time. For frozen waffles, reheating them in the toaster or oven *before* adding glaze is definitely the way to go for that ideal crispness.
Frequently Asked Questions
Final Thoughts
Honestly, making homemade waffles from scratch is one of those little kitchen victories that brings so much joy. It’s proof that delicious, comforting food doesn’t have to be complicated or time-consuming. This recipe is my go-to because it’s reliable, it’s forgiving, and most importantly, it tastes absolutely phenomenal. The crispy exterior, the fluffy interior, the subtle sweetness – it’s just perfect. I truly hope you give these a try and discover your own family’s favorite way to enjoy them. If you loved this recipe, you might also want to check out my recipe for Fluffy Buttermilk Pancakes or my easy Overnight French Toast Casserole for more breakfast inspiration. I can’t wait to hear how your homemade waffles turn out! Don’t be shy – leave a comment below with your favorite toppings or any creative twists you tried. And if you loved them, a star rating would be wonderful!
Homemade Waffles
Ingredients
Main Ingredients
- 2 cups all-purpose flour
- 2 tablespoons granulated sugar
- 0.5 teaspoons baking powder
- 0.25 teaspoons salt
- 2 large eggs
- 1.75 cups milk
- 0.5 cup vegetable oil
- 1 teaspoon vanilla extract
Instructions
Preparation Steps
- In a large bowl, whisk together the flour, sugar, baking powder, and salt.
- In a separate bowl, whisk together the eggs, milk, vegetable oil, and vanilla extract.
- Pour the wet ingredients into the dry ingredients and whisk until just combined. Do not overmix.
- Preheat your waffle iron according to the manufacturer's instructions.
- Pour about 1/2 cup of batter onto the preheated waffle iron and cook until golden brown and crisp.
- Serve immediately with your favorite toppings.
Notes
Featured Comments
“I totally get that—homemade waffles are the perfect way to turn a hectic morning into something warm and comforting. Thanks for sharing this recipe!”
“I totally get that—those mornings call for something simple and delicious like waffles! They’re quick, comforting, and make the chaos a little sweeter.”
“Impressed! Clear steps and spot on results. Perfect for busy nights.”
“New favorite here — comforting. crowd-pleaser was spot on.”
“Super easy and turned out amazing! My family asked for seconds. Saving this one.”
“This sweet treat was absolutely loved — the light really stands out. Thanks!”


I totally get that—those mornings call for something simple and delicious like waffles! They’re quick, comforting, and make the chaos a little sweeter.
I totally get that—homemade waffles are the perfect way to turn a hectic morning into something warm and comforting. Thanks for sharing this recipe!