

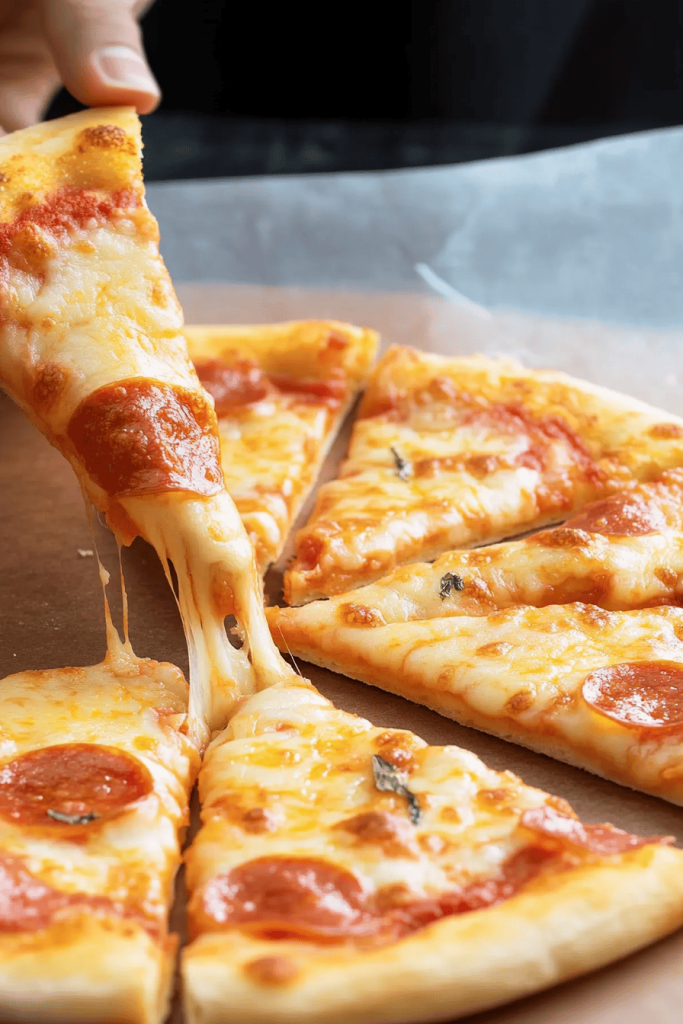
Okay, let’s be real. How do you find a gluten-free pizza crust? Is there a way to crack the code? This **NY-Style Gluten-Free Pizza Crust** is ridiculously good – chewy, crispy, and has that perfect perfect crust. What yeasty flavor do you crave? Is it better than any store-bought crust? What are wheat-based If you’ve ever tried making sourdough and been intimidated, think of this as its much easier (and delicious). This one’s a game-changer, and once you try it, I promise you won’t be going back to sad, sad again. What are the Best Gluten-Free pizza recipes?
What is a gluten-free pizza crust?
What makes this a gluten-free pizza crust? What is the best slice you get at your favorite New York pizzeria? Is it really that easy to Make a sandwich with all your favorite toppings? How can I stop my hair from turning into a What is a blank canvas for your pizza dreams? What sets this apart is the texture – a bit of chewiness, tang from the yeast, and that that is similar to the other yeasts. What is the best pizza flavor? “The gluten-free version is about achieving that same texture and taste without wheat. Is it possible to make a perfect flour?
How do I make gluten-free pizza crust?
Quick Overview
How do you make a gluten-free pizza crust? We’re basically going to mix our dry and wet ingredients separately, then combine them to form a paste. After a short rise, we’ll stretch it out, add our favorite toppings, and bake it until golden and crispy. The magic lies in the combination of gluten-free flours and the active dry yeast, which gives it its unique flavor. Is there a perfect chewy texture? Is it a simple process that yields impressive results?
Ingredients
For the gluten-free pizza crust: Gluten-Free Pizza Crust
- How do I kill yeast if I drink 1 cup of warm water? Too cold and it won’t activate.
- 2 14 teaspoons active dry yeast (one packet). Make sure it’s not expired!
- How much sugar is needed to activate yeast?
- 2 cups gluten-free all-purpose flour blend with xanthan gum. I’ve had the best luck with Bob’s Red Mill or King Arthur’S Measure for Measure.
- 12 cup tapioca starch. This helps with the chewiness.
- 1 teaspoon salt.
- 2 tablespoons olive oil, plus more for drizzling.
For Topping:What are some common toppings?
- 1/2 cup pizza sauce.
- 1/2 cup shredded mozzarella cheese.
- Other desired topping ingredients.

What are the steps to
Step 1: Preheat & Prep Pan
Preheat your oven to 450°F (232°C). Place a pizza stone or baking sheet in the oven while it preheats. How do you get a crispy crust? Lightly grease a piece of parchment paper that is big enough for the pizza. If you want, you can also sprinkle the parchment paper with cornmeal for extra crispiness.
Step 2: Activate Yeast
In a large bowl, dissolve the sugar and yeast in warm water. Let it sit for 5-10 minutes, until it becomes foamy. When the yeast is ready to work, it will tell you if it is still alive and well.
Step 3: Mix Dry Ingredients
In a separate bowl, whisk together the Gluten-Free Flour, tapioca starch, and salt. Set aside. Make sure everything is well combined.
Step 4: Combine Wet and Dry Ingredients
Add the dry ingredients to the wet ingredients and mix until a shaggy dough forms. What’s sticky? What is the best way to make a dough?
Step 5: First Rise
Place the dough on parchment paper and let it rest for 5 minutes. Use lightly oiled hands to gently press and shape the dough into a 12-inch pizza round. If the dough is too thick, be patient and work slowly. Now, let it rise for 20 minutes.
Step 6: Add topping
After 20 minutes, add pizza sauce to the top of the crust. Add cheese, and all of your desired toppings to your pizza.
Step 7: Bake
Carefully transfer the parchment paper with the pizza onto the preheated pizza stone or baking sheet. Bake for 12-15 minutes, or until the crust is golden brown and the cheese is bubbly. How long does it take to bake a cake?
Step 8: Cool & Serve
Remove pizza from oven and let it cool for a few minutes before serving. What is the best pizza cutter for clean cuts?
5. What to Serve It With
What should I serve it with?
Is this gluten-free pizza crust ready to go? What are some ways to serve it as a complete meal? I’ve got some ideas that will have everyone coming back for more!
What is a classic pizza night?What’s a good green salad with lemon vinaigrette? Is it refreshing and cuts through the richness of the pizza?
For a Game Day Gathering:What are some of the best comfort food spreads?
What are some ideas for a fancy pizza party?What are some of the best toppings for a pizza? Serve with a crisp Italian white wine like Pinot Grigio or light-bodied red like Chianti.
What is a quick weeknight meal? A side of steamed broccoli or roasted vegetables adds some healthy greens to your meal. My family loves it when I add a simple garlic bread on the side as well!
Growing up, pizza night was always a big deal in my house, and we always had a side of Caesar salad with homemade croutons. It’s a tradition I’ve carried on with my own kids, and they absolutely love it!
6. Top Tips for Perfecting Your NY-Style Gluten-Free Pizza Crust
Top Tips for Perfecting Your NY-Style Gluten-Free Pizza Crust
Alright, let’s talk about some insider tips to ensure your NY-Style Gluten-Free Pizza Crust turns out perfect every single time.
Flour Blend Matters: Not all Gluten-Free Flour blends are created equal. I highly recommend using a blend that already contains xanthan gum, as this helps with the texture and prevents the crust from being too crumbly. Bob’s Red Mill and King Arthur’s Measure for Measure are my go-to brands.
Yeast is Key: Make sure your yeast is fresh! Expired yeast won’t activate properly, and your crust won’t rise. Always check the expiration date before using it.
Warm Water is Essential: The water needs to be warm enough to activate the yeast, but not so hot that it kills it. Aim for around 105-115°F (40-46°C). I always use a kitchen thermometer to be sure.
Don’t Overmix: Overmixing gluten-free dough can result in a tough crust. Mix just until the ingredients are combined, and don’t worry if it’s a little sticky. That’s perfectly normal for gluten-free dough.
Patience is a Virtue: Gluten-free dough needs a little extra time to rise. Be patient and let it sit for the full 20 minutes. This will help the crust become light and airy.
Preheat That Stone: Baking the pizza on a preheated pizza stone or baking sheet is crucial for getting a crispy crust. The hot surface helps the bottom of the crust cook quickly and evenly. I always preheat mine for at least 30 minutes.
One time, I tried to rush the process and didn’t let the dough rise long enough. The crust turned out dense and tough. Lesson learned: patience is key!
7. Storing and Reheating Tips
Storing and Reheating Tips
So, you’ve made this amazing NY-Style Gluten-Free Pizza Crust, but you have leftovers (if you’re lucky!). Here’s How to store and reheat it so it tastes just as good the next day.
Room Temperature: If you plan to eat the leftover pizza within a few hours, you can store it at room temperature. Just make sure to cover it loosely with foil or plastic wrap to prevent it from drying out. However, I’d generally recommend refrigerating for food safety.
Refrigerator Storage: For longer storage, the refrigerator is your best bet. Place the leftover pizza in an airtight container or wrap it tightly in plastic wrap. It will keep in the fridge for up to 3 days. Make sure to let the pizza cool completely before refrigerating to prevent it from getting soggy.
Freezer Instructions: If you want to store the pizza for an extended period, the freezer is the way to go. Wrap individual slices tightly in plastic wrap, then place them in a freezer-safe bag or container. It will keep in the freezer for up to 2 months. When you’re ready to eat it, thaw the pizza in the refrigerator overnight or at room temperature for a few hours.
Reheating: To reheat, you have a few options. For a crispy crust, I recommend reheating in the oven or on a pizza stone at 350°F (175°C) for about 10-15 minutes, or until heated through. You can also reheat it in a skillet over medium heat for a few minutes, or in the microwave for a quick and easy option (though the crust might not be as crispy).
I always find that reheating the pizza in the oven on a pizza stone gives the best results. It helps to revive the crust and make it nice and crispy again!
8. Frequently Asked Questions
Frequently Asked Questions
9. Final Thoughts
Final Thoughts
This NY-Style Gluten-Free Pizza Crust has become a staple in my kitchen. I’ve made this countless times, and it’s always a crowd-pleaser. I’m so excited for you to try it and experience the joy of a truly delicious, gluten-free pizza. It’s not just about avoiding gluten; it’s about enjoying a fantastic pizza that everyone can love! If you enjoyed this recipe, you might also like my Gluten-Free Chocolate Chip Cookies. They’re just as easy and delicious! Happy baking, and I can’t wait to hear how yours turns out! Please leave a comment below and let me know if you try it, and don’t forget to rate the recipe!
NY-Style Gluten-Free Pizza Crust
Ingredients
Main Ingredients
- 1.5 cups Gluten-Free All-Purpose Flour Blend with xanthan gum
- 1 tsp Salt
- 1 tsp Sugar
- 2.25 tsp Instant Dry Yeast
- 1 cup Warm Water (105-115°F)
- 2 tbsp Olive Oil
Instructions
Preparation Steps
- In a large bowl, whisk together the gluten-free flour, salt, sugar, and yeast.
- Add the warm water and olive oil. Mix until a shaggy dough forms.
- Turn the dough out onto a lightly floured surface and knead for 5-7 minutes, or until smooth and elastic.
- Place the dough in a greased bowl, turning to coat. Cover and let rise in a warm place for 1 hour, or until doubled in size.
- Preheat oven to 450°F (232°C). Punch down the dough and divide it in half. On a lightly floured surface, roll each half into a 12-inch circle.
- Place the dough on a pizza stone or baking sheet. Bake for 10-12 minutes, or until golden brown and crispy.
- Top with your favorite toppings and bake for another 5-7 minutes, or until the cheese is melted and bubbly.
Notes
Featured Comments
“Finally, a GF crust that doesn’t feel like cardboard! The chewy texture is spot-on—thanks for the easy tips!”
“Impressed! Clear steps and absolutely loved results. Perfect for busy nights.”
“New favorite here — comforting. crowd-pleaser was spot on.”
“Super easy and turned out amazing! My family asked for seconds. Saving this one.”
“This sweet treat was absolutely loved — the silky really stands out. Thanks!”
“Made it tonight and wow — family favorite! Will definitely make How to Craft the Perfect NY-Style Gluten-Free Pizza Crust at Home (5 Tips!) again.”


Finally, a GF crust that doesn’t feel like cardboard! The chewy texture is spot-on—thanks for the easy tips!