

Okay, friends, gather ’round! If you’re anything like me, Christmas just isn’t Christmas without a batch of beautifully swirled cookies. I’m talking about those classics. What are they?Pinwheel Christmas Cookies: What are someWhat are some of the Best Holiday cheer? Is it like a sugar cookie? Is it really that easy to make these? The whole house would smell of vanilla and butter, and we kids would fight over who got to help roll. Now, I make them with my own kids, and it’s the highlight of our December. What are edible memories?
What are pinwheel Christmas cookies?
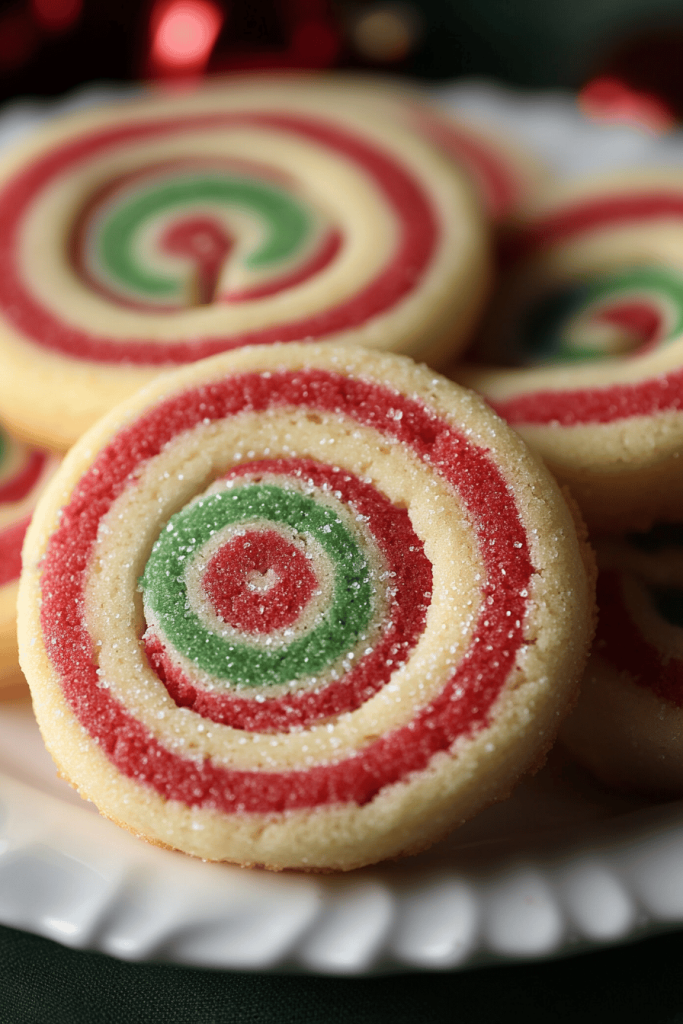
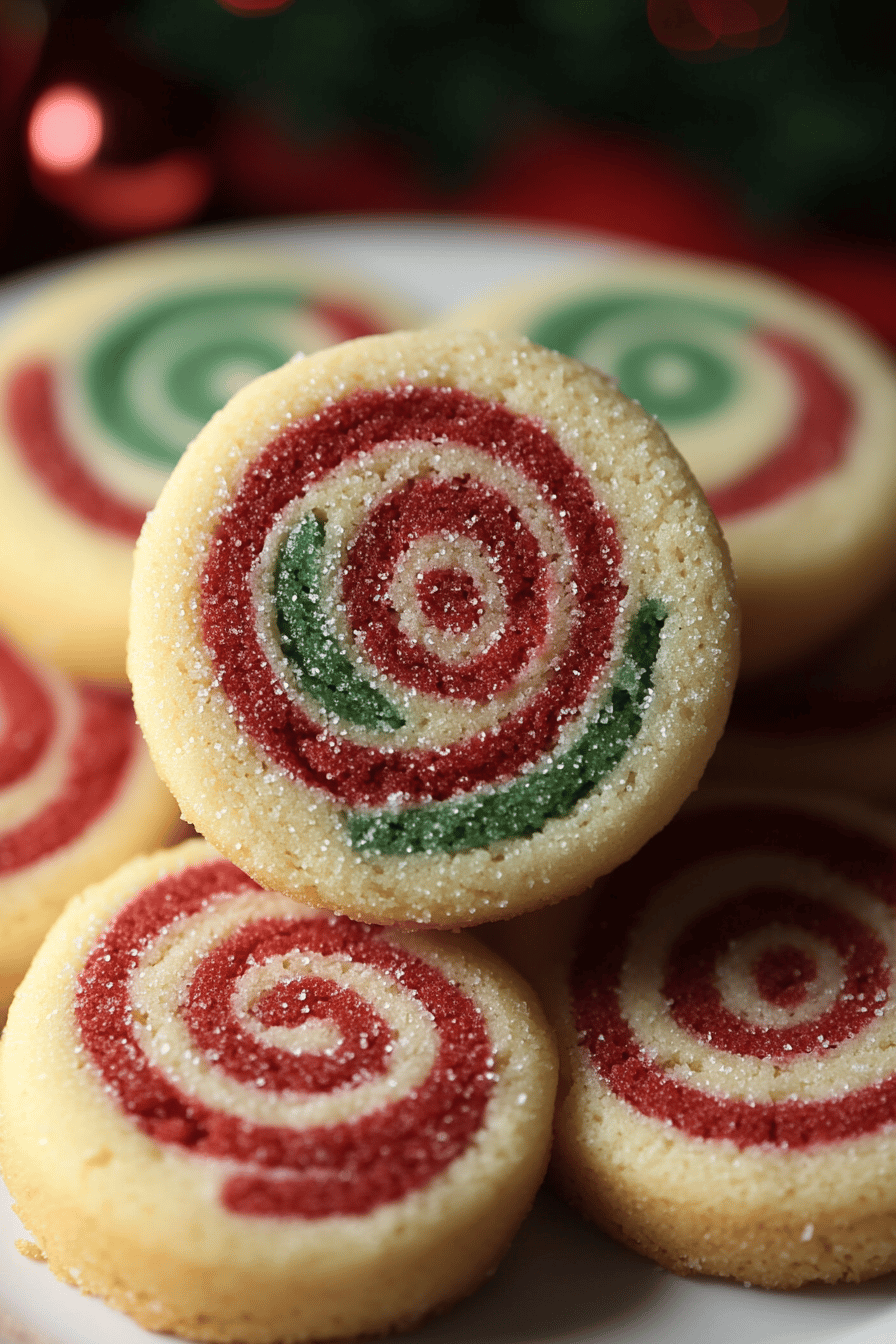
What exactly are we?Pinwheel Christmas Cookies: What are someWhat do you think of rolled Sugar Cookies? Instead of just one flavor, you’ve got two contrasting doughs – usually vanilla and chocolate, or both. Sometimes vanilla and spice dough – that are layered, rolled up like a jelly roll, and then sliced. What are the festive spirals? Is it a slice-and-bake cookie? What is the name of a pinwheel? What are some of the cutest little things that are always a hit with kids?
How do you make pinwheel Christmas cookies?
Quick Overview
Making these Pinwheel Christmas Cookies: What are some is easier than you think! You’ll start by making two separate doughs – one vanilla and one chocolate (or your flavors of choice!). Then, you’ll chill them, roll them out into rectangles, stack them on top of each other, roll them up tightly, chill again, and finally slice and bake! The beauty of this method is that you can make the dough ahead of time and bake them whenever you’re ready. It’s perfect for busy holiday schedules!
Ingredients
For the Main Batter:
* 3 cups all-purpose flour, plus more for dusting. I always use unbleached because I think it gives a better flavor, but either works. * 1/2 teaspoon baking powder * 1 cup (2 sticks) unsalted butter, softened to room temperature. Make sure it’s soft, not melted! * 1 1/2 cups granulated sugar * 2 large eggs* 2 teaspoons Vanilla Extract. Don’t skimp on vanilla! It makes a huge difference. * 1 tablespoon milk.
For the Chocolate Dough:
* 1/4 cup unsweetened cocoa powder. Dutch-processed gives a richer, darker flavor. * 1 tablespoon milk
For the Glaze (Optional):
* 1 cup powdered sugar * 2-3 tablespoons milk * 1/2 teaspoon Vanilla Extract. * Sprinkles, for decorating (because, why not?

What are the steps for
Step 1: Preheat & Prep Pan
Preheat your oven to 375°F (190°C). Line two baking sheets with parchment paper or silicone baking mats. Why is parchment paper so easy to clean?
Step 2: Mix Dry Ingredients
In a medium bowl, whisk together the flour, baking powder, and salt. Set aside. How do you whisk baking powder and salt? What is cookie texture? Don’t skip this step!
Step 3: Mix Wet Ingredients
In a large bowl, cream together the softened butter and granulated sugar until light and fluffy. I use an electric mixer for this, but you can definitely do it by hand (just be prepared for a bit of an arm workout!). Beat in the eggs one at a time, then stir in the vanilla extract and milk. Make sure your butter is at room temp, otherwise it won’t cream properly and you’ll end up with lumpy dough.
Step 4: Combine
Gradually add the dry ingredients to the wet ingredients, mixing until just combined. Be careful not to overmix! Overmixing develops the gluten in the flour, which can result in tough cookies. I stop mixing when there are still a few streaks of flour and then finish combining by hand.
Step 5: Prepare Filling
In a small bowl, combine the cocoa powder and 1 tablespoon of milk. Divide the dough in half. Add this mixture to the other half of the dough and mix until well combined. What is your chocolate dough? If you want to try a different flavor, this is where you’d add your flavoring!
Step 6: Layer & Swirl
Wrap each half of the dough in plastic wrap and chill in the refrigerator for at least 1 hour, or preferably overnight. This is crucial for preventing the dough from spreading too much in the oven. Once chilled, roll each dough out on a lightly floured surface into a 9×12 inch rectangle. Place the chocolate dough rectangle on top of the vanilla dough rectangle. Gently roll the dough into a tight log, starting from one of the longer sides. Wrap the log in plastic wrap and chill for at least 30 minutes. If the dough is too soft, it will be difficult to slice.
Step 7: Bake
Preheat oven to 375 degrees F (190 degrees C). Slice the dough log into 1/4-inch thick rounds. Place the rounds on the prepared baking sheets, leaving about 2 inches between each cookie. Bake for 8-10 minutes, or until the edges are lightly golden brown. Keep a close eye on them – they can burn easily!
Step 8: Cool & Glaze
Let the cookies cool on the baking sheets for a few minutes before transferring them to cling film. Remove from the oven and let cool completely. To cool completely. While cookies are cooling, prepare the glaze (if using). In a small bowl, whisk together the powdered sugar, milk, and vanilla extract. Set aside. Drizzle the glaze over the cooled cookies and sprinkle with sugar.
Step 9: Slice & Serve
Once the glaze has set, these are very easy to make.Pinwheel Christmas Cookies: What are someAre ready to serve?
What should I serve it with?
Pinwheel Christmas Cookies: What are theAre incredibly versatile and pair well with a variety of things, depending on the occasion.
For Breakfast:What are some of the Best ways to enjoy a strong cup of coffee? The sweetness of cookies perfectly complements the bitterness of the coffee. I like to arrange them on a pretty plate for scrumptious morning treat.
For Brunch:Serve them alongside other pastries and fruits for a more elaborate brunch spread. What are some of the best examples of a tiered serving tray? What’s a good way to serve your favorite cocktail with sparkling cider?
As Dessert:What are some of the best cookies to serve after a holiday meal? Serve with whipped cream or a scoop of vanilla Ice Cream for an extra decadent treat. What are some good pairings for dessert wine?
For Cozy Snacks:What’s your favorite song? What’s a cold winter night without cookies and Hot Cocoa? What are some comfort food recipes?
My family tradition is to make these on Christmas Eve and leave them out for Santa (along with a few other gifts). What is your opinion on a glass of milk? What’s a fun way to get the kids involved in the holiday preparations?
How do you make pinwheel Christmas cookies?
Do you want to take your own life?Pinwheel Christmas Cookies to the next level? Here are a few of my top tips, learned from years of baking experience:
Dough Consistency: The dough should be firm enough to roll out easily but not so dry that it cracks. If it’s too dry, add a teaspoon of milk at a time until it reaches the desired consistency. If it’s too sticky, add a tablespoon of flour at a time.
Mixing Advice: Be careful not to overmix the dough! Overmixing develops the gluten in the flour, which can result in tough cookies. Mix until just combined.
Swirl Customization: For a more dramatic swirl, try lightly pressing down on the dough with a rolling pin after you’ve stacked the layers. This helps to fuse the layers together and prevents gaps. You can also try using different colors of dough for a more festive look. Red and green food coloring would be perfect for Christmas!
Ingredient Swaps: If you’re not a fan of chocolate, you can easily substitute it with other flavors. Try adding a teaspoon of peppermint extract to one half of the dough for a festive peppermint swirl. Or, add a teaspoon of almond extract for a more sophisticated flavor. I’ve also experimented with adding a pinch of cinnamon or nutmeg to the vanilla dough for a warmer, spicier flavor. The possibilities are endless!
Baking Tips: Keep a close eye on the cookies while they’re baking! They can burn easily, especially around the edges. If you notice that the edges are browning too quickly, you can tent the baking sheet with foil. Also, be sure to rotate the baking sheets halfway through baking for even cooking.
Glaze Variations: For a richer glaze, try using melted butter instead of milk. Or, add a tablespoon of Cream Cheese for a tangy twist. You can also tint the glaze with food coloring for a more festive look. I love using natural food coloring made from fruit and vegetable extracts.
One lesson I’ve learned the hard way is to make sure the dough is thoroughly chilled before slicing. If it’s too soft, the slices will be misshapen and the swirls won’t be as defined.
Storing and Reheating Tips
These Pinwheel Christmas Cookies can be stored in an airtight container at room temperature for up to 3 days. For longer storage, you can freeze them for up to 2 months.
Room Temperature: Store the cookies in an airtight container at room temperature. They’ll stay fresh for up to 3 days. I like to layer them between sheets of parchment paper to prevent them from sticking together.
Refrigerator Storage: While you *can* store these in the fridge, it’s not really necessary unless your kitchen is very warm. Refrigerating them can dry them out slightly.
Freezer Instructions: To freeze the cookies, wrap them individually in plastic wrap and then place them in a freezer-safe container or bag. They’ll stay fresh for up to 2 months. When you’re ready to eat them, thaw them at room temperature for a few hours.
Glaze Timing Advice: If you’re planning to freeze the cookies, it’s best to freeze them *before* glazing. The glaze can become sticky and messy when frozen. Glaze them after they’ve thawed.
Frequently Asked Questions
Final Thoughts
So, there you have it – my family’s recipe for classic Pinwheel Christmas Cookies! They’re a fun, festive, and delicious way to celebrate the holidays. The beautiful swirls and customizable flavors make them a hit with everyone, and the simple recipe means you can whip up a batch in no time. If you enjoyed this recipe, be sure to check out my other cookie recipes, like my classic sugar cookies or my decadent Chocolate Chip Cookies. Happy baking, friends! I can’t wait to hear how yours turn out. Let me know in the comments if you try them, and be sure to share your own variations!

How to Make 5 Easy Pinwheel Christmas Cookies That Wow!
Ingredients
Dough
- 1 cup Unsalted Butter softened
- 1 cup Granulated Sugar
- 2 Large Eggs
- 1 tsp Vanilla Extract
- 3 cups All-Purpose Flour
- 0.5 tsp Baking Powder
- 0.25 tsp Salt
Filling
- 0.25 cup Unsweetened Cocoa Powder
- 2 tbsp Milk
- 0.25 cup Powdered Sugar
Instructions
Preparation Steps
- In a large bowl, cream together the butter and sugar until light and fluffy. Beat in the eggs one at a time, then stir in the vanilla extract.
- In a separate bowl, whisk together the flour, baking powder, and salt. Gradually add the dry ingredients to the wet ingredients, mixing until just combined. Divide the dough in half.
- In a small bowl, combine the cocoa powder, milk, and powdered sugar to create a chocolate paste. Mix until smooth.
- On a lightly floured surface, roll out one half of the dough into a 12x9 inch rectangle. Spread the chocolate paste evenly over the dough. Roll out the other half of the dough to the same size and place it on top of the chocolate layer.
- Starting from one long side, tightly roll up the dough into a log. Wrap the log in plastic wrap and chill for at least 2 hours.
- Preheat oven to 375°F (190°C). Line baking sheets with parchment paper. Cut the chilled dough log into 0.25 inch thick slices.
- Place the cookies on the prepared baking sheets and bake for 10-12 minutes, or until the edges are lightly golden brown. Let cool on the baking sheets for a few minutes before transferring to a wire rack to cool completely.
Notes
Featured Comments
“Impressed! Clear steps and absolutely loved results. Perfect for busy nights.”
“New favorite here — crowd-pleaser. crowd-pleaser was spot on.”
“Super easy and turned out amazing! My family asked for seconds. Saving this one.”
“This sweet treat was absolutely loved — the bright really stands out. Thanks!”
“Made it tonight and wow — perfect for busy nights! Will definitely make How to Make 5 Easy Pinwheel Christmas Cookies That Wow! again.”
“Packed with flavor and so simple. Exactly what I wanted from How to Make 5 Easy Pinwheel Christmas Cookies That Wow!.”


