

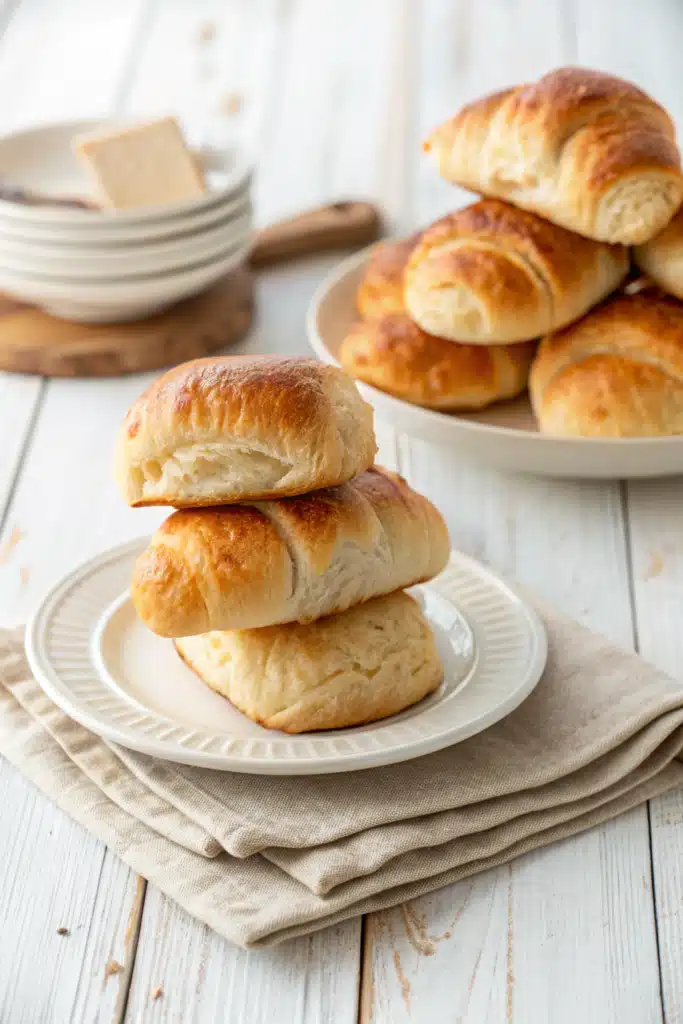
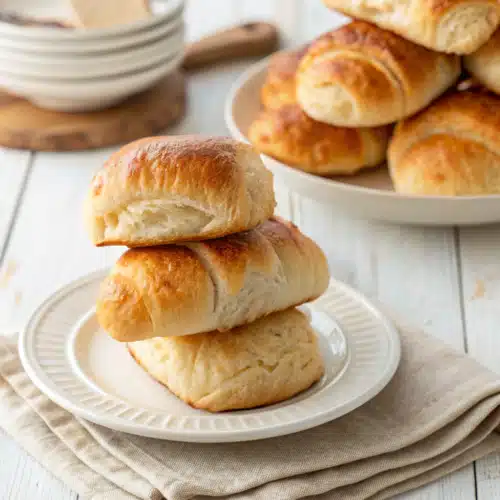
The Best Homemade Gluten Free Crescent Rolls
I remember my first holiday season after going gluten-free. While everyone else at the dinner table was reaching for those warm, flaky, buttery crescent rolls straight from the oven, I was left staring at a sad, crumbly piece of cardboard-like bread. It honestly broke my heart a little bit. For years, I just accepted that those soft, pillowy rolls were a thing of the past. But let me tell you, I am incredibly stubborn when it comes to baked goods.
I spent months tweaking flours, adjusting butter ratios, and testing yeast combinations until I finally nailed it. These gluten free crescent rolls are the real deal. They are incredibly soft, pull-apart tender, and have those iconic buttery layers we all crave. You don’t have to compromise anymore, and you certainly don’t have to watch everyone else enjoy the good stuff while you miss out. Whether you are baking for a holiday dinner, a cozy Sunday soup night, or just because you desperately need a warm roll, this recipe is going to become your new best friend. Grab your apron, because we are making magic happen today!

What Are Gluten Free Crescent Rolls?
If you grew up popping open those famous blue cardboard tubes from the grocery store, you already know the magic of a classic crescent roll. They are a staple at family dinners, Thanksgiving feasts, and holiday breakfasts. Traditionally, they are made with a soft, slightly sweet yeast dough that gets rolled into a triangle and baked until golden and puffy. But traditional recipes rely heavily on wheat gluten to get that stretchy, pliable dough that rolls up perfectly.
So, what exactly are gluten free crescent rolls? They are a lovingly crafted alternative that mimics that exact same nostalgic experience, but completely without the wheat. By using a high-quality gluten-free flour blend, a touch of xanthan gum for elasticity, and the perfect amount of yeast for that signature rise, we recreate the fluffy interior and buttery exterior. They aren’t just a basic substitute; they are a masterpiece in their own right. You get the same iconic crescent shape, the same golden-brown crust, and that irresistible buttery flavor that melts in your mouth, all without upsetting your stomach.
How to Make Gluten Free Crescent Rolls
Quick Overview
Making these rolls is a lot easier than you might think. We start by proofing our yeast to make sure it’s nice and active. Then, we mix our dry ingredients—making sure to use a good quality gluten-free flour blend—and combine them with warm milk, butter, and an egg to create a soft dough. Because there’s no gluten to develop, we don’t have to knead this dough for ages! We just let it rise until it’s nice and puffy, roll it out between sheets of parchment paper, slice it into triangles, and roll them up into those cute little crescents. A quick second rise, a brush of butter, and they are ready for the oven.
Ingredients
Here is what you need to gather before we get started:
- Gluten-Free Flour Blend: Make sure it contains xanthan gum. This is crucial for the dough’s structure so your rolls don’t fall apart.
- Active Dry Yeast: For that beautiful, fluffy rise we all love.
- Warm Milk: Helps activate the yeast and keeps the dough perfectly tender.
- Unsalted Butter: Melted for the dough, plus a little extra for brushing on top.
- Honey: To feed the yeast and add just a touch of sweetness.
- Egg: Acts as a binder and adds richness to the dough.
- Baking Powder: A little extra lifting power never hurts in gluten-free baking!
- Salt: To balance all the delicious flavors.

Step-by-Step Instructions
Step 1: Proof the Yeast
In a small bowl, whisk together your warm milk, yeast, and a teaspoon of honey. Let it sit for about 5 to 10 minutes. You want it to look frothy and smell exactly like a bakery. If it doesn’t bubble up, your yeast might be expired, so start over with a fresh packet to avoid flat rolls.
Step 2: Mix the Dough
In a large mixing bowl, combine your gluten-free flour, baking powder, and salt. Pour in the frothy yeast mixture, the melted butter, the egg, and the rest of the honey. Beat everything together on medium speed until a soft, sticky dough forms. It will resemble thick cookie dough more than traditional bread dough—don’t panic, that’s exactly what we want.
Step 3: First Rise
Cover your bowl with a warm, damp towel and set it in a cozy spot in your kitchen. Let the dough rise for about 45 minutes to an hour. It should puff up nicely and look slightly airy.
Step 4: Roll and Shape
Turn the dough out onto a piece of parchment paper dusted generously with gluten-free flour. Place another piece of parchment on top and roll the dough into a large circle, about a quarter-inch thick. Use a pizza cutter to slice the circle into 8 triangles, just like you are cutting a pizza. Starting from the wide edge, gently roll each triangle up to the point. Place them on a parchment-lined baking sheet.
Step 5: Second Rise and Bake
Cover the shaped rolls lightly and let them rest for another 20 minutes while you preheat your oven to 375 degrees Fahrenheit. Brush the tops with a little melted butter, then bake for 12 to 15 minutes until they are golden brown and smell absolutely heavenly.
What to Serve It With
These gluten free crescent rolls are the ultimate sidekick to practically any meal. I love serving them warm right out of the oven alongside a big, comforting bowl of creamy tomato soup or a hearty beef stew. They are absolutely perfect for soaking up every last drop of gravy at your Thanksgiving or Christmas dinner table.
If you are hosting a weekend brunch, try slicing them open and filling them with scrambled eggs, crispy bacon, and melted cheddar cheese for a mini breakfast sandwich. Or, keep it sweet and simple by slathering them with homemade strawberry jam, apple butter, or a generous drizzle of local honey. Honestly, they are so good, I often just eat them standing by the stove with a little extra pat of salted butter.
Top Tips for Perfecting Your Gluten Free Crescent Rolls
Gluten-free baking is definitely a bit of a science, but I’ve learned a few tricks along the way to make sure these turn out flawless every single time you make them.
- Weigh your flour: If you have a kitchen scale, use it! Scooping gluten-free flour with a measuring cup can pack it down, leading to dense, heavy rolls. If you don’t have a scale, use the spoon-and-level method.
- Don’t skip the parchment paper: Gluten-free dough is notoriously sticky. Rolling it between two sheets of parchment paper will save your sanity and keep your kitchen counters nice and clean.
- Keep the dough chilled if it gets too sticky: If you find the triangles are difficult to roll up, pop the rolled-out circle of dough in the fridge for 10 minutes. The butter will firm up, making it much easier to handle.
- Check your milk temperature: Make sure your milk is warm like bathwater, not boiling hot. If it’s too hot, it will kill the yeast, and your rolls won’t rise at all.
Storing and Reheating Tips
Like most gluten-free baked goods, these rolls are absolute perfection on the day they are made. However, if you happen to have leftovers (which is a very rare occurrence in my house!), you can definitely save them for later.
Store any leftover rolls in an airtight container at room temperature for up to two days. If you want to keep them longer, I highly recommend freezing them. Wrap each roll tightly in plastic wrap and place them in a freezer-safe bag for up to two months.
When you are ready to eat, the microwave is your best friend. Zap a room-temperature roll for about 10 to 15 seconds to bring back that soft, squishy texture. If they are frozen, let them thaw on the counter for a bit, then warm them up in the oven at 300 degrees for about 5 minutes until they are heated all the way through.
Frequently Asked Questions
Final Thoughts

There is just something so deeply comforting about pulling a pan of fresh, warm bread out of the oven. Finding a recipe that actually works when you have dietary restrictions feels like striking gold. These gluten free crescent rolls have brought so much joy back to our family dinners, and I am so incredibly excited for you to experience that exact same joy in your own kitchen.
Don’t let gluten-free baking scare you away from enjoying the foods you love. With a little patience and the right ingredients, you can recreate all of your old favorites. I can’t wait to hear how these turn out for you. Grab a warm roll, slather it in some extra butter, and enjoy every single bite. Happy baking, my friends!
Gluten Free Crescent Rolls
Ingredients
Main Ingredients
- 2 cups gluten-free flour blend with xanthan gum
- 1 tablespoon psyllium husk powder
- 1 teaspoon instant dry yeast
- 1 teaspoon baking powder
- 1 teaspoon granulated sugar
- 1 teaspoon salt
- 0.25 cup cold unsalted butter cubed
- 1 large egg room temperature, beaten
- 0.67 cup lukewarm milk
- 1 tablespoon melted unsalted butter for brushing
Instructions
Preparation Steps
- In a large bowl, whisk together the gluten-free flour, psyllium husk powder, yeast, baking powder, sugar, and salt.
- Using a pastry cutter or your fingers, work the cold cubed butter into the dry ingredients until the mixture resembles coarse crumbs.
- In a separate bowl, whisk together the beaten egg and lukewarm milk. Gradually add the wet ingredients to the dry ingredients, mixing until a soft dough forms.
- Cover the dough and let it rest in the refrigerator for 20 minutes to chill.
- On a surface lightly dusted with gluten-free flour, roll out the dough into a circle. Cut the circle into 7 equal triangles.
- Roll each triangle from the wide end towards the point to form a crescent shape. Place the rolls on a parchment-lined baking sheet.
- Let the rolls rise in a warm place for 1 hour until puffed.
- Preheat oven to 375°F (190°C). Brush the rolls with melted butter and bake for 12 to 15 minutes until golden brown.
Notes
Featured Comments
“Impressed! Clear steps and spot on results. Perfect for busy nights.”
“New favorite here — crowd-pleaser. crowd-pleaser was spot on.”
“Super easy and turned out amazing! My family asked for seconds. Saving this one.”
“This sweet treat was absolutely loved — the buttery really stands out. Thanks!”
“Made it tonight and wow — restaurant-level! Will definitely make How to Make 7 Easy Gluten-Free Crescent Rolls That Taste Homemade again.”
“Packed with flavor and so simple. Exactly what I wanted from How to Make 7 Easy Gluten-Free Crescent Rolls That Taste Homemade.”


