

There’s something about the combination of roasted hazelnuts and rich coffee that just hits differently. It’s like those mornings when you need a little perk-me-up but want it to feel cozy and indulgent at the same time. I honestly can’t count how many times I’ve blended up a hazelnut coffee shake when I’m craving something sweet but don’t want to turn on the oven or fuss over complicated desserts. This one’s a lifesaver on busy nights or lazy weekend mornings. The smell alone — that warm, nutty aroma mixed with a hint of caffeine — makes the whole house feel cozier. My kids ask for this all the time, especially during chilly evenings when a cold drink feels just right. Trust me, once you make this, it’s going to be your new guilty pleasure. Plus, it’s insanely simple, quick to whip up, and so satisfying I guarantee you’ll be making it at least once a week. Ready to indulge? Let’s get blending!
What is a hazelnut coffee shake?
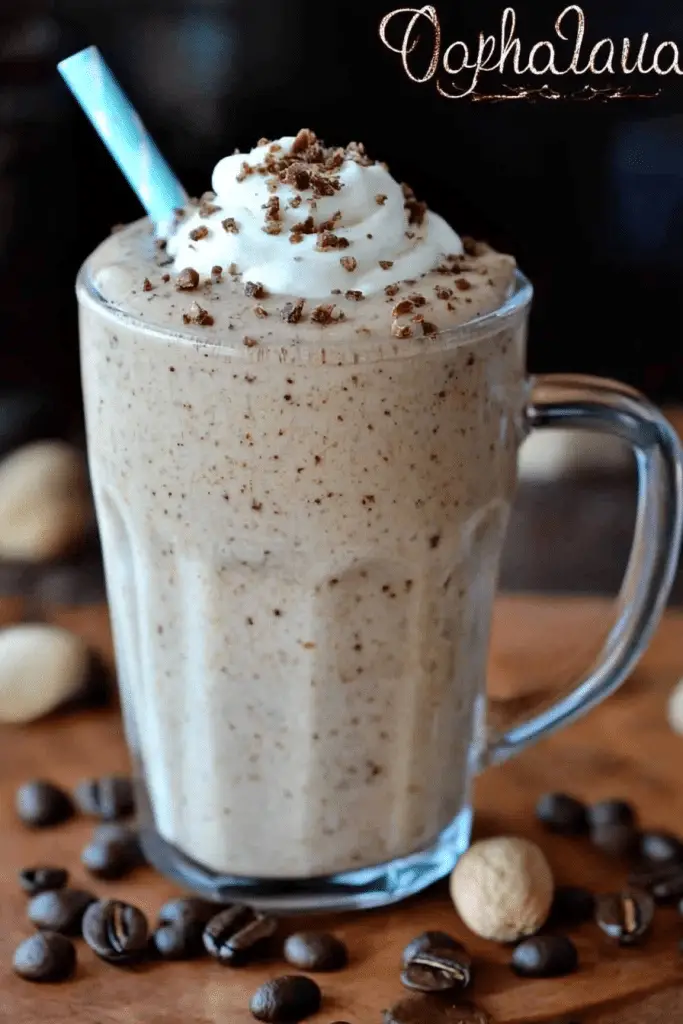
A hazelnut coffee shake is basically like your favorite coffee shop beverage, but turned into a luscious, creamy milkshake you can enjoy at home — no fancy machines required. Think of it as a chilled, silky-smooth drink that combines the bold flavor of brewed coffee with the sweet, nutty goodness of roasted hazelnuts. It’s essentially a coffee-flavored milkshake, but with an extra fancy upgrade thanks to the hazelnut syrup or paste. The concept is simple: you take strong coffee (or espresso for that intense kick), blend it with ice, milk, and hazelnut spread or syrup, and then blend until velvety smooth. I love that it’s both a treat and a pick-me-up. It’s perfect for those days when you’re craving something sweet but also want a little caffeine to keep you going. And if you’re a fan of coffee desserts or Nutella, this shake will feel like a comforting hug in a glass!
How do I make a Hazelnut coffee shake?
Quick Overview
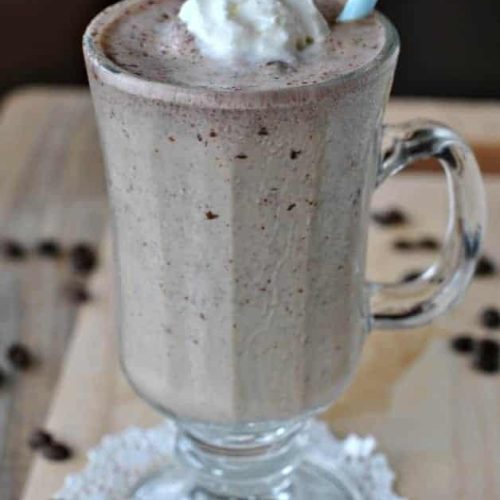
Making a hazelnut coffee shake is as simple as blending together brewed coffee, ice, milk, and hazelnut flavoring until smooth and frosty. I like to start with a strong coffee base for that robust flavor, then add a touch of sweet hazelnut syrup or Nutella for richness. Blending everything until silky takes just a minute or two, and the result is a beautifully thick, fragrant drink that’s absolutely irresistible. You can serve it with a whipped cream topping and a sprinkle of crushed hazelnuts for that extra special touch. The best part? It’s a one-glass wonder that’s ready in about five minutes — perfect when you’re craving a special treat without much fuss.
Ingredients
For the Main Shake:
– 1 cup brewed strong coffee (cooled, preferably espresso or dark roast)
– 1 cup vanilla ice cream (or frozen yogurt for a lighter option)
– 1/2 cup milk (whole, almond, or oat — whichever you prefer)
– 3 tbsp hazelnut syrup or 2 tbsp Nutella spread
– 1 cup ice cubes (more if you want it thicker)
– Whipped cream and chopped hazelnuts for topping (optional but highly recommended)
Additional Flavor Options & Tips:
Feel free to tweak the sweetness with honey or maple syrup if you like it less sugary. For a dairy-free version, swap the ice cream and milk for coconut or almond milk-based alternatives. I’ve even tested this with a splash of coffee liqueur for an adult version — trust me, it’s straight-up delicious!
Step-by-Step Instructions
Step 1: Preheat & Prep Pan
No oven needed here! Just brew your coffee fresh or use leftover chilled coffee. Set it aside to cool if it’s hot — hot coffee will melt your ice too quickly and make your shake too thin. Gather your blender and measure out all your ingredients so you’re ready to go. No messy rushing, I promise—it’s all about quick, smooth fusion.
Step 2: Mix Dry Ingredients
If you’re adding Nutella or any other flavorings, measure them out now. They need to blend well, so having everything close by helps. No dry ingredients here, but if you want to add cocoa powder or a pinch of cinnamon for extra flavor, do it now and whisk it into the coffee!
Step 3: Mix Wet Ingredients
Pour everything into your blender: brewed coffee, ice cream, milk, hazelnut syrup, and ice. Make sure your coffee is at room temperature or cooled. If it’s hot, the ice will melt too fast, and you’ll end up with a watery shake. I’ve learned this the hard way — trust me, patience with cooling makes all the difference!
Step 4: Combine & Blend
Start blending on low speed, then crank it up to high. Blend until the mixture is super smooth and frothy, about 30-45 seconds. If your shake feels too thin, add a few more ice cubes and blend again. Conversely, if it’s too thick, pour in a splash more milk. Keep tasting and adjusting — it’s all about your preferred texture and flavor.
Step 5: Prepare Filling
While it’s not really a filling, I do like to prepare a little whipped cream topping or crushed hazelnuts in advance for presentation. If you’re feeling fancy, drizzle a little caramel or chocolate syrup on top for extra decadence.
Step 6: Layer & Swirl
Pour your shake into a tall glass. If you want a pretty swirl, add a spoon of Nutella or additional syrup and swirl gently with a straw or a toothpick. Top with whipped cream and sprinkle some chopped hazelnuts or cacao nibs if you like a little crunch and wow-factor presentation.
Step 7: Bake
No baking here, but if you want to chill the shake further, pop it into the fridge for a few minutes before serving. Makes it even more refreshing on a hot day!
Step 8: Cool & Glaze
If you plan to add a glaze or syrup on top, do it just before serving. You can also dust with cocoa powder or cinnamon for a quick flavor boost. Honestly, I think the whipped cream topping with a drizzle of caramel is the perfect finishing touch.
Step 9: Slice & Serve
Serve this in a tall glass with a straw or a pretty spoon. It’s surprisingly thick, so I often use a spoon to enjoy the last few sips. This shake is best enjoyed immediately, but if you have leftovers, cover it tightly and refrigerate — just give it a quick stir before drinking again.
What to Serve It With
This hazelnut coffee shake is already a treat on its own, but here are a few ways to make it even more special:
- For Breakfast: Pair it with a flaky croissant or a banana muffin for a relaxed morning. A splash of extra brewed coffee on the side keeps the caffeine flowing.
- For Brunch: Serve it with a cheese and fruit platter or a stack of pancakes topped with strawberries and whipped cream. It’s a decadent addition that’ll wow your guests!
- As Dessert: Use it as the crowning glory after a chocolate brownie or coffee cake. Drizzle with caramel or chocolate sauce for visual and flavor impact.
- For Cozy Snacks: Sometimes I whip this up during movie nights or after a long day — it’s just perfect with a cozy blanket and a good book. My family loves grabbing this at any chance!
This drink’s flexibility makes it a real family favorite. I’ve experimented with different toppings, added a splash of Bailey’s for an adult touch, or even turned it into a breakfast-style milkshake with oats blended in. Whatever your mood, this shake adapts beautifully, making it a true staple in my kitchen.
Top Tips for Perfecting Your Hazelnut Coffee Shake
After making this recipe countless times, I’ve picked up a few tricks to make every shake better than the last:
- Zucchini Prep: Not relevant here, but if you’re experimenting with zucchini in other recipes, always drain excess moisture by squeezing out the grated zucchini before adding it to your batter.
- Mixing Advice: Overmixing can make the shake too frothy or thin. Blend just until smooth and desired consistency — I usually pulse a few times instead of continuous blending to control texture.
- Swirl Customization: For perfect swirls, add spoonfuls of Nutella or syrup in layers, then use a skewer or chopstick to create pretty patterns. It’s surprisingly simple but looks fancy!
- Ingredient Swaps: Almond milk or cashew milk work beautifully, especially if you want a nuttier flavor. I’ve also tried Greek yogurt instead of ice cream — adds creaminess and a tangy twist.
- Baking Tips: No baking here, but if you’re making a baked good inspired by this, like hazelnut coffee muffins, make sure not to overmix the batter for fluffy muffins!
- Glaze Variations: A simple dusting of cocoa powder, crushed nuts, or a drizzle of caramel can elevate your shake presentation. I’ve even added a pinch of sea salt to the caramel for a salted caramel version that’s divine.
Over the years, I’ve learned that a little experimentation goes a long way. Start with the basic ingredients and then play around with your favorite flavors — that’s how you make recipes truly your own. This shake is forgiving, fast, and ridiculously good, even with small tweaks.
Storing and Reheating Tips
If you happen to make extra — which often happens at my house because it disappears in minutes — here’s how I keep it fresh:
- Room Temperature: Best enjoyed immediately, but if you have leftovers, keep it covered tightly and store in the fridge for up to 2 hours. The texture might separate slightly, so give it a quick stir before drinking again.
- Refrigerator Storage: Use an airtight container. It’ll stay fresh for about 24 hours, but expect some ice crystals or separation. Stir well or blend briefly to bring it back together.
- Freezer Instructions: I don’t recommend freezing the shake after blending, as it can turn icy and change texture. But if you want to make it ahead, freeze unblended ingredients separately and blend fresh when ready to serve.
- Glaze Timing: Add whipped cream and toppings just before serving, since they can become soggy or melt if left on overnight. That way, every sip stays deliciously decadent.
This way, you can enjoy leftovers without sacrificing too much of its creamy, frosty goodness. I’ve found that storing in small portions helps, so I often divide the shake into an ice cube tray, then pop a few cubes into my blender to re-blend into a fresh shake later.
Frequently Asked Questions
Final Thoughts
This hazelnut coffee shake has quickly become one of my favorite go-to treats — it’s simple, satisfying, and feels a little fancy every time I make it. Whether you’re starting your day with that extra boost or winding down with a sweet ending, this shake hits all the right notes. I love how adaptable it is: add more hazelnut syrup if you’re feeling nutty, swap out dairy for a healthier twist, or top it with your favorite goodies to make it your own. Honestly, I’ve made this for friends, kids, and even myself after a long workday — it’s a small indulgence that never fails to brighten my mood. I can’t wait to see how you like it! Give it a try, experiment with your favorite flavors, and don’t forget to share your twists in the comments. Happy blending, and here’s to cozy, delicious coffee moments in your own kitchen!
hazelnut coffee shake
Ingredients
Main Ingredients
- 2 cups vanilla ice cream
- 2 Tablespoons Nutella (hazelnut spread)
- 0.25 cup brewed coffee (cooled)
Instructions
Preparation Steps
- Blend vanilla ice cream with Nutella, gradually pouring in the cooled coffee until smooth and creamy.
- Pour into a glass and serve immediately for the best flavor and texture.
Notes
Featured Comments
“I love this combo—so cozy and energizing! Perfect for those chilly mornings when you need a flavorful pick-me-up.”
“I love how this shake combines nutty richness with bold coffee—definitely a cozy pick-me-up for slow mornings.”
“Impressed! Clear steps and spot on results. Perfect for busy nights.”
“New favorite here — turned out amazing. crowd-pleaser was spot on.”
“Super easy and turned out amazing! My family asked for seconds. Saving this one.”
“This sweet treat was absolutely loved — the light really stands out. Thanks!”


I love how this shake combines nutty richness with bold coffee—definitely a cozy pick-me-up for slow mornings.
I love this combo—so cozy and energizing! Perfect for those chilly mornings when you need a flavorful pick-me-up.