

Okay, picture this: Is there if it’s a chilly evening, you’re curled up on the couch and snoozing for tequila, and that sweet craving hits you.hardWhat do you want to be comforting? What is the Best thing about preheating the oven and waiting an hour for baked apples? Is there any time for a secret weapon?Microwave Baked Apples.. These are seriously magic. What are some of the best baked apples you’ve ever had? Is it easier to hug someone in a bowl than to make toast? Prepare to be amazed.

What Is Microwave Baked Apples?
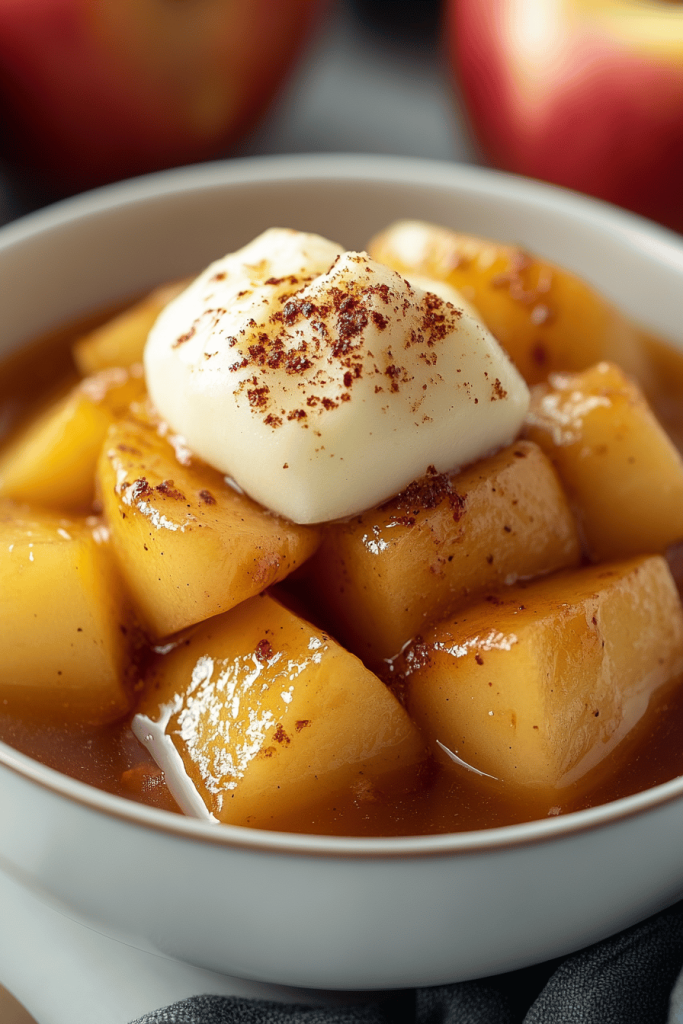
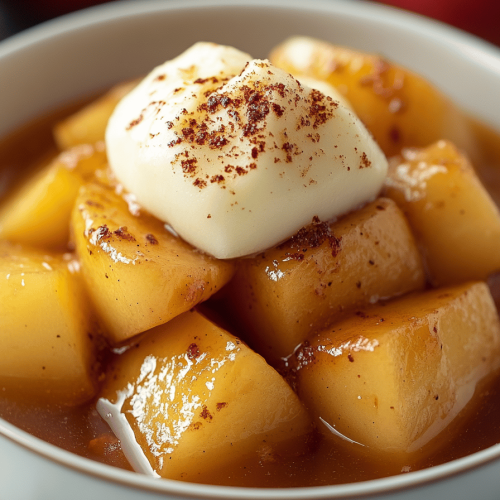
So, what exactly *are* Microwave Baked Apples? Well, think of them as deconstructed apple pie, but even simpler. It’s essentially cored apples, usually Granny Smiths or Honeycrisp (I prefer Honeycrisp!), stuffed with a buttery, cinnamon-sugar mixture, and then microwaved until they’re tender and juicy. No crust needed, no fussy pie-making required. It’s a dessert that’s both wholesome and incredibly satisfying. The microwave works its magic, softening the apples and melting the buttery filling into a luscious sauce. I love how the natural sweetness of the apples intensifies during the cooking process, creating a burst of flavor with every bite. It’s quicker than popping popcorn, healthier than a candy bar, and totally hits the spot when you need a comforting treat, fast.
How to Make Microwave Baked Apples
Quick Overview
Making these Microwave Baked Apples is ridiculously easy. You core your apples, mix a simple filling of butter, sugar, and cinnamon, stuff the apples with the mixture, and microwave until tender. That’s it! The beauty of this method is that it’s quick, efficient, and requires minimal cleanup. Plus, you don’t have to worry about heating up your entire kitchen with the oven. These truly are a microwave marvel!
Ingredients
For the Apples: Which one is
* 2 medium Honeycrisp or Granny Smith apples. I prefer Honeycrisp because they are sweeter and have a lovely crisp texture that holds up well in the microwave.
* 1 tablespoon lemon juice. This prevents the apples from browning and adds a touch of brightness to the flavor.
For the Filling:
* 2 tablespoons unsalted butter, softened. Make sure it’s actually softened, not melted, for the best texture. I sometimes use salted butter if that’s all I have on hand, but reduce the amount of salt you add later.
* 2 tablespoons brown sugar. I like light brown sugar for its subtle caramel flavor, but dark brown sugar works well too if you want a richer taste.
* 1 teaspoon ground cinnamon. Use good quality cinnamon for the best flavor! I sometimes add a pinch of nutmeg or allspice for extra warmth.
* 1/4 teaspoon ground nutmeg. This spice adds a depth of warmth to the apples, enhancing the cinnamon notes.
* 1/4 teaspoon salt. Just a pinch enhances the sweetness and balances the flavors.
* 2 tablespoons chopped pecans or walnuts (optional). I love adding nuts for some extra crunch and nutty flavor.
For the Topping (optional):
* 1 tablespoon caramel sauce. What are some of the best apples to eat? * 1 scoop vanilla Ice Cream. A classic pairing that elevates the dessert to a whole new level.

What are the steps to
Step 1: Prep the Apples
First, wash your apples thoroughly. Then, using an apple corer, carefully remove the core from each apple, leaving the bottom intact. You want to create a well in the center for the filling. Pro tip: if you don’t have an apple corer, you can use a paring knife to carefully cut around the core in a circular motion.
Step 2: Prepare the Filling
In a small bowl, combine the softened butter, brown sugar, cinnamon, nutmeg, and salt. Set aside. Mix everything together with a fork until it forms an crumbly mixture. If you’re adding nuts, stir them in at this point.
Step 3: Stuff the Apples
Spoon the filling into the center of each cored apple, packing it in firmly. Don’t be afraid to load them up! If you have leftover filling, you can sprinkle it around the base of the apples in the dish.
Step 4: Microwave
Place the stuffed apples in a microwave-safe dish. I usually add a tablespoon or two of water to the bottom of the dish to help create steam and keep the apples from drying out. Cover the dish with microwave-safe plastic wrap or a microwave-safe lid. Microwave on high for 3-5 minutes, or until the apples are tender. The exact time will depend on the size and variety of your apples, as well as the power of your microwave. Start with 3 minutes and then check for doneness. If they’re not quite tender, continue microwaving in 30-second intervals until they reach your desired consistency. The apples are ready when they can easily be pierced with a fork.
Step 5: Cool Slightly and Serve
How do you remove a dish from the microwave? Let the apples cool for a minute before serving. How do I set the filling slightly and avoid burning my tongue? Drizzle with caramel sauce and top with a scoop of vanilla Ice Cream. Enjoy immediately! What is the aroma of microwave?
What should I serve it with?
These Microwave Baked Apples are amazing on their own, but they’re even better when paired with the right accompaniments! They’re incredibly versatile and can be enjoyed for breakfast, brunch, dessert, or even as a cozy snack.
For Breakfast: Serve warm with a dollop of Greek yogurt and a sprinkle of granola for a healthy and satisfying breakfast. A cup of strong coffee or a chai latte complements the flavors perfectly.
For Brunch:What are some of the best side dishes for brunch? A mimosa or sparkling cider adds a touch of elegance.
As Dessert:What are some after-dinner treats? Top with vanilla Ice Cream, a drizzle of caramel sauce, and chopped nuts. For an extra decadent experience. A glass of wine or herbal tea is the perfect finishing touch.
For Cozy Snacks: Enjoy these Microwave Baked Apples on a chilly evening while curled up on the couch with a good book. A warm blanket and a cup of hot chocolate complete the cozy picture. My family also loves them as a post-dinner snack, especially during the colder months. We often add a scoop of vanilla Ice Cream or a drizzle of maple syrup for an extra special treat. It’s become a comforting tradition that we all look forward to. Honestly, sometimes I even just eat them straight out of the microwave, standing at the counter, because they’re too good to wait!
Top Tips for Perfecting Your Microwave Baked Apples
After making these Microwave Baked Apples countless times (seriously, I’ve lost count!) I’ve learned a few tricks along the way to ensure they turn out perfectly every time. What are some tips for making microwave baked apples?
Apple Choice: Choose apples that hold their shape well when cooked. Honeycrisp, Granny Smith, and Fuji apples are all great choices. Avoid softer varieties like Red Delicious, which tend to become mushy in the microwave.
Butter Matters: What Use good-quality butter for the best flavor. I prefer unsalted butter so I can control the amount of salt in the recipe, but salted butter works too. Just reduce the amount of salt you add later.
Spice It Up:Don’t be afraid to experiment with different spices! In addition to cinnamon and nutmeg, try adding a pinch of allspice, cardamom, or ginger for an unique flavor.
Nutty AdditionsChopped pecans, walnuts or almonds add a lovely crunch and nutty flavor to the filling. What’s the best way to toast nuts before adding them to the filling?
Sweetness Control: How Adjust the amount of brown sugar to your liking. If you prefer a less sweet dessert, reduce the amount of sugar. You can also use a sugar substitute like stevia or erythritol, but keep in mind that this may affect the texture and flavor of the filling.
Microwave Know-How: Microwave cooking times can vary depending on the power of your microwave. Start with 3 minutes and then check for doneness. If the apples aren’t quite tender, continue microwaving in 30-second intervals until they reach your desired consistency.
Steam Power: Adding a tablespoon or two of water to the bottom of the dish helps create steam, which keeps the apples from drying out in the microwave. You can also cover the dish with microwave-safe plastic wrap or a microwave-safe lid to trap the steam.
The Core Issue: Make sure to core the apples properly, leaving the bottom intact. This creates a well for the filling and prevents it from leaking out during cooking.
Soft Butter is Key: Really ensure that butter is softened. If it’s still cold it will not mix as well.
Lemon Juice For Sure: Don’t skip the lemon juice to help keep the apples from browning while you prepare them.
Caramel Swirls: For an extra touch of indulgence, drizzle caramel sauce over the apples before microwaving. The caramel will melt into the filling, creating a gooey and delicious sauce. I learned this trick after I accidentally squirted some into one and decided I liked it better than before. Trust me on this one!
Storing and Reheating Tips
If you happen to have any leftover Microwave Baked Apples (which is rare in my house!), here’s how to store and reheat them to maintain their delicious flavor and texture:
Room Temperature: Microwave Baked Apples can be stored at room temperature for up to 2 hours. After that, they should be refrigerated to prevent spoilage.
Refrigerator Storage: To store in the refrigerator, place the cooled apples in an airtight container and refrigerate for up to 3 days. The apples may soften slightly during refrigeration, but they will still taste delicious.
Freezer Instructions: For longer storage, you can freeze Microwave Baked Apples. Wrap each apple individually in plastic wrap and then place them in a freezer-safe bag or container. Freeze for up to 2 months. When ready to eat, thaw the apples in the refrigerator overnight.
Reheating Methods: To reheat refrigerated or frozen Microwave Baked Apples, microwave on high for 1-2 minutes, or until heated through. You can also reheat them in a preheated oven at 350°F (175°C) for 10-15 minutes.
Glaze Timing Advice: If you’re planning to store the apples, it’s best to add the caramel sauce or Ice Cream (if using) just before serving. This will prevent the glaze from becoming soggy during storage. I’ve learned this the hard way after finding a container of mushy, sad-looking apples in the back of the fridge. Now I always wait until I’m ready to eat them before adding any toppings.
Frequently Asked Questions
Final Thoughts
So there you have it – my secret weapon for satisfying sweet cravings in a flash! These Microwave Baked Apples are incredibly easy to make, bursting with flavor, and endlessly customizable. They’re the perfect dessert for busy weeknights, unexpected guests, or simply when you need a little bit of comfort. What I love most about this recipe is that it’s a healthier alternative to traditional desserts, without sacrificing any of the deliciousness. If you enjoyed this recipe, be sure to check out my other quick and easy dessert recipes, like my Microwave Chocolate Mug Cake or my No-Bake Peanut Butter Bars. Happy baking (or microwaving!), and I can’t wait to hear how yours turn out! Share your variations and photos in the comments below, and don’t forget to rate the recipe if you loved it. Happy snacking!
How to Make Microwave Baked Apples in Just 7 Minutes: Quick & Easy!
Ingredients
Main Ingredients
- 1 medium Apple Gala, Honeycrisp, or Fuji recommended
- 1 tablespoon Butter Unsalted
- 1 tablespoon Brown Sugar Packed
- 0.5 teaspoon Cinnamon
Instructions
Preparation Steps
- Core the apple, leaving about 0.5 inch at the bottom intact. This creates a pocket for the filling.
- Place the apple in a microwave-safe bowl.
- In a small bowl, mix together the butter, brown sugar, and cinnamon.1 medium Apple
- Spoon the mixture into the center of the apple.
- Microwave on high for 5-7 minutes, or until the apple is tender. Cooking time may vary depending on your microwave.
- Let cool slightly before serving.
Notes
Featured Comments
“Impressed! Clear steps and absolutely loved results. Perfect for busy nights.”
“New favorite here — creamy. crowd-pleaser was spot on.”
“Super easy and turned out amazing! My family asked for seconds. Saving this one.”
“This sweet treat was absolutely loved — the cozy really stands out. Thanks!”
“Made it tonight and wow — turned out amazing! Will definitely make How to Make Microwave Baked Apples in Just 7 Minutes: Quick & Easy! again.”
“Packed with flavor and so simple. Exactly what I wanted from How to Make Microwave Baked Apples in Just 7 Minutes: Quick & Easy!.”


