

There’s something about Oreos that instantly transports me back to childhood — those cookie crumbs smudged across my fingers, the sweet cream filling that’s just enough to make your taste buds dance. As I grew older, I realized that Oreos aren’t just for dunking in milk anymore—they’re the secret ingredient to some seriously irresistible treats. And let me tell you, these Oreo cookie bars? They’re a game-changer. Honestly, I always keep a stash of Oreos in my pantry—just in case I need a quick sweet fix or want to whip up something that’s guaranteed to disappear in minutes. This recipe is my go-to when I want something sweet but don’t have time to mess around in the kitchen for hours. It’s like a hug in dessert form, and my kids ask for it all the time. Plus, it’s one of those recipes that looks fancy enough for guests but is so easy that I can make it on a busy weeknight. Trust me, once you try these Oreo cookie bars, you’ll probably find yourself making them way more often than you’d like to admit!
What is Oreo cookie bar?
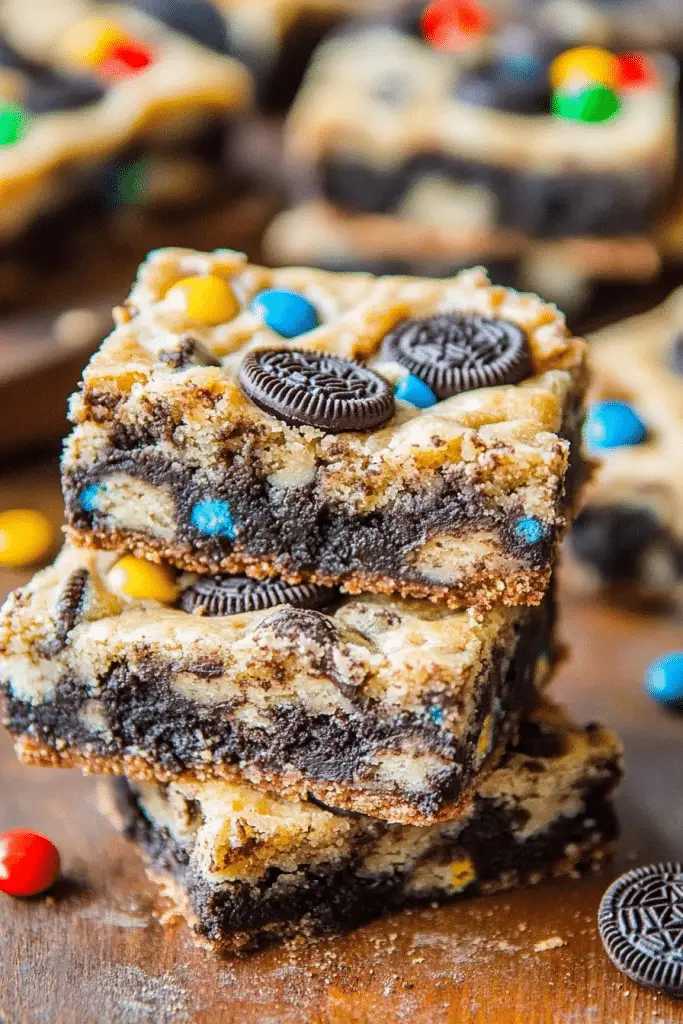
Think of Oreo cookie bars as a fabulous lovechild between a rich, buttery crust, an indulgent creamy filling, and a crunchy, chocolatey top layer—all topped off with lots of crumbled Oreos. It’s essentially a layered bar that combines the best parts of your favorite cookie into one decadent dessert. The name is pretty self-explanatory: these bars are made with Oreos baked right into the mix, creating a delightful combo of crunchy, chewy, and creamy textures. They’re perfect for when you want something sweet, satisfying, and a little nostalgic, all rolled into one. I’ve seen versions with peanut butter, caramel, or even a drizzle of chocolate on top, but honestly, I love keeping it simple so you can really taste that Oreo magic in every bite. Whether it’s for a holiday get-together, a bake sale, or just because you’re craving something seriously delicious, these Oreo cookie bars never fail to steal the show.
How do I make Oreo cookie bars?
Quick Overview
This recipe is a beautiful layering act: start with a buttery crust, then add a luscious cream cheese filling studded with crushed Oreos, finish with a chocolate topping, and sprinkle more Oreos on top. The best part? It’s all assembled quickly, and then you bake it until golden and melty. Once out of the oven, let it cool, then add a shiny glaze if you like, but honestly, they’re perfect as is. It’s so forgiving—you can tweak the ingredients or add extras without messing up the whole thing. What makes this recipe special is how everything comes together in just a few simple steps, producing a dessert that looks fancy but is foolproof.
Ingredients
For the Main Batter:
– 1 ½ cups all-purpose flour (I always go for unbleached for better flavor)
– ½ cup unsalted butter, melted (makes the crust buttery and rich)
– ½ cup granulated sugar (just enough sweetness)
– ½ teaspoon vanilla extract (for that warm depth of flavor)
For the Filling:
– 8 oz cream cheese, softened (use full-fat for creaminess)
– ½ cup powdered sugar (sifted to avoid lumps)
– 1 teaspoon vanilla extract
– 1 cup crushed Oreos (don’t skip crushing for the right texture)
For the Topping & Glaze:
– 1 cup semi-sweet chocolate chips
– ¼ cup heavy cream (to make a smooth, shiny glaze)
– Extra Oreos for sprinkling on top (for that finished look and crunch)
Step-by-Step Instructions
Step 1: Preheat & Prep Pan
Preheat your oven to 350°F (175°C). Line a 9×13-inch baking pan with parchment paper, leaving some overhang on the sides for easy removal. This step is key to preventing sticking and making slicing easier later. I always lightly spray the parchment with non-stick spray just to be extra safe.
Step 2: Make the Crust
Mix the melted butter, sugar, and vanilla until combined. Then add the flour and stir until it resembles coarse crumbs. Press this mixture evenly into the bottom of your prepared pan. I like using the back of a measuring cup to press it down firmly—makes it nice and even. Bake for 15 minutes until the edges start to turn golden. That gives the crust a little crispness that holds everything together.
Step 3: Prepare the Filling
While the crust cools just a bit, beat the softened cream cheese, powdered sugar, and vanilla together until smooth and creamy—about 2-3 minutes. Then fold in those crushed Oreos. I like to crush some finely and leave a few larger chunks for texture. Spread this luscious filling evenly over the baked crust while it’s still warm so it melds nicely.
Step 4: Bake & Cool
Pop it back in the oven for about 20-25 minutes, or until the center is just set (it’ll still be a little jiggly but not runny). Once out, let it cool completely on a wire rack — patience is a virtue here, but trust me, it’s worth it. If you cut into it too soon, everything can fall apart, so don’t rush.
Step 5: Make the Chocolate Glaze
Heat the heavy cream until just boiling (I do this in short bursts in the microwave). Pour it over the chocolate chips and let sit for a minute, then stir until shiny and smooth. Pour this over the cooled bars and use a spatula to spread evenly. Scatter more crushed Oreos on top for that perfect crunch and visual appeal. Chill in the fridge for about 30 minutes if you want the glaze to set well, or just serve straight from the counter if you prefer gooey goodness.
Step 6: Slice & Serve
Use the overhang to lift the bars out of the pan. Slice into squares with a sharp knife—warm water helps for clean cuts. These are best served slightly chilled but are just as good at room temperature. Oh, and don’t forget to save a piece for yourself—this one’s a lifesaver on busy nights!
What to Serve It With
Honestly, these Oreo cookie bars are so good on their own, but I love pairing them with a cold glass of milk or a hot cup of coffee. They make a perfect afternoon treat or a quick dessert after dinner. If you’re hosting a party, serve them on a beautiful platter with some fresh berries or sprigs of mint for a pop of color. My family tradition is to stash a few in the freezer for those days when we need a little happiness—just take a piece out when you need a sweet pick-me-up. I’ve even frozen slices individually for a grab-and-go snack. Quick tip: if you want to make it feel extra special, drizzle some white chocolate or caramel over the top before serving. These bars are truly versatile, and I think everyone should have a batch in their recipe arsenal!
Top Tips for Perfecting Your Oreo Cookie Bars
From my years of making these, I’ve gathered some pro tips that really make a difference:
- Zucchini prep: Hmm, well, in this case, it’s about crushing Oreos just right. Don’t pulverize them into dust—leave some chunks for texture. Also, ensure your cream cheese is softened—cold cheese doesn’t incorporate as smoothly, and you’ll end up with lumps that are hard to spread.
- Mixing advice: When mixing the filling, do it on medium speed—overmixing can make the filling too airy or tough. Fold in the crushed Oreos gently to keep the texture intact.
- Swirl customization: If you want decorative swirls or add-ins like caramel, do this just before pouring the glaze for a layered look. Use a toothpick or skewer to create beautiful marble effects.
- Ingredient swaps: Use dark chocolate if you prefer a less sweet, richer flavor. For a dairy-free version, almond milk chocolate chips work nicely, though I find the texture slightly different.
- Baking tips: Keep an eye on baking times—every oven is a bit different. If the edges brown too quickly, cover loosely with foil to prevent burning while the middle finishes baking.
- Glaze variations: For a thinner glaze, whisk in a splash of milk or heavy cream. For a richer flavor, add a pinch of sea salt or a teaspoon of instant coffee powder.
Over the years, I’ve tweaked and perfected this recipe, and I’ve learned that patience and using quality ingredients make all the difference. Trust me, a little extra cooling time and careful assembly really elevate these bars from good to absolutely addictive.
Storing and Reheating Tips
These bars keep well, which is great if you want to make them ahead. Store them in an airtight container at room temperature for up to two days—just keep them covered to prevent drying out. Want them to last a bit longer? Refrigerate for up to a week — the cold keeps the cream cheese filling fresh and the glaze shiny. To keep that crunch, I recommend wrapping each piece tightly with plastic wrap if freezing. For longer storage, freeze the bars in an airtight container for up to 3 months. When you’re ready to indulge, let them thaw at room temperature for about 30 minutes or microwave for a few seconds to enjoy that warm, gooey goodness. Just remember, the glaze might get a bit softer after freezing, but trust me—it’s still delicious.
Frequently Asked Questions
Final Thoughts
Honestly, these Oreo cookie bars have become a little piece of heaven in my kitchen. They’re simple enough to whip up when you’re craving something sweet fast but elegant enough to serve at a gathering that needs a special touch. What I especially love is how versatile they are—customize the toppings, add some other favorite mix-ins, or keep it classic with just a sprinkle of crushed Oreos on top. Every time I make these, I get reminded of how baking isn’t just about the end product; it’s about creating moments, memories, and a little bit of happiness. I hope you try this recipe and find your own little joy in it. Happy baking, dear friend! And don’t forget to come back and tell me how yours turned out—I’d love to hear your variations or any tips you discover along the way.
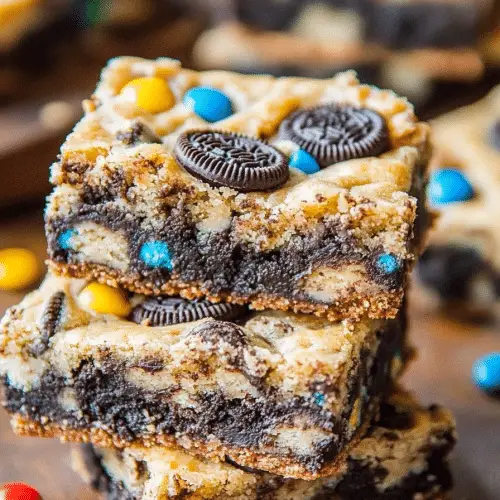
Oreo cookie bars
Ingredients
Main Ingredients
- 0.5 cup unsalted butter
- 1 large egg
- 1 cup light brown sugar packed
- 1 tablespoon vanilla extract
- 1 cup all-purpose flour
- 18 cookie Oreo Cookies coarsely chopped
- 0.5 cup M&M's plain or your favorite flavor
Instructions
Preparation Steps
- Preheat oven to 350F. Line an 8x8-inch baking pan with aluminum foil and spray with cooking spray.
- Melt butter in a large microwave-safe bowl, about 1 minute on high.
- Wait a moment before adding the egg to prevent scrambling. Add egg, brown sugar, vanilla, and whisk until smooth.
- Add the flour and stir until just combined, avoiding overmixing.
- Stir in the Oreo cookies.
- Pour batter into prepared pan and smooth the top with a spatula.
- Sprinkle M&M's evenly over the top and press down lightly.
- Bake for 20-22 minutes until edges are firm and a toothpick inserted in the center comes out clean.
- Allow bars to cool in the pan for at least 30 minutes before slicing and serving.
Notes
Featured Comments
“These Oreo bars bring back such sweet memories! The perfect blend of crunch and creamy filling never gets old.”
“These Oreo cookie bars look amazing! I love how they bring back those nostalgic moments with every bite.”
“Impressed! Clear steps and spot on results. Perfect for busy nights.”
“New favorite here — absolutely loved. crowd-pleaser was spot on.”
“Super easy and turned out amazing! My family asked for seconds. Saving this one.”
“This sweet treat was absolutely loved — the hearty really stands out. Thanks!”


These Oreo cookie bars look amazing! I love how they bring back those nostalgic moments with every bite.
These Oreo bars bring back such sweet memories! The perfect blend of crunch and creamy filling never gets old.