Love bug Oreo cookies turn a familiar sandwich cookie into a cheerful Valentine treat with a red candy coating, candy eyes, sprinkles, and simple icing details. They require no oven and make an easy decorating project for a Valentine party, classroom table, bake sale, or family afternoon. Each step is simple enough to follow in sequence, and the bright finished cookies can be customized with different sprinkle colors while keeping the same dependable method. Work while the coating is soft so the eyes, sprinkles, and ladybug-style details stay attached.
What Are Love Bug Oreo Cookies?
The sandwich cookies provide a sturdy base, red candy melts create a bright shell, candy eyes make the design recognizable, and black icing supplies fine dots and lines.
Why This Recipe Works
The sandwich cookies provide a sturdy base, red candy melts create a bright shell, candy eyes make the design recognizable, and black icing supplies fine dots and lines.
How to Make Love Bug Oreo Cookies
Line a tray with parchment and set every decoration within reach before melting the coating.
Ingredients
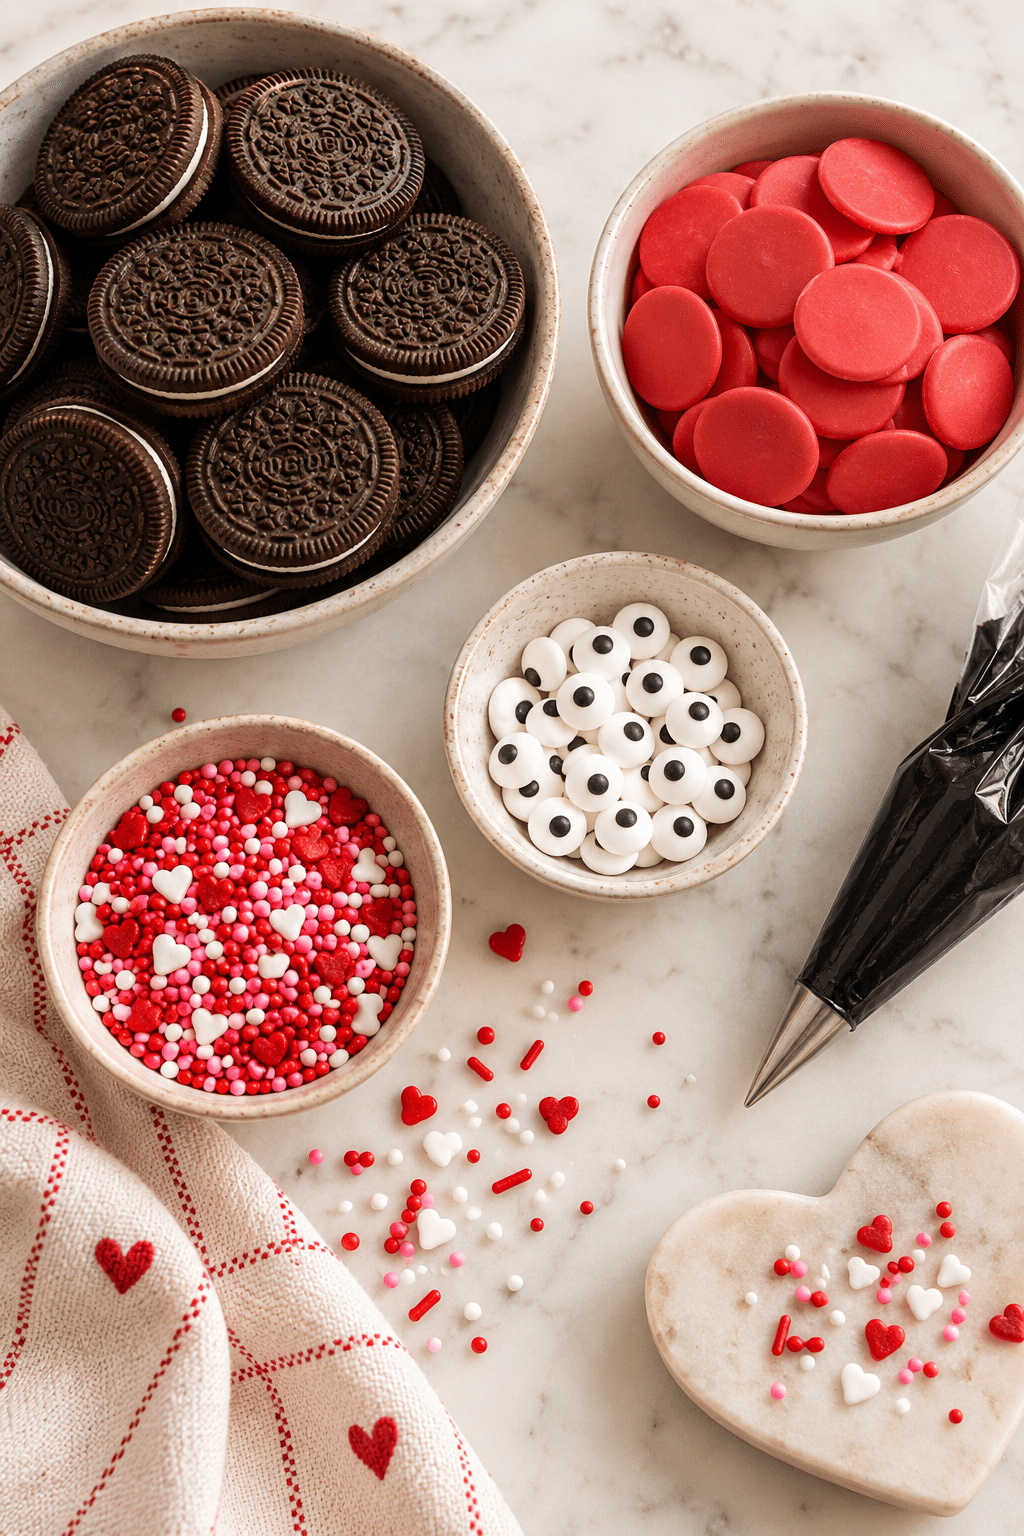
- 24 chocolate sandwich cookies
- 12 ounces red candy melts, melted
- 24 candy eyes
- 1/4 cup black decorating icing
- 1/4 cup red and white sprinkles
Method
- Line a tray with parchment and arrange the cookies.
- Dip each cookie halfway into melted red candy coating and return it to the tray.
- While the coating is soft, add candy eyes and sprinkles.
- Pipe small black dots and lines with decorating icing, then let the coating set completely.

Serving Ideas
Arrange them on a party tray or serve them beside fruit and brownies. For a classroom activity, dip the cookies ahead and let children decorate under supervision.
Tips
Divide decorations into small bowls before dipping. If the coating thickens, warm it gently according to its package directions instead of adding liquid.
Optional Variation
For an optional variation, use pink or white candy melts while keeping the same cookie and decoration method.
Storage
Store the finished cookies covered at cool room temperature, separating layers with parchment.
Search Answers
Can you make them ahead?
Yes, make them earlier the same day or the day before and keep them covered.
What if coating is thick?
Warm thick coating gently in short intervals and stir; do not add water.
FAQ: Love Bug Oreo Cookies
How do decorations stay attached?
Add decorations while the coating is soft so they adhere securely.
Do they need baking?
They need no baking; they are assembled, decorated, and rested until set.
How are they stored?
Store the finished cookies covered at cool room temperature, separating layers with parchment.
The red coating should cover one clean half of each cookie so the dark sandwich cookie remains visible and the finished shape looks deliberate. Letting excess coating drip for a moment prevents a heavy puddle around the base. Parchment makes cleanup easier and also gives the cookies a smooth surface while they set. Keep the decorating tools close because candy eyes and sprinkles adhere best before the coating becomes firm. If several people are decorating, work in small batches so no cookie waits too long before its details are added. The black icing can be used for dots, short lines, or simple antenna-like marks. The goal is a friendly love-bug appearance, not identical decoration on every cookie. For a more polished tray, group cookies with similar sprinkle colors together and leave a few pieces lightly decorated so the red coating remains visible. The cookies are sturdy enough to transport once completely set, but use a flat container so the decorations do not rub against a lid. At serving time, arrange them with the decorated side facing up and avoid stacking unless parchment separates the layers.
Keep the cookies level while they set and handle them only after the coating is firm. The simple sequence of dipping, decorating, and resting gives the finished dessert a clean look without requiring special baking skills. Choose decorations that contrast with the red coating, and keep the tray cool and dry until serving. Keep the cookies level while they set and handle them only after the coating is firm. The simple sequence of dipping, decorating, and resting gives the finished dessert a clean look without requiring special baking skills. Choose decorations that contrast with the red coating, and keep the tray cool and dry until serving. Keep the cookies level while they set and handle them only after the coating is firm. The simple sequence of dipping, decorating, and resting gives the finished dessert a clean look without requiring special baking skills. Choose decorations that contrast with the red coating, and keep the tray cool and dry until serving. Keep the cookies level while they set and handle them only after the coating is firm. The simple sequence of dipping, decorating, and resting gives the finished dessert a clean look without requiring special baking skills. Choose decorations that contrast with the red coating, and keep the tray cool and dry until serving. Keep the cookies level while they set and handle them only after the coating is firm. The simple sequence of dipping, decorating, and resting gives the finished dessert a clean look without requiring special baking skills. Choose decorations that contrast with the red coating, and keep the tray cool and dry until serving. Keep the cookies level while they set and handle them only after the coating is firm. The simple sequence of dipping, decorating, and resting gives the finished dessert a clean look without requiring special baking skills. Choose decorations that contrast with the red coating, and keep the tray cool and dry until serving. Keep the cookies level while they set and handle them only after the coating is firm. The simple sequence of dipping, decorating, and resting gives the finished dessert a clean look without requiring special baking skills. Choose decorations that contrast with the red coating, and keep the tray cool and dry until serving. Keep the cookies level while they set and handle them only after the coating is firm. The simple sequence of dipping, decorating, and resting gives the finished dessert a clean look without requiring special baking skills. Choose decorations that contrast with the red coating, and keep the tray cool and dry until serving. Keep the cookies level while they set and handle them only after the coating is firm. The simple sequence of dipping, decorating, and resting gives the finished dessert a clean look without requiring special baking skills. Choose decorations that contrast with the red coating, and keep the tray cool and dry until serving. Keep the cookies level while they set and handle them only after the coating is firm. The simple sequence of dipping, decorating, and resting gives the finished dessert a clean look without requiring special baking skills. Choose decorations that contrast with the red coating, and keep the tray cool and dry until serving. Keep the cookies level while they set and handle them only after the coating is firm. The simple sequence of dipping, decorating, and resting gives the finished dessert a clean look without requiring special baking skills. Choose decorations that contrast with the red coating, and keep the tray cool and dry until serving. Keep the cookies level while they set and handle them only after the coating is firm. The simple sequence of dipping, decorating, and resting gives the finished dessert a clean look without requiring special baking skills. Choose decorations that contrast with the red coating, and keep the tray cool and dry until serving.

Love bug Oreo cookies are a quick way to make a familiar dessert feel occasion-ready without advanced baking skills.


Love Bug Oreo Cookies
Ingredients
Ingredients
- 24 chocolate sandwich cookies
- 12 ounces red candy melts melted
- 24 candy eyes
- 1/4 cup black decorating icing
- 1/4 cup red and white sprinkles
Instructions
Instructions
- Line a tray with parchment and arrange the cookies.
- Dip each cookie halfway into melted red candy coating and return it to the tray.
- While the coating is soft, add candy eyes and sprinkles.
- Pipe small black dots and lines with decorating icing, then let the coating set completely.