

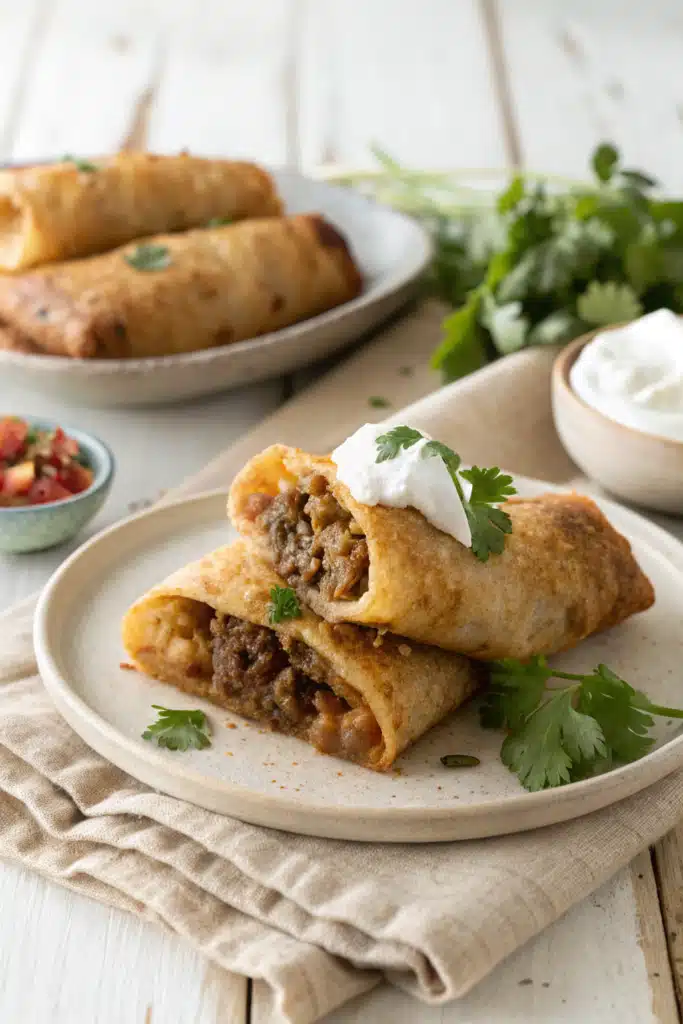
Homemade Beef Chimichangas
Let’s be real for a second. We all have those nights where a standard, run-of-the-mill taco dinner just isn’t going to cut it. You want something hearty, something incredibly crispy, and something that absolutely covers your plate in melted cheese to make you do a happy little dance at the dinner table. That is exactly where these homemade beef chimichangas come into play.
I remember the first time I tried making these at home; I was genuinely a little intimidated. Deep frying a burrito? It sounded like a restaurant-only kind of magic that I had no business trying in my own kitchen. But honestly? It is shockingly simple to pull off. Once you hear that sizzle when the tortilla hits the pan and watch it turn that glorious golden brown, you will be completely hooked.
This isn’t just dinner; it is an event. Whether you are trying to spice up your regular Tuesday night rotation or hosting friends for a weekend get-together, these crispy, savory, beef-stuffed beauties are guaranteed to steal the show. Grab your favorite skillet, and let’s get cooking!
What Are Homemade Beef Chimichangas?
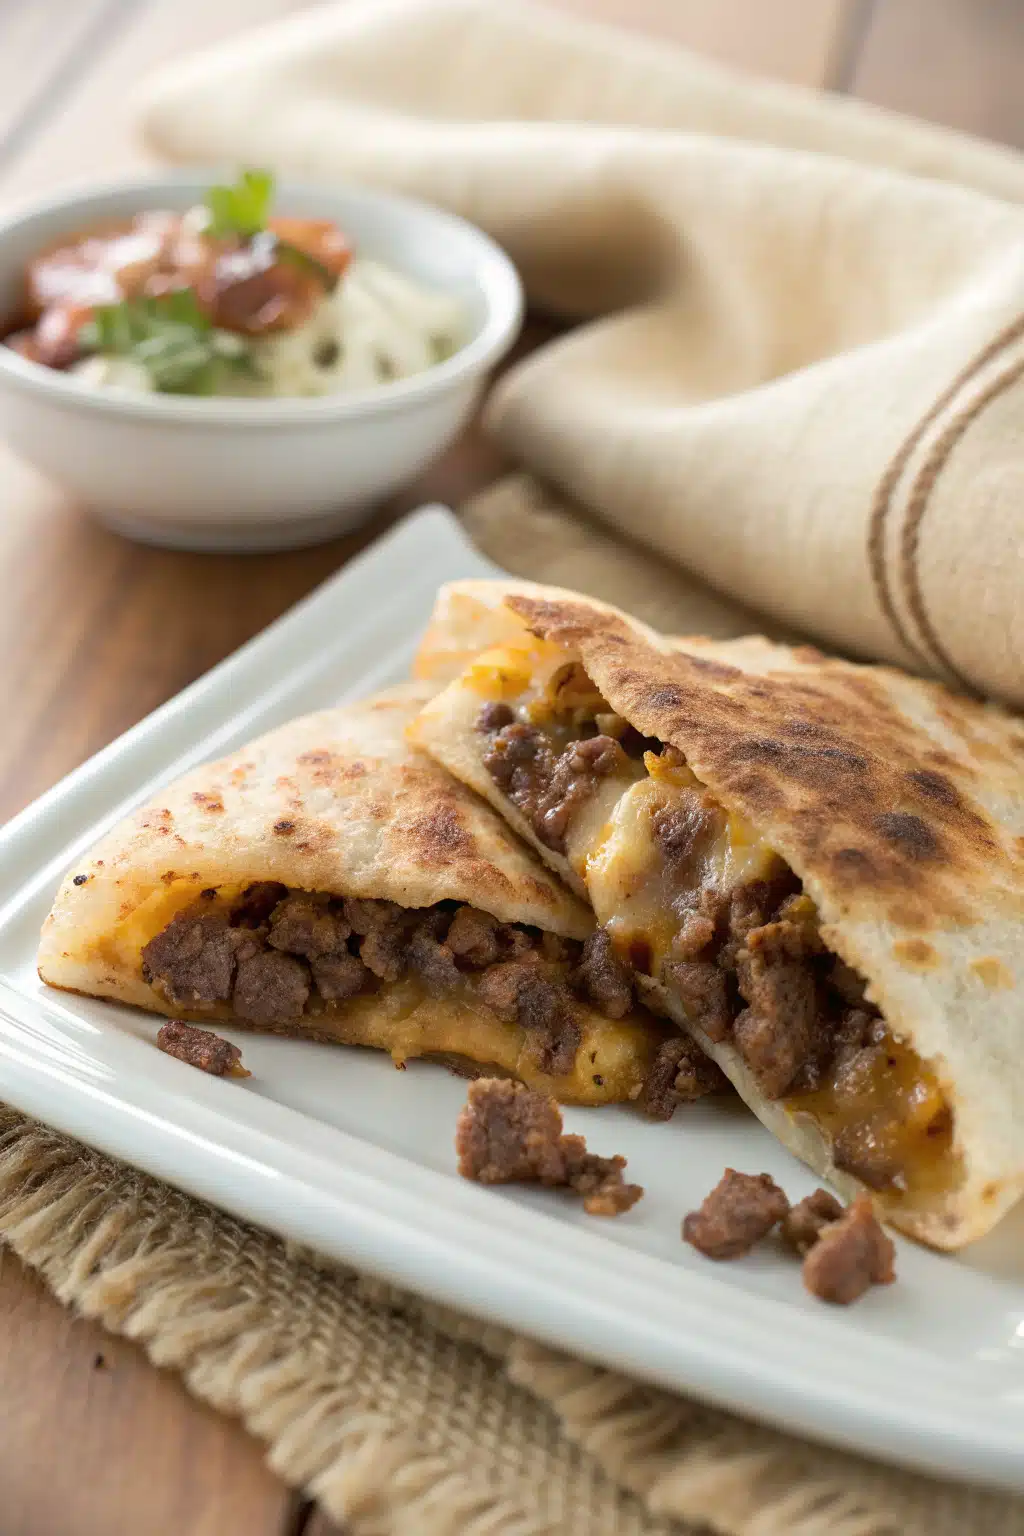
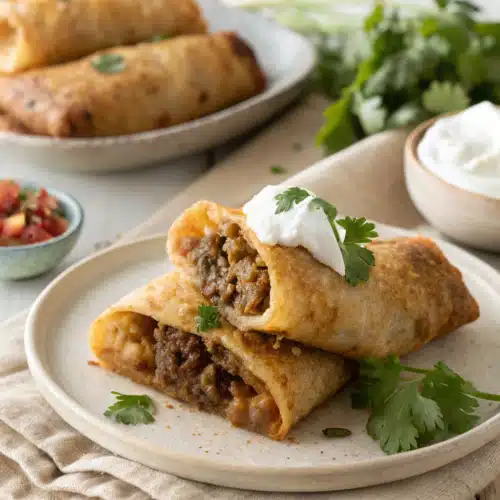
If you have never had the absolute pleasure of eating a chimichanga, please prepare to meet your new favorite comfort food. At its most basic level, a chimichanga is a large burrito that has been deep-fried or pan-fried to crispy perfection. While traditional burritos are soft and pliable, chimichangas offer this incredible, satisfying crunch when you cut into them.
The story goes that the chimichanga was actually invented by accident in Arizona when a burrito was unintentionally dropped into a commercial deep fryer. Whoever made that mistake deserves a culinary award, honestly. Inside that crispy flour tortilla shell, you will typically find a savory filling of seasoned meats, beans, and cheese. For this specific recipe, we are using a richly spiced ground beef mixture that cooks up fast but tastes like it has been simmering all day. Once it is fried, the tortilla becomes flaky and golden, creating the ultimate vessel for all your favorite Mexican-inspired toppings.
How to Make Homemade Beef Chimichangas
Quick Overview
Making these chimichangas is essentially a simple three-part process, and I promise none of it is complicated. First, we are going to build our flavorful beef filling on the stovetop. We will brown the meat, stir in our spices, and mix in a little refried beans and cheese right into the beef so the filling stays perfectly bound together. Next comes the rolling. We will wrap the filling tightly inside large flour tortillas, tucking the ends in so nothing spills out. Finally, we do a quick shallow fry in a skillet until all sides are golden and crispy. It is fast, it is fun, and the results are incredibly rewarding!
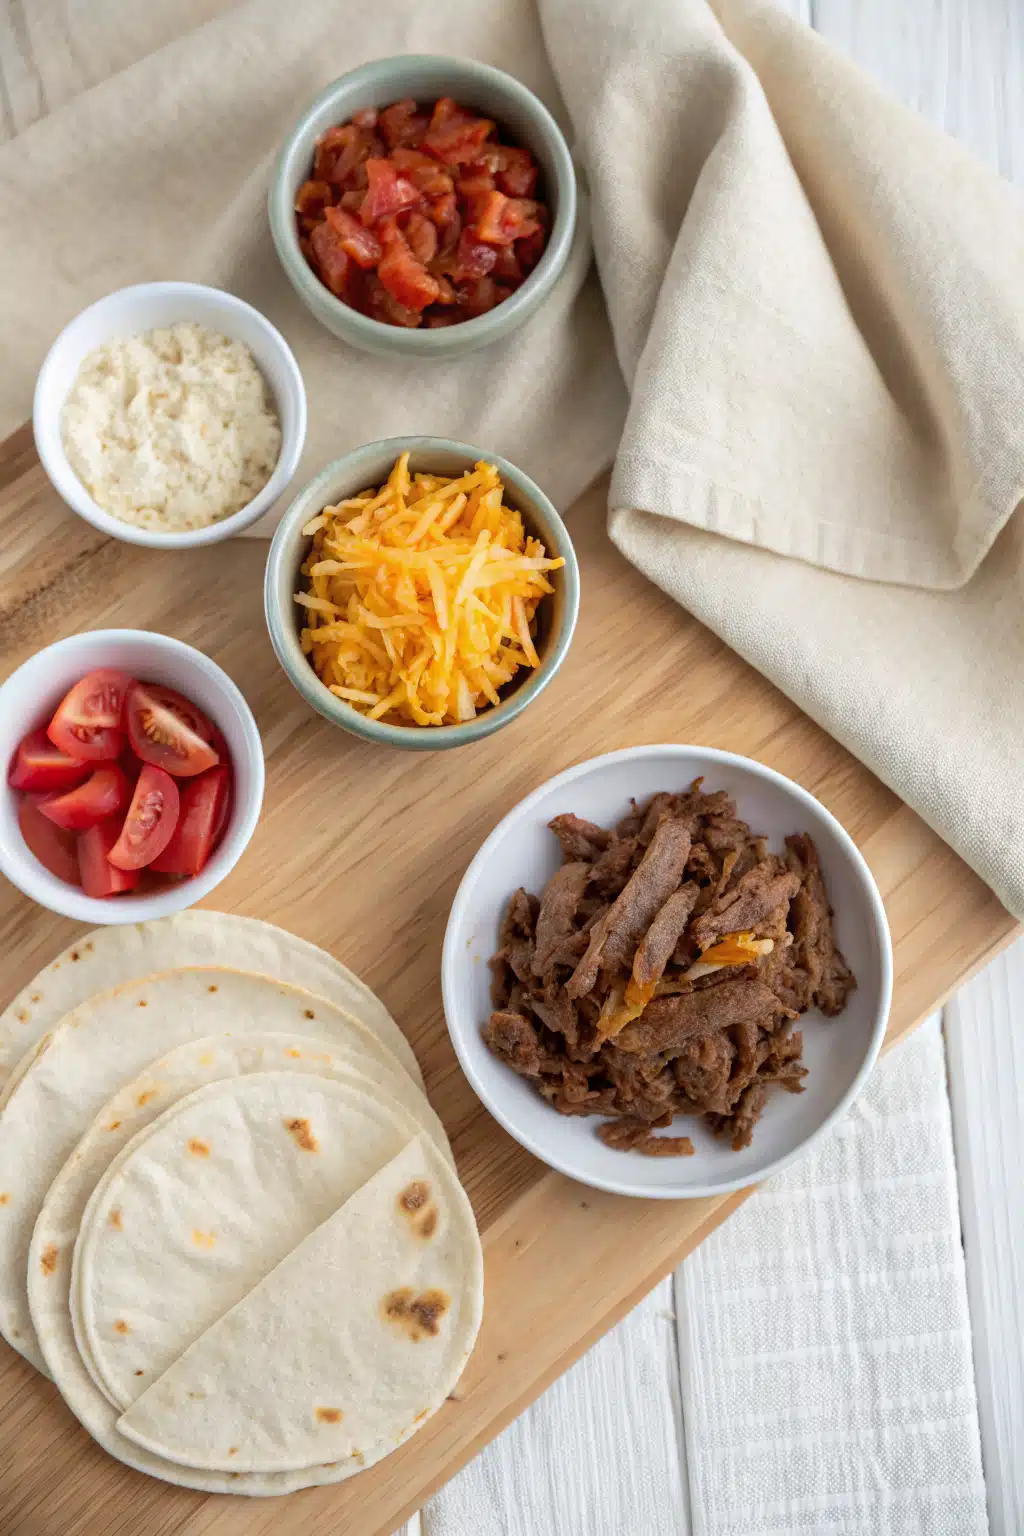
Ingredients
- Ground Beef: I prefer 80/20 for the best flavor, but lean ground beef works perfectly fine too.
- Yellow Onion & Garlic: Essential aromatics for building that savory base.
- Taco Seasoning: Use your favorite store-bought packet or a homemade blend.
- Diced Green Chiles: Just a small can to add a mild, tangy heat.
- Refried Beans: This acts as the “glue” that holds our beef filling together.
- Shredded Cheese: A mix of sharp cheddar and Monterey Jack melts beautifully.
- Large Flour Tortillas: Make sure they are burrito-sized so you have plenty of room to roll.
- Cooking Oil: Vegetable, canola, or peanut oil for frying.
Step-by-Step Instructions
Step 1: Brown the Beef and Aromatics
Heat a large skillet over medium-high heat. Add your ground beef and diced onions, breaking the meat apart with a wooden spoon as it cooks. Once the beef is no longer pink, drain any excess grease from the pan. Stir in the minced garlic and cook for just one more minute until it smells incredibly fragrant.
Step 2: Build the Filling
Turn the heat down to medium-low. Sprinkle your taco seasoning over the beef, pour in the diced green chiles, and add the refried beans. Stir everything together until the beans are smooth and fully incorporated into the meat. Remove the skillet from the heat and stir in the shredded cheese. Let the mixture cool for just a few minutes so it’s easier to handle.
Step 3: Roll the Chimichangas
Warm your tortillas in the microwave for about 20 seconds so they are soft and pliable. Spoon a generous amount of the beef filling just below the center of each tortilla. Fold the left and right sides in over the filling, then take the bottom edge and roll it up tightly, just like a burrito. You want these wrapped as snugly as possible!
Step 4: Fry to Golden Perfection
Pour about an inch of oil into a deep skillet and heat it to 350 degrees Fahrenheit. Carefully place the chimichangas into the hot oil, seam-side down. Frying the seam first seals it shut so they don’t burst open. Fry for about 1 to 2 minutes per side until the tortillas are golden brown and crispy. Transfer them to a paper towel-lined plate to drain.
What to Serve It With
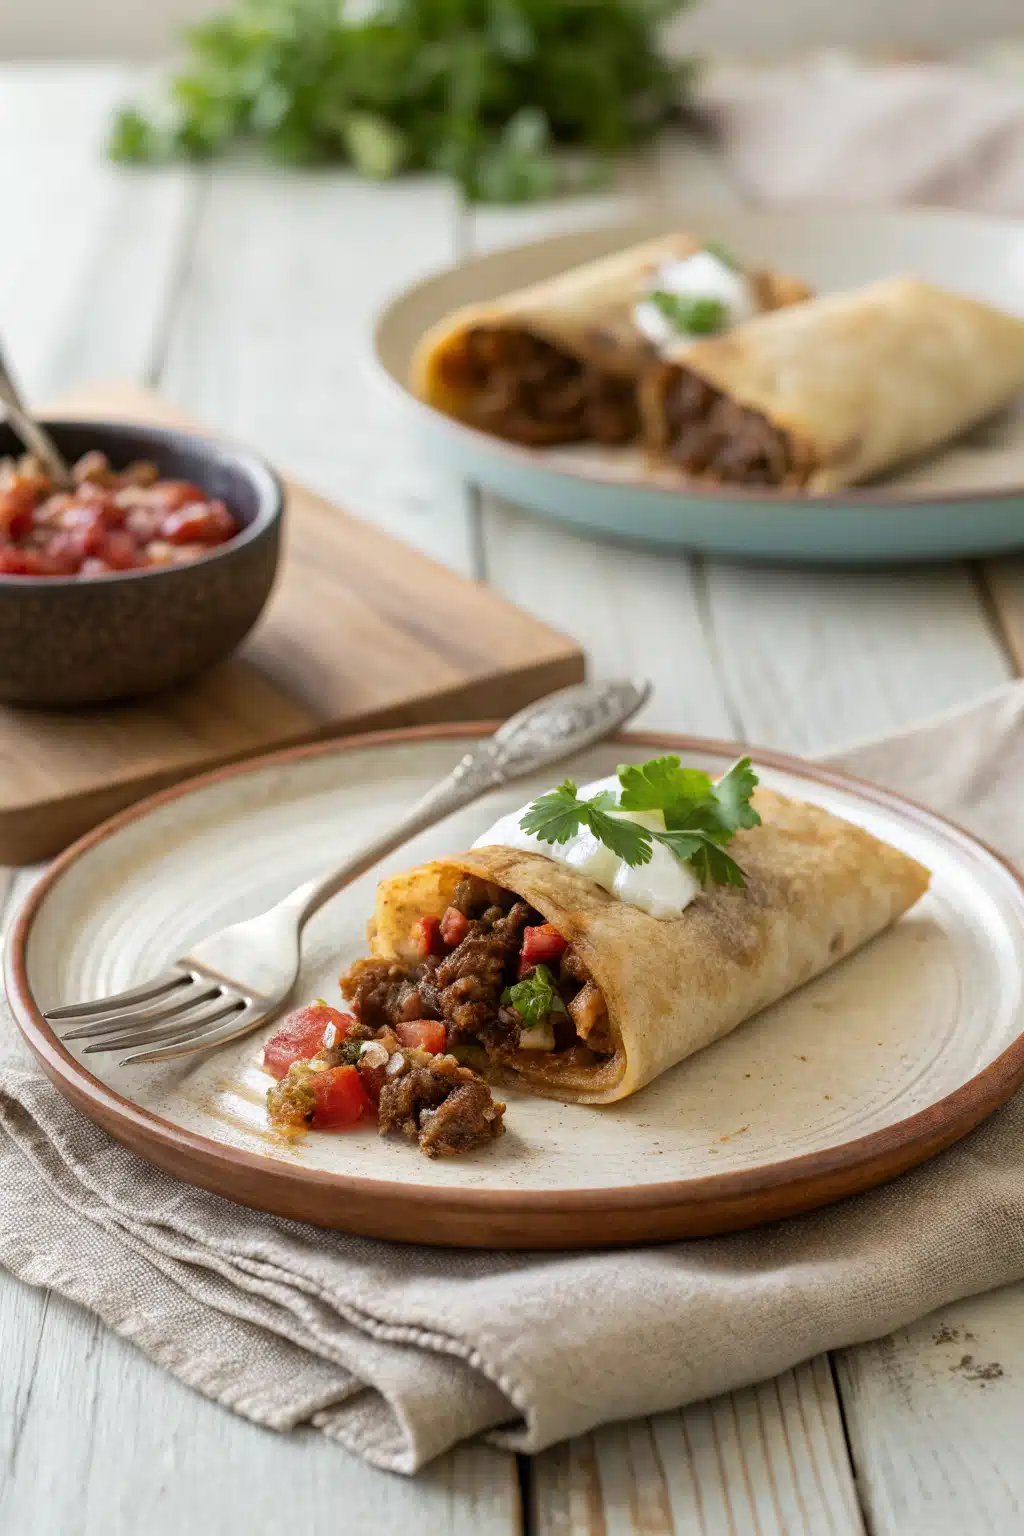
A chimichanga is practically begging to be smothered in delicious toppings. I always serve these with a giant dollop of sour cream, a scoop of fresh guacamole, and a spoonful of vibrant pico de gallo. If you want to recreate that authentic restaurant experience, warm up some queso dip and pour it right over the top before serving.
For side dishes, you cannot go wrong with classic Mexican rice and a side of charro or black beans. If you want to keep things a little lighter to balance out the richness of the fried tortilla, a simple, crisp green salad with a cilantro-lime vinaigrette is a fantastic pairing.
Top Tips for Perfecting Your Chimichangas
Warm your tortillas: I cannot stress this enough! If you try to roll cold tortillas, they will crack, tear, and leak filling into your hot oil. A quick zap in the microwave makes them stretchy and easy to work with.
Do not overfill: It is so tempting to stuff these to the brim, but overfilled chimichangas are incredibly difficult to roll tightly. Stick to about half a cup of filling per tortilla.
Secure with toothpicks: If you are worried about your rolling skills, simply weave a wooden toothpick through the seam of the tortilla before frying. Just remember to take it out before you take a bite!
Watch your oil temperature: If the oil is too hot, the tortilla will burn before the inside gets hot. If it’s too cold, the tortilla will soak up the oil and become incredibly greasy. Medium heat is your best friend here.
Storing and Reheating Tips
If you happen to have leftovers, let them cool completely before storing them in an airtight container in the fridge. They will stay fresh for up to 4 days. You can also wrap them individually in foil and freeze them for up to 3 months!
When it comes to reheating, step away from the microwave! The microwave will turn that beautiful, crispy tortilla into a soggy mess. Instead, preheat your oven to 375 degrees Fahrenheit, place the chimichangas on a wire rack over a baking sheet, and bake for 15-20 minutes until heated through and crispy again. If you have an air fryer, 5-7 minutes at 350 degrees works absolute wonders.
Frequently Asked Questions
Yes, you definitely can! If you want a lighter version, brush the rolled chimichangas generously with melted butter or cooking oil. Bake them at 400 degrees Fahrenheit for about 20-25 minutes, flipping halfway through, until they are golden and crispy.
Absolutely. Spray the chimichangas lightly with cooking spray and place them seam-side down in your air fryer basket. Cook at 380 degrees Fahrenheit for 8-10 minutes, flipping them once halfway through the cooking time.
You definitely need large, burrito-sized flour tortillas for this recipe. Corn tortillas will break when rolled, and smaller fajita-sized flour tortillas won’t hold enough filling to make a proper chimichanga.
Final Thoughts
There you have it—the ultimate guide to making restaurant-quality homemade beef chimichangas right in your own kitchen! I really hope you give this recipe a try, because it has brought so much joy (and so many full bellies) to my own family over the years. It’s crispy, it’s cheesy, and it is everything you could ever want in a comforting dinner.
If you decide to whip these up, I would absolutely love to hear how they turned out for you! Don’t be afraid to experiment with the fillings and make this recipe your own. Grab those tortillas, get that oil sizzling, and treat yourself to a dinner you won’t soon forget.
Chicken Chimichangas
Ingredients
Main Ingredients
- 2 cups cooked shredded chicken
- 1 cup shredded cheddar cheese
- 0.66 cup picante sauce or salsa
- 1 tbsp ground cumin
- 1 tsp dried oregano
- 6 flour tortillas 8-inch
- 2 tbsp melted butter or vegetable oil
Instructions
Preparation Steps
- Preheat oven to 400°F (200°C) and lightly grease a baking dish.
- In a medium bowl, mix the shredded chicken, picante sauce, cumin, oregano, and cheddar cheese.
- Spoon about 0.5 cup of the chicken mixture onto the center of each flour tortilla.
- Fold the opposite sides of the tortilla over the filling, then roll up from the bottom to form a tight cylinder.
- Place the chimichangas seam-side down in the prepared baking dish and brush the tops with melted butter or oil.
- Bake for 25 minutes, or until the tortillas are golden brown and crispy.
- Serve hot, garnished with extra cheese, sour cream, and guacamole if desired.
Notes
Featured Comments
“I absolutely love chimichangas—this sounds like the perfect comfort food! Crispy on the outside, warm and delicious inside? Yes, please.”
“Impressed! Clear steps and comforting results. Perfect for busy nights.”
“New favorite here — family favorite. crowd-pleaser was spot on.”
“Super easy and turned out amazing! My family asked for seconds. Saving this one.”
“This sweet treat was absolutely loved — the zingy really stands out. Thanks!”
“Made it tonight and wow — perfect for busy nights! Will definitely make Make Chimichangas again.”


I absolutely love chimichangas—this sounds like the perfect comfort food! Crispy on the outside, warm and delicious inside? Yes, please.