

Incredibly Juicy Garlic Parmesan Chicken (Just 4 Ingredients!)
If your weeknights look anything like mine, dinner time can feel like a total scramble. Between juggling homework, walking the dogs, and trying to keep the house from falling apart, spending an hour over a hot stove is the absolute last thing I want to do. You know those nights where you stand in front of the open fridge, hoping a fully cooked meal will just magically appear? We have all been there. That is exactly why this garlic parmesan chicken has become a permanent fixture in my weekly meal rotation.
I am always on the hunt for recipes that require minimal effort but deliver maximum flavor, and let me tell you, this one is an absolute lifesaver. You only need four basic ingredients—things you probably already have sitting in your fridge and pantry right now. It takes maybe five minutes of prep work before you pop it into the oven, leaving you completely free to tackle everything else on your to-do list. The best part? It tastes like something you would order at a fancy Italian restaurant, but you get to eat it in your sweatpants.
What Is Garlic Parmesan Chicken?
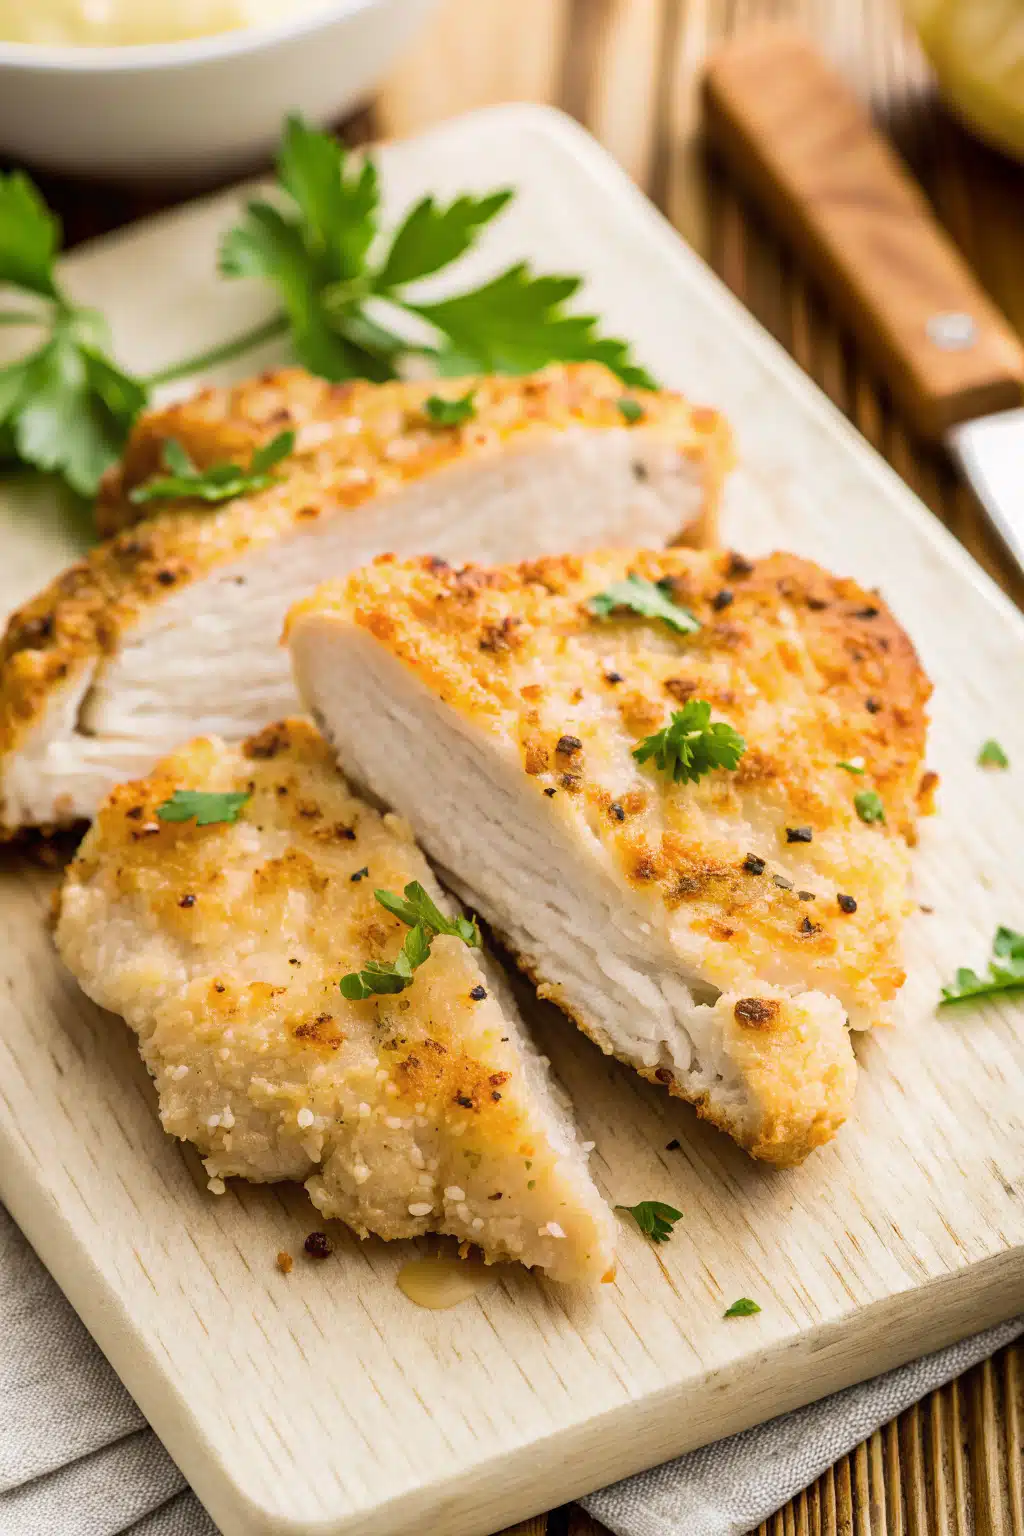
At its core, garlic parmesan chicken is a brilliant little dinner hack that transforms plain, boring chicken breasts into something incredibly rich, juicy, and flavorful. Instead of dealing with complicated breading stations or standing over a frying pan dealing with popping oil, you simply coat thin chicken cutlets in a savory, creamy mixture and bake them.
The magic really happens in the oven. The topping—a simple blend of mayonnaise, savory parmesan cheese, minced garlic, and a touch of seasoning—melts down over the chicken as it cooks. It creates this beautiful, golden-brown crust on top while simultaneously locking all the moisture inside the meat. If you have ever struggled with dry, rubbery baked chicken, this method completely eliminates that problem. It is a naturally low-carb and keto-friendly dish, but it is so deeply comforting and decadent that nobody at the table will even realize they are eating a “diet-friendly” meal. It is just genuinely good food.
How to Make Garlic Parmesan Chicken
Quick Overview
This is literally a 1-2-3 and into-the-oven kind of situation. You are just going to arrange your chicken in a dish, mix up your creamy cheese topping, slather it over the meat, and let the oven do all the heavy lifting. The whole prep process takes about five minutes, and then you have 40 minutes of hands-off baking time to relax, make a quick side salad, or just pour yourself a glass of wine. It really does not get much simpler than this!
Ingredients
Here is what you will need to pull this together. Don’t forget to check the recipe card for the exact measurements!
- Chicken Breasts: I highly recommend using thinly sliced chicken cutlets. They cook so much faster and more evenly than thick breasts.
- Mayonnaise: This is the secret ingredient! Use regular, full-fat mayo or an olive oil-based one. Avoid fat-free mayo, as it gets a weird texture when baked.
- Parmesan Cheese: Shredded parmesan works best for that gorgeous golden crust. You’ll divide this to mix some into the sauce and sprinkle the rest on top.
- Garlic Cloves: Freshly minced garlic gives the best flavor punch, but jarred minced garlic totally works in a pinch.
- Seasonings: Just a little garlic salt (or seasoned salt) and freshly cracked black pepper.
Step-by-Step Instructions
Step 1: Preheat & Prep Pan
Start by preheating your oven to 375 degrees Fahrenheit. Grab a 9×13 casserole dish or a large rimmed baking sheet and give it a quick spray with non-stick cooking spray. Lay your thinly sliced chicken breasts flat in the dish in a single, even layer.
Step 2: Mix the Creamy Topping
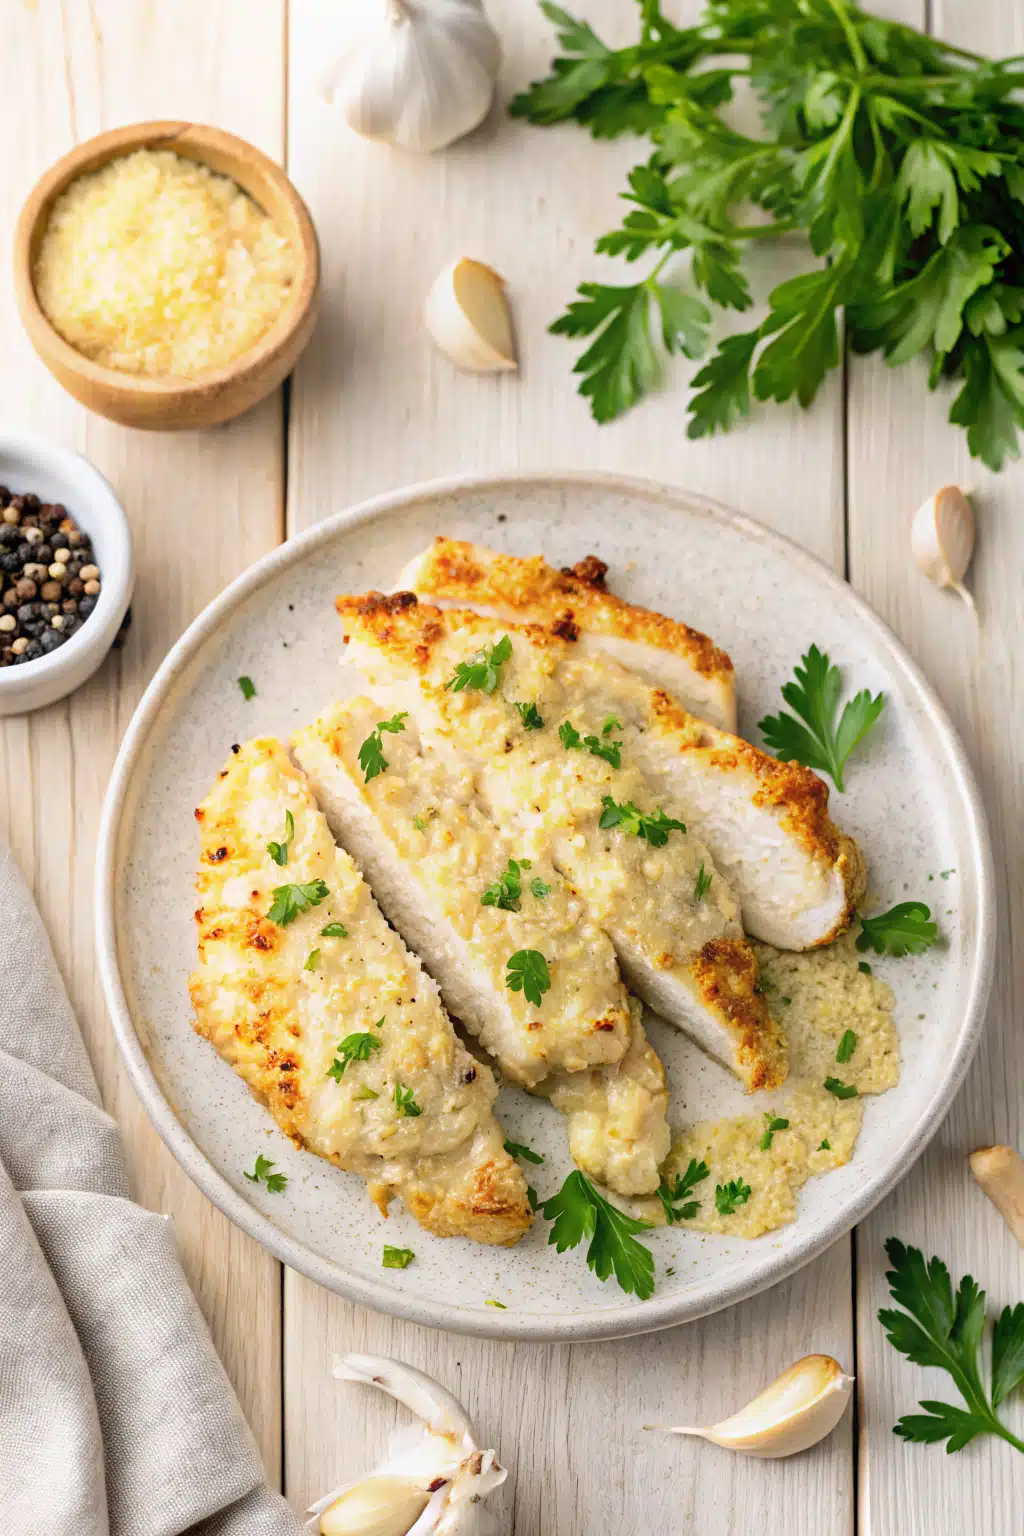
In a small mixing bowl, whisk together your mayonnaise, half a cup of the shredded parmesan cheese, the minced garlic, your garlic salt, and the black pepper. Give it a really good stir until everything is completely combined into a thick paste.
Step 3: Spread and Sprinkle
Take a spoon or a spatula and spread that creamy mayo mixture evenly right over the top of the raw chicken breasts. You want to make sure every piece is nicely coated. Then, take your remaining one cup of shredded parmesan cheese and sprinkle it generously all over the top.
Step 4: Bake to Perfection
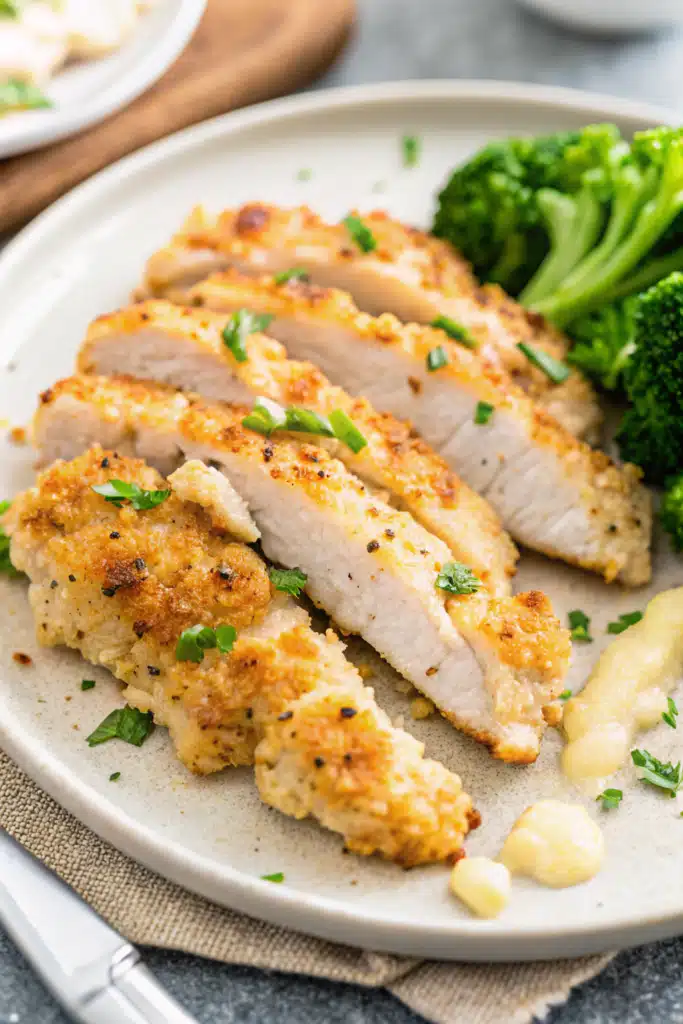
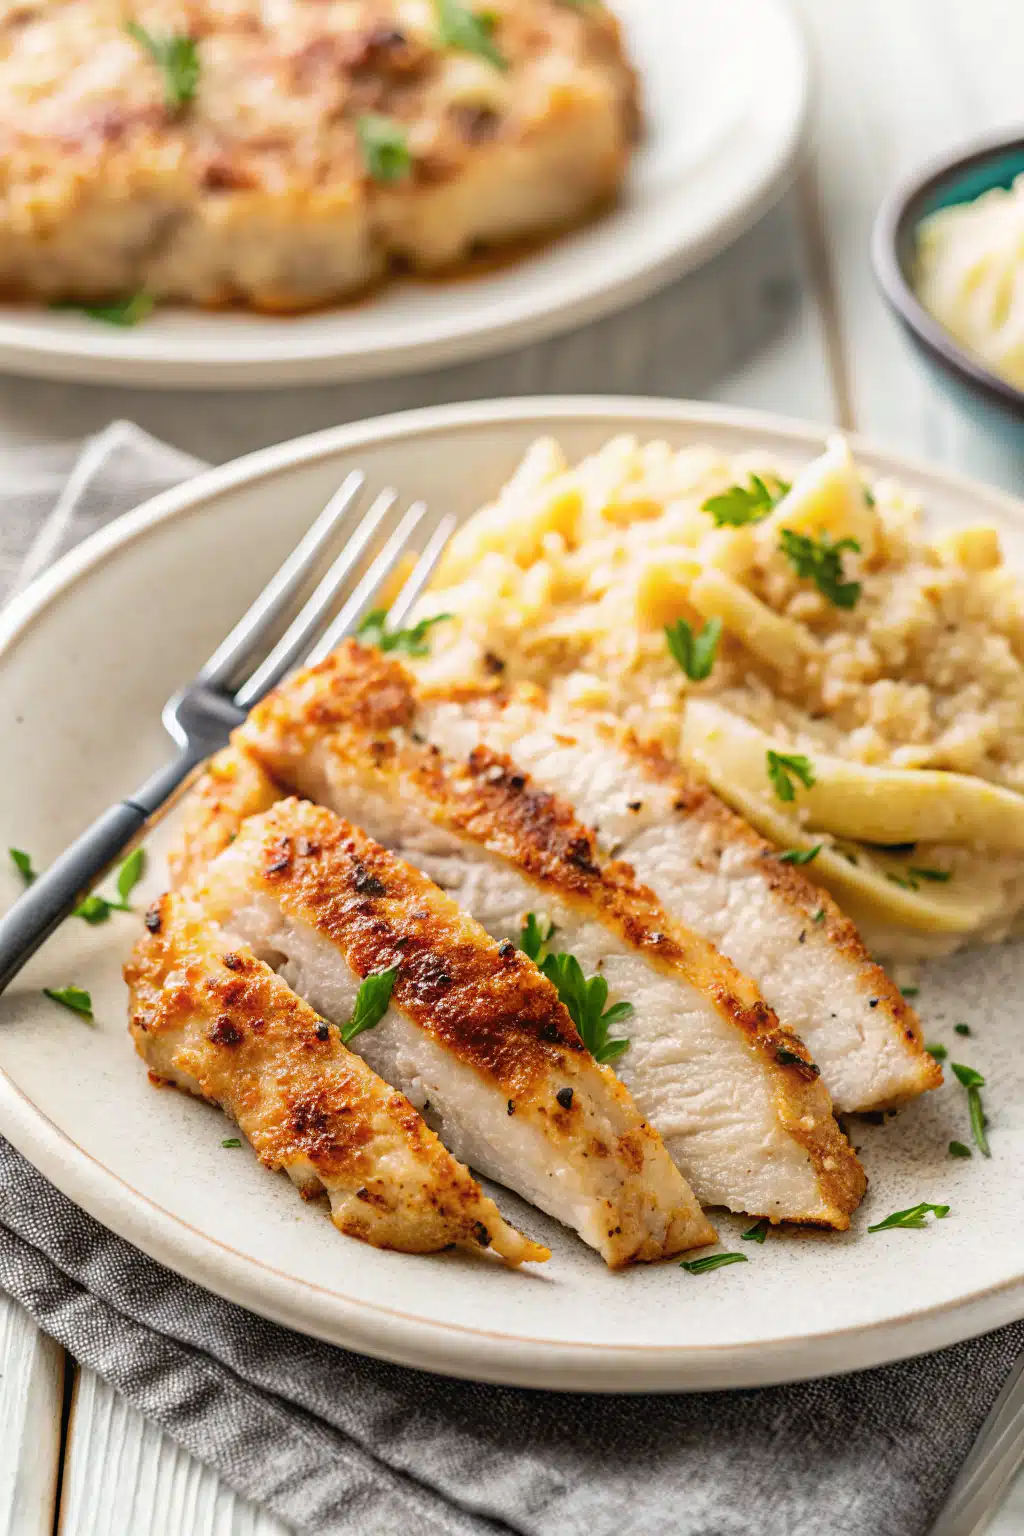
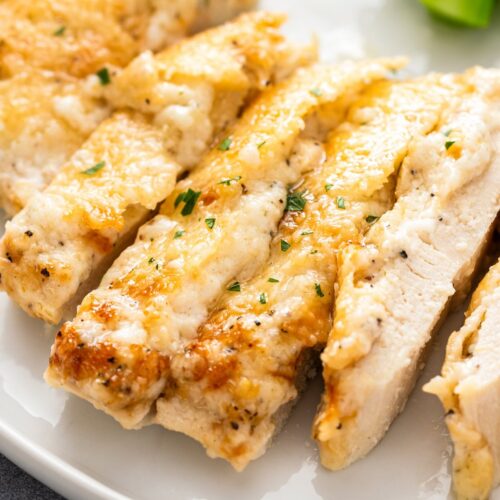
Slide the dish into your preheated oven and bake for about 40 minutes. You are looking for an internal temperature of 165 degrees Fahrenheit on a meat thermometer, and the cheese on top should be beautifully browned and bubbling. Let it rest for a minute, garnish with a little fresh parsley if you want to be fancy, and serve hot!
What to Serve It With
Because this garlic parmesan chicken is so rich and savory, I love pairing it with sides that balance out the plate. If you want to keep things light and low-carb, a crisp cucumber tomato salad is absolutely perfect. The acidity of the tomatoes cuts right through the creaminess of the chicken. Simple sautéed green beans or parmesan roasted broccoli are also fantastic vegetable options.
If carbs aren’t a concern and you want a truly comforting meal, you absolutely cannot go wrong serving this alongside creamy mashed potatoes or buttered pasta. The juices from the chicken mix with the melted cheese to create a sort of makeshift sauce that is practically begging to be soaked up by something starchy. My kids always beg for homemade garlic knots on the side, too!
Top Tips for Perfecting Your Garlic Parmesan Chicken
Do not fear the mayo: I know some people are totally weirded out by the idea of baking mayonnaise, but trust me on this one. You will not taste mayo in the final dish! It acts purely as a binder for the cheese and seals the juices right into the chicken. Just make sure you avoid fat-free mayonnaise, as it tends to separate and turn gummy in the oven.
Thin your chicken: If you can only find massive, thick chicken breasts at the store, do yourself a favor and slice them in half horizontally to make thinner cutlets. Alternatively, you can put them between two pieces of plastic wrap and pound them out to about half an inch thick. This ensures they cook quickly and stay incredibly tender.
Switch up the protein: This topping isn’t just for chicken! It is actually phenomenal on firm white fish like cod, flounder, or snapper. The mayo mixture keeps the delicate fish incredibly moist. Just bump the oven heat up to 400 degrees Fahrenheit and reduce the cooking time to about 20 minutes.
Storing and Reheating Tips
If you happen to have leftovers (which is a rare occurrence in my house!), let the chicken cool down completely before transferring it to an airtight container. It will keep beautifully in the refrigerator for up to three days. To reheat it, you can just pop it in the microwave until warmed through, though I prefer reheating it in the oven or air fryer to help crisp that cheese back up.
You can also freeze this recipe! If freezing cooked leftovers, they will last up to three months. The cheese topping won’t be quite as crispy when it thaws, but the flavor is still great. For meal prep, you can actually freeze the chicken uncooked. Just assemble the raw chicken and the topping in a freezer-safe dish, wrap it tightly in plastic wrap and foil, and freeze. You can thaw it overnight in the fridge before baking, or even bake it straight from frozen by adding an extra 15 to 20 minutes to your cook time.
Frequently Asked Questions
Final Thoughts
Finding a dinner that is quick, requires almost no cleanup, and actually gets my whole family excited to sit at the table is like finding gold. This creamy garlic parmesan chicken checks absolutely every single box for me. It is comforting, incredibly flavorful, and saves my sanity on the busiest of weeknights. I really hope it brings as much ease and deliciousness to your dinner table as it does to mine. If you try it out, please let me know how it goes—I always love hearing from you guys!
Creamy Garlic Parmesan Chicken
Ingredients
Main Ingredients
- 1 lb boneless, skinless, chicken breasts thinly sliced
- 0.75 cup mayonnaise
- 1.5 cup shredded parmesan cheese divided
- 2 cloves garlic minced
- 1.5 teaspoons garlic salt or seasoned salt
- 1 teaspoon freshly cracked pepper
- chopped parsley optional garnish
Instructions
Preparation Steps
- Preheat oven to 375°F. Grease a 9x13 casserole dish or large baking dish. Place chicken breasts in an even layer in the dish.
- In a small bowl, whisk together mayo, 0.5 cup parmesan cheese, minced garlic, salt and pepper.
- Spread mixture over chicken breasts. Sprinkle the remaining 1 cup parmesan cheese over the top of the chicken.
- Bake for 40 mins, or until an internal temperature on an instant-read meat thermometer reaches 165°F. Serve hot and garnish with parsley, if desired.
Featured Comments
“Impressed! Clear steps and comforting results. Perfect for busy nights.”
“New favorite here — spot on. crowd-pleaser was spot on.”
“Super easy and turned out amazing! My family asked for seconds. Saving this one.”
“This sweet treat was absolutely loved — the cozy really stands out. Thanks!”
“Made it tonight and wow — so flavorful! Will definitely make Parmesan chicken again.”
“Packed with flavor and so simple. Exactly what I wanted from Parmesan chicken.”


