


The Absolute Best Soft Peanut Butter Blossoms
There is something truly magical about the moment the weather turns chilly and the holiday baking season officially begins. If your house is anything like mine, the oven is practically running on a loop from Thanksgiving right through New Year’s! But out of all the fancy layered bars, intricate gingerbread houses, and delicate truffles I whip up every single year, there is one absolute non-negotiable classic that my family begs for: Peanut Butter Blossoms.
I vividly remember sitting on the kitchen counter as a little girl, my hands covered in sparkly granulated sugar, waiting for my mom to give me the green light to press those little chocolate kisses into the warm, puffy cookies. It is a core memory, and honestly, the smell of sweet peanut butter baking in the oven still brings me right back to that cozy kitchen. Whether you are baking these for a neighborhood cookie exchange, sending a care package to a loved one, or just craving a little nostalgic comfort on a random Tuesday night, this is the only recipe you will ever need. Let’s get baking!
What Are Peanut Butter Blossoms?
If you somehow missed out on these beauties growing up, let me introduce you to your new favorite treat. What exactly are Peanut Butter Blossoms? They are the quintessential American cookie, making a star appearance at nearly every holiday party, potluck, and bake sale across the country.
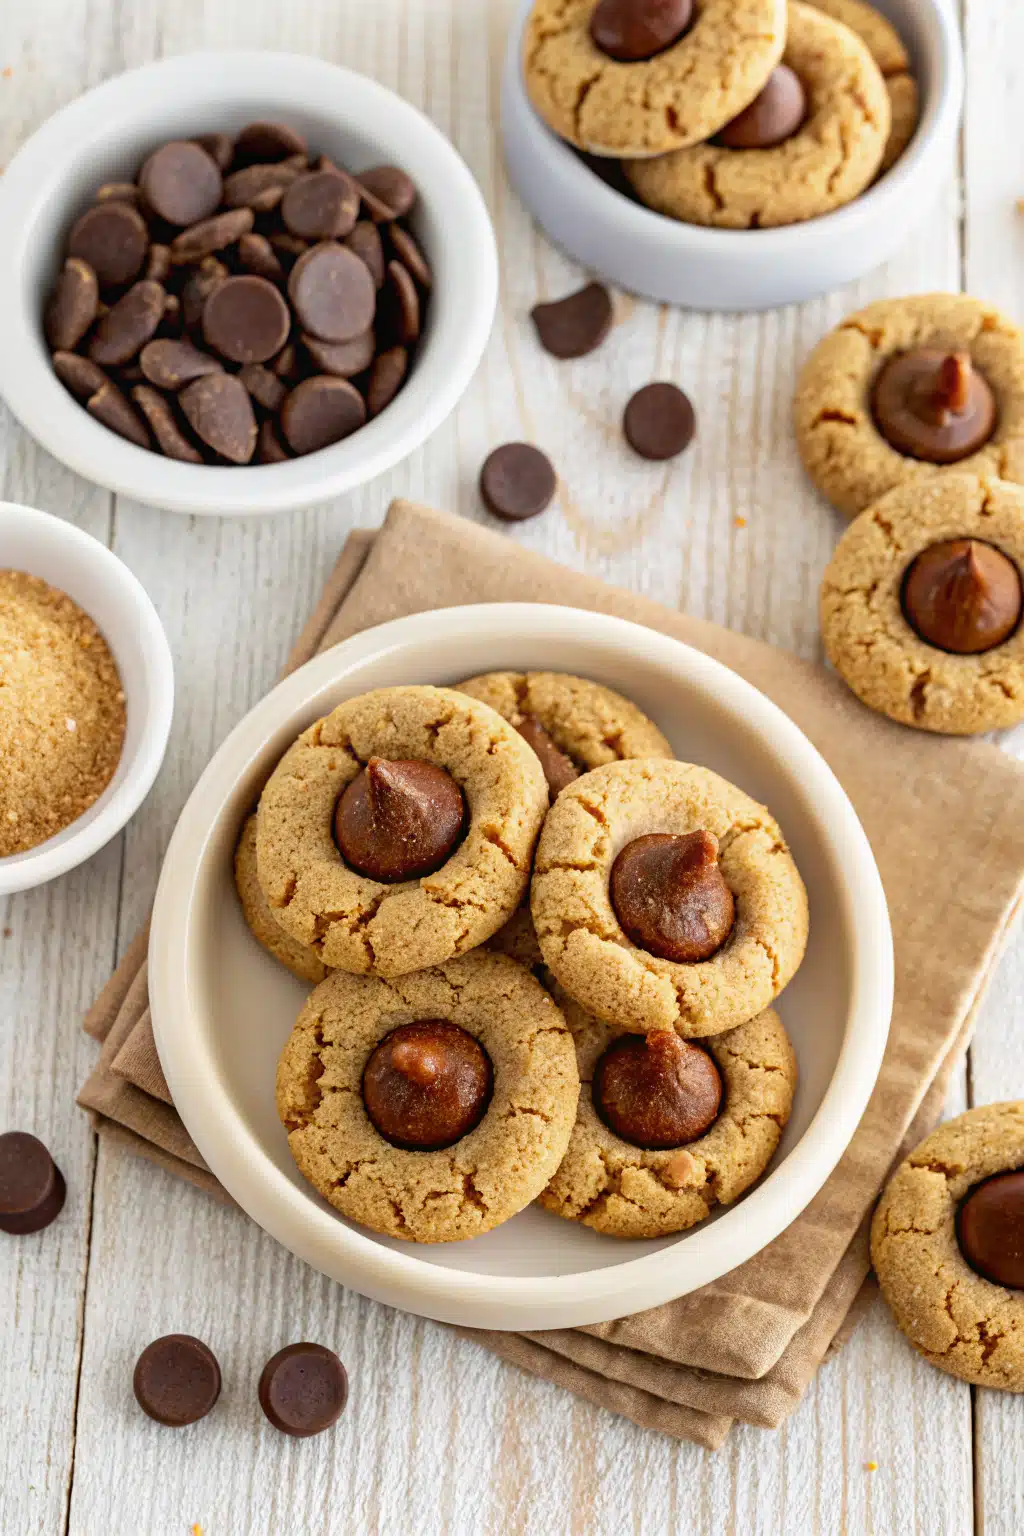
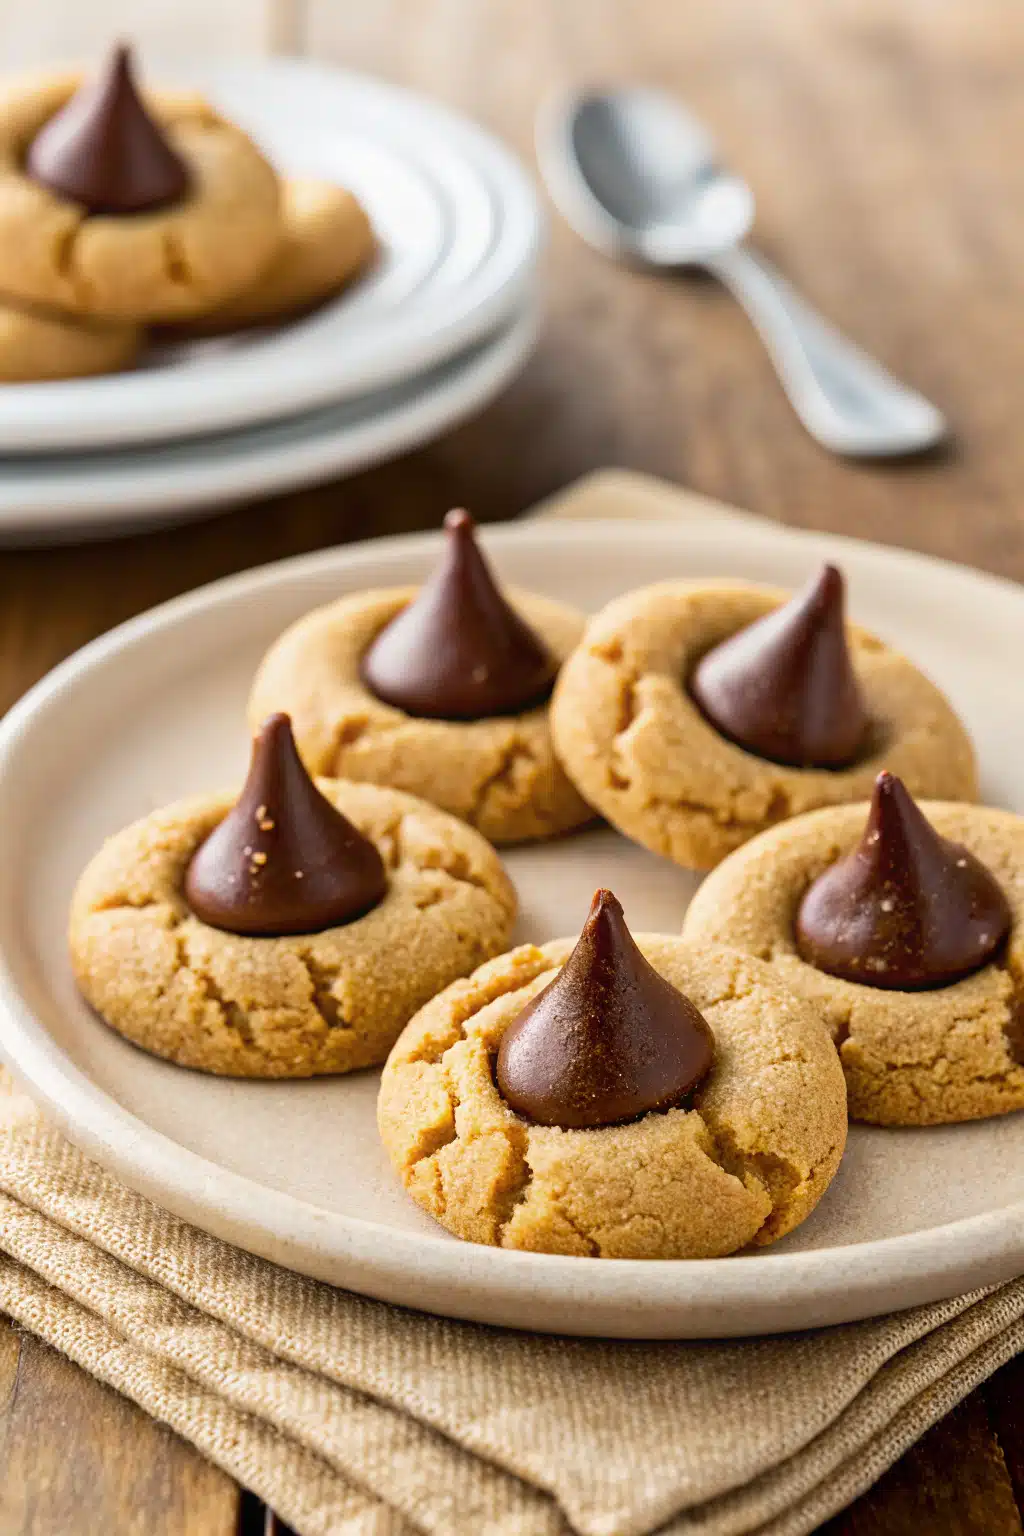
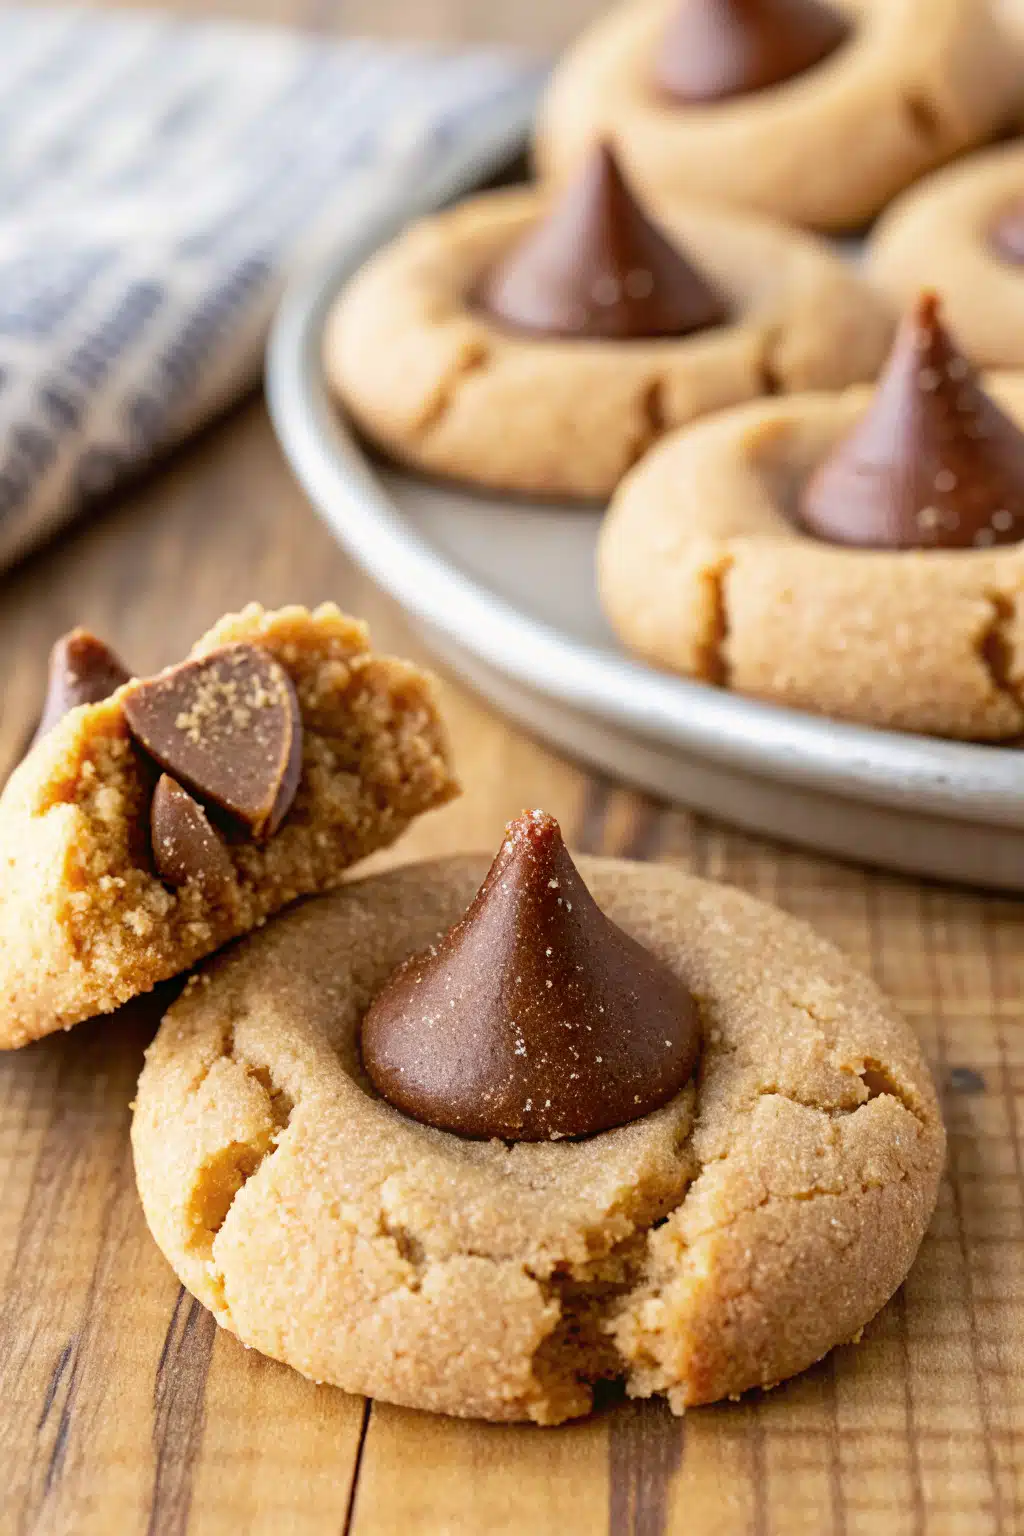
At their core, they feature a rich, tender, and incredibly soft peanut butter cookie dough that gets rolled into little bite-sized balls. Before hitting the oven, each dough ball is generously coated in a layer of granulated sugar, which gives the finished cookie a beautiful, slightly crisp, and sparkly exterior.
But the real magic happens right after they finish baking. While the cookies are still piping hot and fresh out of the oven, a solid milk chocolate kiss is pressed firmly into the center of each one. The gentle heat from the cookie causes the bottom of the chocolate to melt just enough so it adheres perfectly, creating a stunning visual blossom effect. It is the absolute ultimate flavor trifecta: sweet, slightly salty, and intensely chocolatey.
How to Make Peanut Butter Blossoms
Quick Overview
Making these Peanut Butter Blossoms is an absolute breeze, even if you are a total beginner in the kitchen. You only need about 15 minutes of active prep time, and the oven does the rest of the heavy lifting. The process is incredibly straightforward: you will mix your dry ingredients, cream together your wet ingredients, and then combine the two into a soft, manageable dough. From there, it is just a matter of rolling the dough into little spheres, giving them a quick toss in some sugar, and popping them into the oven. The most tedious part is simply unwrapping all those chocolate kisses, which is a fantastic task to hand off to any kids hanging around the kitchen!
Ingredients
- Butter-Flavored Shortening: A half cup is all you need for the softest texture imaginable. You can use unsalted butter if you must, but they will not be quite as soft!
- Creamy Peanut Butter: Stick to the classics like Jif or Skippy. Natural peanut butter tends to separate and makes the dough too oily.
- Sugars: A mix of granulated sugar and packed brown sugar gives you the perfect sweetness and a lovely hint of caramel flavor. You will also need extra white sugar for rolling.
- The Wet Ingredients: One large egg, two tablespoons of whole milk, and a splash of pure vanilla extract.
- The Dry Ingredients: All-purpose flour (spooned and leveled!), baking soda, and a pinch of salt.
- Milk Chocolate Kisses: You will need 48 unwrapped kisses to crown your beautiful cookies.
Step-by-Step Instructions
Step 1: Preheat & Prep Your Pan
Start by preheating your oven to 375 degrees Fahrenheit. Grab your favorite baking sheet and line it with a piece of parchment paper. This prevents sticking and makes cleanup a total breeze.
Step 2: Whisk the Dry Ingredients
In a medium-sized bowl, toss together your all-purpose flour, baking soda, and salt. Give it a good whisk so everything is evenly distributed, then set the bowl aside for a moment.
Step 3: Cream the Wet Ingredients
In a large mixing bowl, beat the butter-flavored shortening and creamy peanut butter together until they are smooth. Add in your granulated sugar and brown sugar, beating the mixture for about two to three minutes until it looks incredibly light and fluffy. Toss in the egg, whole milk, and vanilla extract, and mix until everything is perfectly combined.
Step 4: Form the Dough
Gradually pour your dry flour mixture into the wet ingredients. Keep your mixer on a low speed and beat just until a soft dough forms. Be careful not to overmix here!
Step 5: Scoop and Roll
Using a small cookie scoop, portion out the dough into 1-inch balls (about one tablespoon of dough per ball). Roll each dough ball between your palms until smooth, then toss it in a small bowl of granulated sugar until it is completely coated. Place them on your prepared baking sheet.
Step 6: Bake to Perfection
Bake the cookies for 8 to 10 minutes. You want to pull them out when they are just barely browned around the edges and look slightly puffy. Do not wait for them to get dark, or they will dry out!
Step 7: The Grand Finale
The second you pull the baking sheet out of the oven, immediately press a chocolate kiss right into the center of each hot cookie. Let them sit on the pan for about 5 minutes to set, then carefully move them to a wire rack to cool completely.
What to Serve It With
Honestly, it is hard to beat eating one of these warm right off the cooling rack! But if you want to make an event out of it, serve your Peanut Butter Blossoms alongside a tall, ice-cold glass of whole milk. They are also absolutely incredible paired with a steaming mug of hot chocolate or your morning cup of coffee. If you are hosting a holiday party, these look gorgeous arranged on a massive dessert platter next to some no-bake butterscotch haystacks, rich chocolate fudge, and classic sugar cookies.
Top Tips for Perfecting Your Peanut Butter Blossoms
Chill sticky dough: If your kitchen is warm and your dough feels a bit too soft or sticky to roll, do not panic! Just pop the bowl into the refrigerator for 30 to 60 minutes. It will firm right up and stop the cookies from spreading flat in the oven.
Use a cookie scoop: I highly recommend using a small spring-loaded cookie scoop. It ensures every single cookie is the exact same size, which means they will all bake at the exact same rate. Nobody wants half a tray of burnt cookies and half a tray of raw ones!
Unwrap the kisses early: This is a mistake I only made once! Unwrap all 48 chocolate kisses before your cookies even go into the oven. You only have a tiny window of time to press the chocolate into the warm cookies before they start to set, and fumbling with foil wrappers is incredibly stressful.
Watch for cracks, not color: These cookies will not turn a deep golden brown. You know they are done when they puff up slightly and form tiny little cracks on the surface. Pull them out immediately to keep them soft!
Storing and Reheating Tips
Because we use shortening in this recipe, these cookies have an amazing shelf life! You can store them in an airtight container right on your kitchen counter at room temperature, and they will stay delightfully soft for up to a whole week.
My favorite trick: If you want to guarantee they stay bakery-soft, toss a single slice of plain white bread into the container with the cookies. The cookies will absorb the moisture from the bread! Just swap out the bread every few days when it gets hard and stale.
I do not recommend freezing the fully baked cookies because the chocolate kisses tend to pop off or turn a weird chalky color. However, you can absolutely freeze the unbaked dough! Just make the dough, freeze it in an airtight bag, and let it thaw overnight in the fridge before you scoop, roll, and bake as usual.
Frequently Asked Questions
Final Thoughts
There is a very good reason why Peanut Butter Blossoms have stood the test of time and remain a staple in so many households. They are simple, they are comforting, and they bring a little bit of joy to anyone who eats them. I really hope you give this shortening-based version a try this season. I know it might feel like a leap of faith to step away from butter, but once you bite into that incredibly soft, chewy center, you will be a total convert just like I am!
Grab your mixing bowls, turn on your favorite baking playlist, and enjoy the process. Be sure to leave a comment below if you try them out, I absolutely love hearing how your baking adventures turn out. Happy baking, friends!

Peanut Butter Blossoms
Ingredients
Main Ingredients
- 0.5 cup butter flavored shortening or unsalted butter, softened
- 0.75 cup creamy peanut butter
- 0.25 cup granulated sugar plus more for rolling
- 0.5 cup packed brown sugar
- 1 large egg
- 2 tablespoons whole milk
- 1 teaspoon vanilla extract
- 1.5 cups all-purpose flour
- 1 teaspoon baking soda
- 0.5 teaspoon salt
- 48 Milk Chocolate Kisses unwrapped
Instructions
Preparation Steps
- Preheat the oven to 375°F. Line a baking sheet with parchment paper.
- In a medium sized bowl, whisk together the flour, baking soda and salt. Set aside.
- In a large bowl, beat to combine the shortening and peanut butter. Add 0.25 cup granulated sugar and brown sugar, beating until light and fluffy, about 2-3 minutes.
- Add egg, milk, and vanilla; beating until well combined. Gradually add the flour mixture and continue beating until a dough forms.
- Using a small cookie scoop and your hands, shape the dough into 1-inch balls. If you do not have a small cookie scoop, this is a little more than 1 tablespoon worth of dough for each ball.
- Toss/roll each dough ball in the granulated sugar until coated, then place on the prepared cookie sheet.
- Bake for 8 to 10 minutes, until ever so lightly browned on the edges. You do not want to over bake these cookies, it will dry them out!
- Immediately press a chocolate kiss into center of each cookie as soon as they come out of the oven. Allow cookies to cool for 5 minutes and then transfer cookies to a cooling rack to cool completely.
Featured Comments
“Impressed! Clear steps and perfect for busy nights results. Perfect for busy nights.”
“New favorite here — family favorite. crowd-pleaser was spot on.”
“Super easy and turned out amazing! My family asked for seconds. Saving this one.”
“This sweet treat was absolutely loved — the rich really stands out. Thanks!”
“Made it tonight and wow — so flavorful! Will definitely make Peanut Butter Blossoms again.”
“Packed with flavor and so simple. Exactly what I wanted from Peanut Butter Blossoms.”


