These peanut butter mallow bars bring together a chewy peanut butter cookie base, a cloud of marshmallow creme, and little chocolate peanut butter cups in one easy pan dessert. The bottom layer bakes briefly before the candy and marshmallow go on, while pieces of the reserved dough form a rustic top. The result is soft, rich, and pleasantly nostalgic without requiring a complicated decorating step.
What are peanut butter mallow bars?
Peanut butter mallow bars are layered cookie bars baked in an 8-by-8-inch pan. A lightly sweet peanut butter dough is split into two portions. The first portion becomes the base, then chocolate peanut butter cups and marshmallow creme are layered over it. The remaining dough is placed on top before the bars return to the oven.
Why you will love this dessert
These bars are approachable, rich, and easy to portion. The short first bake gives the base enough structure to support the filling, while the second bake lightly browns the edges. Foil makes lifting the cooled slab from the pan simple, and the recipe is convenient when you want a dessert that travels well.
Ingredients for peanut butter mallow bars
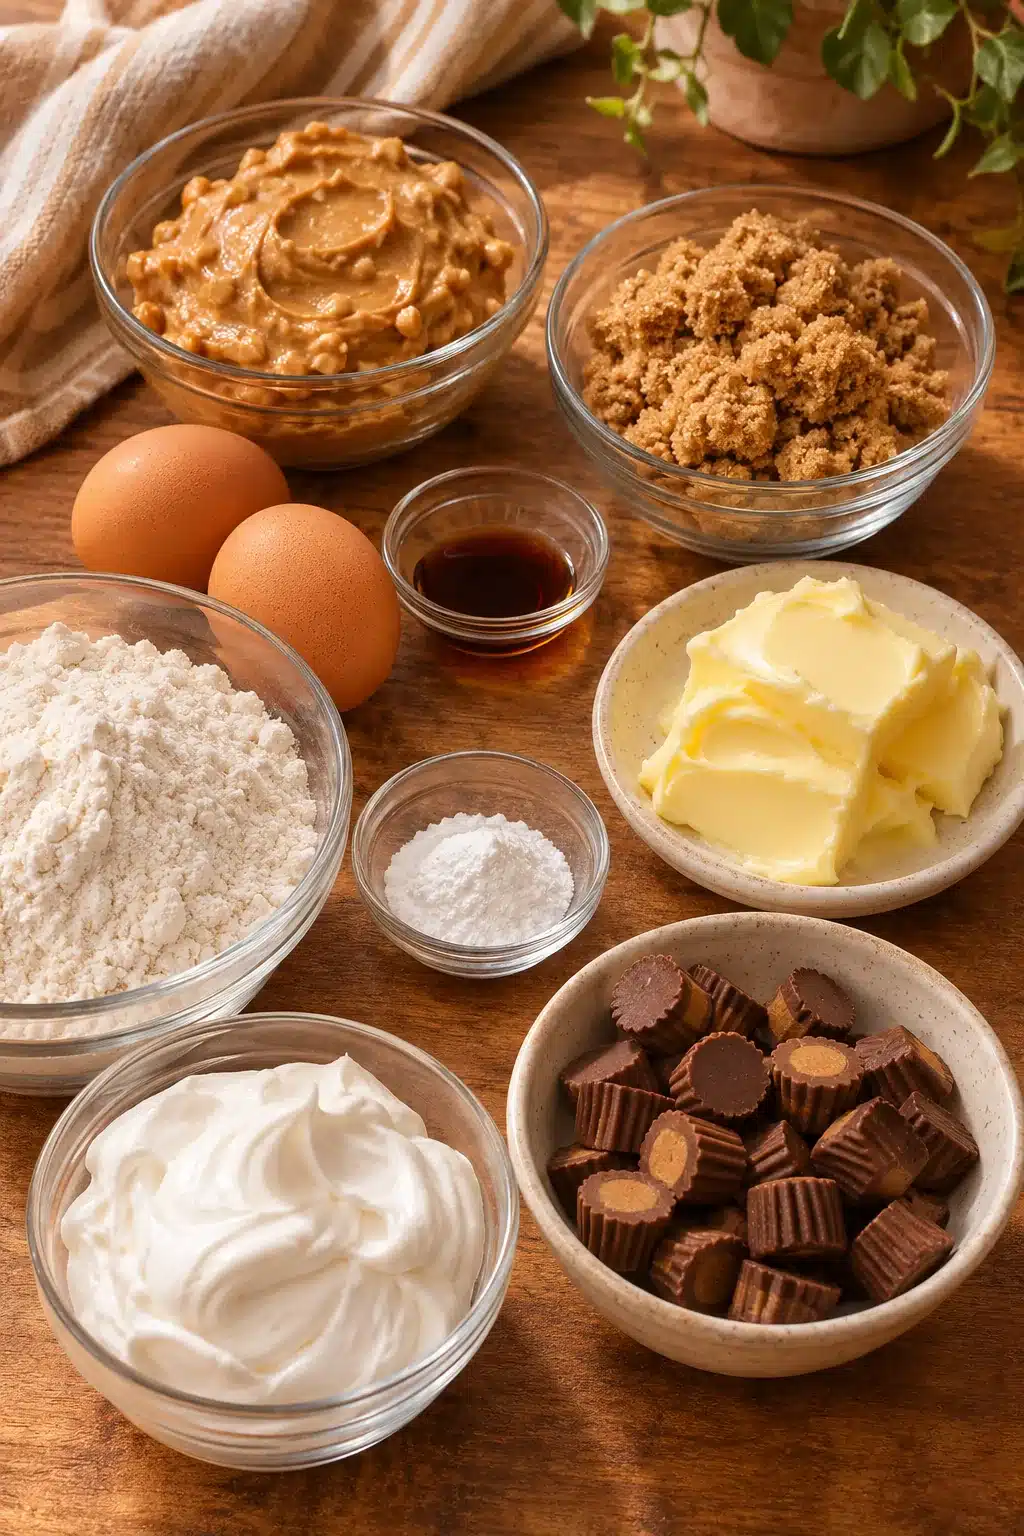
You will need crunchy peanut butter, packed brown sugar, large eggs, vanilla extract, softened butter, baking powder, and all-purpose flour for the dough. The filling uses marshmallow creme and mini chocolate peanut butter cup candies. Crunchy peanut butter adds texture, but creamy peanut butter can be used when that is what you have on hand.
How to make the cookie dough
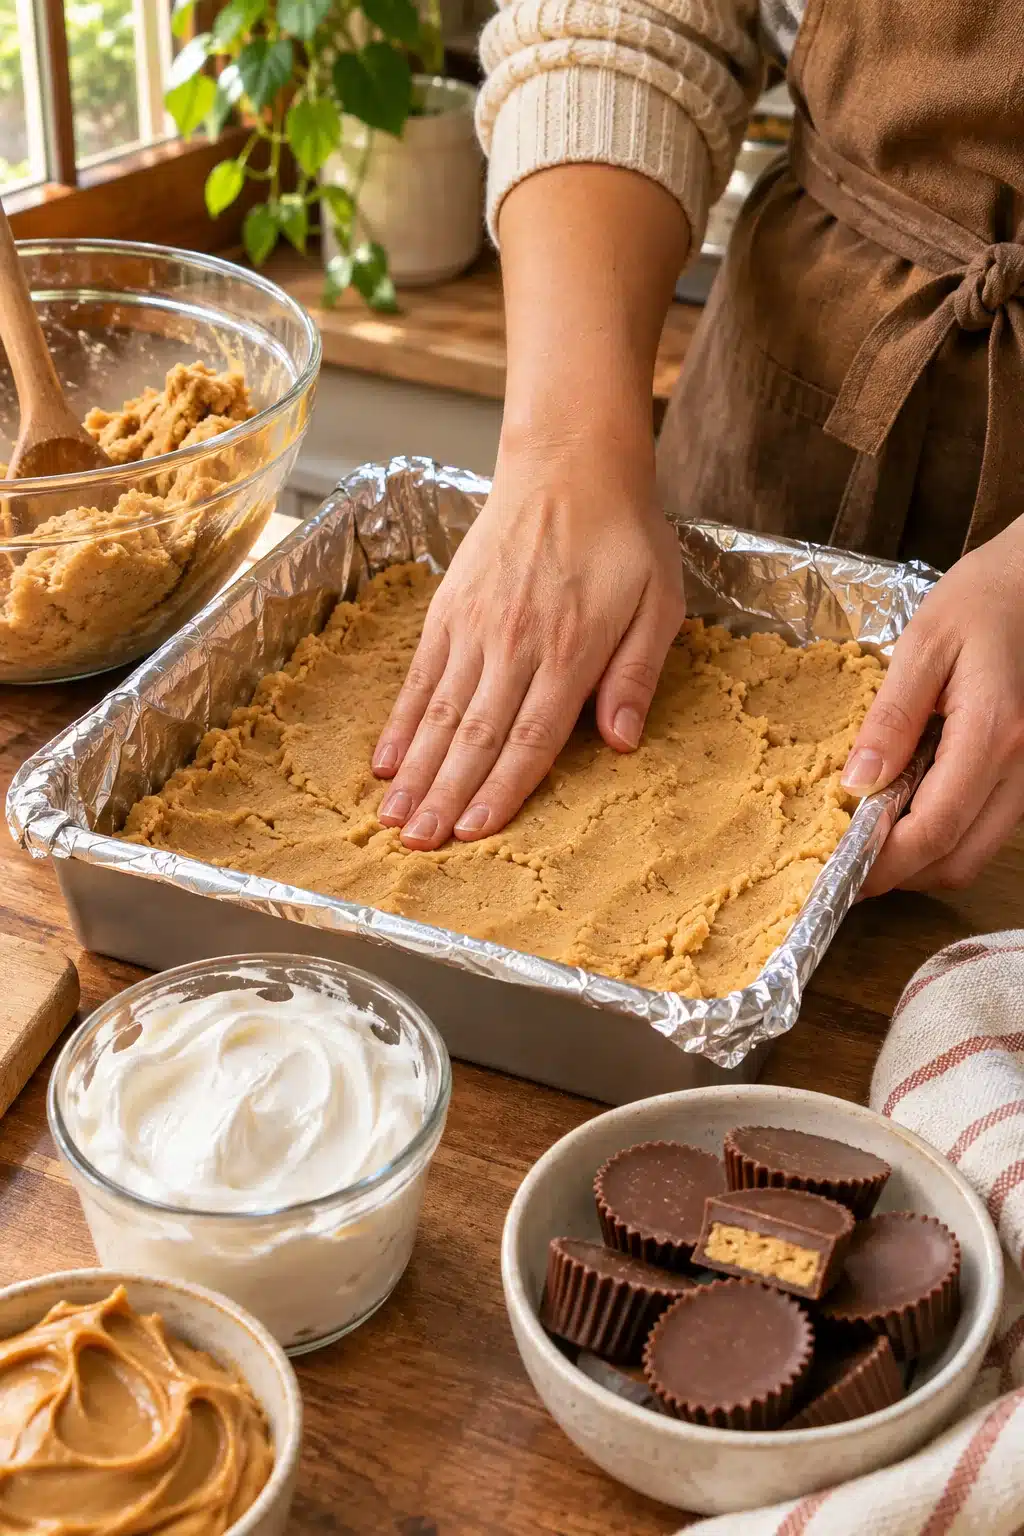
Line the pan first so the foil extends over the sides. Cream the peanut butter, brown sugar, eggs, vanilla, and softened butter until smooth. Add baking powder and flour and mix only until the dough comes together. Overmixing can make the baked bars firm instead of tender.
How to layer the bars
Divide the dough into two equal portions. Press one portion evenly into the lined pan and bake it for 10 minutes. Let the base cool completely before adding the filling. Scatter the chocolate peanut butter cups over the surface, then spread the marshmallow creme from the center outward. A few seconds of gentle warming makes the creme easier to spread.
How to finish baking
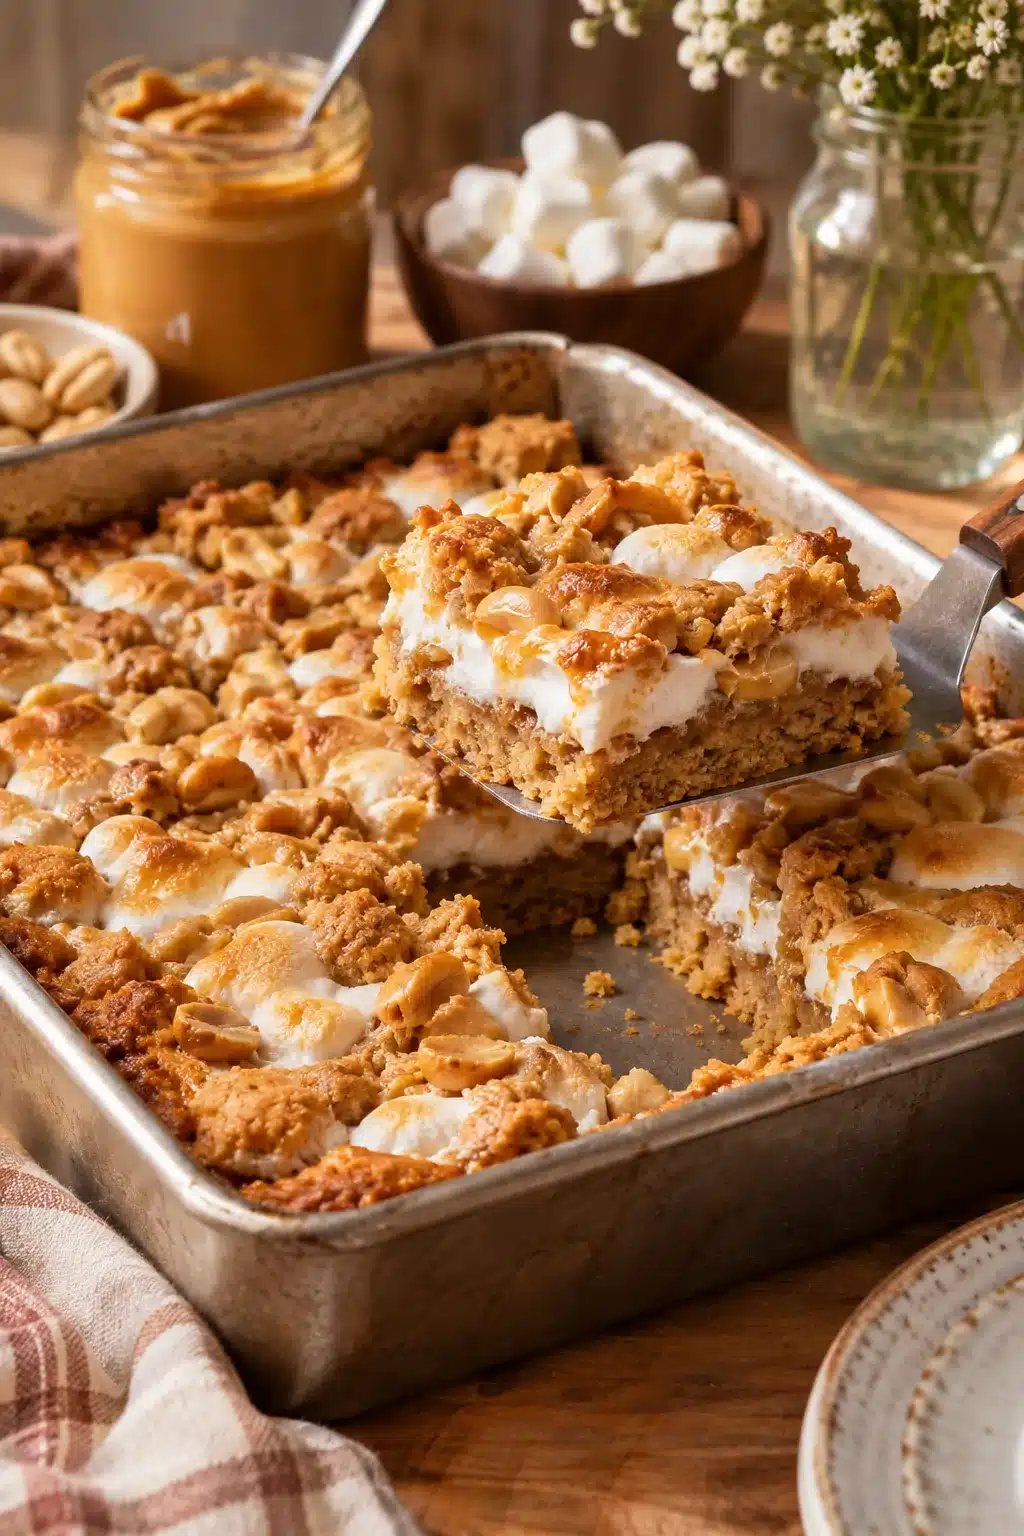
Flatten small pieces of the reserved dough between your palms and arrange them over the marshmallow layer. Continue until the filling is mostly covered; a few small gaps are fine. Bake again for about 20 minutes, watching for lightly golden edges. The center will continue to settle as the bars cool.
Serving and slicing tips
Cool the pan completely before lifting the slab by its foil handles. Use a sharp knife and wipe it between cuts for tidy squares. Serve the bars at room temperature, when the marshmallow layer is soft and the peanut butter cookie is easy to bite. For smaller portions, cut the slab into 16 squares or even 24 petite bars.
Storage and make-ahead advice
Store cooled peanut butter mallow bars in an airtight container at room temperature for several days. Separate layers with parchment if stacking them. For longer storage, wrap the slab or individual squares well and freeze them. Thaw at room temperature before serving so the marshmallow creme regains its soft texture.
Detailed baking method
Heat the oven to 350°F and line an 8-by-8-inch pan with foil, leaving an overhang. This small preparation step makes cleanup easier and gives you handles for removing the finished bars. Cream peanut butter, brown sugar, eggs, vanilla, and softened butter. Mix in baking powder and flour until combined. The dough should be cohesive and thick, with no visible streaks of flour.
Divide the dough in half. Press one half into the pan and bake for 10 minutes, then cool completely. Do not rush the cooling step: the warm base can make the marshmallow layer slide or melt. Scatter the candies over the cooled base and spread the marshmallow creme over them. Flatten small pieces of the remaining dough and arrange them over the marshmallow layer until covered. Bake about 20 minutes more, until the edges are lightly golden. Cool completely, slice, and serve.
Optional variation
For an optional variation, use creamy peanut butter for a smoother cookie layer or swap the mini chocolate peanut butter cups for chopped chocolate chips. Keep the marshmallow creme and the two-stage bake unchanged so the bars retain their signature soft center and sturdy base. This variation is optional and does not replace the primary recipe.
Small details that improve the bake
Use room-temperature butter so it blends evenly with the peanut butter and sugar. Scrape the mixing bowl once before adding the flour, then stop mixing as soon as the dough is uniform. Press the bottom portion into an even layer, especially in the corners, because a thin spot can bake faster than the rest. Let the first layer cool on a rack rather than in the refrigerator, where condensation can make the surface damp.
When spreading marshmallow creme, place it in the center and work outward with a lightly greased spatula. Avoid pressing hard enough to disturb the candy layer. For the top dough, small flattened pieces are easier to distribute than one large sheet. They also allow a little marshmallow to peek through, which gives the finished bars a homemade appearance. Begin checking the second bake around 18 minutes if your oven runs hot.
These bars are especially good for cookie trays, lunchbox treats, and casual gatherings. Their peanut butter flavor pairs naturally with coffee, cold milk, or hot cocoa. Cut larger squares for a rich dessert or smaller pieces for a party platter. If you are transporting them, chill the cooled slab briefly before slicing and pack the pieces in a single layer until the marshmallow center is set.
Because the recipe uses a foil-lined pan, lift the entire slab only after it is fully cool. If the foil sticks at a corner, loosen it gently with a thin knife rather than pulling against the soft filling. A serrated knife can help with the top crust, while a straight chef’s knife gives cleaner edges through the marshmallow. Wipe the blade after each cut for a neat presentation.
FAQ: Frequently asked questions
Can I use creamy peanut butter?
Yes. Creamy peanut butter makes a smooth bar, while crunchy peanut butter adds small pieces of peanut throughout.
Why should the base cool before filling?
Cooling keeps the marshmallow creme from melting into the base and helps the layers stay distinct.
How do I get clean slices?
Cool the bars fully, lift them from the pan with the foil, and cut with a sharp, lightly cleaned knife.

Peanut Butter Mallow Bars
Ingredients
Ingredients
- 1 cup crunchy peanut butter
- 3/4 cup packed brown sugar
- 2 large eggs
- 1 teaspoon vanilla extract
- 4 tablespoons butter softened
- 1 teaspoon baking powder
- 1 cup all-purpose flour
- 7 ounces marshmallow creme
- 1 heaping cup mini chocolate peanut butter cup candies halved if desired
Instructions
Instructions
- Heat the oven to 350°F and line an 8-by-8-inch pan with foil, leaving an overhang.
- Cream peanut butter, brown sugar, eggs, vanilla, and softened butter. Mix in baking powder and flour until combined.
- Divide the dough in half. Press one half into the pan and bake for 10 minutes, then cool completely.
- Scatter the candies over the cooled base and spread the marshmallow creme over them.
- Flatten small pieces of the remaining dough and arrange them over the marshmallow layer until covered.
- Bake about 20 minutes more, until the edges are lightly golden. Cool completely, slice, and serve.