

There’s something magical about Easter mornings, isn’t there? The aroma of blooming flowers mingling with the scent of freshly baked goodies, children squealing with excitement, and the table sprinkled with colorful eggs and sweet treats. I always do this when Easter rolls around—a cake that’s as cheerful as a spring garden, with bright flavors and a cozy warmth. It’s one of those recipes I’ve had forever, a true family favorite that I secretly think might be better than any store-bought dessert. I remember my grandma’s look when she first handed me her old, stained recipe card, telling me, “Make this for your family one day, and they’ll ask for it every year.” And, honestly, they do. This Easter cake is surprisingly simple, but packed with flavor—perfect when you want something homemade but don’t want to spend hours in the kitchen. Plus, it’s versatile enough to be the star of your brunch or a sweet closing note after a big feast. Trust me, once you try it, you’ll be making it every spring too!
What is an Easter cake?
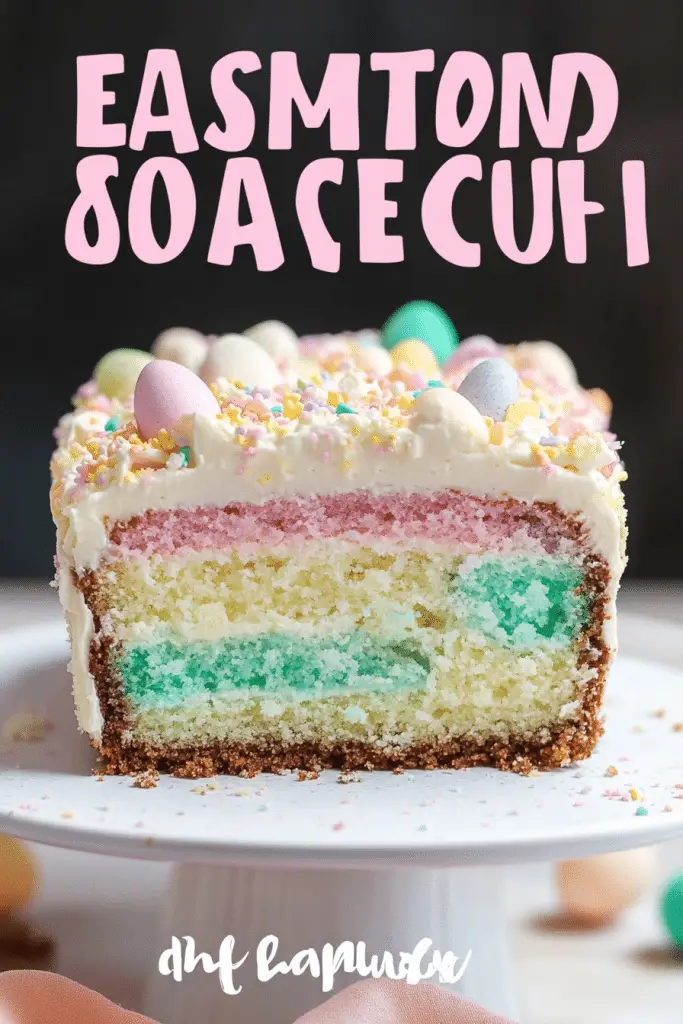
Think of this Easter cake as a joyful twist on a classic loaf, infused with a hint of celebration. It’s essentially a tender, moist cake that incorporates fresh fruit, speckled with colorful sprinkles or candied zest, making it perfect for spring—and especially Easter. The name might be just what it sounds like: a cake made to celebrate the holiday, but really, it’s a piece of family tradition that could easily become your new favorite. It’s kind of like a cross between a sweet bread and a light sponge, with a bit of nostalgia baked in. What I love most about this recipe is how forgiving it is—whether you’re a seasoned baker or just starting out, you’ll find it’s straightforward, forgiving, and endlessly customizable. Think of it as your “go-to” for any spring gathering or whenever you want a slice of sunny goodness. It’s cozy, yet fancy enough for special occasions, and your kitchen will smell like a beautiful garden after a rainstorm.
How do I make an Easter cake?
Quick Overview
This Easter cake is a one-bowl wonder that comes together in about ten minutes, then bakes up beautifully in under an hour. You start by whisking together simple ingredients—flour, sugar, eggs, and butter—then fold in your favorite fruit and a handful of sprinkles for whimsy. The batter is pourable but thick enough to hold a swirl of fruit and color. The magic comes during baking, as it puffs up and fills your kitchen with that irresistible smell of vanilla and citrus zest. Once cooled, you can glaze it with a simple lemon glaze or enjoy it plain. It’s the kind of dessert that looks pretty, tastes even better, and makes you feel like a pro in the kitchen, even when you’re sneaking in a few kid-approved tricks.
Ingredients
For the Main Batter:
– 2 cups all-purpose flour (I like unbleached for extra flavor)
– 1 ½ cups sugar (white granulated or a mix of brown and white for depth)
– 1 teaspoon baking powder (for fluffiness)
– ½ teaspoon salt
– 1 cup unsalted butter, melted (let it sit out for a bit to get soft)
– 3 large eggs
– 1 teaspoon vanilla extract
– Zest of 1 lemon (or orange, if you prefer more citrus!)
– ½ cup milk (whole, skim, almond—whatever works!)
For the Filling:
– 1 cup fresh berries or dried fruit chopped small
– 2 tablespoons cute sprinkles or colorful sugar crystals (because we’re celebrating!)
– Optional: 1 tablespoon orange or lemon juice for extra zing
For the Glaze:
– 1 cup powdered sugar
– 2-3 tablespoons lemon juice or milk
– A splash of vanilla or almond extract (optional)
– More sprinkles for fun!
Step-by-Step Instructions
Step 1: Preheat & Prep Pan
Set your oven to 350°F (175°C). Grease a classic loaf pan or springform pan with butter and dust lightly with flour—trust me, this helps it come out smooth and pretty. Line the bottom with parchment if you’re feeling fancy or just grease and flour your pan well. As the oven warms, gather all your ingredients—no rushing around later.
Step 2: Mix Dry Ingredients
In a large bowl, whisk together flour, sugar, baking powder, and salt. I always do this first because it evenly distributes the leavening and ensures every bite gets that perfect rise. It’s a quick step, but super important for that light, airy texture.
Step 3: Mix Wet Ingredients
In a separate bowl, beat eggs, then add melted butter, vanilla, citrus zest, and milk. I like to do this in a slightly warm bowl if I’ve just melted the butter, to keep things temperate and avoid curdling. Whisk until smooth and fragrant. The mixture should be slightly frothy—trust your nose here.
Step 4: Combine
Pour the wet mixture into the dry ingredients and stir gently with a spatula until just combined—don’t overmix or it’ll be dense. Some streaks of flour are okay. This is the secret to tenderness—overmixing is the enemy!
Step 5: Prepare Filling
In a small bowl, toss your fruit and sprinkles with a touch of flour if they’re wet, so they won’t sink to the bottom. If you’re using berries, a quick rinse and pat dry works best to prevent leaking juice. This is where you can get creative—try dried apricots or chopped candied ginger for a grown-up twist.
Step 6: Layer & Swirl
Pour half of the batter into your pan, then sprinkle half of the fruit and sprinkles on top. Cover with the remaining batter and gently swirl with a skewer or knife—don’t overdo it, but a few stylish swirls will give a beautiful marbled effect. I love seeing little pops of color and bits of fruit in every slice.
Step 7: Bake
Pop it into your preheated oven and bake for 50-60 minutes. To test doneness, insert a toothpick into the center—if it comes out clean, it’s ready! Keep an eye on it after 45 minutes; if it’s browning too fast, tent with foil. The top should be golden and slightly domed. This cake loves being admired just as much as eaten.
Step 8: Cool & Glaze
Let the cake cool in the pan for about 15 minutes, then transfer to a wire rack. If you want to add glaze, do so when the cake is slightly warm—not hot—so it soaks in beautifully. A drizzle of lemon glaze makes it feel extra spring-like and fresh.
Step 9: Slice & Serve
Use a serrated knife to cut clean slices, and serve with whipped cream or a dusting of powdered sugar. If you like, add more sprinkles on top for color. I love how each slice reveals tiny fruit bits and playful sprinkles—almost too pretty to eat, but I never resist.
What to Serve It With
This Easter cake is pretty much a chameleon. For breakfast, pair it with your favorite coffee or tea—trust me, the citrus zest wakes you right up. It also makes a beautiful brunch centerpiece, especially when sliced and arranged on a platter with fresh berries and bright flowers. If you want to turn it into a dessert, serve it warm with a dollop of vanilla whipped cream or mascarpone—one of my kids’ favorites. And, if you’re feeling extra casual, a simple cup of hot chocolate and a slice is heavenly. At home, I sometimes toast leftover slices lightly and spread with jam for a cozy snack that still feels special. My family’s tradition is always to bake it together on Easter Sunday morning—kids helping with pouring, sprinkling, and the best part, sneaking tastes of the batter. It smells amazing the whole house, and everyone’s excited to dig in. Honestly, this cake feels like a warm hug—especially when shared with loved ones.
Top Tips for Perfecting Your Easter Cake
This is a forgiving recipe, but I’ve learned a few tricks over the years that really help make it shine. First, if your batter seems a little thick, don’t hesitate to add an extra splash of milk—this keeps it moist and pourable. When I make it with dried fruit, I always soak them in warm water or fruit juice for 10 minutes beforehand; it plumps them up and prevents them from soaking up too much moisture from the batter. About the sprinkles—use ones that won’t bleed color into your cake, or opt for the non-MSG, colorful sugar crystals that stay vibrant.
For the swirl effect, I suggest using a toothpick or skewer to gently swirl the batter, running it through the top, then rotating the pan slightly to create a marbled look. This gives the cake a festive appearance without much effort. As for baking, oven hot spots happen—I always rotate my cake halfway through to ensure even baking. If the edges brown too quickly, tent it with foil, so the middle doesn’t stay underdone. When it comes to glazing, I prefer a slightly runny consistency because it seeps into the cake, making each bite even more flavorful. Trust me, a little patience waiting for the glaze to set is worth it—once it firms up, it’s glossy and tempting.
I’ve tried swapping out the sugar for honey or maple syrup, which gives it a lovely depth, but I found it makes the batter a touch denser. If you go that route, reduce the milk slightly. Sometimes, I double the citrus zest because I love that burst of tang—just adjust to your taste. Honestly, the key is to have fun with it, and remember, a good smell and beautiful appearance go a long way. After all, baking is love made visible.
Storing and Reheating Tips
This Easter cake stays fresh quite well—wrapped tightly in plastic wrap or stored in an airtight container. If you’re serving it later in the day or the next morning, it’s best to keep it at room temperature for the first 24 hours, covered to prevent it from drying out. If you want to enjoy it longer, pop it in the fridge—just let it come to room temp before slicing so it’s tender and fragrant again. To freeze, wrap the entire cake or individual slices tightly in plastic wrap, then foil. It’s a lifesaver on busy mornings—just thaw at room temperature or warm in the microwave for a few seconds. When it’s time to serve, a quick reheat or a warm slice enhances the flavors and makes the fruit sparkle again. If you added a glaze, hold off on re-glazing until just before serving so it stays glossy and appealing. I’ve learned that gently warming slices makes them taste almost like fresh-baked—and my kids think it’s magic!
Frequently Asked Questions
Final Thoughts
This Easter cake is more than just dessert; it’s a celebration of spring, family, and simple joys. Every time I make it, I’m reminded of childhood Easter mornings filled with giggles, fragrant gardens, and the smell of fresh baked happiness wafting through the house. It’s a recipe that’s easy to love because it’s forgiving, adaptable, and downright delicious. Whether you’re baking it for your own family, a holiday gathering, or just because you’re craving something sweet and comforting, I promise it’ll bring smiles all around. Do me a favor—try it, tweak it to your liking, and let me know how it turned out. I always love hearing your stories and seeing your beautiful slices on social media. Happy baking, and here’s to many sweet Easter mornings ahead!
Easter cake
Ingredients
Main Ingredients
- 1 box white cake mix
- 0.25 cup water
- 4 large egg whites
- 0.5 cup vegetable oil
- 1 cup sour cream
- 1 teaspoon pure vanilla extract
- food coloring (blue, pink, yellow) gel or liquid
- 0.5 cup unsalted butter, softened
- 2 cups powdered sugar
- 0.25 teaspoon salt
- 1 teaspoon pure vanilla extract
- 3 tablespoons heavy cream or milk
- 1 some food coloring (optional)
- sprinkles Sprinkles
Instructions
Preparation Steps
- Preheat oven to 350°F and grease a 9x13-inch baking dish.
- In a large mixing bowl, beat the cake mix, water, egg whites, oil, sour cream, and vanilla until combined. Mix on low for 30 seconds, then on medium for 2 minutes. Scrape down sides of the bowl.
- Pour 2 cups of batter into the prepared pan.
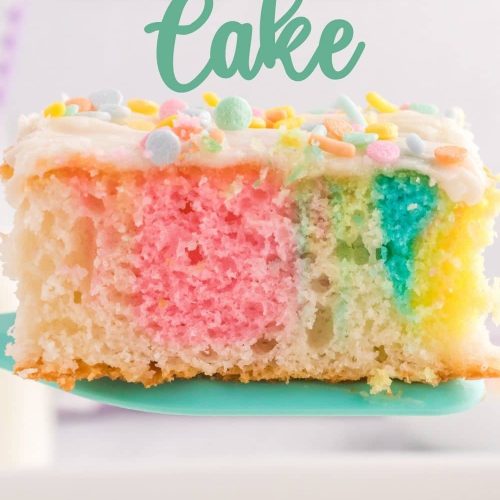
- Divide the remaining batter into three bowls. Add a few drops of blue, pink, and yellow food coloring to each bowl, stirring until desired color is reached.
- Drop spoonfuls of each colored batter randomly on top of the white batter. Use a knife to swirl the colors together.
- Bake for 30-35 minutes or until a toothpick inserted comes out clean. Cool completely before frosting.
- For the frosting, whip the butter until fluffy, then add powdered sugar and salt. Beat until combined. Mix in vanilla and 2 tablespoons of heavy cream. Adjust consistency with more cream if needed. Color frosting as desired.
- Frost the cooled cake and decorate with Easter sprinkles.
Notes
Featured Comments
“Love the description—so cozy and Easter-y! Can't wait to try this pastel cake recipe.”
“Impressed! Clear steps and comforting results. Perfect for busy nights.”
“New favorite here — absolutely loved. crowd-pleaser was spot on.”
“Super easy and turned out amazing! My family asked for seconds. Saving this one.”
“This sweet treat was absolutely loved — the bright really stands out. Thanks!”
“Made it tonight and wow — absolutely loved! Will definitely make Pretty Pastel Easter Cake Recipe again.”


Love the description—so cozy and Easter-y! Can’t wait to try this pastel cake recipe.