

You know those days when the 3 PM slump hits HARD, and you’re desperately craving something sweet but don’t want to commit to a whole baking project? Yeah, I’ve been there more times than I can count. It’s usually around that time I find myself rummaging through the pantry, hoping for a little pick-me-up. And that’s exactly where these amazing pumpkin pie energy balls came into my life! Honestly, they’re a total game-changer. They taste like a tiny, no-bake slice of your favorite fall dessert, but they give you that much-needed boost without the sugar crash. Think of them as your personal little pockets of autumn sunshine, ready whenever you need them. They’re so incredibly easy to whip up, even on the busiest weeknights. My kids, who are usually pretty picky, absolutely devour these. They’re constantly asking me to make another batch, which, if you’re a parent, you know is the highest praise possible! If you love the warm, comforting flavors of pumpkin pie but want something fuss-free, you are going to adore these pumpkin pie energy balls.
What are pumpkin pie energy balls?
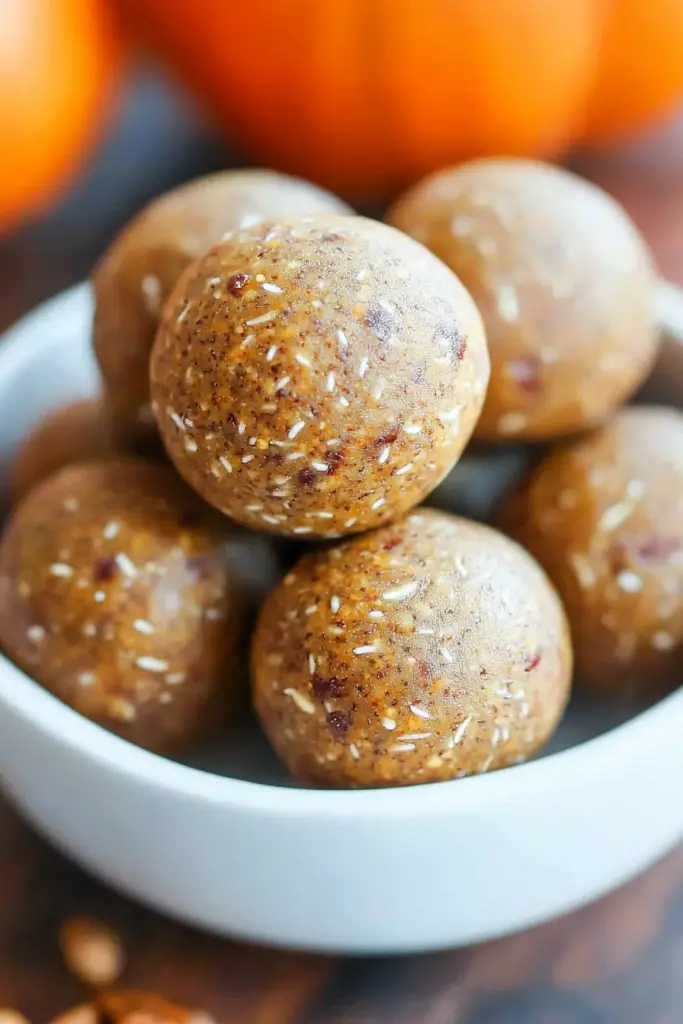
So, what exactly *are* these little delights? Basically, they’re no-bake spheres packed with wholesome ingredients that taste remarkably like pumpkin pie, but without all the fuss of actually baking a pie. The name really says it all! We’re talking about oats, nut butter, a touch of sweetness, warming spices, and of course, that signature pumpkin flavor. They’re essentially a super-convenient, portable treat that delivers all the cozy vibes of fall in a single bite. There’s no oven required, no complicated steps, just simple mixing and rolling. It’s the perfect way to get your pumpkin spice fix in a healthy, satisfying way. They’re the kind of snack that makes you feel good about what you’re eating, while still being utterly delicious. They’re like a happy little secret you can keep in your fridge for those moments you need a little treat.
How do I make pumpkin pie energy balls?
Quick Overview
This recipe is designed for maximum flavor with minimum effort. You’ll simply combine a few key ingredients in a bowl, mix them until a dough forms, and then roll them into bite-sized balls. The magic happens with the combination of pumpkin puree, warming spices, and nutrient-dense binders that hold it all together. It’s the perfect no-bake solution for when you’re craving something sweet and spiced, taking less than 15 minutes from start to finish. You’ll be amazed at how something so simple can taste so decadent.
Ingredients
For the Main Batter:
Here’s where the magic starts. I always opt for old-fashioned rolled oats because they give the best chewy texture. Instant oats can turn a bit mushy, and steel-cut are just too hard. You’ll need about 1 cup. For the binder, I typically use almond butter, but you could totally use Peanut Butter or even sunflower seed butter if you have allergies. About 1/2 cup should do it. You want a good quality nut butter that’s just nuts and salt, no added sugars or oils if possible. For that quintessential pumpkin pie flavor, we need 1/4 cup of pure pumpkin puree – make sure it’s not pumpkin pie filling, just plain pumpkin! A little bit of natural sweetener is key too; I prefer maple syrup, about 1/4 cup, but honey or agave works wonderfully. A tablespoon of chia seeds or flax seeds adds a nice nutrient boost and helps bind everything together. And for the soul of the pie flavor: 1 teaspoon of pumpkin pie spice. If you don’t have pumpkin pie spice, a mix of 1/2 tsp cinnamon, 1/4 tsp ginger, 1/8 tsp nutmeg, and a pinch of cloves will do the trick. A tiny pinch of salt really brings out all the flavors.
For Added Flavor & Texture (Optional):
This is where you can really make them your own. I sometimes like to stir in a tablespoon or two of mini chocolate chips for a little surprise. A few chopped pecans or walnuts are also lovely for an extra crunch. Some people love adding a bit of Vanilla Extract (1/2 teaspoon) for an extra layer of flavor. I even tried adding a little shredded coconut once, and it was delicious!
Step-by-Step Instructions
Step 1: Gather Your Ingredients
First things first, let’s get everything ready. Having all your ingredients measured out and within reach makes the whole process so much smoother. This is a step I always tell people not to skip, especially when they’re new to making energy balls. It prevents that “oh no, I forgot the spice!” moment later on.
Step 2: Combine Dry Ingredients
In a medium-sized mixing bowl, add your rolled oats. If you’re using chia seeds or flax seeds, add them in now. Give it a little whisk or stir to combine them. This just ensures everything is evenly distributed before we add the wet ingredients.
Step 3: Add Wet Ingredients
Now, add the pumpkin puree, nut butter, maple syrup (or your chosen sweetener), pumpkin pie spice, and a pinch of salt to the bowl with the oats. If you’re adding vanilla extract, pop that in too.
Step 4: Mix Everything Together
This is where the magic really happens! Grab a sturdy spoon or spatula and start mixing everything together. It might seem a bit dry at first, but keep going. You want to mix until a thick, cohesive dough forms. It should be sticky enough to hold its shape but not so wet that it’s unmanageable. If it feels a little too dry, you can add a tiny splash of water or almond milk – just a teaspoon at a time. If it’s too wet, add a tablespoon more oats. I’ve learned that the consistency of nut butter and pumpkin puree can vary, so a little adjustment is often needed. Don’t overmix it, though; we want to keep those oats nice and chewy.
Step 5: Add Optional Mix-ins
If you decided to add any of those optional goodies like chocolate chips or chopped nuts, now’s the time to stir them in. Gently fold them into the dough until they’re evenly distributed. Again, don’t go crazy with the mixing here; just incorporate them.
Step 6: Roll Into Balls
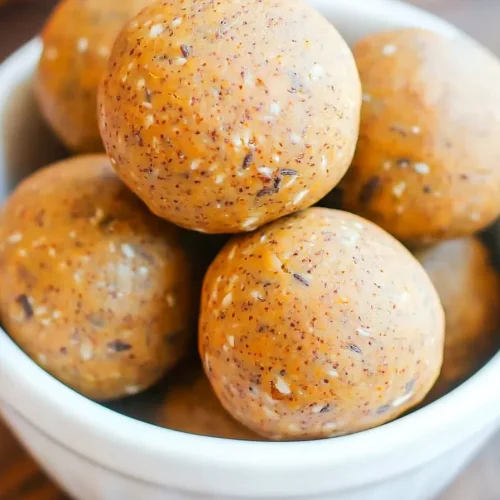
Now for the fun part! Take about a tablespoon of the dough and roll it between your palms to form a compact ball. They should be about 1-inch in diameter. If the dough is sticking to your hands, you can lightly dampen your palms with a little water. Continue rolling until all the dough is used up. This recipe usually makes about 15-20 balls, depending on how big you make them.
Step 7: Chill
Place the rolled energy balls on a plate or baking sheet lined with parchment paper. Pop them into the refrigerator for at least 30 minutes. This step is crucial! It helps them firm up and hold their shape, making them much easier to handle and enjoy. This is also when the flavors really start to meld together beautifully.
Step 8: Enjoy!
Once they’re chilled and firm, your delicious pumpkin pie energy balls are ready to be devoured! Grab one (or two!) and enjoy that taste of autumn anytime, anywhere.
What to Serve It With
These pumpkin pie energy balls are wonderfully self-sufficient, but they also pair beautifully with a variety of beverages and moments. For a quick and satisfying breakfast, I love grabbing one with my morning coffee. The rich, warm spices complement the coffee perfectly, and it’s just enough to tide me over until my next meal. If you’re hosting a brunch, these are a fantastic addition to a sweet spread. They look so elegant nestled amongst other pastries and fruit. A small drizzle of extra maple syrup or a dollop of Greek yogurt on the side can elevate them even further. For an after-dinner treat, they’re the ideal light dessert. They satisfy that sweet craving without feeling heavy, and they’re a delightful alternative to a big slice of pie. I often serve them with a cup of herbal tea, like chamomile or peppermint. And for those quiet, cozy snack moments – curled up with a book or watching a movie – these are simply perfection. They’re comforting and familiar. My absolute favorite pairing, though, is with a warm glass of almond milk on a chilly evening. It’s pure comfort!
Top Tips for Perfecting Your Pumpkin Pie Energy Balls
I’ve been making these pumpkin pie energy balls for quite a while now, and through a few happy accidents and some deliberate experimentation, I’ve picked up a few tricks that I think make them truly shine. First, about the pumpkin puree: make sure you’re using 100% pure pumpkin, not the pie filling. The filling has added sugar and spices, which can throw off the balance of your recipe. If your pumpkin puree seems a bit watery, try draining off any excess liquid before you measure it out. This little step can make a surprising difference in the dough’s consistency. When it comes to mixing, I’ve learned that you don’t want to overdo it. Just mix until everything is *just* combined and forms a cohesive dough. Overmixing can make the oats a bit tough or gummy. For the nut butter, the natural kind that separates is usually best because it doesn’t have added oils that can make the mixture too greasy. If your nut butter is really stiff and hard to stir, you can warm it up gently for a few seconds in the microwave, but be careful not to overheat it. I’ve also found that the type of oats really matters; old-fashioned rolled oats are the way to go for that satisfying chew. If your dough is too crumbly and won’t hold together, it probably needs a little more moisture. Try adding a teaspoon of water, almond milk, or even a little more pumpkin puree. If it’s too sticky, a tablespoon more oats or a sprinkle of coconut flour can usually do the trick. And for rolling, if you find them sticking to your hands, a tiny bit of water or a light dusting of oat flour works wonders. Don’t be afraid to play around with the spices, too! If you love extra cinnamon or a bit more ginger, go for it. These are very forgiving. I also discovered that chilling them properly is a must; it not only firms them up but also allows the flavors to really meld and deepen. It’s like they get even better overnight!
Storing and Reheating Tips
These pumpkin pie energy balls are fantastic for making ahead, which is why I always have a batch in my fridge. For room temperature storage, they’re generally good for about 2-3 days, but honestly, they disappear much faster than that in my house! Just keep them in an airtight container. For longer freshness, the refrigerator is your best friend. Store them in an airtight container for up to a week, maybe even 10 days if you’re lucky. They stay wonderfully firm and flavorful in the fridge. When they’re chilled, they have the best texture, in my opinion. If you need to make a *really* big batch or want to stock up for later, freezer instructions are your go-to. Lay the balls in a single layer on a baking sheet and freeze until solid, then transfer them to a freezer-safe bag or container. They’ll keep well for up to 2-3 months. To thaw, just take a few out of the freezer and let them sit at room temperature for about 30-60 minutes, or until they reach your desired consistency. I usually don’t add any kind of glaze to them before freezing, as it can sometimes get a bit sticky when thawing. It’s best to enjoy them plain from the freezer or just roll them in a little extra spice mix before serving if you want a little something extra.
Frequently Asked Questions
Final Thoughts
Honestly, these pumpkin pie energy balls are one of those recipes that just makes my life easier and happier. They’re proof that you don’t need to spend hours in the kitchen to create something incredibly delicious and satisfying. The blend of pumpkin, spices, and wholesome ingredients makes them a treat you can feel genuinely good about. Whether you’re a busy parent, a student, an office worker, or just someone who loves a good autumnal flavor, I really encourage you to give these a try. They’re a perfect example of how simple ingredients can come together to create something truly special. If you enjoy these, you might also love my no-bake oat bars or my spiced apple bites for more easy, delicious treats! I can’t wait to hear what you think. Let me know in the comments below if you make them, or if you have any fun variations you tried! Happy snacking!
Pumpkin Pie Energy Balls
Ingredients
Main Ingredients
- 1 cup rolled oats
- 0.5 cup almond butter
- 0.33 cup pumpkin puree not pumpkin pie filling
- 0.25 cup maple syrup
- 1 teaspoon pumpkin pie spice
- 0.5 teaspoon vanilla extract
- 0.25 cup chia seeds
- 0.25 cup chopped pecans optional, for rolling
Instructions
Preparation Steps
- In a medium bowl, combine the rolled oats, almond butter, pumpkin puree, maple syrup, pumpkin pie spice, and vanilla extract. Mix well until thoroughly combined.
- Stir in the chia seeds.
- Roll the mixture into 1-inch balls.
- If desired, roll the balls in chopped pecans for extra crunch.
- Place the energy balls on a baking sheet lined with parchment paper and refrigerate for at least 30 minutes to allow them to firm up.
- Store in an airtight container in the refrigerator for up to a week.
Notes
Featured Comments
“These sound perfect for my afternoon cravings—no bake needed but still feel like a treat!”
“Impressed! Clear steps and so flavorful results. Perfect for busy nights.”
“New favorite here — creamy. crowd-pleaser was spot on.”
“Super easy and turned out amazing! My family asked for seconds. Saving this one.”
“This sweet treat was absolutely loved — the balanced really stands out. Thanks!”
“Made it tonight and wow — absolutely loved! Will definitely make pumpkin pie energy balls again.”


These sound perfect for my afternoon cravings—no bake needed but still feel like a treat!