There are some recipes that just feel like a warm hug, aren’t there? This purple Velvet Cake is absolutely one of those for me. It’s not just a dessert; it’s a memory. I remember my grandmother making something similar, though hers was more of a deep, mysterious red. When I started experimenting with food coloring and wanted to create a showstopper for my daughter’s birthday, the idea of a *purple* velvet cake just clicked. It has that same impossibly tender crumb and subtle, luxurious flavor that velvet cakes are known for, but with a pop of color that’s pure magic. Honestly, when I first pulled this out of the oven, I just stood there for a moment, amazed. It’s like a hug you can eat, and it’s surprisingly simpler to whip up than you might think. Forget those fussy layered cakes that take all day; this one is a lifesaver when you want something truly special without all the fuss. It’s quickly become a family favorite, and I’m so excited to share my perfected version with you.
What is purple velvet cake?
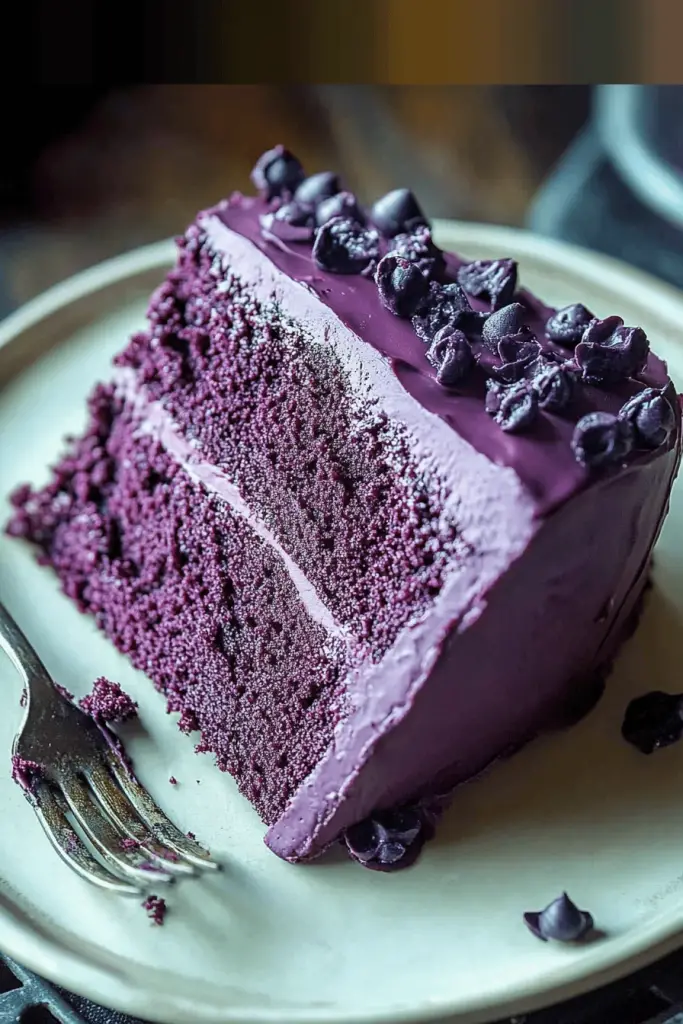
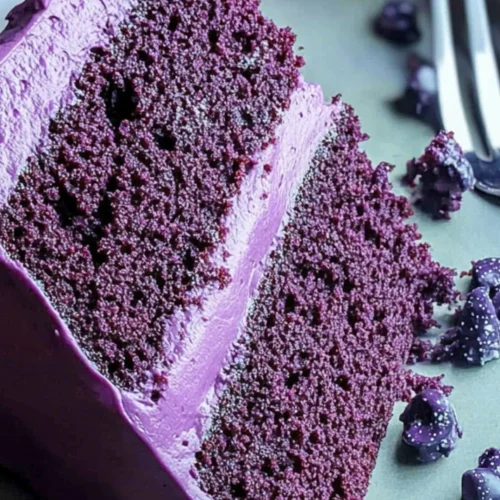
So, what exactly *is* purple velvet cake? Think of it as the most elegant, visually stunning cousin of the classic Red Velvet. It shares that signature incredibly soft, moist crumb that just melts in your mouth, thanks to a careful balance of ingredients like buttermilk and oil. The “velvet” texture comes from the cake’s fine crumb and the tenderizing effect of buttermilk and a touch of acidity, often from vinegar or buttermilk itself, which also reacts with baking soda to give it a lovely lift. The “purple” part? Well, that’s where the fun comes in! A good quality purple food coloring, either gel or liquid, is incorporated into the batter to give it that enchanting, vibrant hue. It’s not just about the color, though; the flavor is a delicate dance of sweet, slightly tangy, and a hint of cocoa, which is subtle here to let the vanilla and that gorgeous color really shine. It’s essentially a celebration cake that tastes as good as it looks, without any of the intimidation often associated with fancy baking.
How do I make purple velvet cake?
Quick Overview
Whipping up this purple velvet cake is a joy. You’ll essentially mix your dry ingredients, then your wet ingredients, combine them, bake, and frost. The real magic happens with the food coloring and the signature tender crumb. It’s designed to be straightforward, so you get that beautiful velvet texture and stunning color without a lot of complicated steps. We’ll also whip up a luscious frosting to complement it perfectly. This method ensures a consistently moist and flavorful cake every single time, making it a reliable favorite for any occasion.
Ingredients
For the Main Batter:
2 ½ cups all-purpose flour: Make sure it’s sifted! It makes a world of difference in getting that super fine texture. I always use unbleached all-purpose for baking. If you can find cake flour, you can use that for an even lighter crumb, but all-purpose works beautifully here.
1 ½ cups granulated sugar: For that perfect sweetness. Don’t skimp here; it’s crucial for the texture.
1 teaspoon baking soda: Our leavening agent that reacts with the buttermilk.
½ teaspoon salt: Just to balance out all the sweetness and bring out the flavors.
1 tablespoon unsweetened cocoa powder: This is key for that subtle richness and color depth, even though we’re going for purple! Don’t skip it, but you don’t need a lot.
1 cup buttermilk: This is non-negotiable for that signature velvet texture. If you don’t have any, you can make a quick substitute by adding 1 tablespoon of white vinegar or lemon juice to 1 cup of milk and letting it sit for 5-10 minutes. Trust me, it works wonders!
½ cup vegetable oil (or canola oil): Oil keeps cakes incredibly moist, way more so than butter sometimes. This is my secret weapon for a truly tender crumb.
2 large eggs: At room temperature, please! It helps them incorporate much better into the batter.
2 teaspoons Vanilla Extract: For that classic, comforting flavor. I always go for pure vanilla extract; the imitation stuff just doesn’t have the same depth.
1-2 tablespoons purple food coloring (gel preferred): This is where the magic happens! Gel food coloring gives you a much more vibrant color without adding too much liquid. Start with a tablespoon and add more until you get the shade of purple you love. A nice, deep amethyst is usually what I aim for.
1 teaspoon white vinegar: This works with the baking soda to give the cake its amazing lift and that tender texture.
For the Cream Cheese Frosting:
8 ounces Cream Cheese, softened: Make sure it’s truly soft, or you’ll end up with lumps. Leave it on the counter for a good hour.
½ cup unsalted butter, softened: Same rule as the Cream Cheese – needs to be soft!
4 cups powdered sugar, sifted: Sifting is crucial to avoid a gritty frosting.
1 teaspoon vanilla extract: For that lovely sweetness.
1-2 tablespoons milk or heavy cream (optional, for thinning): If your frosting is too thick, a little liquid helps.
A few drops of purple food coloring (optional): If you want the frosting to match the cake perfectly.
Step-by-Step Instructions
Step 1: Preheat & Prep Pan
First things first, let’s get our oven ready. Preheat it to 350°F (175°C). Then, grab your 9×13 inch baking pan. Grease it really well with butter or cooking spray, and then lightly flour it. I like to tap out any excess flour – you don’t want clumps. Some people also like to line the bottom with parchment paper for extra insurance against sticking, and I’ve found that’s a great idea, especially if you want a perfectly clean slice. A well-prepped pan is the first step to a cake that comes out beautifully!
Step 2: Mix Dry Ingredients
In a large mixing bowl, whisk together your sifted flour, granulated sugar, baking soda, salt, and cocoa powder. Give it a really good whisk until everything is thoroughly combined. You want to make sure there are no pockets of baking soda or cocoa powder. This ensures an even distribution of ingredients, which is key for a consistent crumb and rise. I always give it a good 30 seconds of whisking to make sure all those dry components are friends.
Step 3: Mix Wet Ingredients
In a separate, medium-sized bowl, whisk together your buttermilk, vegetable oil, room temperature eggs, vanilla extract, and the purple food coloring. Whisk until everything is nicely combined and you have that beautiful, vibrant purple hue. If you’re using gel coloring, start with about a tablespoon and add more until you reach your desired shade. Remember, the color might deepen a bit as it bakes. Once you’ve got the color just right, whisk in the white vinegar.
Step 4: Combine
Now, pour the wet ingredients into the bowl with the dry ingredients. Mix everything together until *just* combined. This is where you absolutely MUST be careful not to overmix. Overmixing develops the gluten in the flour, which can lead to a tough cake. Mix until you no longer see streaks of dry flour. A few small lumps are perfectly fine! I usually stop mixing as soon as the last bit of flour disappears. A spatula is great for this final folding step.
Step 5: Prepare Filling
This step is for the frosting, which we’ll make while the cake bakes or cools. In a large bowl, beat together the softened cream cheese and softened butter until they are light and fluffy. This might take a few minutes with an electric mixer. Gradually add the sifted powdered sugar, about a cup at a time, beating well after each addition. If you want a purple frosting, now’s the time to add a drop or two of food coloring. Once all the sugar is incorporated, add the vanilla extract. If the frosting is too thick, you can add a tablespoon or two of milk or cream until it reaches your desired spreading consistency. Beat until smooth and creamy.
Step 6: Layer & Swirl
This instruction applies more if you were making a layer cake. For this 9×13, you’ll simply pour the batter evenly into your prepared pan. Smooth the top with your spatula so it’s level. There’s no need to swirl here, as we’re going for a uniform purple goodness in this format!
Step 7: Bake
Pop that pan into your preheated oven. Bake for 30-35 minutes. The best way to check for doneness is to insert a toothpick into the center of the cake. If it comes out clean or with a few moist crumbs attached, it’s ready. If it comes out with wet batter, give it a few more minutes. Every oven is a little different, so keep an eye on it towards the end.
Step 8: Cool & Glaze
Once the cake is baked, let it cool in the pan on a wire rack for about 15-20 minutes. This allows it to set up a bit before you try to frost it. After that initial cooling, you can either frost it directly in the pan or carefully invert it onto a wire rack to cool completely before frosting. I usually frost it right in the pan because it’s just easier and tidier! Make sure it’s completely cool before frosting, or you’ll end up with a melty mess.
Step 9: Slice & Serve
Once the cake is frosted, you’re ready to serve! For the cleanest slices, use a sharp knife dipped in hot water and wiped dry between cuts. This helps the knife glide through the cake and frosting without dragging. Serve it up and watch everyone’s eyes light up! It’s delicious on its own, or with a dollop of whipped cream or a scoop of vanilla ice cream.
What to Serve It With
This purple velvet cake is a star on its own, but it pairs wonderfully with a few things depending on the occasion. For **Breakfast**, I love a thin slice with a strong cup of coffee. The richness of the cake is a lovely contrast to the bitterness of coffee, and the sweetness is just enough to kickstart the day without being overwhelming. It’s a decadent little morning treat! For **Brunch**, it feels extra special. I like to serve it with fresh berries – raspberries or blueberries are amazing with the purple theme! A sprig of mint adds a lovely touch of green for contrast. For a more formal **Dessert** setting, I’ll often serve a slice with a small scoop of good quality vanilla bean ice cream. The contrast of warm cake and cold ice cream is always a winner. A drizzle of white chocolate sauce can also be a lovely addition. And for those **Cozy Snacks** moments, when you just need something comforting? A simple glass of cold milk is all you need. My kids always ask for it this way! It’s a delightful treat that feels both indulgent and comforting.
Top Tips for Perfecting Your Purple Velvet Cake
I’ve made this purple velvet cake more times than I can count, and over the years, I’ve picked up a few tricks to make sure it turns out perfectly every single time. For the **Batter**, the key is not to overmix once you combine the wet and dry ingredients. Seriously, stop mixing as soon as you don’t see dry flour. A few lumps are way better than a tough cake! And remember that buttermilk substitute if you run out – it’s a lifesaver. When it comes to the **Food Coloring**, I always recommend using gel food coloring. It gives you a much more intense color without adding extra liquid, which can alter the cake’s consistency. Start with a little and build up to your desired shade; you can always add more, but you can’t take it away! For the **Cream Cheese Frosting**, make sure both your cream cheese and butter are truly at room temperature. This is crucial for a smooth, lump-free frosting. If you find it’s too stiff, a tiny splash of milk or cream can loosen it up perfectly. If you’re feeling adventurous with **Swirl Customization**, you can always divide the batter into two bowls and color one a lighter shade of purple or even a contrasting color (like a pale pink or lavender) and then swirl them together in the pan before baking. Just don’t over-swirl, or the colors will blend too much. For **Ingredient Swaps**, if you need to go dairy-free, I’ve had success using a plant-based milk with vinegar for the buttermilk substitute and a dairy-free cream cheese and butter for the frosting. The texture might be slightly different, but it’s still delicious! When it comes to **Baking**, always do the toothpick test. Ovens can vary so much, and it’s the most reliable way to know if your cake is done. You want it to come out with just a few moist crumbs, not wet batter. If your cake seems to be browning too quickly on top, you can loosely tent it with foil. Finally, for **Glaze Variations**, if you’re not a fan of cream cheese frosting, a simple powdered sugar glaze made with powdered sugar, a little milk, and vanilla extract also works beautifully. You could even add a touch more purple food coloring to that for a vibrant glaze!
Storing and Reheating Tips
Storing this beautiful purple velvet cake is pretty straightforward, and it keeps remarkably well. For **Room Temperature Storage**, if it’s unfrosted or frosted with a buttercream (not cream cheese), it can stay out on the counter for up to 2 days, well-covered with plastic wrap or in an airtight container. However, because of the cream cheese frosting, I generally recommend **Refrigerator Storage** for any leftovers. Covered tightly with plastic wrap, it will stay fresh and delicious in the fridge for about 3-4 days. When you take it out, let it sit on the counter for about 15-20 minutes to soften up a bit – the frosting is much better at room temperature. If you want to freeze it, it’s best to freeze it unfrosted. Wrap the cooled cake tightly in plastic wrap, then in a layer of aluminum foil, and freeze for up to 2-3 months. Thaw overnight in the refrigerator, then let it come to room temperature before frosting. If you have frosted cake you want to freeze, place it in the freezer uncovered for about an hour to set the frosting, then wrap it tightly as described. For **Glaze Timing Advice**, if you’re making a simple glaze and not frosting, it’s best to apply it to a completely cooled cake, and then store it at room temperature for a day or two, or in the fridge for longer. The glaze helps protect the cake.
Frequently Asked Questions
Final Thoughts
So there you have it – my absolute favorite purple velvet cake recipe! It’s one of those recipes that just makes me happy every time I bake it. The rich, tender crumb, that hint of cocoa, and of course, that stunning purple hue, all come together for a truly special treat. It’s proof that you don’t need to be a professional baker to create something show-stopping that tastes incredible. If you love this recipe, you might also enjoy my classic Red Velvet Cupcakes or my No-Bake Cheesecake for more delightful dessert ideas. Give this purple velvet cake a try; I promise it won’t disappoint! I can’t wait to hear how yours turns out, so please share your thoughts, photos, and any fun variations you try in the comments below. Happy baking, everyone!
Purple Velvet Cake
Ingredients
Cake Ingredients
- 2.5 cups all-purpose flour
- 0.5 cup unsweetened cocoa powder
- 1.5 teaspoons baking soda
- 0.5 teaspoon salt
- 1 cup unsalted butter, softened
- 2 cups granulated sugar
- 2 large eggs
- 1 teaspoon vanilla extract
- 1 cup buttermilk
- 1 tablespoon red food coloring
- 0.5 teaspoon white vinegar
Cream Cheese Frosting Ingredients
- 8 ounces cream cheese, softened
- 0.5 cup unsalted butter, softened
- 4 cups powdered sugar
- 1 teaspoon vanilla extract
- 1 tablespoon milk or heavy cream optional, for thinning
Instructions
Cake Preparation
- Preheat oven to 350°F (175°C). Grease and flour two 9-inch round cake pans. Line the bottoms with parchment paper.
- In a medium bowl, whisk together flour, cocoa powder, baking soda, and salt.
- In a large bowl, cream together the softened butter and granulated sugar until light and fluffy.
- Beat in the eggs one at a time, then stir in the vanilla extract.
- In a small bowl, whisk together the buttermilk, red food coloring, and white vinegar.
- Alternately add the dry ingredients and the buttermilk mixture to the butter mixture, beginning and ending with the dry ingredients. Mix until just combined.
- Divide the batter evenly between the prepared cake pans.
- Bake for 30-35 minutes, or until a wooden skewer inserted into the center comes out clean.
- Let the cakes cool in the pans for 10 minutes before inverting them onto a wire rack to cool completely.
Frosting Preparation
- In a large bowl, beat together the softened cream cheese and butter until smooth.
- Gradually add the powdered sugar, mixing until combined. Stir in the vanilla extract and milk (if using) until the frosting reaches the desired consistency.
Assembly
- Place one cooled cake layer on a serving plate. Spread a generous layer of frosting over the top.
- Top with the second cake layer and frost the entire cake, including the sides.
- Decorate as desired. Chill the cake for at least 30 minutes before slicing and serving.
Notes
Featured Comments
“Impressed! Clear steps and comforting results. Perfect for busy nights.”
“New favorite here — quick weeknight win. crowd-pleaser was spot on.”
“Super easy and turned out amazing! My family asked for seconds. Saving this one.”
“This sweet treat was absolutely loved — the bright really stands out. Thanks!”
“Made it tonight and wow — so flavorful! Will definitely make Purple velvet cake again.”
“Packed with flavor and so simple. Exactly what I wanted from Purple velvet cake.”