

There’s something nostalgic about the smell of banana bread wafting through the house on a lazy weekend morning. Maybe it’s the warmth of freshly baked comfort or the way it makes your entire home smell like you’ve got a secret ingredient—because let’s be honest, the magic often starts with those neglected bananas sitting on the counter, turning brown and speckled. I always do this when I have overripe bananas—make a batch of my favorite banana bread. It’s one of those recipes that’s so simple yet so satisfying, and I swear, the overripe bananas give it that deep, caramelized sweetness that store-bought bananas just can’t match. Plus, this recipe is a huge help on busy nights when you need something quick, homemade, and downright delicious. My kids ask for this all the time—sometimes I double the recipe just so I can sneak in a few extra bananas for an extra moist, flavorful loaf. Trust me, once you try it, overripe bananas will become your best baking buddy!
What is banana bread?
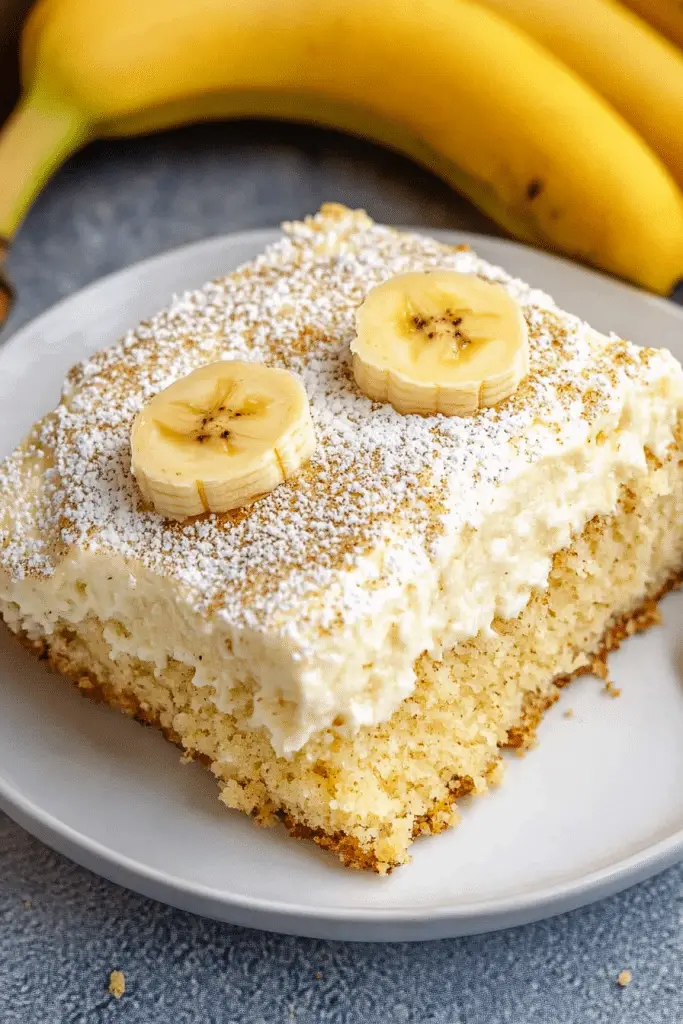
Banana bread isn’t just bread—it’s a warm hug in loaf form. Think of it as a sweet, moist cake that’s a little healthier because it’s packed with bananas. The name is pretty straightforward: it’s bread made primarily from ripe bananas, mashed and mixed into a batter that bakes into something wonderfully dense and tender. The concept probably dates back decades, but honestly, it’s timeless. The reason overripe bananas work so well is that they’re at their peak sweetness and flavor—soft, jammy, and full of caramel notes—that transform a simple batter into a rich, decadent treat. It’s essentially a bonus dish for those bananas that look like they’ve had better days—think of it as turning tragedy into triumph, right? Whether you slice it for breakfast, smear it with butter, or enjoy it plain, banana bread is a beloved staple in many kitchens.
How do you make banana bread?
Quick Overview
In a nutshell, this banana bread is as straightforward as stirring together mashed overripe bananas, flour, eggs, and butter, then pouring it into a pan and baking until golden. The magic lies in mashing those bananas well and not overmixing the batter—trust me on this, it keeps the bread tender and moist. From start to finish, it takes me about an hour, including cooling time, and the reward is a loaf that’s sweet, fragrant, and just the right amount of dense. I love that this recipe doesn’t require any fancy appliances—just a whisk, a bowl, and a good spatula. It’s perfect for those lazy Sundays or a last-minute dessert or snack. Plus, I’ve tested it with different ingredients, and it never fails to deliver that warm, cozy feeling in every bite.
Ingredients
For the Main Batter:
- 3 overripe bananas (the darker, the sweeter!);
- 1/3 cup melted butter or neutral oil (or applesauce for a health boost);
- 1 teaspoon vanilla extract (because vanilla makes everything better);
- 1 teaspoon baking soda (to give it some lift);
- 1 1/2 cups all-purpose flour (or whole wheat flour for a bit more texture);
- 1/2 cup sugar (adjust based on how sweet your bananas are);
- Pinch of salt (to balance the flavors);
- 2 large eggs (for structure and richness).
For the Optional Add-ins:
- Chocolate chips or chopped nuts (for a little extra indulgence);
- A dash of cinnamon or nutmeg to add warmth;
- Blueberries or dried fruit for a fruity twist.
For the Glaze (if you like a little shine and sweetness on top):
- 1/2 cup powdered sugar;
- 1-2 teaspoons milk or lemon juice (to thin it to your preferred consistency);
- A splash of vanilla or citrus zest for extra flavor.
Step-by-Step Instructions
Step 1: Preheat & Prep Pan
Set your oven to 350°F (175°C). Grease your loaf pan with butter or non-stick spray—trust me, this makes the un-molding way easier. If you want, line it with parchment paper for extra ease. Having everything ready makes the process smooth, especially when the adorable but messy bananas are staring at you.
Step 2: Mix Dry Ingredients
In a large bowl, whisk together the flour, baking soda, salt, and any spices if you’re using them. This step ensures everything is evenly combined, and those leavening agents are distributed perfectly.
Step 3: Mix Wet Ingredients
In a separate smaller bowl, mash your bananas until smooth—this is the fun part that smells so good—then add the melted butter, vanilla, and eggs. Mix well. I always do this with a fork first, then use a whisk to get it really creamy. Make sure the eggs are at room temperature for the best mix—trust me, it makes a difference.
Step 4: Combine
Pour the wet mixture into the dry ingredients. Gently fold together using a spatula—avoid overmixing. When you see a few lumps, stop! Overmixing can create dense bread, and nobody wants that. Just fold until everything is barely combined—you’ll get that light, tender crumb.
Step 5: Prepare Filling
If you’re adding chocolate chips, nuts, or fruit, fold them in now. I love folding in chocolate chips and walnuts—so classic. For a swirl, set aside some batter and add a bit of cocoa or cinnamon to it, then layer it with the plain batter for a marbled effect.
Step 6: Layer & Swirl
Pour half of the batter into your pan, then add your filling in the center or on top, and top with remaining batter. Use a knife or skewer to swirl gently, creating beautiful marbled patterns. This little step makes every slice special!
Step 7: Bake
Place the loaf in the center of your oven and bake for 50-60 minutes. The top should be golden, and a toothpick inserted into the center should come out clean. If it browns too quickly, tent with foil halfway through. Every oven bakes differently, so keep an eye on it after 50 minutes.
Step 8: Cool & Glaze
Once baked, let the bread cool in the pan for about 10 minutes, then transfer it to a wire rack. Wait until completely cooled before applying the glaze—that way, it doesn’t melt or slide off. Mix powdered sugar with your chosen liquid and drizzle over the top.
Step 9: Slice & Serve
Use a serrated knife for clean slices. Serve warm or at room temperature. I find it tastes even better the next day, with a smear of butter or even some honey. It’s perfect with a strong cup of coffee or tea—but honestly, I’ve been known to eat it straight from the fridge for a midnight snack!
What to Serve It With
This banana bread is so versatile, it practically pairs with everything. For breakfast, try it alongside a steaming cup of coffee and maybe some fresh fruit. I love topping slices with a little butter and a drizzle of honey—so simple but so good. During brunch, serve it with a cheese platter or yogurt parfaits for a cozy, homemade touch. As a dessert, warm slices topped with vanilla ice cream or whipped cream are divine. My family enjoys it as a snack anytime—warm from the oven or sliced and toasted the next morning. My tradition is to make this when I have overripe bananas and a few free minutes, and it always turns into a little celebration around the kitchen table. It’s one of those recipes that just makes everyone happy, no matter the occasion.
Top Tips for Perfecting Your Banana Bread
From my years of baking this, I’ve learned some tricks to make it even better. First, when preparing bananas, I like to mash them really well—leaving some chunks is fine if you like a bit of texture, but I prefer smooth for a more uniform crumb. I’ve tried using different flours, and honestly, whole wheat adds a lovely nuttiness, but I find that a mix of half all-purpose and half wheat gives me the best fluffy texture. When mixing the batter, avoid overworking it; a few lumps are okay, and this keeps the bread tender. If you want a foolproof swirl, I suggest using a skewer to draw circles through the batter after layering. For ingredient swaps, coconut sugar works beautifully instead of white sugar, and applesauce can replace the butter for a lighter version—just expect a slightly denser loaf. I’ve learned not to open the oven door too often, as sudden temperature drops can affect rising. Don’t forget to check with a toothpick—if it comes out moist but not wet, you’re golden. For glazes or toppings, experimenting with citrus zest, maple syrup, or even a splash of bourbon can add a personalized touch. Over the years, I’ve learned that simple is best, and patience during cooling helps the loaf set perfectly. The key is to enjoy the process—baking should be fun, after all!
Storing and Reheating Tips
This banana bread keeps well, so don’t worry if you can’t eat it all at once. At room temperature, keep leftovers covered in foil or an airtight container for 2-3 days. If you sprinkle a light dusting of powdered sugar or drizzle the glaze right before serving, it stays fresh and pretty. For longer storage, pop slices into the refrigerator in a sealed container for up to a week—just let it come to room temperature before slicing again for the best crumb. Freezing is a game changer: wrap tightly with plastic wrap and foil, and it’ll last for up to 3 months. When you’re ready to enjoy, defrost at room temperature or pop a slice in the microwave for about 15 seconds. Reheating it gently keeps the bread moist and fresh-tasting. A quick note: if you added glaze or toppings, I recommend adding those just before serving to keep everything looking appealing. I’ve tested all these methods myself, and they keep the flavors bright and the texture just right, so don’t be afraid to make ahead and enjoy it later!
Frequently Asked Questions
Final Thoughts
This recipe for banana bread made with overripe bananas is truly one of my favorites. It’s simple, forgiving, and yields such a moist, flavorful loaf that I’ve lost count of how many times I’ve made it—usually when those bananas get overly speckled and I think, “Well, let’s turn these into something cozy.” Every time I slice into it, I’m reminded of childhood mornings, my grandma’s kitchen, and the happiness that comes with sharing good food. It’s perfect as a breakfast treat, a comforting snack, or even a quick dessert with a dollop of yogurt or whipped cream. The best part? It’s adaptable and a great way to use up those leftover bananas that would otherwise go to waste. Give it a try, experiment with add-ins, and make it your own. I can’t wait to hear how yours turns out—happy baking!
overripe bananas
Ingredients
Main Ingredients
- 3 large overripe bananas
- 2 cups all-purpose flour
- 1 cup granulated sugar
- 0.5 cup unsalted butter melted
- 2 large eggs
- 1 teaspoon vanilla extract
- 0.5 teaspoon baking soda
- 0.25 teaspoon salt
Instructions
Preparation Steps
- Preheat your oven to 350°F. Grease a loaf pan.
- In a large bowl, mash the overripe bananas until smooth.
- Add melted butter, eggs, and vanilla extract to the mashed bananas and mix well.
- In a separate bowl, whisk together flour, sugar, baking soda, and salt.
- Gradually add the dry ingredients to the wet ingredients, mixing until just combined.
- Pour the batter into the prepared loaf pan and bake for 50 minutes, or until a toothpick inserted into the center comes out clean.
- Allow to cool before slicing and serving.
Notes
Featured Comments
“Ah, that smell takes me straight back to childhood Sundays—so cozy and comforting!”
“Impressed! Clear steps and creamy results. Perfect for busy nights.”
“New favorite here — perfect for busy nights. crowd-pleaser was spot on.”
“Super easy and turned out amazing! My family asked for seconds. Saving this one.”
“This sweet treat was absolutely loved — the rich really stands out. Thanks!”
“Made it tonight and wow — quick weeknight win! Will definitely make Spotlight on Mushy Bananas Simple Treats again.”


Ah, that smell takes me straight back to childhood Sundays—so cozy and comforting!