

You know those recipes that just feel like a warm hug? The ones you can whip up without a second thought, knowing they’ll be met with happy sighs and empty plates? Well, this strawberry Cream Cheese cobbler is *exactly* that for me. It’s the kind of dessert that feels fancy enough for guests but is so ridiculously easy, I make it for weeknight cravings. Seriously, if you’ve ever wished you could have a slice of cheesecake but also a comforting, fruity cobbler, this is your jam. It’s like the best of both worlds, baked into one glorious dish. I’ve tried countless variations of cobblers over the years – apple, peach, berry – but this strawberry cream cheese version? It’s the one that gets requested over and over again. My kids, who are usually pretty picky, devour it. It’s become our go-to for summer birthdays, lazy Sundays, and even just a Tuesday when we need a little something sweet. The combination of tangy cream cheese, sweet strawberries, and that perfectly crumbly topping is just pure magic.
What is a Strawberry Cream Cheese Cobbler?
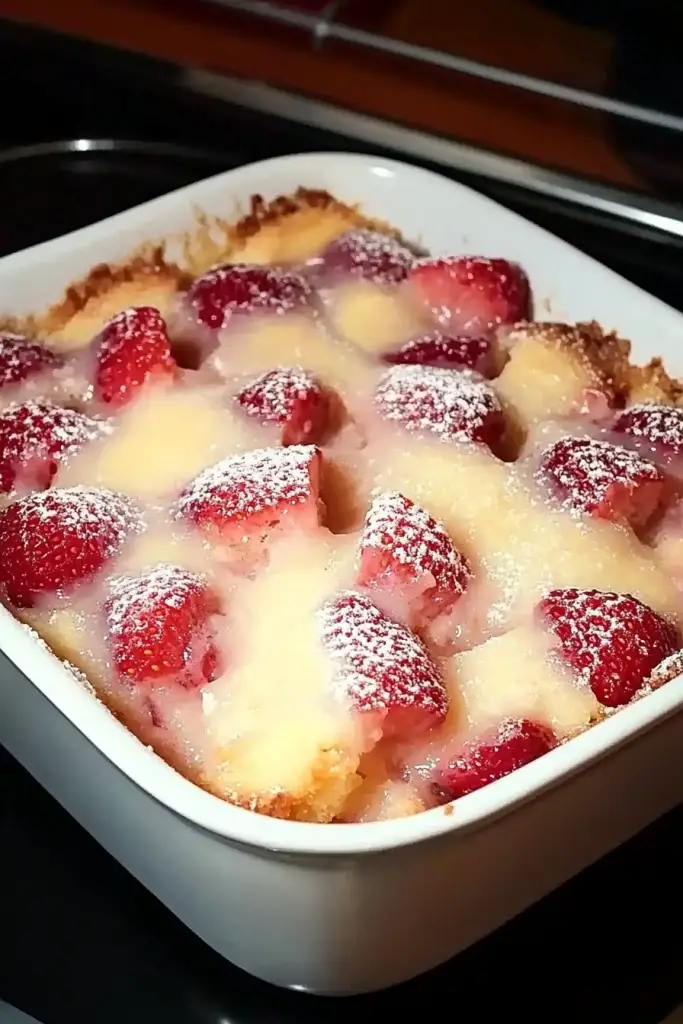
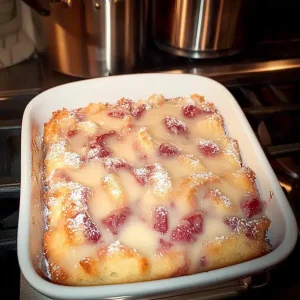
So, what exactly is this magical dish we’re talking about? Think of it as a delightful fusion. It starts with a tender, almost cake-like batter that’s studded with luscious, juicy strawberries. But here’s the twist that takes it from great to absolutely unforgettable: swirls of rich, tangy Cream Cheese woven throughout. It’s not quite a cheesecake, and it’s not just a fruit cobbler. It’s this wonderful hybrid that has a creamy, decadent interior nestled within a comforting, buttery topping. The cream cheese layer adds this amazing depth of flavor and a super smooth texture that’s just divine. It bakes up into this beautiful mosaic of red and white, with golden brown edges that are perfectly crisp. It’s the kind of dessert that makes your kitchen smell absolutely heavenly while it’s baking. Honestly, it’s pure comfort food with a sophisticated little cream cheese wink.
How do you make a strawberry cream cheese Cobbler?
Quick Overview
This strawberry Cream Cheese cobbler is surprisingly straightforward. You’ll mix up a simple batter, fold in fresh strawberries, and then swirl in a luscious cream cheese mixture. The magic happens in the oven as everything bakes together into a golden, bubbly masterpiece. It’s truly a dump-and-mix affair for the batter, and the cream cheese swirl is more about a gentle folding than precise technique, making it foolproof even for beginners. The result is a comforting, fruity dessert with an unexpected creamy twist.
Ingredients
For the Main Batter:
2 cups all-purpose flour (I always use unbleached; it seems to give a slightly better texture)
1 cup granulated sugar (you can adjust slightly based on strawberry sweetness)
2 teaspoons baking powder (make sure it’s fresh – old baking powder is a sad dessert’s worst enemy!)
1/2 teaspoon salt
1 cup milk (whole milk gives the richest result, but I’ve had great luck with 2% too!)
1/2 cup unsalted butter, melted and slightly cooled (don’t let it get too hot, or it can cook the eggs)
2 large eggs, at room temperature (this helps them incorporate smoothly)
For the Filling:
4 cups fresh strawberries, hulled and sliced or quartered (frozen work in a pinch, but fresh are really best here for texture and flavor)
1/4 cup granulated sugar (to sweeten the strawberries)
1 tablespoon cornstarch (this helps thicken the juices so they don’t make the bottom soggy)
1 teaspoon lemon juice (brightens up the strawberry flavor beautifully)
For the Cream Cheese Swirl:
8 ounces cream cheese, softened (let it sit on the counter for at least an hour; it makes a huge difference!)
1/4 cup granulated sugar
1/2 teaspoon Vanilla Extract (pure vanilla extract is key for that lovely aroma)
Step-by-Step Instructions
Step 1: Preheat & Prep Pan
First things first, get your oven preheated to 375 degrees Fahrenheit (190 degrees Celsius). While that’s warming up, grab an 8×8 inch baking dish or a similar-sized oven-safe skillet. Lightly grease it with butter or cooking spray. This little step prevents any sticking and makes for a much cleaner presentation when you’re ready to serve.
Step 2: Mix Dry Ingredients
In a large mixing bowl, whisk together the flour, 1 cup of granulated sugar, baking powder, and salt. Give it a good stir to make sure everything is evenly distributed. This ensures your cobbler rises evenly and has a lovely, consistent texture throughout.
Step 3: Mix Wet Ingredients
In a separate, medium-sized bowl, whisk together the milk, melted butter, and eggs until they’re well combined. This is where you want your eggs to be at room temperature – they emulsify better and create a smoother batter. If your butter is too hot, let it cool down a bit before adding it so you don’t scramble those eggs!
Step 4: Combine
Pour the wet ingredients into the bowl with the dry ingredients. Stir *just* until everything is combined. Seriously, don’t overmix! A few little lumps are perfectly fine. Overmixing develops the gluten in the flour, which can lead to a tough cobbler, and we don’t want that. We’re aiming for a tender, cake-like texture.
Step 5: Prepare Filling
In a medium bowl, gently toss the prepared strawberries with 1/4 cup granulated sugar, cornstarch, and lemon juice. Stir until the strawberries are evenly coated. The cornstarch will help thicken the juices as it bakes, preventing a watery cobbler. The lemon juice is my secret weapon for really making the strawberry flavor pop!
Step 6: Layer & Swirl
Now for the fun part! Spoon about two-thirds of the batter into your prepared baking dish, spreading it evenly. Scatter about half of the strawberry mixture over this layer. Then, dollop spoonfuls of the softened cream cheese mixture over the strawberries. Don’t worry about making it perfect; we want that rustic swirl! Top with the remaining batter, then the rest of the strawberries. You can even add a few more dollops of cream cheese on top if you like. Then, using a knife or a skewer, gently swirl the cream cheese into the batter and strawberries to create beautiful marbled patterns. Don’t over-swirl; you want distinct ribbons of cream cheese.
Step 7: Bake
Pop the dish into your preheated oven. Bake for 40-50 minutes, or until the top is golden brown and the filling is bubbly around the edges. You can test for doneness by inserting a toothpick into the center; it should come out mostly clean, with maybe a few moist crumbs attached. If the top is browning too quickly, you can loosely tent it with foil.
Step 8: Cool & Glaze
This is perhaps the hardest part – waiting! Let the cobbler cool for at least 15-20 minutes before serving. This allows the filling to set up a bit. If you’re adding a glaze (optional, but delicious!), whisk together 1/2 cup powdered sugar with 1-2 tablespoons of milk until it’s smooth and pourable. Drizzle it over the warm cobbler. You can also just dust it with a little powdered sugar if you prefer.
Step 9: Slice & Serve
Once it’s cooled slightly, scoop generous portions into bowls. It’s absolutely divine served warm, especially with a scoop of vanilla bean ice cream or a dollop of whipped cream. The contrast of the warm, fruity cobbler with cold, creamy ice cream is pure bliss!
What to Serve It With
This strawberry cream cheese cobbler is so versatile, it’s a winner for any meal or occasion! For breakfast, I love it warmed up with a strong cup of coffee; it’s honestly better than any pastry from the bakery. The slightly tart cream cheese and sweet berries cut through the richness of the coffee beautifully. For a more elegant brunch spread, I’ll serve it in a nice glass dish with a dusting of powdered sugar and a sprig of mint. It pairs wonderfully with mimosas or a light fruit salad. As a dessert, it’s a classic, of course! It’s incredible served warm with vanilla ice cream (my personal favorite), but a drizzle of chocolate sauce or a dollop of crème fraîche also works wonders. For those cozy, quiet evenings when you just need a little something sweet, a small, warm portion straight from the oven, perhaps with a glass of milk, is pure comfort. My family also loves it for movie nights – we just grab spoons and dig in right from the pan!
Top Tips for Perfecting Your Strawberry Cream Cheese Cobbler
Over the years of making this, I’ve picked up a few tricks that I think make all the difference. For the strawberries, fresh is truly best. If you have to use frozen, make sure they are fully thawed and patted dry as much as possible to avoid excess moisture in the cobbler. When you’re mixing the batter, remember that ‘just combined’ is your mantra. A few lumps are absolutely fine; overmixing is the enemy of tender baked goods! For the cream cheese swirl, make sure your cream cheese is truly softened. If it’s still cold, it’s going to be lumpy and hard to swirl. I usually take mine out of the fridge an hour or two before I start baking. Don’t be afraid to get a little creative with the swirl; some people like distinct ribbons, others prefer more of a marbled effect. Both are delicious! I’ve also found that using a good quality vanilla extract makes a noticeable difference in the depth of flavor, especially in the cream cheese layer. For baking, every oven is a little different. Keep an eye on it after about 35-40 minutes. If the edges are getting dark but the center isn’t quite done, you can always tent the dish loosely with foil to prevent over-browning. If you want to jazz it up even more, try adding a sprinkle of chopped pecans or almonds to the batter or the topping for a little crunch. And for the glaze, consistency is key. If it’s too thick, add a tiny bit more milk; too thin, add a bit more powdered sugar. The goal is a drizzly, not runny, consistency.
Storing and Reheating Tips
This strawberry cream cheese cobbler is best enjoyed fresh, but it does store quite well. If you have any leftovers (which is rare in my house!), you can leave it at room temperature for up to 2 days if it’s covered loosely with plastic wrap or foil. Just make sure it’s cooled completely before covering to prevent condensation. For longer storage, pop it in the refrigerator. It will keep well in an airtight container for up to 4-5 days. The texture might change slightly, becoming a bit denser, but it’s still delicious. If you plan on freezing it, I recommend doing so before adding the glaze, if you choose to use one. Wrap individual portions or the whole dish tightly in plastic wrap, then in aluminum foil, and freeze for up to 2-3 months. To reheat, you can warm individual slices in the microwave for about 20-30 seconds, or bake the whole dish (or portions) in a 300-degree Fahrenheit oven for about 15-20 minutes, until warmed through. If you’re reheating from frozen, allow extra time and thaw it in the refrigerator overnight first if possible.
Frequently Asked Questions
Final Thoughts
Honestly, this strawberry cream cheese cobbler is more than just a recipe to me; it’s a keeper. It’s that perfect balance of comfort and a little bit of indulgence, made incredibly easy. It’s proof that you don’t need to spend hours in the kitchen to create something truly special and delicious. Whether you’re a seasoned baker or just starting out, this recipe is your friend. It’s reliable, forgiving, and always a hit. If you love fruit desserts with a creamy twist, you might also enjoy my classic apple crisp or my berry crumble bars – they have that same homey, comforting vibe. I truly hope you give this strawberry cream cheese cobbler a try. I can’t wait to hear what you think, and especially, how it turns out for you! Happy baking, and enjoy every single bite!
Strawberry Cream Cheese Cobbler
Ingredients
Cobbler Topping
- 1.5 cup all-purpose flour
- 0.75 cup granulated sugar
- 2 teaspoons baking powder
- 0.5 teaspoon salt
- 0.5 cup unsalted butter, cold and cubed
- 0.5 cup milk
Strawberry Filling
- 4 cups fresh or frozen strawberries, hulled and sliced
- 0.5 cup granulated sugar
- 2 tablespoons cornstarch
- 1 tablespoon lemon juice
Cream Cheese Swirl
- 4 ounces cream cheese, softened
- 0.25 cup granulated sugar
- 1 teaspoon vanilla extract
Instructions
Preparation Steps
- Preheat your oven to 375°F (190°C). Grease a 9x13 inch baking dish.
- In a large bowl, whisk together the flour, 0.75 cup sugar, baking powder, and salt for the cobbler topping.1.5 cup all-purpose flour
- Cut in the cold butter using a pastry blender or your fingertips until the mixture resembles coarse crumbs.1.5 cup all-purpose flour
- Pour in the milk and stir until just combined. Do not overmix.1.5 cup all-purpose flour
- In a separate bowl, combine the strawberries, 0.5 cup sugar, cornstarch, and lemon juice. Toss to coat the strawberries evenly.1.5 cup all-purpose flour
- Spread the strawberry mixture evenly into the prepared baking dish.
- In a small bowl, beat together the softened cream cheese, 0.25 cup sugar, and vanilla extract until smooth.1.5 cup all-purpose flour
- Drop spoonfuls of the cream cheese mixture over the strawberries. Use a knife or skewer to swirl the cream cheese into the strawberry layer.
- Pour the cobbler topping batter over the cream cheese and strawberries. It will be a thick batter.
- Bake for 45-50 minutes, or until the topping is golden brown and the filling is bubbly.
- Let the cobbler cool for at least 15 minutes before serving. Serve warm with ice cream or whipped cream.
Notes
Featured Comments
“This sounds absolutely comforting—perfect for cozy nights. I love how simple yet delicious it turns out!”
“Impressed! Clear steps and so flavorful results. Perfect for busy nights.”
“New favorite here — spot on. crowd-pleaser was spot on.”
“Super easy and turned out amazing! My family asked for seconds. Saving this one.”
“This sweet treat was absolutely loved — the buttery really stands out. Thanks!”
“Made it tonight and wow — family favorite! Will definitely make strawberry cream cheese cobbler again.”


This sounds absolutely comforting—perfect for cozy nights. I love how simple yet delicious it turns out!