

You know those nights? The ones where you *want* to make something special, something that looks like you spent hours fussing, but you’re also kind of exhausted and the thought of a major cleanup makes you want to order pizza? Yeah, I have those nights *all the time*. And this recipe? This is my secret weapon for those evenings. My stuffed Chicken Breasts aren’t just a meal; they’re a little bit of magic that looks way more complicated than it is. Honestly, it’s the closest thing I’ve got to a culinary superpower. It reminds me a little bit of my grandma’s pot roast – the way it smells, the comforting feeling it gives you – but with a modern twist that’s perfect for weeknights or even when you have friends popping over unexpectedly. I’ve tried countless ways to dress up chicken, but these stuffed chicken breasts always, always win.
What is stuffed chicken breast?
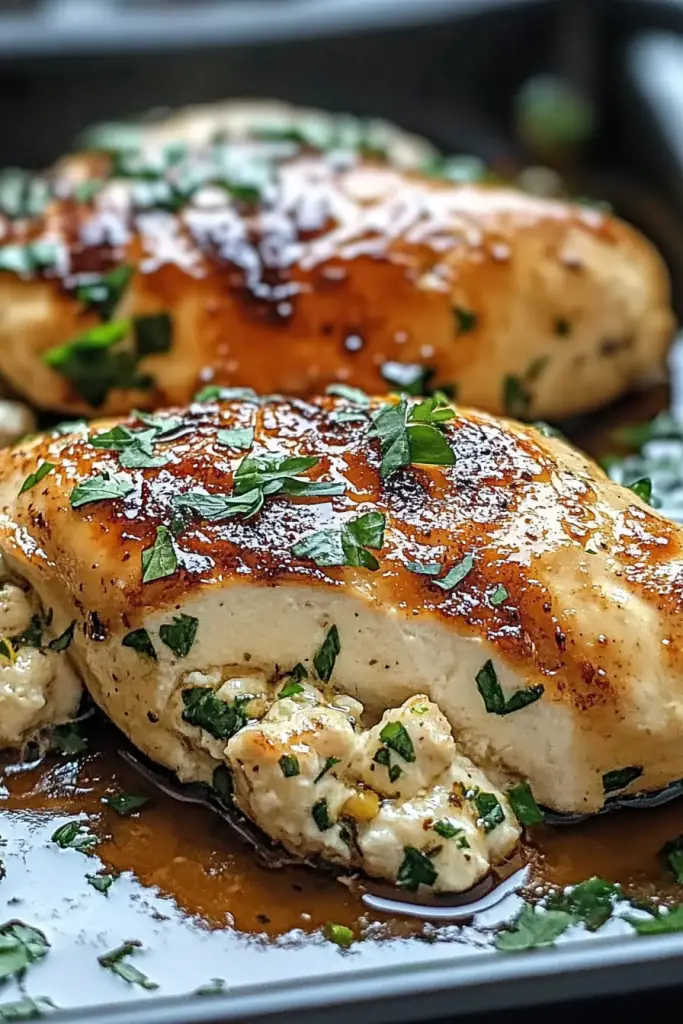
So, what exactly are Stuffed Chicken breasts? Think of it as a delicious hug for your chicken! It’s essentially chicken breasts that have been carefully prepared – usually butterflied or pocketed – and then filled with a flavorful mixture before being cooked to golden perfection. It’s not just about the chicken itself, but the incredible flavor explosion waiting inside. The name might sound a bit fancy, but at its heart, it’s just about creating a little parcel of deliciousness. It’s a technique that takes a simple ingredient and elevates it, turning it into something truly special. It’s like giving your chicken a surprise party, and everyone at the table gets to enjoy the fun!
How to Make Stuffed Chicken Breasts
Quick Overview
This recipe is all about creating a flavorful pocket within tender chicken breasts, then baking them until juicy and golden. We’ll butterfly the chicken, whip up a quick, delicious filling, stuff it all in, and bake until done. It’s a straightforward process that yields restaurant-quality results right in your own kitchen. The beauty is in its simplicity – minimal fuss, maximum flavor, and a truly impressive final dish with hardly any stress. You’ll be amazed at how easily this comes together.
Ingredients
For the Chicken Breasts:
4 large boneless, skinless chicken breasts (about 6-8 ounces each)
1 tablespoon olive oil
Salt and freshly ground Black Pepper to taste
For the Filling:
1/2 cup cream cheese, softened (full-fat gives the best texture!)
1/4 cup grated Parmesan cheese
2 tablespoons finely chopped fresh spinach (frozen, thawed, and squeezed dry works too)
1 clove garlic, minced
1 tablespoon chopped sun-dried tomatoes (oil-packed, drained)
1/4 teaspoon dried Italian seasoning
Pinch of Red Pepper flakes (optional, for a little kick)
Salt and freshly ground black pepper to taste
For the Glaze (Optional but Recommended!):
2 tablespoons melted butter
1 teaspoon Dijon mustard
1/2 teaspoon honey or maple syrup
Step-by-Step Instructions
Step 1: Preheat & Prep Pan
First things first, get that oven preheating to 375°F (190°C). While it’s warming up, grab a baking dish large enough to hold all your chicken breasts without them touching too much. A 9×13 inch pan usually does the trick. Lightly grease the dish with a little cooking spray or a thin layer of olive oil. This helps prevent any sticking and makes cleanup a breeze. I always find preheating the oven is the first step to making any meal feel less chaotic!
Step 2: Mix Dry Ingredients
Now, let’s get that filling ready. In a medium bowl, combine the softened Cream Cheese, grated Parmesan cheese, chopped spinach, minced garlic, chopped sun-dried tomatoes, Italian seasoning, and optional red pepper flakes. Give it a good stir with a fork or a small spatula until everything is well incorporated. You want a nice, cohesive mixture. Taste it and add a pinch of salt and pepper if you think it needs it. Remember, the Parmesan is already salty, so don’t go too heavy-handed with the salt.
Step 3: Mix Wet Ingredients
This step is actually for the glaze, which we’ll add later. In a small bowl, whisk together the melted butter, Dijon mustard, and honey or maple syrup. Set this aside for now. We’ll brush this over the chicken towards the end of baking for that gorgeous golden-brown finish and extra flavor.
Step 4: Combine
This is where the magic happens. Take your chicken breasts and place them on a clean cutting board. You want to create a pocket for the filling. The best way I’ve found to do this is to carefully slice horizontally into the thickest part of the breast, about two-thirds of the way through, creating a pocket without cutting all the way through. Be gentle! Alternatively, you can butterfly them by slicing horizontally all the way through and then opening them up like a book. Pat the chicken breasts dry with paper towels – this helps the seasoning stick and promotes a better sear if you were to pan-sear them first (though we’re baking today!). Season both sides generously with salt and pepper. Then, carefully spoon the filling into the pocket of each chicken breast. Don’t overstuff, or it’ll just ooze out everywhere, though a little bit escaping is totally fine and delicious!
Step 5: Prepare Filling
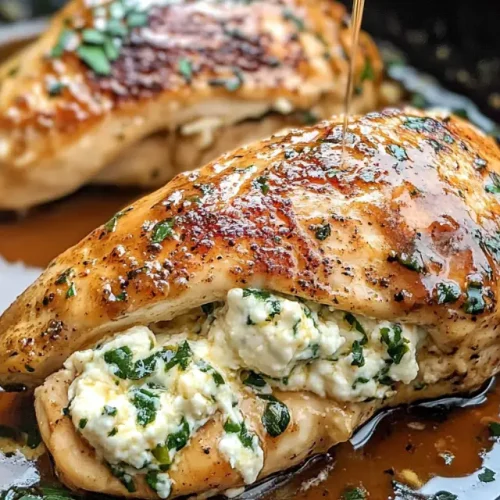
We actually already prepared the filling in Step 2! This is just a placeholder to keep the structure. The filling is the heart of this dish, and we’ve made sure it’s packed with flavor. The cream cheese provides a wonderfully creamy base that holds everything together, while the spinach, sun-dried tomatoes, and garlic add pops of savory goodness. The Parmesan cheese adds that essential salty, nutty depth that just can’t be beat. It’s a combination that just works so, so well.
Step 6: Layer & Swirl
Once your chicken breasts are stuffed, carefully place them into your prepared baking dish. Make sure they have a little space between them. If any filling has escaped, you can gently tuck it back in or just leave it – it will cook up into delicious little crispy bits on the bottom of the pan, which I *love*. At this point, you don’t really need to swirl anything, but you can if you want to make it extra pretty!
Step 7: Bake
Pop that baking dish into your preheated oven. Bake for about 25-30 minutes. The exact time will depend on the thickness of your chicken breasts. You’re looking for the chicken to be cooked through and the filling to be hot and bubbly. To check for doneness, you can use a meat thermometer – the internal temperature should reach 165°F (74°C). Or, you can carefully make a small slit in the thickest part of a breast; the juices should run clear, and the meat should be opaque white throughout.
Step 8: Cool & Glaze
Once the chicken is cooked, carefully brush the tops with the prepared glaze mixture. Pop it back into the oven for another 5 minutes, or until the glaze is lightly golden and the chicken is absolutely gorgeous. Let the chicken rest in the baking dish for about 5-10 minutes before serving. This is a crucial step! It allows the juices to redistribute throughout the meat, making it extra tender and moist. If you cut into it too soon, all those delicious juices will run out onto the plate. Trust me on this one – resting makes all the difference!
Step 9: Slice & Serve
Now for the best part! Carefully transfer the rested chicken breasts to a serving platter or individual plates. You can slice them in half crosswise to show off that beautiful, gooey filling, or serve them whole. It looks so impressive! The aroma alone will have everyone gathering around. Serve immediately and watch it disappear!
What to Serve It With
The beauty of these stuffed chicken breasts is that they are so adaptable, making them perfect for any meal of the day. For a hearty Breakfast, I love serving these alongside some fluffy scrambled eggs and maybe some crispy bacon. The savory filling complements the eggs perfectly. For a proper Brunch, these are a showstopper! Pair them with a vibrant arugula salad with a light vinaigrette, some roasted potatoes, and a mimosa or a fancy coffee. It feels so elegant and is surprisingly easy to pull off. As a more substantial Dessert – yes, really! – you can serve a smaller portion with a dollop of fresh berries and a light drizzle of balsamic glaze. The savory and slightly sweet notes work surprisingly well, especially if you’ve added a touch of sweetness to your filling. And for those times when you just need a comforting, satisfying meal, these are perfect as Cozy Snacks or a main course with some creamy mashed potatoes or a simple roasted vegetable medley. My kids absolutely love them with some buttered noodles, and honestly, who can blame them? It’s pure comfort!
Top Tips for Perfecting Your Stuffed Chicken Breasts
I’ve been making these stuffed chicken breasts for years, and along the way, I’ve picked up a few little tricks that I think really make a difference. For the Chicken Prep, make sure your chicken breasts are relatively uniform in thickness. If you have one really thick one and one thin one, the thin one will cook much faster. You can gently pound the thicker parts of the larger breasts with a meat mallet (or even the bottom of a heavy pan) to even them out before you make your pocket. This ensures even cooking. For Mixing Advice, don’t be afraid to get your hands a little messy when preparing the filling. Sometimes, the best way to ensure everything is perfectly combined is to mix it with your fingertips. Just wash your hands thoroughly beforehand! Also, don’t overwork the chicken when you’re stuffing it; be gentle to avoid tearing the meat. When it comes to Swirl Customization, if you want to add different colors or textures to your filling, you can divide the filling into two bowls and mix different ingredients into each (like adding finely chopped chives to one and crumbled feta to the other), then layer them into the pocket. For Ingredient Swaps, feel free to get creative! If you don’t have spinach, finely chopped kale or even some sautéed mushrooms would be delicious. Sun-dried tomatoes can be swapped for roasted red peppers. For a spicier kick, add a diced jalapeño to the filling. And if you’re not a fan of cream cheese, ricotta or even a well-drained cottage cheese can work in a pinch, though the texture will be different. For Baking Tips, always use a baking dish that’s not too crowded. Giving the chicken space allows it to cook evenly and brown nicely. If you notice the tops browning too quickly before the inside is cooked, you can loosely tent the dish with foil. And remember, that rest time after baking is non-negotiable for juicy chicken! Finally, for Glaze Variations, if you don’t have Dijon, a little bit of honey mustard or even just plain melted butter with some herbs can be lovely. You can also add a splash of lemon juice to the glaze for a bit of brightness.
Storing and Reheating Tips
These stuffed chicken breasts are wonderfully forgiving when it comes to storing and reheating. If you have any leftovers – which is rare in my house, but it happens! – you can store them at Room Temperature for no more than two hours. After that, it’s best to refrigerate them. For Refrigerator Storage, let the chicken cool completely before transferring it to an airtight container. It will stay fresh in the fridge for about 3-4 days. The filling will firm up a bit, but it’s still delicious. If you need to store them for longer, Freezer Instructions are your friend. Wrap each cooled chicken breast tightly in plastic wrap, then in aluminum foil, or place them in freezer-safe bags. They’ll keep in the freezer for up to 2-3 months. To thaw, transfer them to the refrigerator overnight. For reheating, if they are refrigerated, you can pop them back into a 350°F (175°C) oven for about 10-15 minutes, or until heated through. If they are frozen, bake them from frozen at 350°F (175°C) for about 25-30 minutes, or until heated through. Microwaving is also an option for speed, but I find the oven gives you the best texture. Just be careful not to overheat them, as they can dry out. For Glaze Timing Advice, if you know you’ll be refrigerating or freezing leftovers, you might want to hold off on the glaze until you reheat them. You can always brush on a fresh glaze when reheating for the best appearance and flavor.
Frequently Asked Questions
Final Thoughts
There you have it – my favorite way to whip up some truly incredible stuffed chicken breasts. It’s a dish that truly makes me feel like I’ve accomplished something special in the kitchen, even on my most low-energy days. The combination of tender chicken, that savory, creamy filling, and that little bit of sweet and tangy glaze is just pure perfection. It’s comforting, elegant, and incredibly satisfying. If you’re a fan of this kind of approachable yet impressive cooking, you might also love my recipe for Lemon Herb Roasted Chicken or my Creamy Tuscan Chicken Pasta – they both have that same vibe of making everyday meals feel a bit more special. I can’t wait to hear how yours turns out! Please, if you try this, leave a comment below and let me know what you think, or share your own creative filling ideas. Happy cooking!
stuffed chicken breasts
Ingredients
Main Ingredients
- 4 boneless, skinless chicken breasts Chicken Breasts
- 0.5 cup Ricotta Cheese
- 0.25 cup Shredded Mozzarella Cheese
- 2 tablespoons Chopped Fresh Parsley
- 0.5 teaspoon Garlic Powder
- 0.25 teaspoon Salt
- 0.25 teaspoon Black Pepper
Instructions
Preparation Steps
- Preheat oven to 375°F (190°C).
- Place each chicken breast between two pieces of plastic wrap and pound them to about 0.5 inch thickness.
- In a small bowl, mix together ricotta cheese, mozzarella cheese, parsley, garlic powder, salt, and pepper.
- Spoon the cheese mixture onto one half of each pounded chicken breast.
- Fold the other half of the chicken breast over the filling and secure with toothpicks if necessary.
- Place the stuffed chicken breasts in a baking dish.
- Bake for 25-30 minutes, or until the chicken is cooked through and golden brown.
Notes
Featured Comments
“I totally get that! Stuffed chicken breast is such a win—looks fancy but takes almost no time. Perfect for those nights when you still want to feel like a chef.”
“Impressed! Clear steps and super easy results. Perfect for busy nights.”
“New favorite here — quick weeknight win. crowd-pleaser was spot on.”
“Super easy and turned out amazing! My family asked for seconds. Saving this one.”
“This sweet treat was absolutely loved — the balanced really stands out. Thanks!”
“Made it tonight and wow — restaurant-level! Will definitely make stuffed chicken breasts again.”


I totally get that! Stuffed chicken breast is such a win—looks fancy but takes almost no time. Perfect for those nights when you still want to feel like a chef.