

Oh, this sweet and sour chicken! It’s one of those recipes that, honestly, feels like a warm hug. I remember the first time I tried making it from scratch. I was so intimidated by the idea of getting that perfect crispy coating and that tangy, sweet sauce. I’d always just grabbed takeout, you know? But one lazy Saturday, I decided to be brave, and wow, was I rewarded. This isn’t just *any* sweet and sour chicken; it’s the kind that makes everyone at the table pause, close their eyes for a second, and then ask for seconds. It’s got that irresistible balance – a little bit sweet, a little bit tangy, and the chicken is just perfectly tender on the inside with the most delightful crisp on the outside. If you’re looking for a recipe that tastes like a million bucks but is actually super approachable for a weeknight dinner, you’ve found it. It’s honestly just as good, if not better, than any restaurant version I’ve ever had, and that’s saying a lot!
What is sweet and sour chicken?
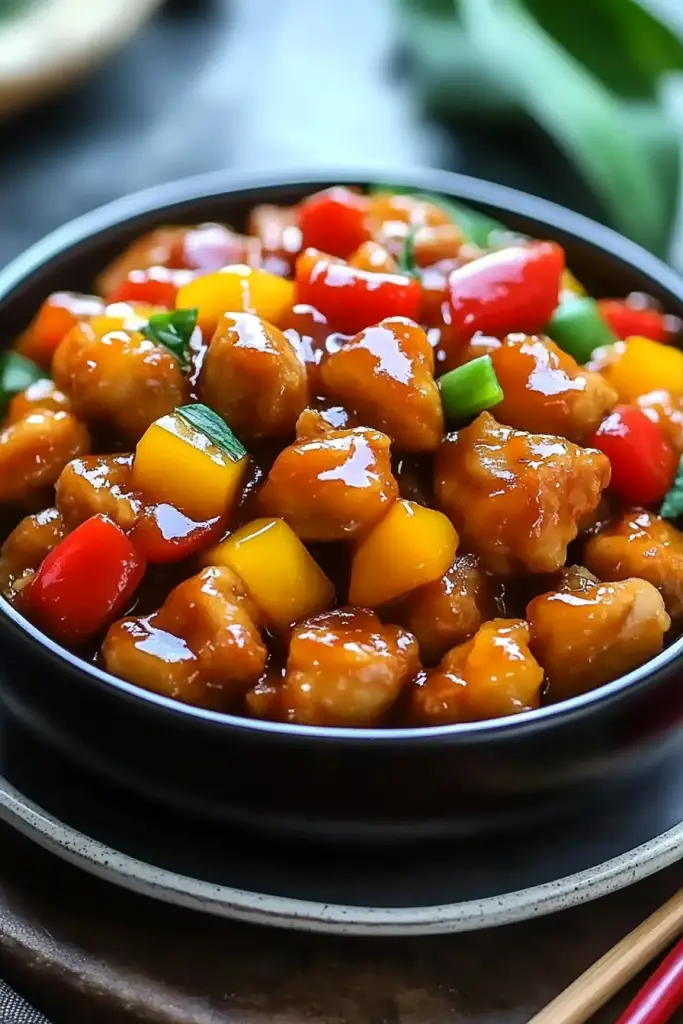
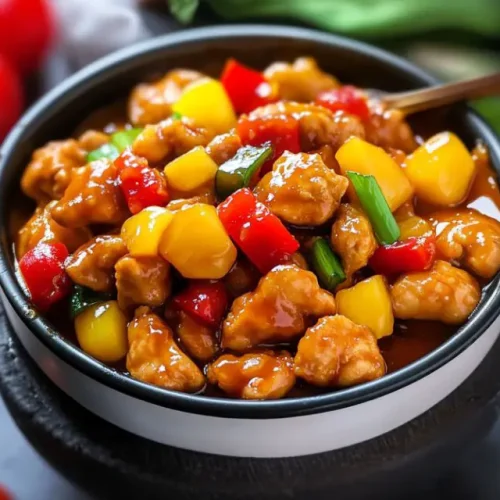
So, what exactly *is* sweet and sour chicken? At its heart, it’s a classic Chinese-American dish featuring pieces of tender chicken, typically coated and fried until golden and crisp, then tossed in a vibrant, glossy sauce that’s a harmonious blend of sweet and sour flavors. Think of it as the ultimate comfort food with a kick! The name itself tells you exactly what to expect: the sweetness comes from ingredients like sugar, pineapple juice, or even ketchup (a secret weapon for many!), while the sourness is usually from vinegar. The magic happens when these contrasting tastes meet, creating a complex yet utterly craveable flavor profile. It’s the kind of dish that’s universally loved because it hits all the right notes – it’s comforting, exciting, and just plain delicious. It’s essentially a hug in a bowl, but way more exciting than a regular hug.
How do I make sweet and sour chicken?
Quick Overview
Making this sweet and sour chicken is a straightforward process that focuses on getting that perfect crispy exterior and a flavorful, balanced sauce. You’ll coat and lightly fry your chicken pieces until they’re golden, then whip up a quick, vibrant sauce. Finally, you’ll toss everything together to coat beautifully. The key is in the sauce ingredients and not overcooking the chicken. It’s truly a lifesaver on nights when you want something impressive but don’t have hours to spend in the kitchen.
Ingredients
For the Main Batter:
For that perfect crisp, we’re going to keep the batter simple but effective. You’ll need about 1.5 cups of all-purpose flour, 1/2 cup of cornstarch (this is key for crispiness!), 1 teaspoon of baking powder (it adds lightness!), and a pinch of salt and pepper. Make sure your flour and cornstarch are fresh; it really makes a difference in how the coating adheres and fries up. I always keep my cornstarch in an airtight container to prevent clumping.
For the Filling:
We’ll use about 1.5 pounds of boneless, skinless chicken thighs or breasts. Thighs tend to stay more tender and juicy, but breasts work wonderfully too! Just make sure to cut them into bite-sized pieces, about 1-inch cubes. For the oil, you’ll need a neutral oil with a high smoke point, like vegetable, canola, or peanut oil, for frying. You’ll want enough to come about 1-2 inches up the side of your pot or wok.
For the Glaze:
This is where the magic happens! You’ll need 1/2 cup of pineapple juice (from a can of crushed pineapple works great, just strain it), 1/3 cup of rice vinegar (for that essential tang), 1/4 cup of ketchup (don’t skip this, it adds color and depth!), 1/4 cup of brown sugar (or granulated sugar if that’s what you have), 1 tablespoon of soy sauce (low-sodium is good if you prefer), and a teaspoon of grated fresh ginger and a clove of minced garlic for that fragrant punch. For thickening, we’ll use a slurry made from 1 tablespoon of cornstarch mixed with 2 tablespoons of water. This makes the glaze beautifully glossy and helps it cling to the chicken.
Step-by-Step Instructions
Step 1: Preheat & Prep Pan
First things first, let’s get our frying setup ready. You want to heat about 1.5 to 2 inches of your chosen neutral oil in a heavy-bottomed pot or wok over medium-high heat. You’re looking for a temperature of around 350°F (175°C). If you don’t have a thermometer, a good test is to drop a tiny bit of batter into the oil; it should sizzle and float to the top immediately. While the oil heats, line a baking sheet with paper towels. This is crucial for draining the fried chicken and keeping it crisp.
Step 2: Mix Dry Ingredients
In a medium bowl, whisk together your all-purpose flour, cornstarch, baking powder, salt, and pepper. Give it a good whisk to make sure everything is well combined and there are no lumps of cornstarch. This forms the base of our crispy coating. Ensure it’s thoroughly mixed so every piece of chicken gets evenly coated.
Step 3: Mix Wet Ingredients
In a separate, larger bowl, whisk together the pineapple juice, rice vinegar, ketchup, brown sugar, soy sauce, grated ginger, and minced garlic. Make sure the sugar is dissolved. This is your beautiful, flavorful glaze base. Don’t worry if it looks a little thin right now; it will thicken up beautifully when we cook it.
Step 4: Combine
Now, add your bite-sized chicken pieces to the bowl with the wet glaze ingredients. Toss them gently to ensure each piece is coated. Let them marinate for about 10-15 minutes. This step isn’t strictly necessary for flavor, but it helps the batter stick a little better. Don’t let them sit for too long, or the chicken can get soggy.
Step 5: Prepare Filling
In a large bowl, combine the marinated chicken pieces with about half of the dry batter mixture you prepared earlier. Toss them around until each piece is thoroughly coated. You want a nice, even coating. If it seems too wet, add a little more of the dry mixture, a tablespoon at a time, until it coats well without being clumpy. We want the coating to stick but not be thick and doughy.
Step 6: Layer & Swirl
This step isn’t for the chicken, it’s for our glaze! In a small bowl, whisk together the 1 tablespoon of cornstarch with 2 tablespoons of water to create your cornstarch slurry. Set it aside. We’ll add this to the glaze later to thicken it. Get your frying going now that the oil is hot and the chicken is coated.
Step 7: Bake
Carefully add your coated chicken pieces to the hot oil in batches. Don’t overcrowd the pot, or the oil temperature will drop, and your chicken won’t get crispy. Fry for about 3-4 minutes per batch, until they’re golden brown and cooked through. Use a slotted spoon or spider strainer to remove the chicken from the oil and place it on your prepared paper towel-lined baking sheet to drain. Repeat until all chicken is fried.
Step 8: Cool & Glaze
Once all the chicken is fried and drained, pour the glaze mixture into a clean saucepan or wok over medium heat. Bring it to a simmer, stirring constantly. Once simmering, slowly whisk in the cornstarch slurry. Continue to whisk and cook for another 1-2 minutes until the glaze has thickened to a lovely, glossy consistency that coats the back of a spoon. This is the moment you’ve been waiting for! Add the fried chicken back into the pan with the thickened glaze. Toss gently until every piece is beautifully coated.
Step 9: Slice & Serve
Serve your glorious sweet and sour chicken immediately! The crispiness is best right after it’s made, so don’t let it sit around too long. I love serving it over fluffy white rice or brown rice to soak up all that amazing sauce. You can garnish it with some chopped green onions or toasted sesame seeds for an extra touch of freshness and visual appeal.
What to Serve It With
This sweet and sour chicken is so versatile, it can be enjoyed in so many ways! For a classic weeknight dinner, serving it over a bed of steaming white or brown rice is a no-brainer. It’s perfect for soaking up all that delicious sauce. If you’re feeling a bit more adventurous, try pairing it with some fluffy steamed jasmine rice for an extra aromatic touch. For a lighter option, it’s fantastic alongside some stir-fried vegetables like broccoli, bell peppers, and snap peas. My kids actually love it tucked into soft lettuce cups for a fun, DIY meal. And if you’re ever having a potluck or a casual get-together, this sweet and sour chicken is always a huge hit! It holds up pretty well and is always the first dish to disappear. It’s also lovely with some crispy fried noodles on the side for an extra textural contrast. Honestly, the possibilities are endless, and it always feels special!
Top Tips for Perfecting Your Sweet and Sour Chicken
I’ve made this sweet and sour chicken more times than I can count, and over the years, I’ve picked up a few tricks that I think really elevate it. For starters, when it comes to the chicken, don’t be tempted to overcrowd your frying pan. I know it’s tempting to get it all done at once, but trust me on this one – working in batches is key to achieving that beautiful golden crisp. If you overcrowd, the oil temperature drops, and you end up with soggy chicken. And speaking of oil, make sure it’s hot enough before you add the chicken. A good test is that little sizzle when you drop in a bit of batter. For the sauce, I always make sure to whisk the cornstarch slurry *really* well before adding it. Nobody wants lumps in their gorgeous glaze! Also, don’t be afraid to taste and adjust the sauce before adding the chicken. If you prefer it a little sweeter, add a touch more sugar; if you want more tang, a splash more vinegar. It’s your kitchen, after all! For the batter, I like to use a combination of flour and cornstarch because cornstarch is the secret weapon for that amazing crispiness that lasts. And if you’re in a hurry, you can absolutely use pre-minced garlic and ginger, but fresh really does make a noticeable difference in the aroma and depth of flavor. I’ve also learned that letting the chicken marinate in the sauce base for just a few minutes before coating it in the dry mix helps the coating adhere better. Lastly, a little garnish of fresh green onions or sesame seeds really does make it look restaurant-worthy and adds a nice fresh finish.
Storing and Reheating Tips
This sweet and sour chicken is best enjoyed fresh, hot, and crispy, but let’s be real, sometimes we have leftovers! If you do have some, the best way to store it is in an airtight container in the refrigerator. It should stay good for about 2-3 days. Now, reheating is a bit of a delicate dance to try and recapture some of that crispiness. Microwaving will work, but it tends to make the chicken a bit soft. For the best results, I recommend reheating it in a skillet over medium heat with a tiny bit of oil, or even in a toaster oven or regular oven at around 350°F (175°C) for about 5-10 minutes, until heated through. This helps to crisp up the coating again. If you have the glaze separate from the chicken, that’s even better for reheating, as you can warm the glaze and then toss the reheated chicken in it. I wouldn’t recommend freezing this dish, as the fried coating tends to get a bit mushy once thawed. It’s really at its prime when enjoyed within a couple of days of making it.
Frequently Asked Questions
Final Thoughts
There you have it – my go-to recipe for the most incredibly delicious sweet and sour chicken. It’s the kind of dish that makes you feel like a kitchen rockstar, and the best part is, it’s genuinely achievable for anyone. The combination of that crispy chicken with that perfectly balanced, glossy sauce is just pure comfort food magic. I really hope you give this a try. It’s been a family favorite for ages, and I’m so thrilled to share it with you. It’s proof that amazing meals don’t always require hours of work or a trip to a specialty store. If you love this, you might also enjoy my sticky sesame chicken or my Honey Garlic Chicken wings for more weeknight-friendly favorites. Don’t forget to let me know in the comments how yours turns out, or if you have any special tweaks you make! Happy cooking!
Sweet and Sour Chicken
Ingredients
Chicken Marinade
- 1.5 pounds chicken breast cut into 1-inch pieces
- 1 tablespoon soy sauce
- 1 teaspoon sesame oil
- 0.5 teaspoon black pepper
For Dredging
- 0.5 cup all-purpose flour
- 0.25 cup cornstarch
- 1 egg beaten
Sweet and Sour Sauce
- 0.5 cup pineapple juice
- 0.33 cup rice vinegar
- 0.33 cup ketchup
- 0.25 cup granulated sugar
- 1 tablespoon soy sauce
- 1 tablespoon cornstarch dissolved in 2 tablespoons water
Stir-fry
- 2 tablespoons vegetable oil
- 1 onion cut into chunks
- 1 green bell pepper cut into chunks
- 1 red bell pepper cut into chunks
- 0.5 cup pineapple chunks fresh or canned
Instructions
Preparation Steps
- In a bowl, combine the chicken pieces with soy sauce, sesame oil, and black pepper. Let it marinate for at least 10 minutes.
- In a shallow dish, mix the flour and cornstarch for dredging.
- Dip each marinated chicken piece into the beaten egg, then dredge in the flour mixture, ensuring it's fully coated.
- In a small saucepan, whisk together pineapple juice, rice vinegar, ketchup, sugar, and soy sauce. Bring to a simmer over medium heat.
- Stir in the cornstarch slurry and cook, stirring constantly, until the sauce thickens. Set aside.
- Heat vegetable oil in a large skillet or wok over medium-high heat.
- Add the dredged chicken pieces in a single layer (you may need to do this in batches to avoid overcrowding) and fry until golden brown and cooked through, about 5-7 minutes.
- Remove the chicken from the skillet and set aside. Drain off any excess oil.
- Add the onion and bell peppers to the skillet and stir-fry for 2-3 minutes until slightly tender-crisp.
- Return the cooked chicken to the skillet. Add the pineapple chunks and pour the prepared sweet and sour sauce over everything. Toss to coat.
- Cook for another 1-2 minutes until heated through and the sauce is glossy. Serve immediately over rice.
Notes
Featured Comments
“Impressed! Clear steps and restaurant-level results. Perfect for busy nights.”
“New favorite here — absolutely loved. crowd-pleaser was spot on.”
“Super easy and turned out amazing! My family asked for seconds. Saving this one.”
“This sweet treat was absolutely loved — the cozy really stands out. Thanks!”
“Made it tonight and wow — comforting! Will definitely make sweet and sour chicken again.”
“Packed with flavor and so simple. Exactly what I wanted from sweet and sour chicken.”


